Showing posts with label McCalls 4292. Show all posts

Saturday, December 12, 2020

A Classic in Navy

While I am still playing catch up with posting projects on the blog, I actually have a few to share that are seasonally appropriate, now that Winter has arrived!  And it's a good reminder that I should be pulling this dress out of the closet to wear.   

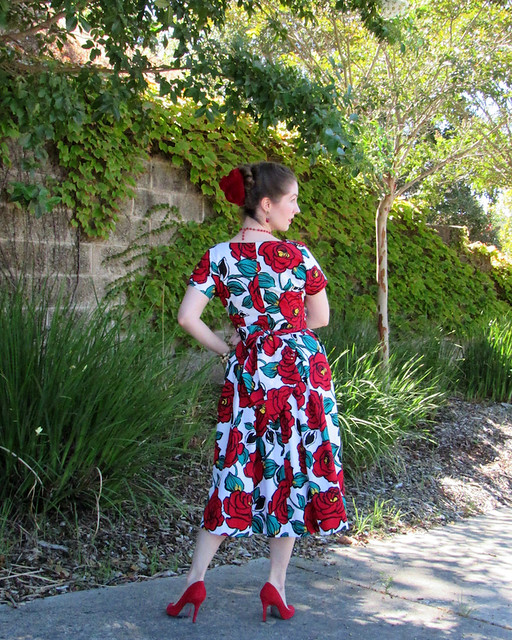
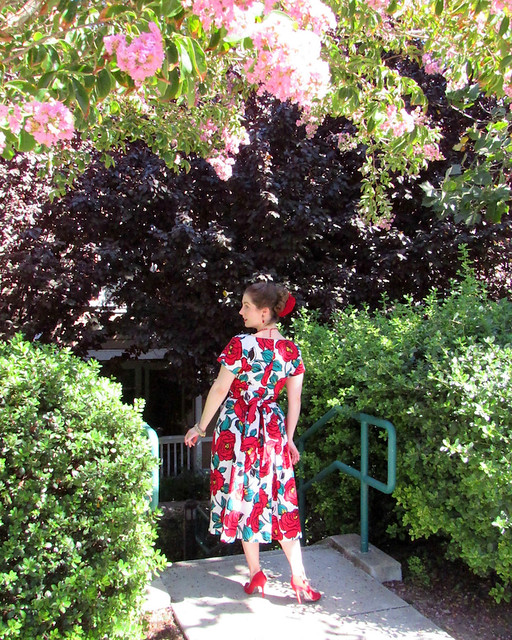
I took these pictures back in January of this year.  That evening I attended a Marin Symphony concert (and boy, do I miss getting dressed up and going out to events). 

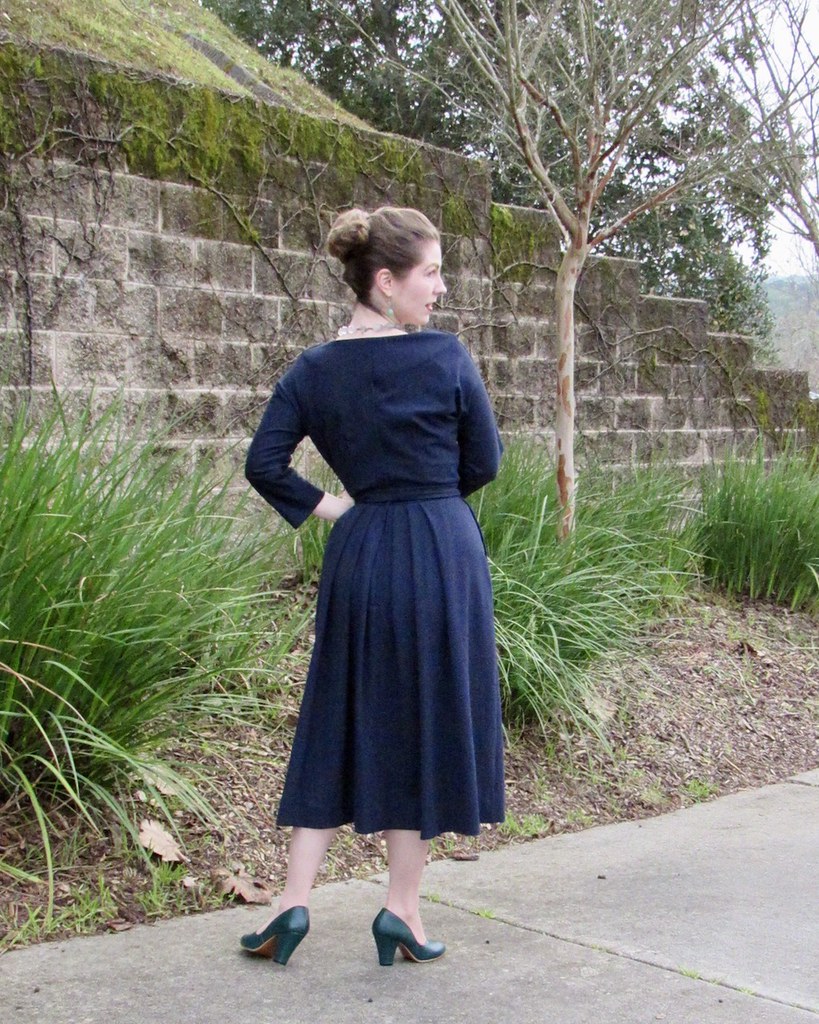
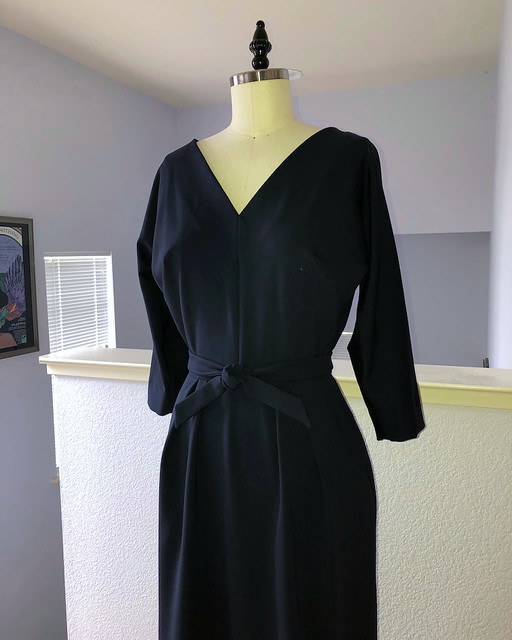
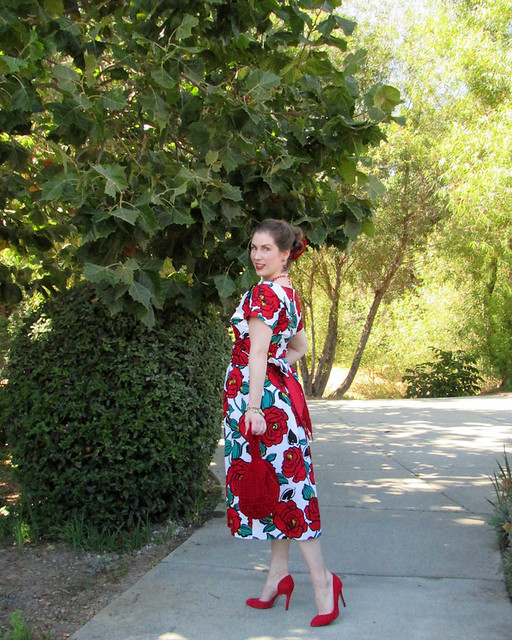
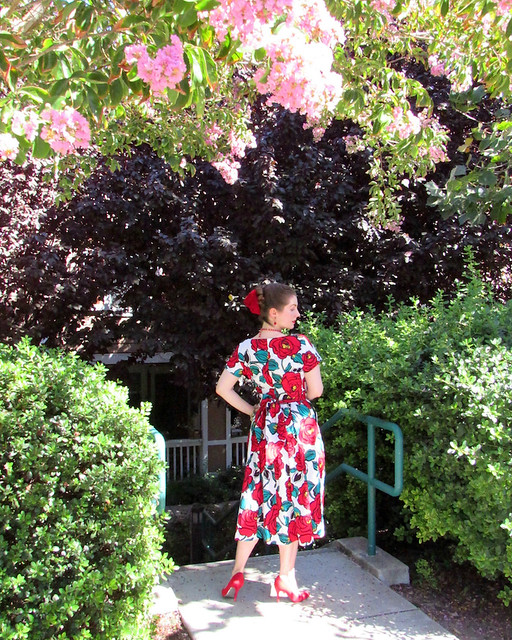
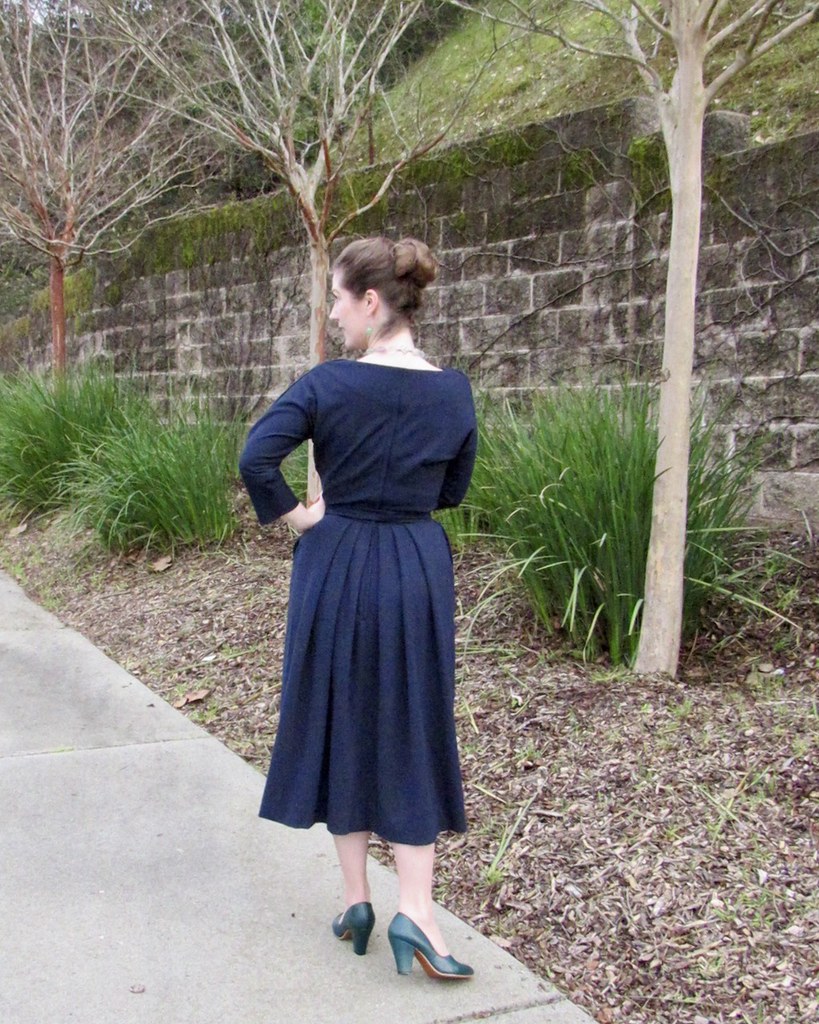
This dress was a bit of an experiment.  I loved my Claire McCardell rose printed cotton version so much, I wanted to see how it might work in a knit.  And this is the result.

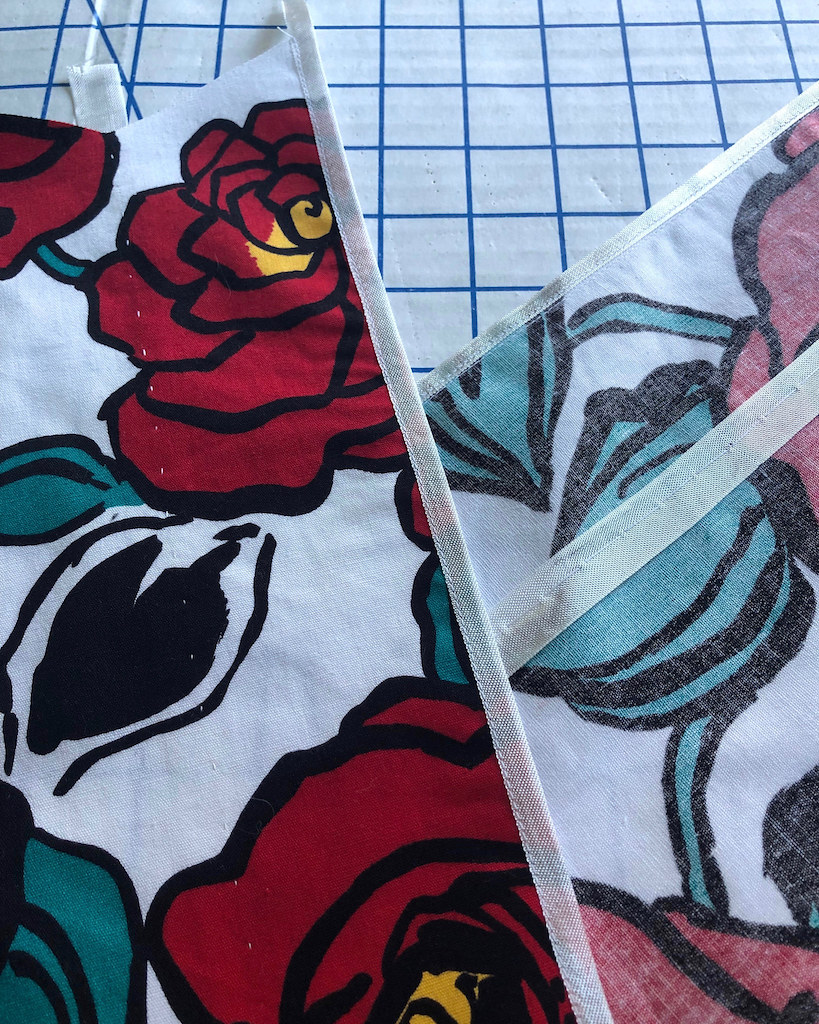
The experiment worked pretty well, I think!  Granted, I used a fairly stable rayon ponte, but it still has some stretch to work around.

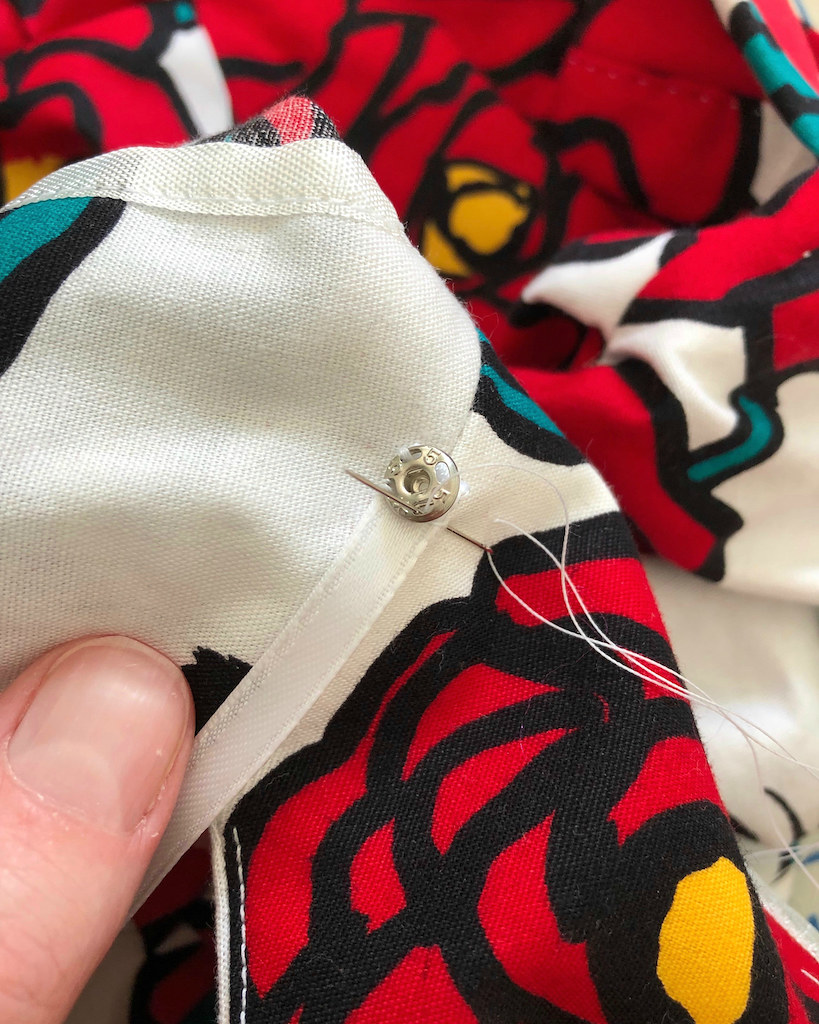
I swapped out the side zipper for a center back application.  I probably should have done a centered zip, but chose to do a lapped one instead, since they are my favorite.  There is a bit of a bump where the zipper top meets the neckline facing, but most people would probably never notice.

The pockets mean that the side seams are not quite as smooth as they might be, which is definitely due to using a knit fabric that shows every lump and bump, but it's not terrible.  I always feel like I am letting down the sewing community when I remove pockets from garments, but I never use them in a garment like this, so I should probably just do the unpopular thing and not put them in!  Blasphemous, I know, but if they aren't getting any use, why are they there only to create more bulk?!

I do like the way the pleated back of the skirt gets a little more attention in a solid color than a print.

I have a few ideas about making myself a skirt using that portion of this pattern, and I still may do that at some point.

And who knows, if another fabric presents itself, I may just have to make myself another version of the dress . . . the only question is, will it be a print, or a solid?


Dress & Belt:  Made by me, McCalls 4292
Shoes:  American Duchess, "Marilyn" Pumps
Necklace:  Made by me

Monday, January 27, 2020

Swapping a Knit for a Woven


Almost as soon as I finished my rose print version of this Claire McCardell design, I wanted to make another.  The design is that good!


This time, just for fun, I thought it would be nice to try it in a ponte knit since I have been having a fair amount of success with the textile lately.


I actually wanted this dress to be made from a brighter royal blue that I ordered from fabric.com, but it never arrived.  I had also ordered this deep navy for another project, but since I couldn't get the McCardell dress out of my head, I decided that a navy dress is always a classic, and I might as well go ahead with the fabric that I had.


I was a bit trepidatious about adding pockets to a knit, even if it is relatively stable.  I decided to go ahead, figuring if they turned out lumpy and horrible looking, it wouldn't be too much trouble to remove them.  It did take a bit of ironing with a ham and a press cloth to get the lower hip to lay flat, but in the end, I think it works.


For the hem, I decided to try something new.  On the interior, I marked twice the wide of my hem so that I could match up the cut edge with that mark at the ironing board.  It worked, but I am not sure it is my favorite method.


And I added a length of rayon seam binding to the waist seam.  Although the fabric is stable, it also is quite heavy with a nice drape, so I am hoping the added stability will keep this piece from stretching out of shape.


The skirt and sleeve hems are done by hand.  I know there is a place for top-stitching, but I think this looks a lot more polished with the less obvious stitching.


Of course, a belt was needed.  In the end, there was only enough fabric to piece the belt.  My original thought was to have the knot placed at center back as it is on this dress, but because of the seamline, I have decided to keep the tie the belt at center front.


Lingerie guard were added to this dress as I did for my first version.  The neckline is not exceptionally wide, but some of my bra straps are more narrow set than others, and this ensures that nothing will peek out.


I prefer to make my own with a length of ribbon and a snap.  It doesn't take very long, and they look so much nicer than the store bought ones.


The knit fabric definitely gives a different look to this dress, but I am quite pleased with it.


And I would normally close with a view of the back of the garment, but this is the best I can do since my dress form has no squishy bits and the finished waist is the same size as she is at that point.  The original dress design calls for a size zipper, but I decided to place the opening at center back.  This way, I have a little bit more zipper length and the opening is easier to get in and out of.  A distant memory of putting together this Vintage Vogue pattern gave me the idea, and I can say that pulling this dress on is much easier than any side zip I have ever come across!  So I will definitely be using the technique where appropriate in the future.


Saturday, November 16, 2019

A Bold Rose Print


There are some projects that come together with minimal effort.  This was one of them.  And I have even managed to post the finished dress on my blog within two months of my initial wearing of the outfit.  Miracles do happen!  


I knew immediately that I would pair the bold floral estate sale fabric find with this Claire McCardell design.


During the process of cutting the fabric, I was reminded just how much extra fabric a large scale print requires to attempt matching of any kind!


I wasn't even planning on print matching . . . just making sure that none of the obvious seamlines at center front and back did not look terrible with duplicate roses directly across from one another.  I achieved my goal, but I did have to piece one of the sashes.


Which is not a huge problem, especially since that join gets lost in the bow that gets tied at center back.


I ended up lining that sash because the wrong side of this cotton print is not especially pretty.  Also, since I pieced one of them, the extra seam needed to be covered up.


The directions call for a single layer that gets narrow hemmed along the edges, and even though I was slightly concerned that the double thickness of the cotton might prove too much for a tied bow, I moved ahead with my plan.


It's a bit trickier than a single layer would have been, but the bow ties up nicely.


And I will definitely be making use of this pattern in the future.  


It's definitely a keeper!  My love of oversized florals is not likely to go away any time soon.  If I look like I'm wearing an old sofa cover, I don't mind.  I just love those flowers!


I suspected that I would like this design from the start, but you never know until you put on the finished garment.  And this one is a winner!


Dress:  Made by me, Eva Dress Claire McCardell reproduction
Hair Rose: Made by me
Bag:  Made by me, Vogue 625
Necklace:  Vintage, from Mom
Earrings & Bracelet:  Vintage, gift
Shoes:  Kristin Cavallari "Copertina"

Thursday, October 10, 2019

An Oversized Estate Sale Floral


I have had my eye on this Claire McCardell pattern for some time.  Of course, I have so many ideas for my next project swirling around in my head and this one dropped off of my top ten to-do list.


But when Emily mentioned the pattern recently, it reminded me of the wonderful design.  Of course, I couldn't find the perfect fabric in my stash, but it was only a matter of time until something suitable showed up.  A muslin was made, cinching the deal.  It's a fabulous dress!


And then I found this oversized rose print at an estate sale and there was enough yardage for the McCardell, miracle of miracles!  It was certainly meant to be.  I suspect this is a quilting cotton from the 1980s or 1990s.  I just love the graphic print and as soon as I found it I knew that it would be just perfect for this dress design.


The bodice of this dress is cut on the bias, meaning that the opening v-neck is on the straight of grain.  McCardell genius, you might say.  I went a little overboard and decided to stabilize the opening anyway with a strip of rayon seam binding since it has become a habit.


The front facing is cut in one with the bodice, as you can see here.


And, of course, that rayon seam binding gets a lot of play in most of my projects, as it certainly did here.


One of the most frequently asked questions I receive about rayon seam binding is how it works on curved edges.  The answer is, the product is woven on the grain, but because it is very thin and narrow and irons beautifully, you can ease it around curves without too much fuss.


And here is the front bodice with the cut in one facing folded into place.  The seam binding I used to stay the neckline opening was stitched just inside the fold line, and if you look closely, you can see the white thread on the red and black portions of the fabric.


I did forget just how much extra yardage is needed with an oversized print like this.  So while I had slightly more fabric than the pattern yardage requirements stated, it was a fight to get everything cut out.   I ended up piecing the sash because I wanted print placement on the front and back bodice to look as intentional as possible.


The skirt is pretty fabulous on its own.  I may just have to make a skirt from this pattern in the future. And another potential project gets added to the very long list . . .


A regular zipper was hand stitched into the left side seam.


And I catch-stitched the hemline in place.


Because my favorite vintage style bra has very narrow set straps that like to peek out of necklines, I added lingerie guards to the shoulder seams.


It's easy to make your own with a snap and a short length of ribbon, and I think they look much nicer than the store bought options.


And that means the dress is finished, right down to the smallest detail.  This is definitely a pattern I plan to make again in the near future!