
But back to the topic at hand. Having more time at home has led me to rediscover some old projects that were not quite finished. I recently found a bag with two folded up cross stitch projects; totally completed except for framing. So I decided to do something about it. And miraculously, I found a pre-made 10x20 frame (so much cheaper than having something custom made). Some foam core and a little time were the only things needed to get these ladies up on the wall where they belong!

I like needlework not to be covered with glass. It's a personal choice, and yes, it does expose the work to dirt and dust, but a little Scotch Guard or some other equivalent does a nice job of protecting things. Would I hang these in the kitchen? No. But a light spray has done a great job of protecting other work in the past, and on a wall in my sewing room, I think they will be safe.

But the first step is to wash the piece. Luke warm water is best. I know some people think these are dry clean only, but I have never had an issue with color bleed so long as I use a gentle dishwashing liquid and no cold or hot water. And after handling a piece like this for hours and hours while stitching, there is no way they are pristine and perfectly clean, even if they look like they are.

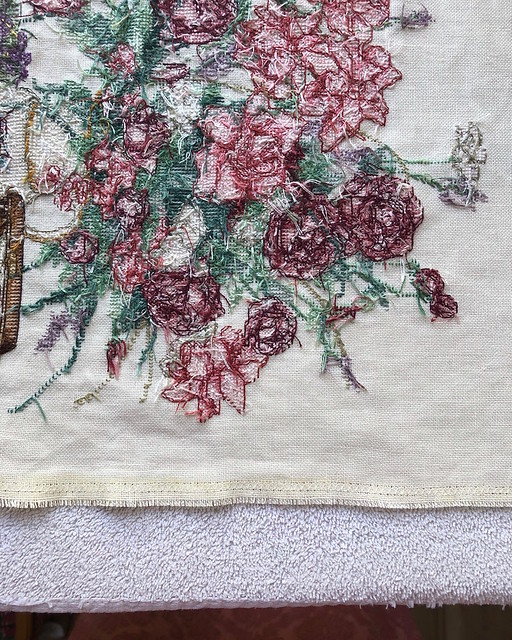
This project was wrapped in tape along the edges to help with fraying, but I would not recommend the practice. Thankfully, I peeled that off years ago, but there was still residue that I wanted to get off. This project was started before I had easy access to a sewing machine; these days I would simply zig zag around the edges before starting the embroidery bits. I did zig zag after washing to protect the edges during framing.

After a dunk in soapy water and a good rinse, roll them in a towel to get ride of the excess moisture. I like to put them upside down on a drying rack outside for a few hours in the sun. Upside down is a good idea just in case a falling leaf or something that might leave a spot happens to land on the piece while it is drying.

After it's been washed, the piece will need to be ironed. You don't want to press directly on any areas that are stitched, but a burst of steam will work wonders. Make sure to do this on the wrong side of the work.
You can use a press cloth if your iron likes to spit rusty water, like mine. [And yes, it's probably time for a new iron, but I am so sick of irons going bad, and I keep putting it off.] Another option is to place the piece on a towel. As with a needle board for velvet, the towel won't let you smoosh the textured stitches/fabric as an ironing board might.

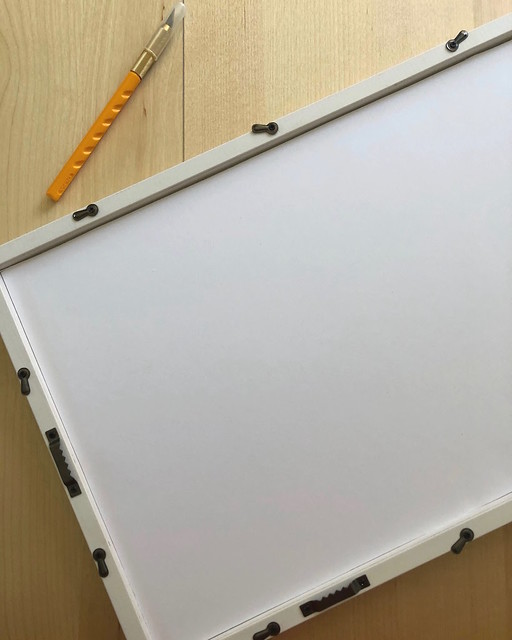
On to the frame. Different frames are put together differently, so there may be different challenges with different styles, but you get the idea. Miraculously, I found a ready-made frame that matched the dimensions of the oblong piece. This particular one is a floating frame, but I am going to make it work. As I previously mentioned, I don't like to cover cross stitch with glass, but I will use the glass to cut myself a piece of acid free foam core. The glass obviously fits inside the frame, so I just need to duplicate that size. Mark the edges with a pencil and use a blade to cut through the foam core (you may need to slice from both sides). You can use the edge of the glass to make a clean cut. And make sure you have something under your foam core that you don't mind getting sliced. An old cardboard box that was waiting to be recycled worked perfectly for me.

Make sure to check if your newly cut piece of foam core fits easily inside the frame. We are going to be wrapping fabric around the edges which will add to the size, so if it's a really tight squeeze, you may want to trim more from the edges.
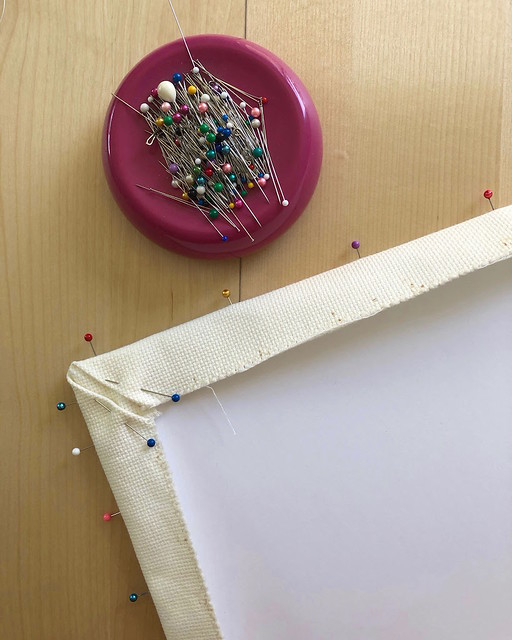
Pop the foam core out of the frame. Now it's time to attached the needlework to the foam core. Working from the center of each side, stretch the work around the foam core and pin in place.

This piece is made with Aida Cloth and is quite sturdy. You can tape the overlap in place on the back side of the foam core, but I try to avoid adhesives when I can. Over time they do weird things. I can't imagine the adhesive working its way through the foam core, but just to be safe, and because I have plenty extra fabric to work with, I decided to stitch the fabric in place. This also helps to stretch the piece. I am using a heavy weight cotton meant for hand quilting that is doubled. The dimensions of this design is 10x20 inches, so it took a fair amount of thread, but I think they extra time and effort was worth it.

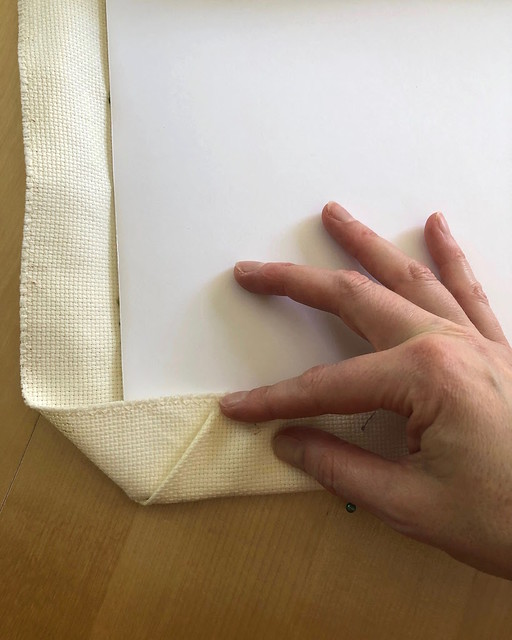
As for the corners, mitering is the easiest way to get the fabric bulk out of the way. It's not truly mitered because I am not trimming anything (which I don't want to do in case I ever decide to mat this piece). Not the prettiest corner in the world, but it works.
Those corners then get stitched into place.
After a while, you will have something that looks like this. And then you get to remove all of those pins.
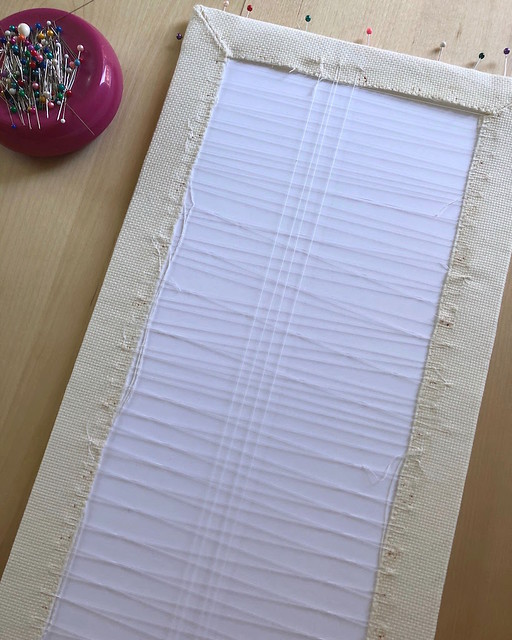
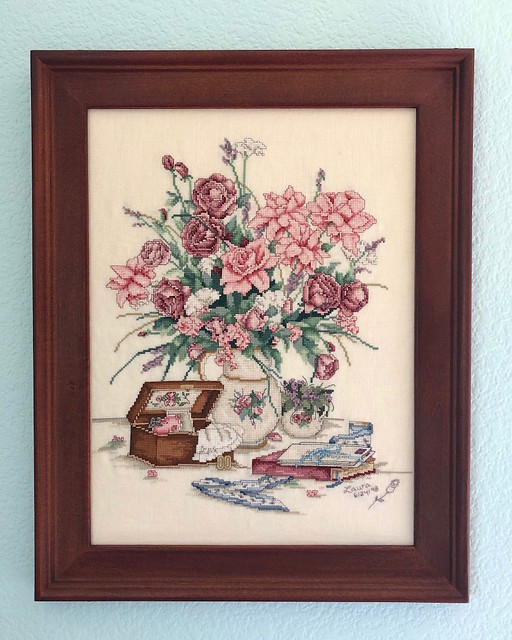
And here it is from the front. If I ever decide that I want to reframe this with a mat, I can just clip the threads and release the design from the foam core. You will also notice that I have some white fabric visible from the front. The edge of the frame is going to hide a portion of the outer edges of any picture. This just means I lose a little bit less of my stitching to the frame lip.

The fabric/foam core combo then goes into the frame.

Because this particular frame is a floating frame, it did not come with a backing board. As an easy fix, I cut a second piece of foam core as a backing. And just so I don't forget the title of the design, I marked it on the back, along with the date of completion. Which means this cross stitch project is ready to hang on a wall!

For the second piece of embroidery, I had very little extra fabric to worth with, but the process begins in the same way. [In the future, I am always going to make sure to get an oversized piece of linen so I don't have this issue.] I could have used a smaller frame, but I think the design would have looked cramped in anything smaller.

Here you can see just how little fabric I have to fold over the edge of the foam core; just enough to stitch the edges together.

And this time I decided that the combination of loose weave linen fabric and such a small margin of fabric to work with made tape my only option.

I started with small piece of tape to secure the mid points and then went back and covered the whole edge with tape.

This frame comes with a press board backing often found on standard sized frames, so that covers the taped foam core. Then that little hook gets screwed into the frame and the cross stitch can be mounted on the wall.

And it only took me 22 and 14 years, respectively, to frame them.

Now, that's a long term project!