This is a project that I have been working on for the last few weeks, and I thought I would do the smart thing and jot down my thoughts right after making the dress so the memory of construction is fresh. What a concept! I haven't managed to do this in what feels like ages, so hopefully this means that I can get back into a routine around here.

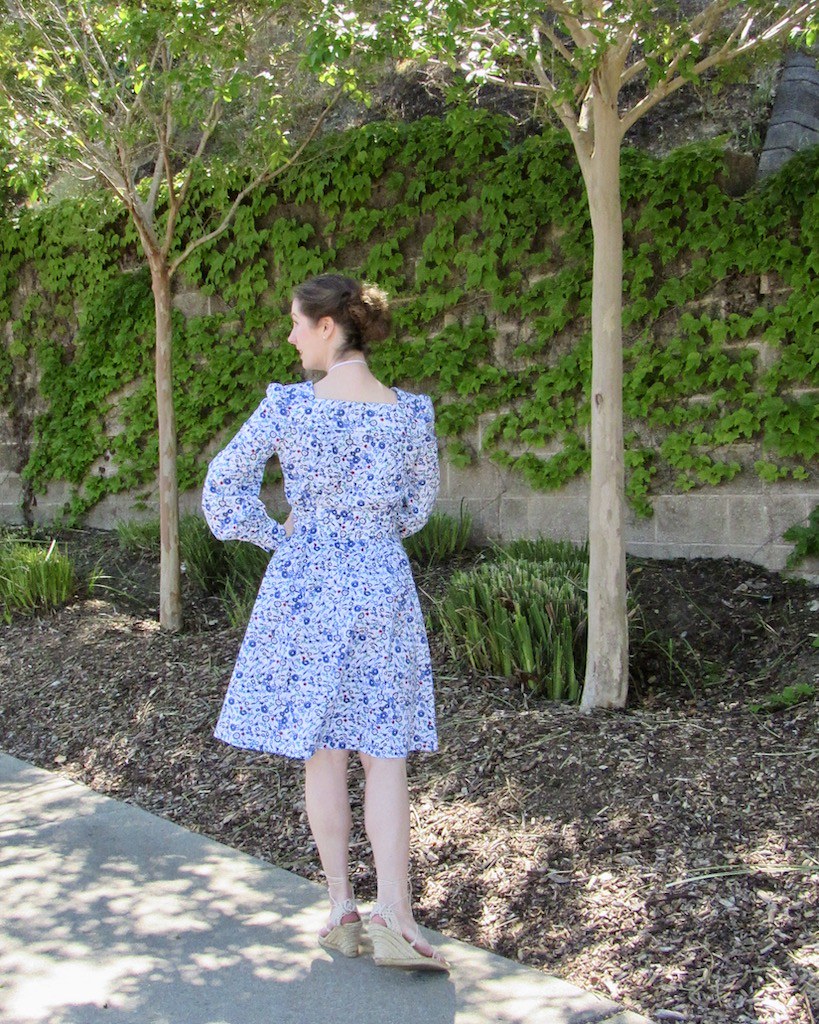
I actually had the design for this project outlined (in my head, at least) for almost a year. The fabric was initially purchased with the thought that it would make a lovely quilt backing, and it would have done a wonderful job. But I didn't love the match with the quilt that I had in mind, and the more I handled the fabric and looked at the print, the more I was convinced that the fabric deserved better than to be hidden on the back of a quilt. Since I had a whole lot of yardage that had been intended for a queen sized quilt, I thought I might as well take advantage of that fact. The idea of a tiered maxi skirt was the first thing that came to mind. I mean, how often do you have almost 9 yards of fabric to play with?!
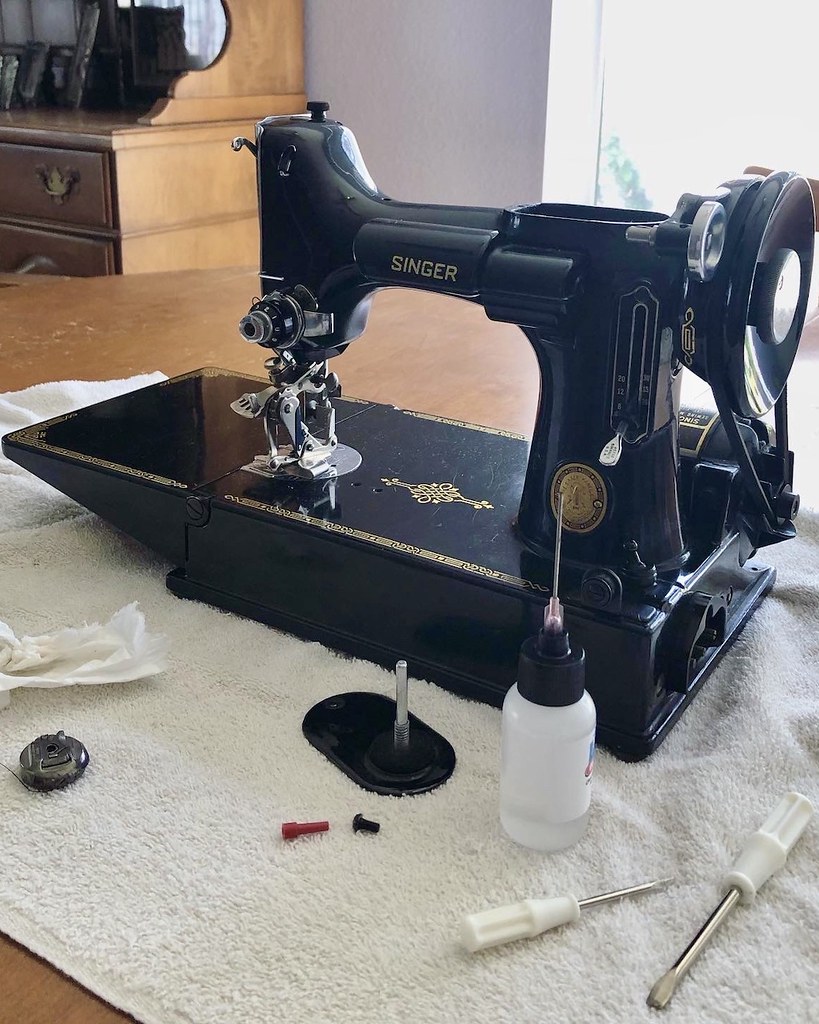
But if I wanted to make a tiered skirt with all of that gathering, I was determined to use one of my vintage ruffler feet. That meant that my Featherweight needed a little TLC. I don't use this machine as much as I would like because I am slightly wary of damaging it. And if it was going to create miles of ruffles, it was going to get a bit of a workout, so I figured it was time to get the screwdriver out and make sure she was ready for the task ahead.
I am no repair expert, but the nice thing about these machines is that everything is fairly basic and there is plenty of online information to be found. And clearly someone had taken some care with this Featherweight at some point in the not too distant past. I was expecting a lot more lint under the needle plate, for instance. Now that I have spent some quality time with her, I believe I will christen her "Fiona the Featherweight."
But back to those ruffles! I am not one for top-stitching as a general rule, but I had a crazy idea as the dress design was coming together in my mind. Why not use another vintage sewing machine foot if I was going to use that ruffler. And instead of gathering each tier and stitching right sides together, I might as well go crazy and apply each ruffle one on top of the other to create a visible fluted edge.
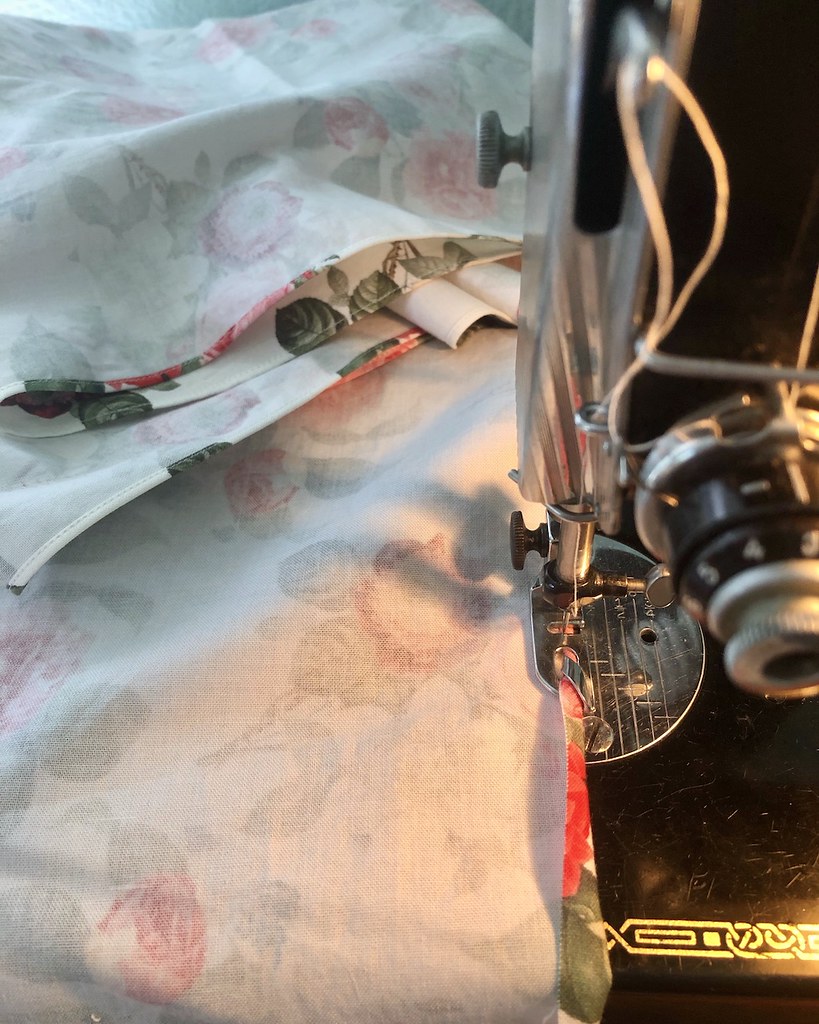
That was going to require more of the dreaded top-stitching, so why not go a step further and use a narrow hem foot for that top edge? Because my fingers are not ready to narrow hem never-ending ruffle edges; I just know I would burn myself with steam from the iron and get disgusted with the whole process.

I recall using a modern version of the narrow hem contraption on at least one dress back in the day with my first sewing machine (a White with snap on feet). If memory serves, there was a few curse words uttered, and although the hem turned out pretty well, it was not perfect. But that was a curved hem, and a straight edge should be easier, right?! It took a bit of practice to get where I wanted to go, but overall, I am quite pleased with the end result. I have a few of these narrow hem feet for vintage machines. One is adjustable, but it wouldn't make anything narrower than a 1/4" hem. It looked okay, but slightly clunky for this application. The 1/8" foot was giving me grief because the needle placement was too far to the left to catch the folded edge of the fabric. But for some reason, after I cleaned the machine, this was no longer an issue. I am not sure why that fixed the issue, but I am very thankful that the narrower hem was achieved since it looks so much nicer!

One thing that I wasn't expecting was the fact that my pre-hemmed lengths of fabric reacted differently under the ruffler than a raw edged piece of fabric. The good news is that I tested scraps of hemmed fabric and calculated the amount of fabric taken up by the foot before cutting my actual dress pieces, so it was clear to see the difference between my initial un-hemmed scraps, and the hemmed fabric bits and readjust things.

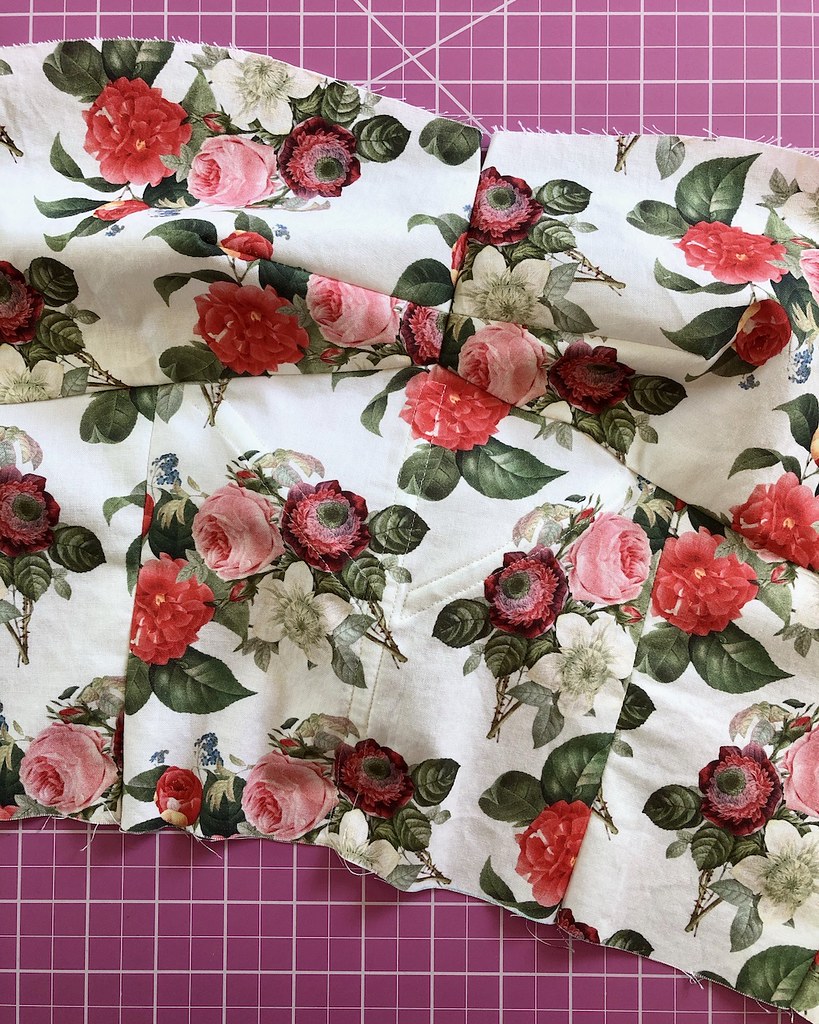
But before cutting out those really long strips of fabric, I spent quite a bit of time thinking about how many ruffles I wanted in the skirt, and what the width of each ruffle should be. It's a bit ridiculous how long I thought about this, and the amount of images I stared at. I knew that I wanted a narrow width at the waist, grading to larger widths as they move toward the hemline. Most photos of ready-to-wear skirts have a deep ruffle at the waist, and narrow ones at the hemline. And I suspect this has more to do with saving on the cost of fabric than anything else, since the lower ruffles are going to take up a whole lot more fabric because they have to be a significantly longer length than the upper ruffles. So if you are going to have to cut yards and yards of ruffle for that bottom tier, making them 6" wide instead of 14" wide makes a huge difference when you are making hundreds or even thousands of the same dress. But, in my opinion, having a wider ruffle above a narrow one looks unbalanced, so I decided to splurge on the yardage. And since four tiers is more extravagant than three, that sounded good, too.

For my skirt, I decided that the four finished tiers would be 7, 9, 11, and 13" wide, respectively. Since I was applying the ruffled edge on the right side of the fabric, I gave myself some wiggle room when cutting those pieces out.
To create the ruffle tiers, I first calculated the length needed, and cut my four strips, each tier approximately 1.7 times longer than the one above it.
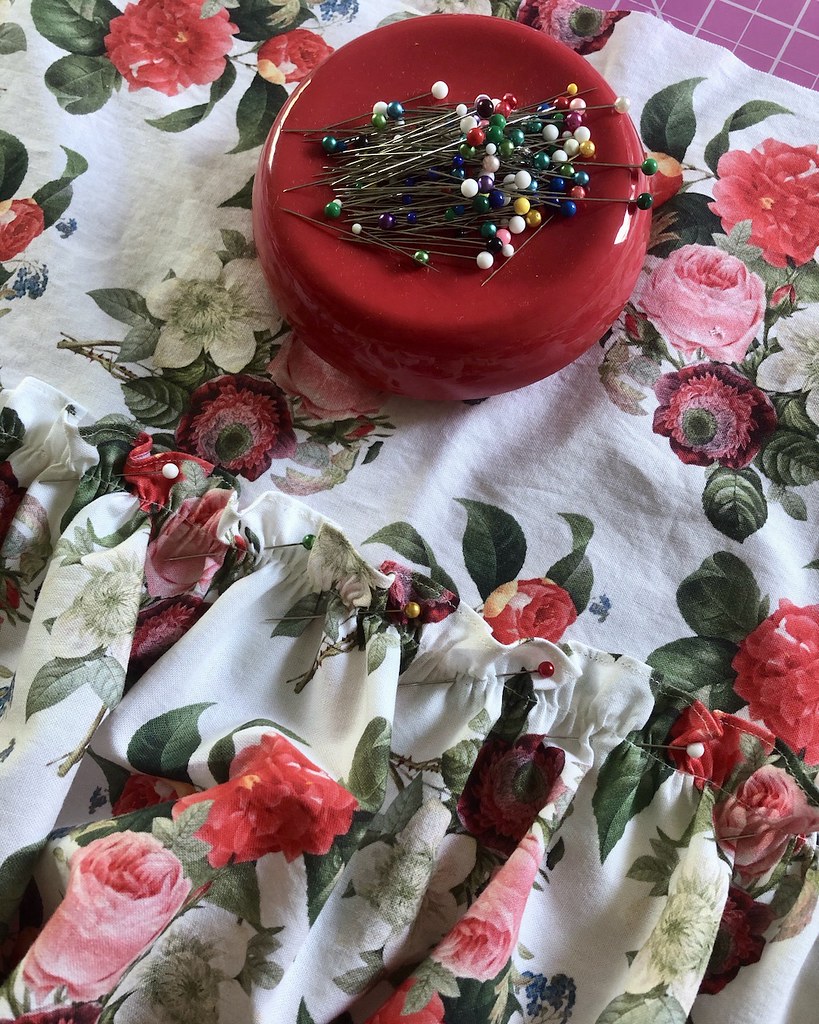
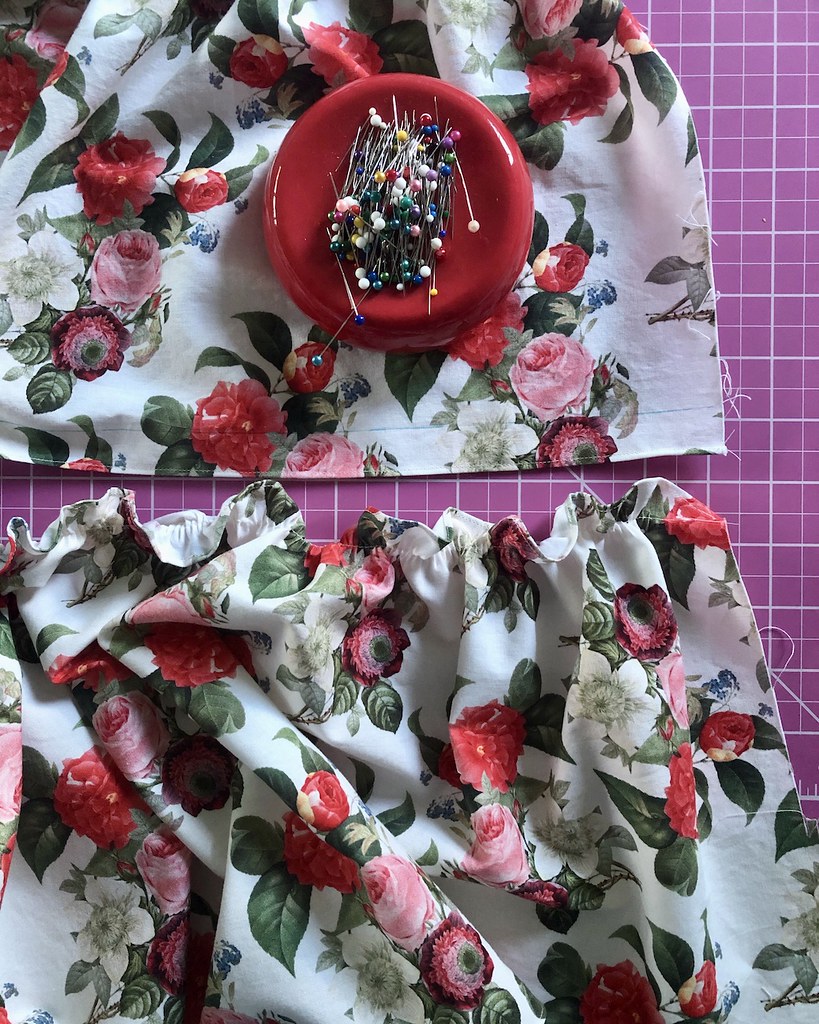
Next, both edges of each piece was narrow hemmed, except for the very top edge that would be attached to the bodice, and the bottom edge of the lowest tier. I decided that the fluted edge would only add bulk at the waistline, so that one seam would be constructed in the normal fashion, skirt gathered down to the width of the bodice waist edge, and stitched right sides together.
For the three lower tiers, the upper edge was put through the ruffler, to be stitched approximately 5/8" from the narrow hemmed edge.
That left me with a mountain of ruffled fabric.
It was then possible to measure down from the stitching line made by the ruffle foot to my 9" length, or 11" length, etc. I then marked that line across the length of the edge and applied the next tier along that placement.
Once pinned in place, each successive layer was stitched into place along the same line of stitching created by the ruffler.
Because I was dealing with a massive amount of fabric, I went back to my contemporary machine for this step since there is a lot more room for maneuvering than with a small vintage one.
And that process was repeated for each layer of ruffle.
And eventually, after hauling around a lot of fabric, the skirt began to take shape!
I should also mention that I left the lower edge of the bottom ruffle raw. I decided that a narrow hem was something that I would find on a cheap maxi skirt at the mall, and a more substantial hem would add a bit of weight and create a much nicer finish.
And here is the almost completed skirt. That's a whole lot of floral fabric to haul about, and I love it!