Showing posts with label Halloween Costume. Show all posts

Wednesday, November 5, 2025

Kiss of the Spider Woman

Although this dress didn't turn out quite as expected, I am happy with the result.

First off, the pattern is very fitted.  If I were to make another version, I would probably use a smaller seam allowance to give a bit more ease to the finished dress.

There is just something about negative ease that makes me nervous.  And while I am getting more comfortable sewing with knit fabrics, I'm not sure I will ever get over that particular issue that is very common with patterns drafted for knit fabrics.

The other "issue" that I came across was rather unexpected.

I always remove a wedge of length in the back bodice for fitting purposes, but this dress makes me think that I should have taken even more length out of the back.  

Or perhaps it's something else.

The collar of this dress is extremely tall.  Really, really tall.  I would say that I have a long neck, but this was almost too much for me.

And the reason why is that darn invisible zipper (at least, I am pretty sure it is).  Anyone who has worked with an invisible zipper knows that they do not bend at all.  So that zipper is working almost like a piece of plastic bonding that will not let the length of the back collar fold.

I would hazard a guess that if I hadn't inserted an invisible zipper at center back, the collar would just flatten out to fit any length of neck you might happen to have.  What seems to be happening here is that the inches of zipper in the collar are very stiff, but further down the back, the invisible zipper is able to puff out around my mid-back.

So if you plan to insert the zipper, it's just something to think about - you may want to fold the collar so that it's a bit shorter unless you have a very long neck!

The other disappointment is that I do wish that I had a little more yardage and could have added a few inches to the overall length of the dress.

But really, I do love the overall look of the dress.  And adding to my Halloween themed collection is always fun!

Dress:  Made by me, Vogue 2064
Shoes:  American Duchess "Marigold"
Earrings:  Nicky Bulter

Thursday, October 30, 2025

Metallic Webs

It's time for the annual Halloween frock.

I purchased this fabric last year along with the ghost knit that I made into a DVF reproduction wrap dress for last year's dress.  When the fabric showed up, I realized that the metallic spiderwebs were printed on top of a black cotton knit that was obviously stretchy, but the printed bits were not.  That meant that once the fabric was slightly stretched, the webs were going to look a bit broken.  I wasn't sure how that was going to look, so I put it aside and went with the ghosts and forgot about the webs at the time.

But this year I thought that I should make something with that spider web fabric since it was still sitting around, so I pulled out a few patterns from the stash.  There were a few options that would work for the look I was going for, and in the end, I went with Vogue 2064.  One of the main reasons for that choice was that the pattern includes a center back zipper which I figured would minimize the amount of stretching of the spiderwebs.

The dress design has interesting seaming, although it gets a bit lost in this fabric print.

But the pattern goes together very easily.  My main issue was not quite enough yardage to get the length that I wanted, so cutting the pieces out was the most aggravating part of the process.

And I am happy to say that this sleeve is nice and fitted (unlike most knit patterns that I have used) so I am definitely going to reference this pattern piece for future projects.

I went ahead and used an invisible zipper as suggested by the pattern after fusing a strip of interfacing the the back opening edges.  Interestingly enough, the metallic spiderwebs did just fine with an iron (although I did use press cloth because I didn't want to press my luck!).

Everything really did go together quite easily.

Because I wanted to save as much length as possible, I just serged the hem edge and folded up the serged bit for a narrow hem.

As with most of my knit projects, I prefer to hand sew the hemlines (skirt & sleeves).  This avoids stretching the edge out, not to mention that I enjoy a bit of hand sewing.

The dress is quite body-con, which is not exactly what I was going for - but to be fair to the pattern, it does look fitted on the pattern envelope.  I was just thinking that a 100% cotton knit was not going to be quite so clingy as a rayon/spandex, for instance.

I was considering this to be a wearable muslin since it's a very niche print that isn't going to see a whole lot of wear, and it was the perfect excuse to try more of a contemporary silhouette than I generally choose.

I am not entirely convinced that I will be making another version in a less holiday themed print, but the dress did turn out great . . . it's just not exactly what I had in mind when I started it!


Wednesday, October 30, 2024

Fantasma

I finally got around to purchasing the Vintage Vogue reproduction Diane von Furstenberg wrap dress pattern that everyone around the interwebs has been making.

And since it was October by the time I got around to actually making the pattern, I decided that the perfect wearable muslin would be my annual Halloween themed frock.

I have a couple of vintage 1970s DVF wrap dresses in my closet, and they are generally made from a cotton/rayon knit jersey with a decent weight to it.  The fabric does not have any spandex in it, and I think the reason that they are so universally flattering is that particular textile choice.

Now, finding a cotton/rayon blend jersey is not something that I was able to do in 2024, which is a shame.  However, I did stumble across this adorable ghost print 100% cotton jersey on the JoAnn website.  Go figure.

It's definitely a thinner material than the originals, but I figured it was worth a try.

I did make a couple of changes to the pattern, such as interfacing the facing pieces instead of the bodice and skirt fronts . . . along with my standard fitting alterations of lengthening the bodice and taking a wedge out of the back bodice.  I will also note that the given facing pattern pieces are quite a bit wider than they are on the vintage ready-to-wear versions.  I cut off about 1/4" while serging the facing edges, but when I make this again, I will probably go ahead and significantly narrow the facings.

I also ended up serging extra bits like the front seamline that attaches the facing as well as the seamlines on the waist ties to keep the cotton jersey from rolling (this cotton really wanted to roll along the edges).

I also placed my topstitching closer to the edge than is suggested by the pattern and my vintage originals.  It just felt right for the print. 

The pattern itself is rated as a "Very Easy Vogue."  The dress does go together very easily, and quite quickly.  (I always forget how quick it is to sew garments with knit fabric.)

That being said, I wouldn't suggest this to an absolute beginner with no garment sewing experience as it might be a bit overwhelming.

One other alteration I would suggest is narrowing the sleeves if you want them to resemble the pattern illustration.  If you look closely at the photographs of the reproduction dresses on the models that are included on the simplicity.com website, you can see that there is quite a bit of ease through the sleeve.  That is not how the illustration and the vintage model photos are drafted, and my ready-to-wear versions are also quite form fitting through the arm, right down to the sleeve cuffs.

I also ended up serging about one half inch off of the length of the skirt.  The pattern suggests taking up a 3" hem, and I knew that I didn't want to do that and have to deal with all of the excess fabric from the shaped pieces.  If you want a full length dress, you may want to lengthen the skirt pieces.  In heels, and with what would have been a 2" hem taken up from the skirt as drafted, this dress doesn't quite hit the ground on me, and I am only 5'6" tall.  

Yes, this pattern uses quite a bit of fabric, but if you want the full length 1970s maxi dress experience, you won't want to shorten those skirt pieces unless you are petite.

Overall, I would highly recommend this pattern.  It doesn't get much more classic than a Diane von Furstenberg wrap dress.  Do I agree that she "invented" the wrap dress?  Absolutely not!  But it's a garment that you can throw on with minimal effort and look completely put together.  There is a reason this silhouette is still popular fifty years later and doesn't even look "vintage" to most people.

As for my ghosty print version, I am very pleased with my choice of fabric, and my finished frock!


Tuesday, November 1, 2022

Latticework

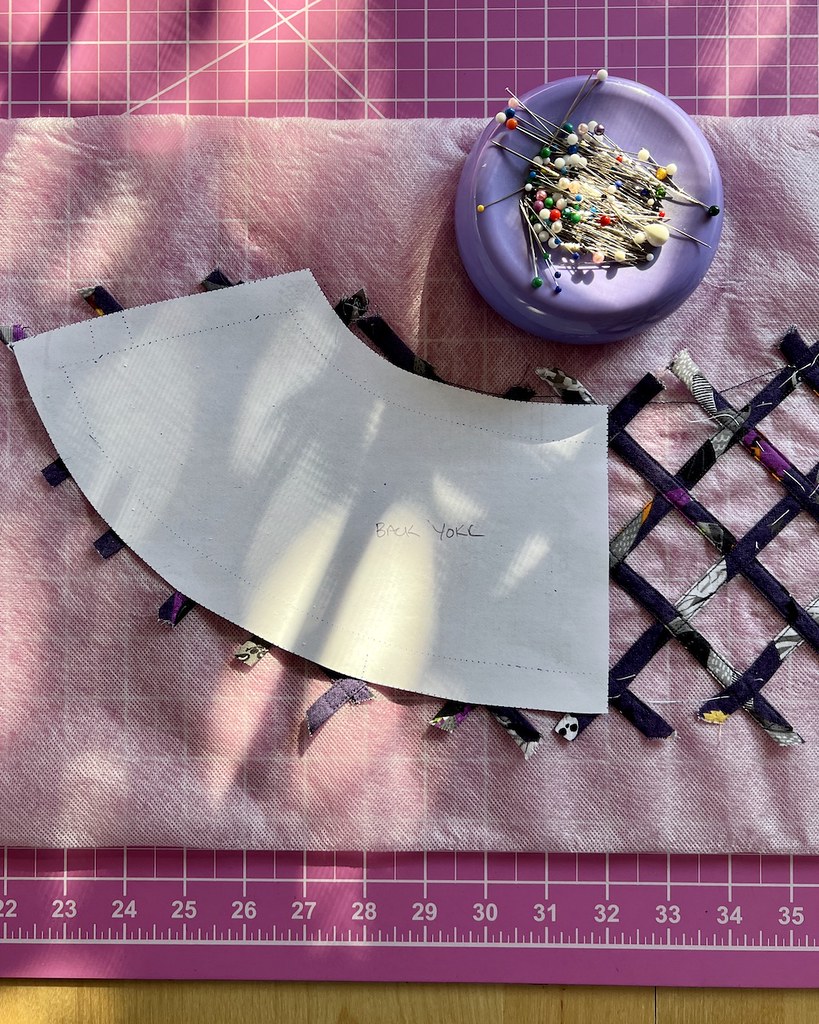
If I had to choose my favorite portion of this pattern, it is the scalloped edge.  But I was unsure about the yoke.  The scallops were not going to show very well if I used self-fabric for that portion of the pattern, and I didn't think that I could find a sheer fabric in a short period of time.  But I have been wanting to attempt a lattice cage along the neckline of a dress for quite a few years, and now seemed like an excellent opportunity.  First, I traced the yoke pattern on paper so that I could visualize how the spacing would work.

The next step was to test my theory.  I found water soluble stabilizer and purchased a roll.  This product is generally used for machine embroidery, and I have never used anything like it.  I was somewhat skeptical that it would wash away, so I pulled out some scrap fabric.

Short answer is, the product works.  I have found that it dissolves best in warm water, and I used some mild hand soap to make sure everything was washed away.

Proof of concept was a success!  With that accomplished, I was ready to get started on the actual yoke.

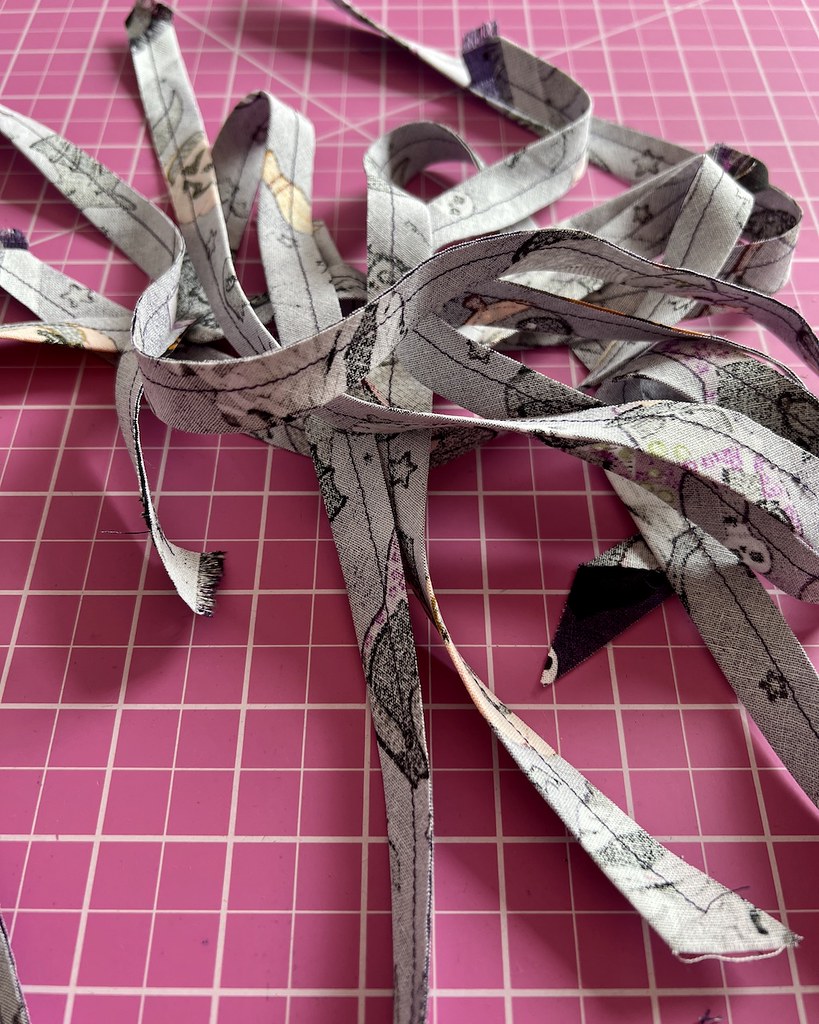
First, I cut out a bunch of bias strips.

Those were stitched together with a narrow seam allowance.

And then comes the fun part . . .

I know all of the tricks, but I still detest turning loops right side out.  I hate it almost as much as mending, which is saying a lot!  A quick bit of steam flattened them out nicely, and that bit of torture was over.

I knew that I would have to make more lattice than was needed for the yoke, but I wanted some idea of the shape.  This was accomplished by tracing directly onto the stabilizer.

Next, I drew in the spacing lines for the lattice.

This particular stabilizer does not sit completely flat.  I was able to stretch the edges slightly, but I was unable to keep it from puckering, especially with the pinned strips of bias.

I wasn't too concerned about the stabilizer itself (since it would be washed away) and since my fabric was bias, I was hoping it would turn out flat if I dried it on a flat surface.

So what started out as a simple two piece yoke turned into a rather time consuming activity.  

As I was laying everything out, I realized that I should probably weave them in and out of each other.  This had completely slipped my mind as I was thinking through all of the steps.  Thankfully, these yoke pieces are not too big, so making sure everything was properly woven under and over was not too much work.  That being said, how do people manage this with pastry?!

With all of those pins, I knew that I would have a fit at the sewing machine, so it was obviously time to hand baste everything into place.

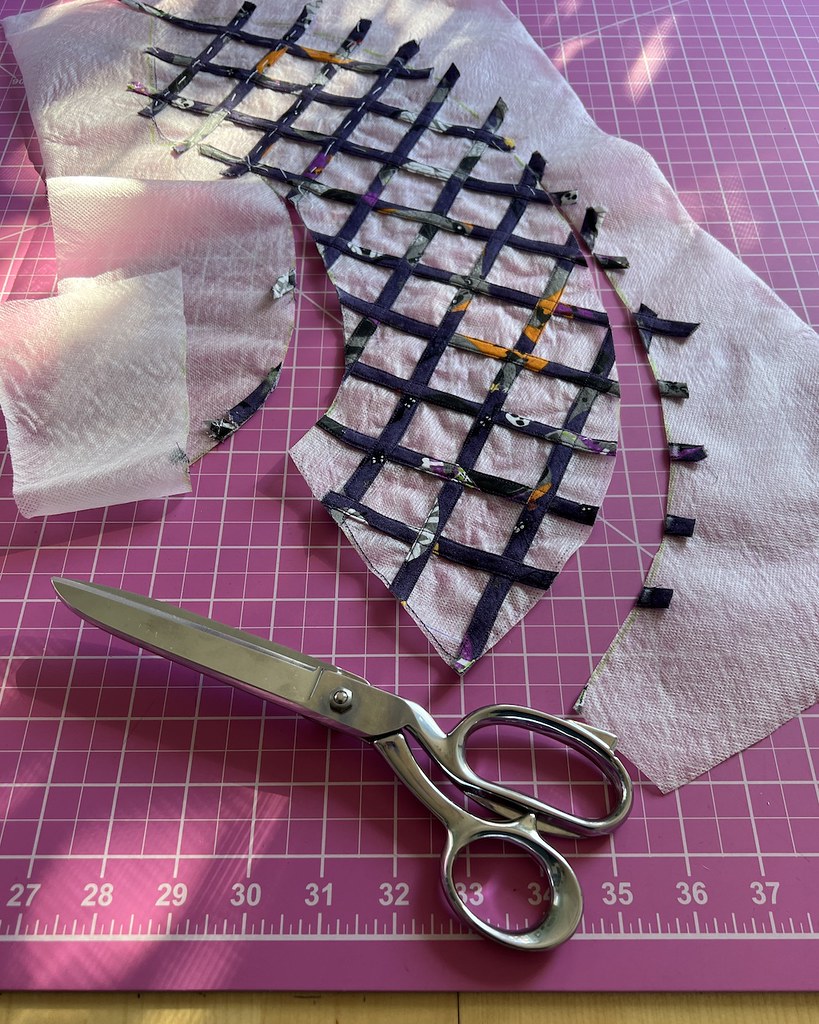
Once that was accomplished, it was just a matter of edge stitching all of the strips down.

I generally prefer hand sewing to machine sewing, but I got in a rhythm with this and it wasn't too bad.

I had, of course, traced the outline of the yoke directly on the stabilizer, but I wanted to make sure that stitching on a slightly puckered surface hadn't shrunk my yoke, so I made myself a paper template and retraced that shape.

It was fairly accurate, even with the addition of all that machine stitching, but I am glad that I took the time to ensure that the pieces were the proper size.

And then I had to cut that shape out.

After joining both shoulder seams, it starts to look like part of the bodice.

And it was at this point that I realized that I would need to add two more strips of bias. 

I wanted the cage to be centered, both front and back, but that meant that there were not many strips matching along the shoulder seams.  Once that stabilizer was washed away, I don't think the pieces would have stayed connected without the additional bias strip.  But better to figure that out now rather than later!

I also ran another line of stitching just inside of my seamline.  This may not have been necessary, but I wanted to bind the neck edge, necessitating removal of the seam allowance, and I didn't want the lattice to stretch out.

The final step was to bind the neck edge with another strip of bias fabric.  And so ends the saga of the cage yoke, and now it's time to get back to the actual construction of the dress!