Thursday, June 24, 2021

Death of a Closet

I have a confession to make: I kill closets.  You may not have known it was possible to do such a thing, but I am here to tell you, I murder closets.  Although I admitted to the death of my current closet on Instagram a couple of weeks ago, this is, in fact, number 3 on the hit list.  It's embarrassing, and I have never before admitted this, but I am releasing that truth out in the world on the off chance that someone else is ashamed of the fact - you are not alone! 

The first victim was in the first apartment I ever lived in.  Prior to that, I was dealing with old homes that must have had some well built closets.  Turns out, the 7 or 8 foot long closet in this apartment had a shelf that was supported by two pieces of plastic on both side walls, plus two or three dinky little metal supports that hook onto the shelf front and get screwed into the back wall at a 45 degree angle.  This, of course, was not enough to support my metric tonnage of clothes and shoes, but how was I to know?!?  I came home one day to the contents of my closet on the floor.  Thankfully, the maintenance guy was really understanding and put it back up and added a few more supports throughout the length of the closet.  Case closed!

A few year later, I moved to another apartment building and the same darn thing happened again.  But this time around, after living in the apartment for a couple of years, there was a massive crash in the middle of the night right next to my bed.  It woke me out of a deep sleep and terrified me.  Not entirely sure what had happened, my heart was pounding for what felt like an eternity.  Then it came to me:  I had killed another closet.  Aarrrgh!!!  So I lived with my clothes covering the sewing table in the second bedroom for a few days before a second maintenance fellow reinstalled the closet (which, coincidentally, was built exactly like the first one).  He also shored up the second bedroom closet, just to be safe!

That brings me to Sunday evening a couple of weeks back, this time in my condo, so no maintenance man to help, nor building owner to pay for it (because now, that's me!).  And, quite frankly, I am done with these stupid Closet Mate systems that are screwed into drywall in the middle of the closet wall.  They don't work for a person who has multiple tea length circle skirts made of heavy wool (how much does one of those weigh?, not sure, but it has to be at least 6 pounds, right?), and underlined and lined garments, and so, so many shoes.

One day I hope to live in a home with a spectacular walk-in closet.  That day may never come, but I can still dream.  And until then, I am pretty happy with what I found at The Container Store.  They are more expensive than the Ikea system, but looking at the specs, the Container Store can handle more weight.  Sturdy is what I need, so I spent a little extra, and so far, so good.  Only time will really tell, but this system hangs off of a track at the top of the closet where there was a horizontal stud, which I am hoping does better than the previous piece of garbage tenuously attached in the middle of a wall.

I do realize that I should probably get rid of some of the clothes.  But, as discussed on Instagram, it's really difficult to let go of things that I have made.  If I donate them, will they end up on a barge to India where they will be ripped apart to use as carpet insulation?  And the whole "fit" thing doesn't help all that much when weeding through the masses of clothes.  For most of these garments, I am a skinny or fat day away from wearing them.  Out of style also doesn't apply since all of my clothing is so far out of date, it's almost coming back into style!  There is also the idea that something that isn't worn for a year should be tossed.  To which I say, *&%$ that.  I come back to clothes that have lived in the back of the closet for years only to decide they are now my favorite item some five + years after they were last worn.  I have three dresses that I wore in middle school and high school that I rediscovered a few years back and they are in heavy rotation during the summer months for the past three years, and those aren't even hand made.  Whatever shall I do with all the clothing?!?

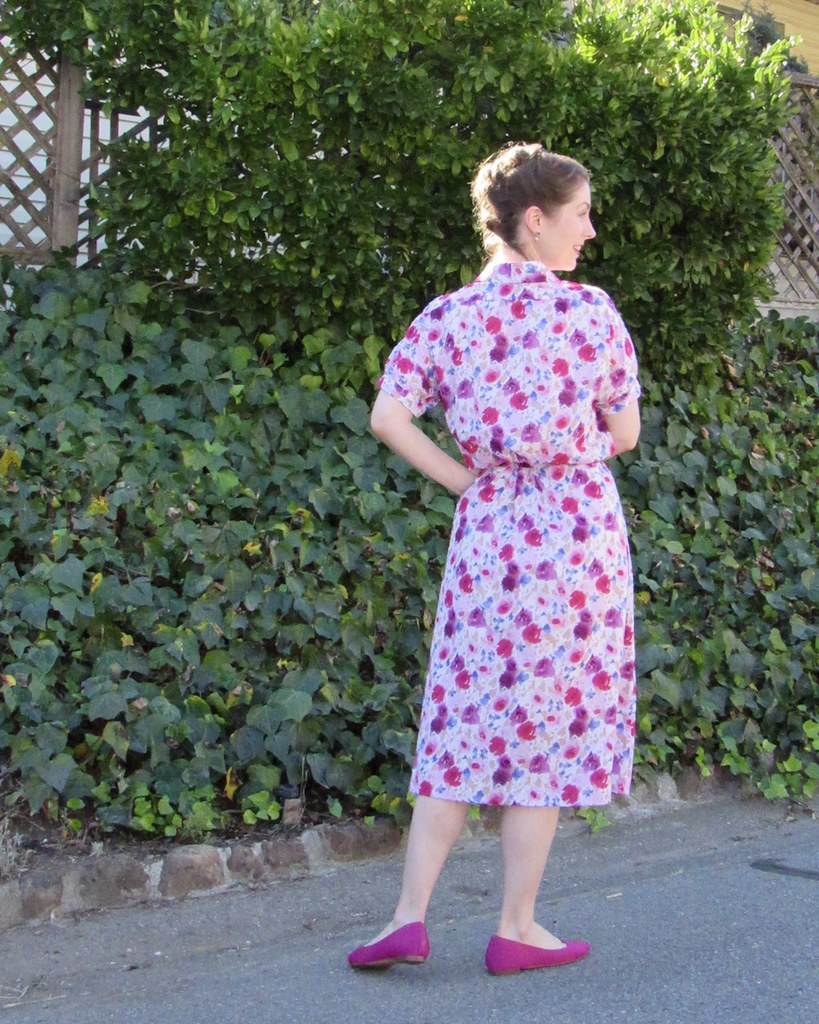
But I have found at least one handmade skirt that I am willing to donate and hope that she gets a second life with someone else, although I am fully aware that she may end up in the scrap heap.  It's not a pleasant thought, but it's one that I have come to accept.

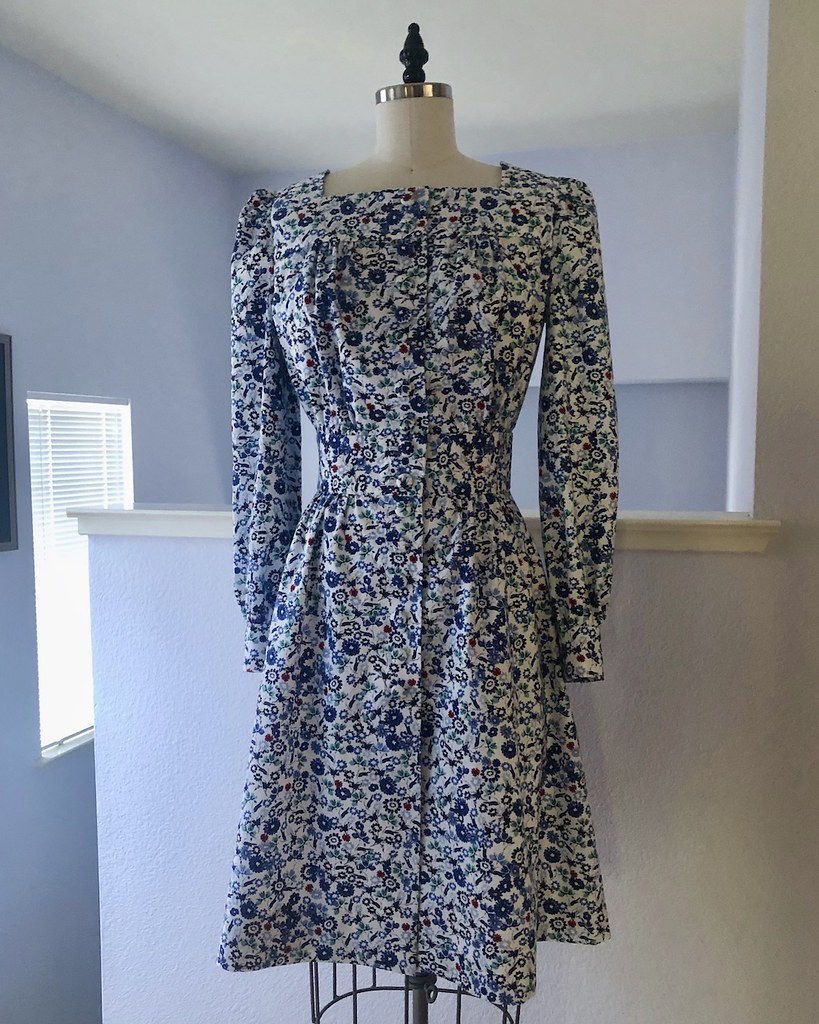
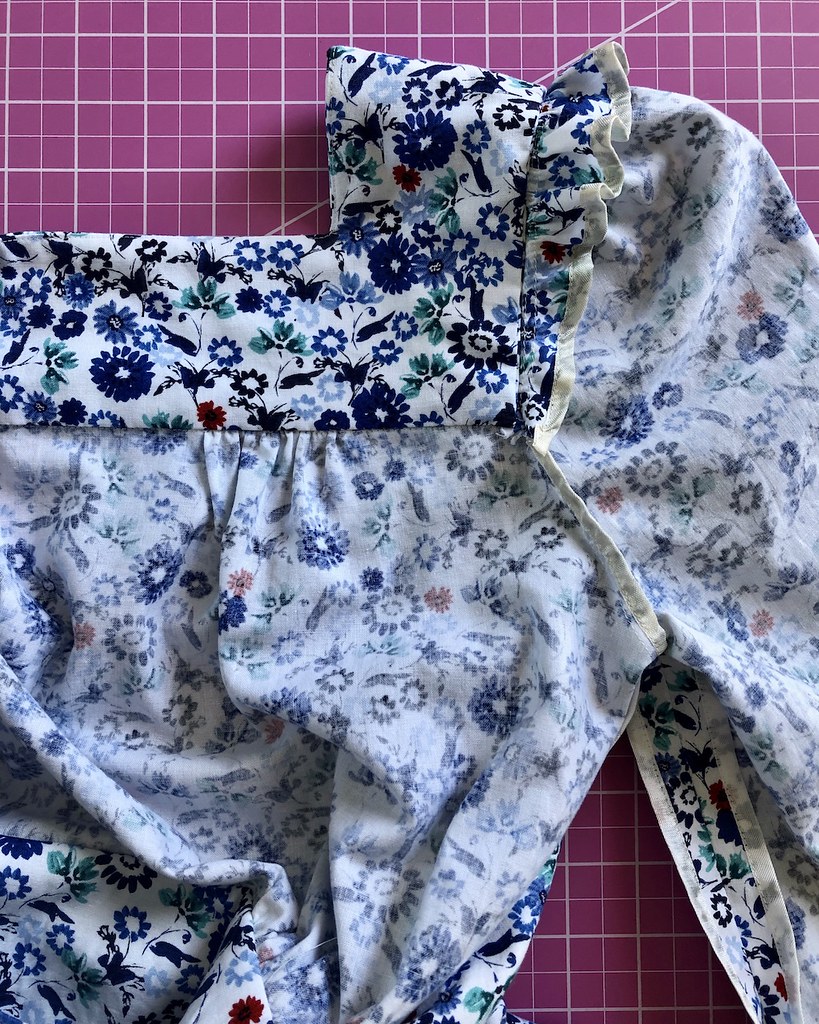
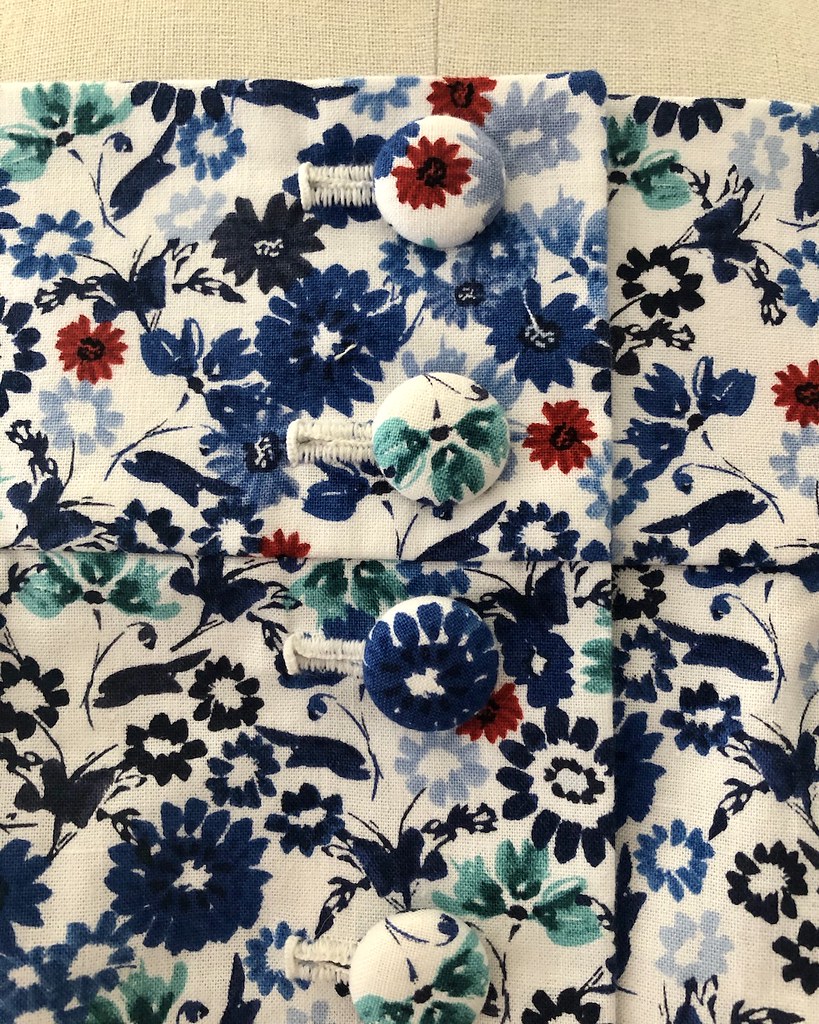
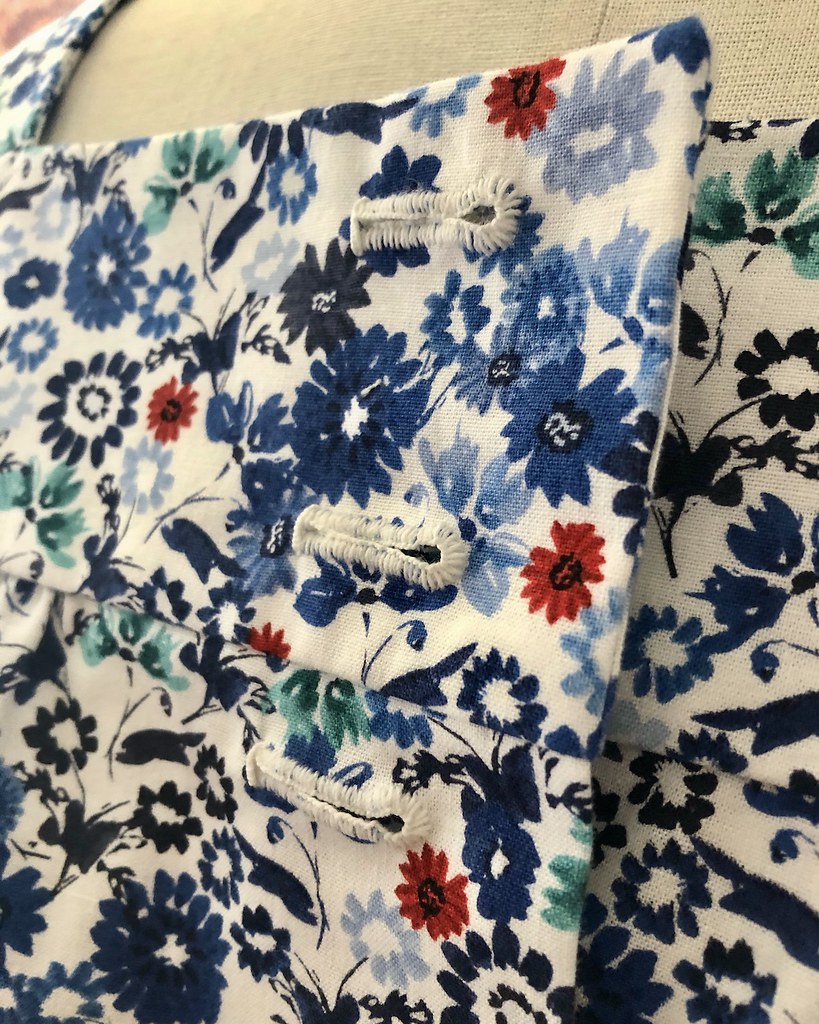
This was one of the first sewing projects I ever made.  I remember going to Britex Fabrics and finding this yardage on the remnant floor.  I specifically asked for something other than wool because I wanted to wash the garment.  [These days I hand wash almost all of my wool yardage before cutting into it, and I hand wash those skirts with no issue.]  And while the skirt still fits fine, it does have a tendency to have static cling, and the inner finishing leaves me slightly embarrassed at this point.  Here is proof . . . yikes!

But I am talking one last look, realizing just how far I have come in my sewing journey, and moving on.  One less skirt in the closet, and a pound or so saved on the hanging rack.

When the mood strikes, I am going to go back into the closet and find a couple more items that I can part with!

And, of course, I am open to any suggestions that you may have about space saving and/or ways to get rid of precious home made items that hold emotional significance.  Please be advised that there are also multiple bureaus that hold my sweaters, and boxes stored under the bed that contain hats and costumes that are neatly folded out of sight, so rotating seasonal items in and out of the closet is not really an option.  And I am far from ready to stop creating, so while the knitting, quilting, and cross stitching may slow down the influx of new clothing looking for a home in the closet, it won't stem the tide for long.  Obviously very first world problems, and I am aware of how lucky I am, but I would definitely be grateful for any solutions!!  Also, if anyone has a closet system recommendation, I would love to know.  I believe I may need to upgrade the master closet before another disaster befalls that one.  

You didn't really think those closet photos showed the entirety of my clothing collection, now did you?

Sunday, June 20, 2021

Daffodils

I have been going through photos on my computer and came across the images of this blouse that was stitched together some five or size years ago.  The fabric was from the remnant bins, and it was just enough to make up a short sleeved blouse.

I have been on a quest to discover the "perfect" blouse, and I don't think I have found it just yet.  But I was willing to test out Butterick 2259 and I though the cheery daffodils would work quite nicely with the design.  Also, I love to pick fabric for my wearable muslins that don't require any pattern matching.  This print is certainly busy enough to avoid such a thing!

And while this turned out a little more camp shirt than I had hoped, I do love the print, and I always love working with vintage patterns/directions.

It's no surprise, of course, that I had to bind my seams and go full tilt with the bound buttonholes, just because!

I love the print, and these photos have reminded me of the shirt - with this warm weather, it's the perfect time to pull this out of the closet.  Am I the only one who forgets certain garments that are tucked away, only to rediscover them years later?  I know it must be a sign that I have too many clothes, but then again, it's almost like being able to shop for clothes in my own closet, which is always fun!

Friday, June 11, 2021

Puffed Sleeves from the Seventies

This pattern has been sitting on my sewing table for over a year.  Prior to that, it was sitting right on top of a basket full of other patterns so that I wouldn't get distracted and forget about it.  Well, I finally found a fabric that I thought would pair nicely with it, and here we are.

All of the those buttonholes gave me pause for a second because I didn't think my white backgrounded fabric would take well to bound buttonholes.  And then I thought, why not figure out how to make a hand worked buttonhole.  I love hand sewing, so why not finally get around to trying that technique?  But more on that later.

The construction was pretty straight forward, but I did come across something that is new to me.  Take a look at the top of that sleeve pattern.  Notice anything odd?

It jumped right out at me so that I had to look at the instructions to confirm my guess as to what was going on here.

And, sure enough, that extra large seam allowance is added to create a little mini sleeve head that is built right into the pattern piece to help the puffed sleeve to puff.  Pretty genius, actually.  My only complaint would be that you need to thread trace or mark the seam allowances on both your armscye and the sleeve cap since the edges will not match up as the sleeve has extra allowance and the armscye does not.

As to buttons, seventeen are required between the front opening and the sleeve cuffs.  Now, I thought I was being super slick and had found some lovely shell buttons.  I had about 20 of them stashed away, but alas, this print is very white, and the shell was not.  Turns out, optic white buttons are difficult to find (or, at least, the ones that I like are).  I love these domed ones, but I only had two.

In the interest of making this project out of nothing but what was on hand, I used covered buttons since I have a whole lot of those laying around.  I sort of wish they contrasted a little bit more as a solid white would have, but the dress turned out fine, so it is what it is.

And now on to those hand worked buttonholes.

I pulled out an old reference book for a little help.  And I also perused a couple of YouTube videos to see some different techniques for the bar tacks, etc.

My initial thought was to use a white silk thread that I had stashed away, but it was too thin.

I really didn't want to purchase anything new for this dress, so I was at a loss for a day or two.  After searching through most of my thread, I realized that cotton button and carpet thread might be a good alternative to buttonhole twist.  The spool I had was vintage and 100% cotton, which matches the fiber of the dress, and it's beefy.  I made a little scrap of fabric for a few test buttonholes, and after whip-stitching the buttonholes closed with some Gutermann silk thread, I decided to try the button and carpet thread for the buttonhole stitch itself.

It may be a little thick for the weight of the dress fabric, but it worked pretty well.

I started the real buttonholes at the bottom of the center front row of buttons, hoping each one would look slightly better than the last, and the ones that show more at the top would look the best.  I am by no means an expert, but between the test versions and the dress, I've got about twenty hand worked buttonholes under my belt. Only 980 more to becoming an expert, right?!

The other interesting thing to note on this pattern is the placement of the lowest buttonhole.  It stops rather high up from a modesty perspective, which is evident from the pattern illustration.  It's a design choice which looks great, and I know why the designer chose to stop the buttons at that point.  To solve the modesty issue, the pattern instructs that a snap should be added to close the skirt front below the line of buttons.  Now why didn't I think of that?

And once again, vintage patterns come through with great drafting and a couple of surprises.  I really encourage everyone to use vintage patterns for this very reason - there are so many great tips and tricks that I have picked up over the years from those brittle instruction pages.

This particular vintage pattern helped me make a great little dress.  And I am pretty sure I will be using this one again.  I may even dare to make this out of a solid, provided I can fine a solid colored fabric that I really like.  This has proved rather challenging in the past, but I am hopeful that one day I will stumble on some beautifully textured solid colored dress weight fabrics.

Tuesday, June 8, 2021

Upper Back Pattern Adjustments

In my last post, I made reference to two of the pattern adjustments that I almost always make to the back bodice of any pattern: an erect upper back/flat upper back adjustment, and a long torso adjustment.  I had quite a few people ask about what I was describing, so I decided to clarify those adjustments here.  I rarely see any reference to the flat upper back fitting issue.  People mention full bust adjustments, and small bust adjustments, and sway back adjustments all the time, but I really never hear about erect upper back or flat upper back adjustments!  Maybe that means there are not many people who require the alteration, but perhaps it will help someone out there with a similar issue.  In short, most standard blocks allow for a slightly rounded upper back as the average human body has that shape and requires slightly more fabric to cover that rounding.  Since I don't have that rounding, mostly due to my posture, I think, I don't need that extra fabric, and it pools below my shoulder blades.  This is one way to remove that extra fabric.

The major thing to remember about this adjustment is that it must be done prior to cutting out your bodice back.  It's best to figure this issue out ahead of time!

All of my life (or at least as long as I can remember), I have known that I have a longer than average torso.  There is a story that as a child in diapers wearing a jumpsuit at a party, some guy made a comment about how short my legs looked.  Thanks a lot, rude man, but clearly, my torso is longer than my legs.  Both of my parents have long torsos, so it's not a surprise that I do as well.  And it's certainly one of the reasons why I am such a fan of high heels!  It's all about proportion!!

After I started making my own clothes some twenty years ago, I figured out pretty quickly that a long-torso adjustment would help with the fit of the clothing that I was making.  It took a lot longer to figure out what to do with the excess pooling on the back of the bodice somewhere around bottom of my shoulder blades.

The first adjustment I make probably looks familiar to most people.  This is the easiest way to lengthen (or shorten) a bodice.  A lot of contemporary patterns will include a lengthen/shorten line with other printed information right on the pattern pieces.  It's best not to add the length at the bottom of the pattern since it will affect the waist measurement as the side seam will continue to get smaller and the dart intake will get larger.  If this notation is not on the pattern, it is easy to make a line perpendicular to the grainline and adjust from there.  You can true up the side seams, but your waistline measurement will remain the same and therefore match your skirt pieces.

Then, all that you need to do is fold to shorten, or cut and add an extra strip of paper to that pattern piece.  Just make sure to keep that grainline nice and straight and do the same adjustment to all of your bodice pieces!  Well, that will give me the added length I need so that the waistline sits at my actual waist (I usually add anywhere from 5/8" or 3/4" to the torso length).  Ironically, I still need to remove extra fabric from my upper and mid back.  The adjustment itself ends up looking like a horizontal double ended dart, or something like this.

Basically, you are removing excess fabric from the mid center back, but not changing the armscye area or the length of the bodice side seams, since those have to match up with your bodice front and the sleeve.

First up, draw a line perpendicular to the grainline somewhere just below the arm.  I don't need to adjust the armhole or the sleeve, and since those curved edges are more of a bear to modify, I like to steer clear.  I also don't want it to be too far down toward the waist, since that is going to be more in the territory of fixing a swayback.  My particular issue has pooling fabric that starts just below the shoulder blades.

Next, I fold the pattern along that new line.  You can slash through to the seam allowance at the side bodice edge, but I try to keep my cutting of the pattern to a minimum when possible!

Using the folded edge as a guide, I tuck about 3/8" out of the center back bodice, tapering to nothing at the side seam.  [If you are using a princess seamed bodice, make sure to lay those extra seamlines together and take that into account as you take a wedge of length out of the pieces.]

You will notice that this distorts the grainline and the center back is no longer on grain.  But we will deal with that next.

As you can see, a small wedge was taken out, which can now get pinned in place.

If your back bodice has a dart, you may need to true the upper portion of the dart legs, or even reposition it slightly.  I usually find that I can make my adjustment below the armscye and above any dart, but this bodice block I found online has the darts up rather high.  But the adjustment still works!

The most important thing to do is reconcile the grainline.

I often cut my bodice back out with extra pattern tissue to play with at center back, but if that is not an option, simply add a strip of paper.

Draw a line from the top of center back to the bottom of center back, recreating a vertical center back seam that will line up with your fabric grainline (and make it possible to cut on the fold, if need be!).  It is also a good idea to mark a nice straight grainline as well, or at least cross out the janky one.

And now my pattern piece is ready to be cut out of fabric!  These two changes are made to almost all patterns I use and I have found that it works well for me.


These two changes are made to almost all of the patterns that I use and I have found that the technique works well for my body shape.  I would be curious to know if anyone else has to make a similar adjustment for a really flat back, and how they slice and dice their pattern pieces!

Wednesday, June 2, 2021

1970s Shawl Collars

Well, the sewing motivation has returned, and my intention to get back to blogging finished projects has disappeared.  No matter what I try, I never can seem to do both things on a consistent basis.  And honestly, the actual creating is usually what wins out in the end . . . which is probably how it should be.

But I do want to catch up with some of my projects here on the blog, and seeing as the temperatures are rather high these days, I thought this particular dress would be appropriate to post.  

I am going to have to pull this out of the closet now that I have reminded myself that it is a perfect warm weather garment.

My original intention with this pattern was to make the blouse, however, I had enough fabric to make the dress, so I went for it!

And I am very pleased that I have a dress and not a top with nothing in the closet that matches.  Don't you hate when that happens?!

If I make this pattern again, I will have to remember to take a wedge out of the upper back length.  I always forget to do that with designs that don't have a waist seam and are simply belted to achieve shaping of any kind.  And even though the intent of the dress is to have a bit of drape through the back bodice area, I tend to have too much length which pools oddly if I'm not careful.  It's an odd thing because I alway have to add length to the bodice pieces to have a waist seam sit at my actual waist, but then remove a wedge from the upper back because it's so flat.  Figuring that out took me a few years of sewing my own clothing, but it was a game changer for fit.

It certainly doesn't make the dress unwearable, but I think I would enjoy wearing it more if I had remembered to do that adjustment.  That, and I should also remember that I definitely prefer to have an actual waist seam.  So why do I keep making designs without?  I really haven't got a clue.  In this case, I blame the collar.  I do love a good shawl collar!

The question is, will I make a blouse version - and I haven't decided one way or the other quite yet.  If the right fabric came along, or I happen to find it stashed away, I may have to revisit this pattern (and remember to make that simple adjustment!).

And yes, no need to adjust your monitors, I am wearing flats.  It has been happening a bit more than normal since things shut down for the plague, but never fear, I am still a huge fan of my heels.  They really are a long-waisted girl's best friend!

Dress:  Made by me, Butterick 6463