
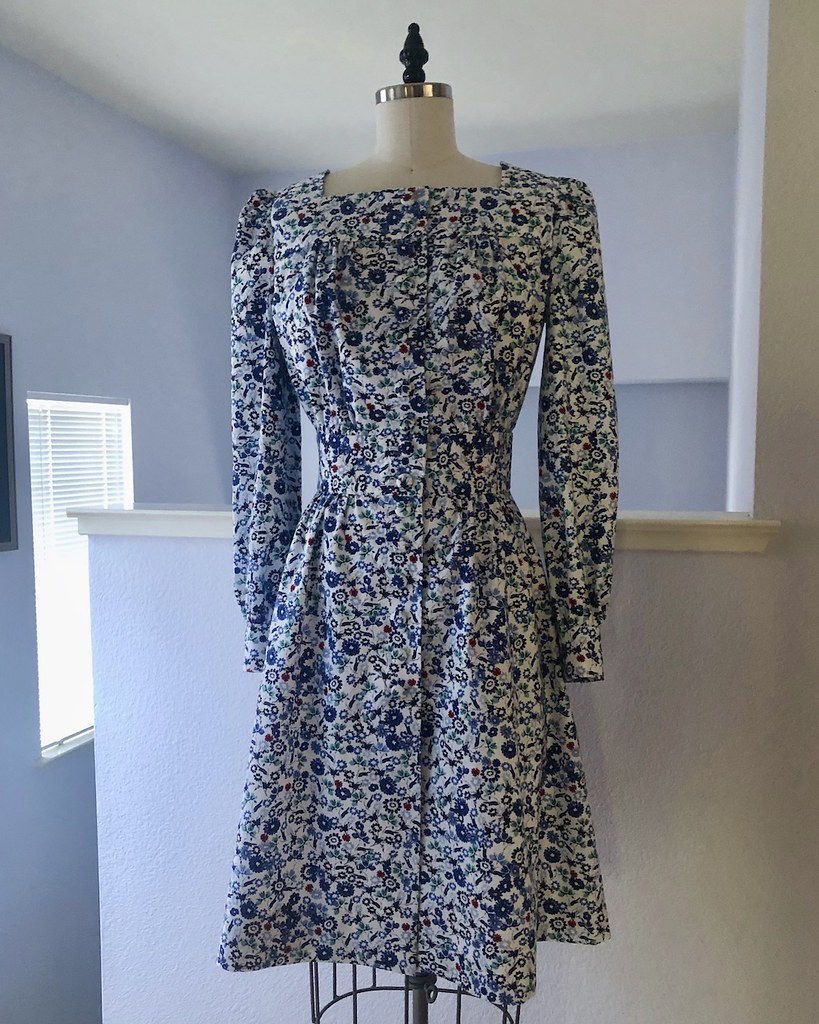
This pattern has been sitting on my sewing table for over a year. Prior to that, it was sitting right on top of a basket full of other patterns so that I wouldn't get distracted and forget about it. Well, I finally found a fabric that I thought would pair nicely with it, and here we are.

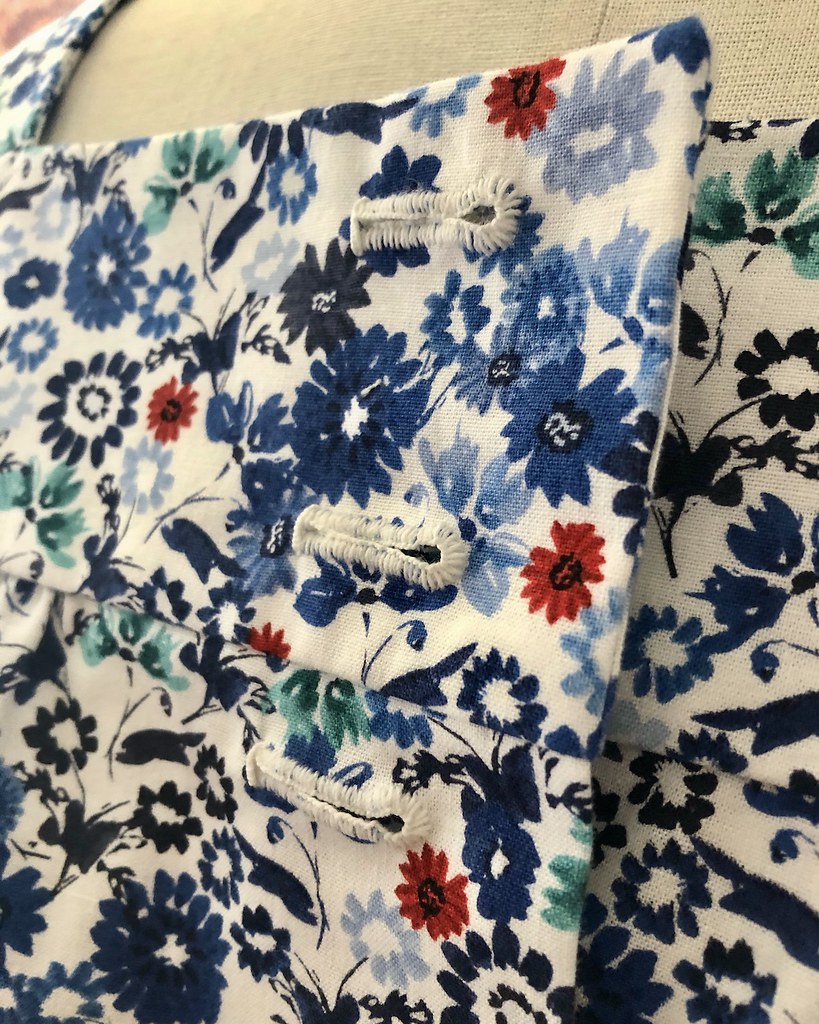
All of the those buttonholes gave me pause for a second because I didn't think my white backgrounded fabric would take well to bound buttonholes. And then I thought, why not figure out how to make a hand worked buttonhole. I love hand sewing, so why not finally get around to trying that technique? But more on that later.

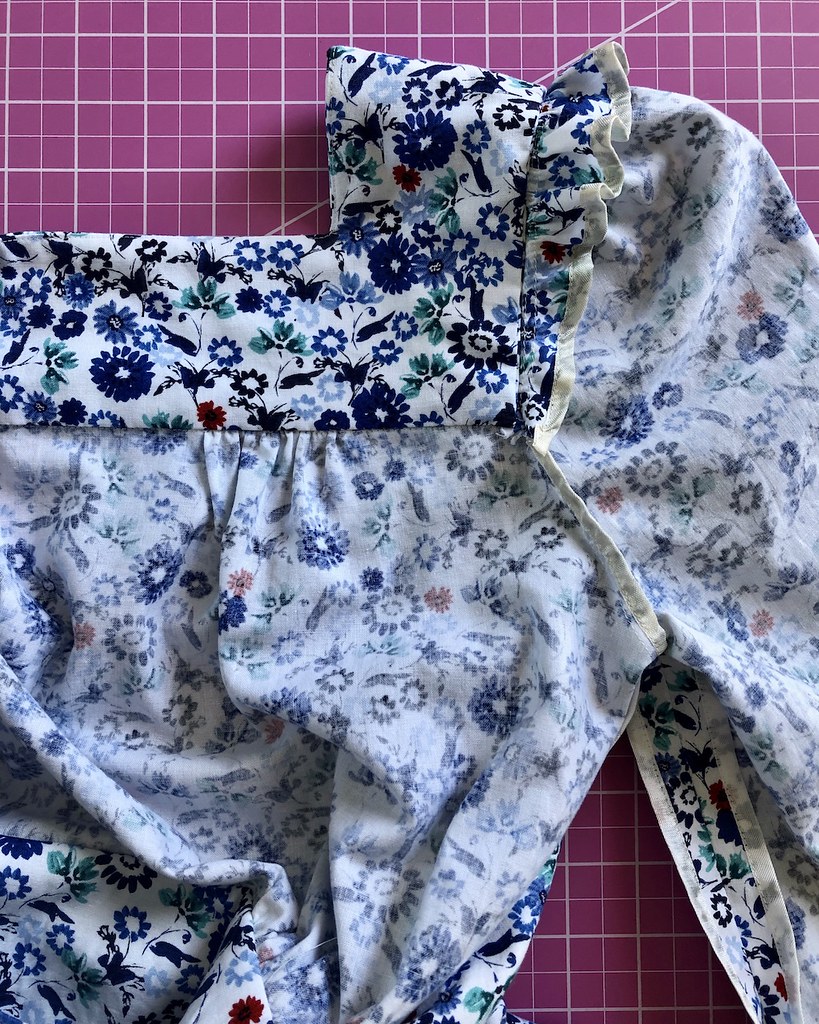
The construction was pretty straight forward, but I did come across something that is new to me. Take a look at the top of that sleeve pattern. Notice anything odd?

It jumped right out at me so that I had to look at the instructions to confirm my guess as to what was going on here.

And, sure enough, that extra large seam allowance is added to create a little mini sleeve head that is built right into the pattern piece to help the puffed sleeve to puff. Pretty genius, actually. My only complaint would be that you need to thread trace or mark the seam allowances on both your armscye and the sleeve cap since the edges will not match up as the sleeve has extra allowance and the armscye does not.
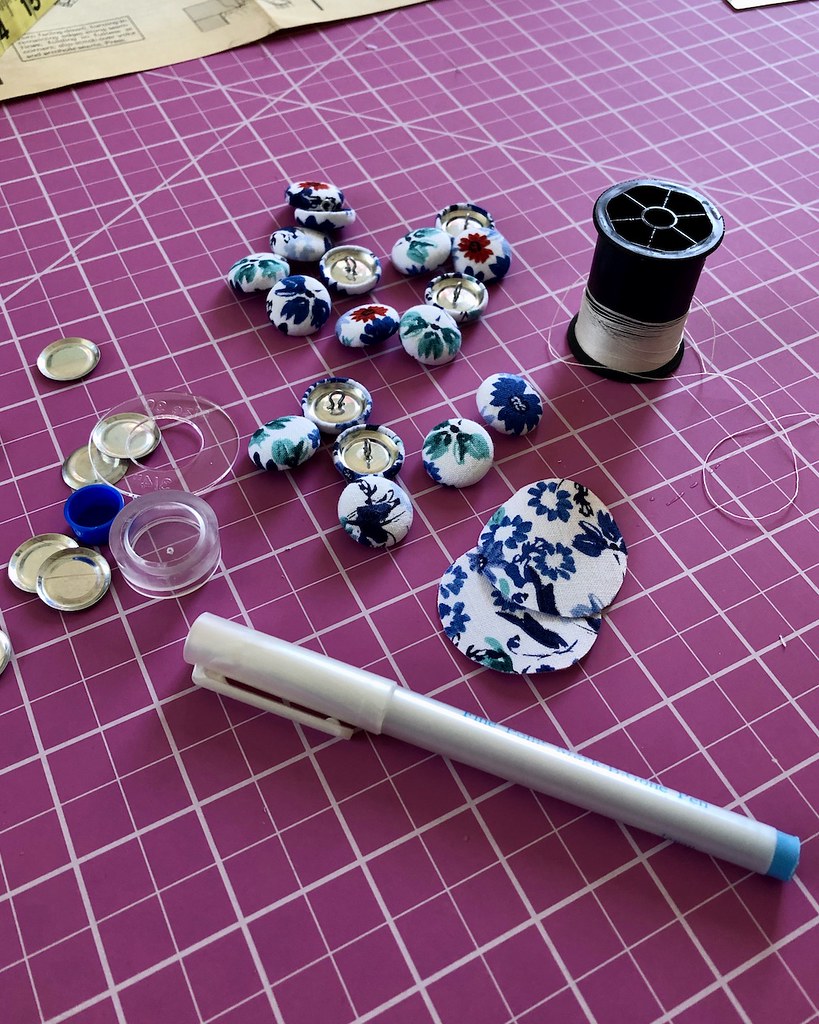
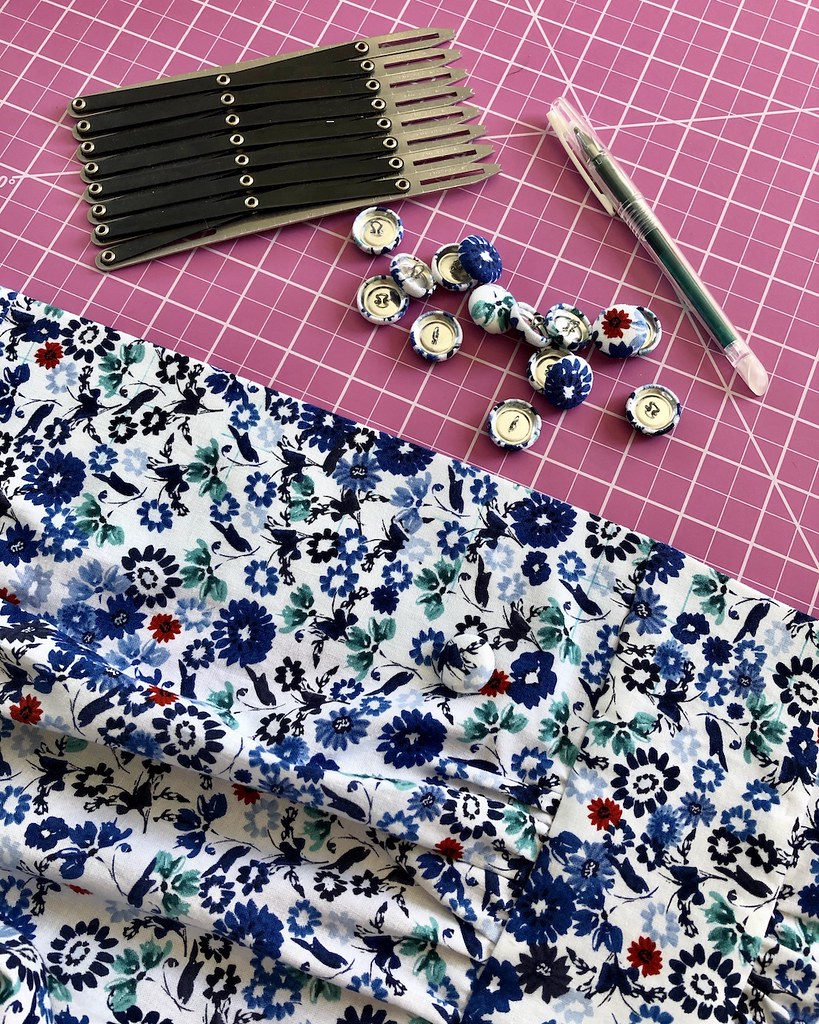
As to buttons, seventeen are required between the front opening and the sleeve cuffs. Now, I thought I was being super slick and had found some lovely shell buttons. I had about 20 of them stashed away, but alas, this print is very white, and the shell was not. Turns out, optic white buttons are difficult to find (or, at least, the ones that I like are). I love these domed ones, but I only had two.

In the interest of making this project out of nothing but what was on hand, I used covered buttons since I have a whole lot of those laying around. I sort of wish they contrasted a little bit more as a solid white would have, but the dress turned out fine, so it is what it is.
And now on to those hand worked buttonholes.
I pulled out an old reference book for a little help. And I also perused a couple of YouTube videos to see some different techniques for the bar tacks, etc.

My initial thought was to use a white silk thread that I had stashed away, but it was too thin.

I really didn't want to purchase anything new for this dress, so I was at a loss for a day or two. After searching through most of my thread, I realized that cotton button and carpet thread might be a good alternative to buttonhole twist. The spool I had was vintage and 100% cotton, which matches the fiber of the dress, and it's beefy. I made a little scrap of fabric for a few test buttonholes, and after whip-stitching the buttonholes closed with some Gutermann silk thread, I decided to try the button and carpet thread for the buttonhole stitch itself.

It may be a little thick for the weight of the dress fabric, but it worked pretty well.
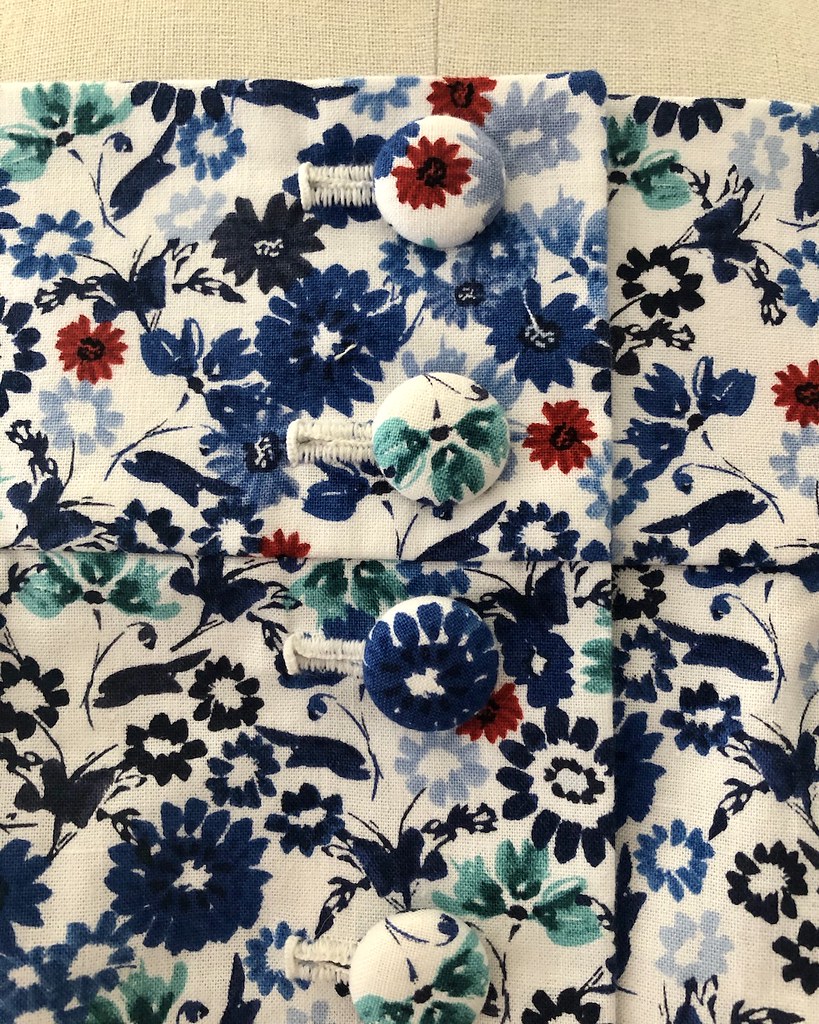
I started the real buttonholes at the bottom of the center front row of buttons, hoping each one would look slightly better than the last, and the ones that show more at the top would look the best. I am by no means an expert, but between the test versions and the dress, I've got about twenty hand worked buttonholes under my belt. Only 980 more to becoming an expert, right?!
The other interesting thing to note on this pattern is the placement of the lowest buttonhole. It stops rather high up from a modesty perspective, which is evident from the pattern illustration. It's a design choice which looks great, and I know why the designer chose to stop the buttons at that point. To solve the modesty issue, the pattern instructs that a snap should be added to close the skirt front below the line of buttons. Now why didn't I think of that?

And once again, vintage patterns come through with great drafting and a couple of surprises. I really encourage everyone to use vintage patterns for this very reason - there are so many great tips and tricks that I have picked up over the years from those brittle instruction pages.

This particular vintage pattern helped me make a great little dress. And I am pretty sure I will be using this one again. I may even dare to make this out of a solid, provided I can fine a solid colored fabric that I really like. This has proved rather challenging in the past, but I am hopeful that one day I will stumble on some beautifully textured solid colored dress weight fabrics.

I love this! I have made quite a few "70 patterns lately and I really like them.
ReplyDeletethat is so pretty and your buttonholes look so good!
ReplyDeleteBeautiful dress - love your fabric choice!
ReplyDeleteMmmmm. Go good. That ruffle is so smart, and of course it's the perfect weight!
ReplyDeleteAnd now, from peering at your photo, I have a copy of Sewing Made Easy coming my way (because I love all the sewing books).
Un patrón muy bonito y un gran trabajo. BESICOS.
ReplyDeleteYour buttonholes are beautiful.
ReplyDeleteLovely dress, and I really like the idea of the sleeve ruffles.
ReplyDeleteExcept for the (genius) sleeve heads, this could be the Simplicity version of the style chosen for my high school a capella group dresses. Medium olive green kettle cloth ... we had fetching little scarfs strangled around our necks. The style was flattering on many body types. The fabric had enough polyester in it to make it very hot to wear onstage, under lights.
ReplyDelete