Tuesday, January 31, 2023

Alterations, oh my!

Alterations/repairs are bad words around these parts.  I will avoid stitching a button back onto a store bought sweater for YEARS.  It's ridiculous, but true.  I am willing to spend countless hours sewing away on a complicated project that I have made from scratch and takes months to complete, but ask me to "fix" something on a finished item and I will avoid it like the plague.

In other words, it takes a lot for me to make changes to an existing garment.  But I thought that this skirt would pair perfectly with my sweater, so I decided to make the skirt work for me, even if it meant that I would be altering instead of constructing it.

My first thought was that I could leave the zipper alone; because who wants to rip out a zipper?!  But this is a pleated skirt, not a gathered one, and that would mean that the pleats were going to get wonky if I could only take in the two side seams.

I unpicked the waistband and found a fabric that wanted to fray . . . a lot.  And the seam allowances had been trimmed down to almost nothing.

But I had come this far, so I just kept going.

This process was no where near as enjoyable as making a skirt from scratch, but it wasn't as terrible as I expected, either!

Am I going to start re-fashioning (not sure I can call this a refashion, it's probably more of an alteration)?  Definitely not. 

But this was a good exercise since it's not something that I do very often.

So what did I do, exactly?  I cannot be sure, but I believe that this skirt was meant to be worn below the natural waistline.  That type of fit just isn't my favorite, so I took in the waistband significantly.

This skirt also has side pockets, which I really didn't want to mess with, so I had to fudge the side seam pleats/pockets.

Instead of cutting the pockets, I just tucked the excess into the pleats and increased the take-in of the pleats themselves to make the skirt fit into the smaller waistband.  I also took up the hem to a more flattering length for me.  This also required hemming the lining which includes a bit of netting to help the skirt poof, but that was an easy fix.

As I said, this kind of project is never likely to be my favorite, but I do think the time and energy was worth it in the end.  And another pink hued skirt is always welcome in my closet!


Monday, January 23, 2023

Jammy Tweeds

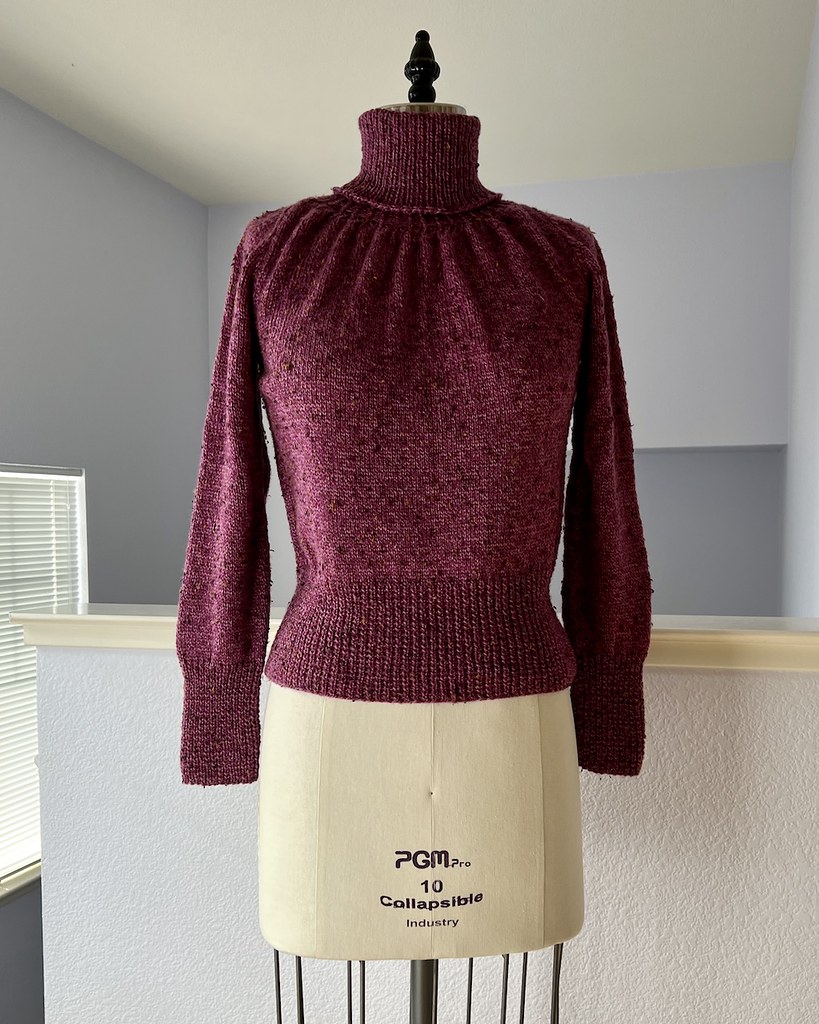
I have had the Encyclopedia of Knitting in my knitting library for many years.  One of the main reasons I purchased the book for was this sweater pattern, and last year, I finally got around to knitting my own version.

I have no idea why it took so long.  Sure, I was distracted by other newer and shinier patterns, but every once in a while I would come across the book and it would remind me that I wanted to try out that sweater pattern.

In November, I was looking for a new knitting project to sit with on the couch since Mr. Tino has been rather demanding of my attention these days.  

I wasn't up for something complicated, so the simple pattern seemed like a good fit.  I just needed to find a yarn to make the basic stockinette stitch sing.

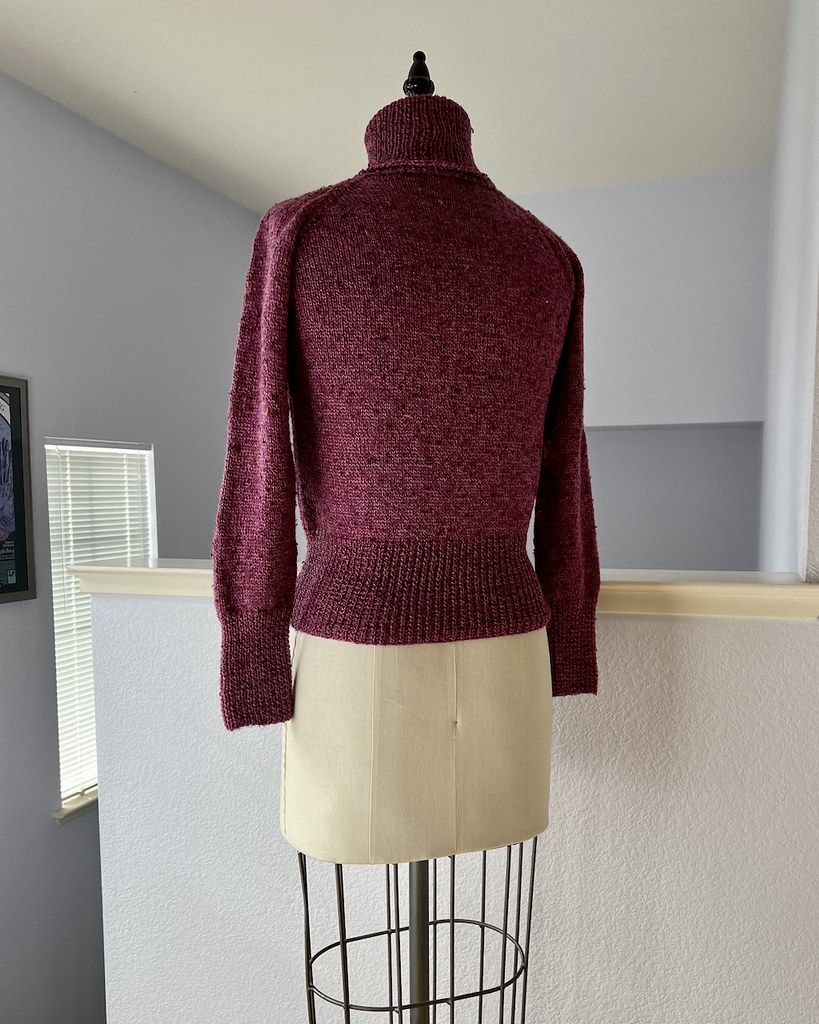
After digging around in the stash, I found this KnitPicks Provincial Tweed, and decided the tweedy texture would work well with the pattern.  

The pattern itself was very straightforward, although upon closer inspection of that collar, I decided that I wanted a deeper fold over.

That was easy enough to accomplish by adding more rows and making sure to use a stretchy bind off.

I am not sure that the twisted ribbing on the collar and cuffs and waistband shows up all that well in this yarn, but that's okay.  The most beautiful part of the design, in my opinion, is the gathered neckline.

And that looks great in this tweed yarn.

I actually love the way this turned out.

And it seems that my favorite type of sweater to knit these days is a turtleneck if my last few projects are anything to go by.

So the question is, do I make another collared garment for my next knitting project, or should I go for a completely different style?  Or perhaps Tino will let me spend some time in the sewing room instead of getting trapped on the couch under 7 lbs of immovable chihuahua!


Wednesday, January 18, 2023

Jumpers & Pinafores

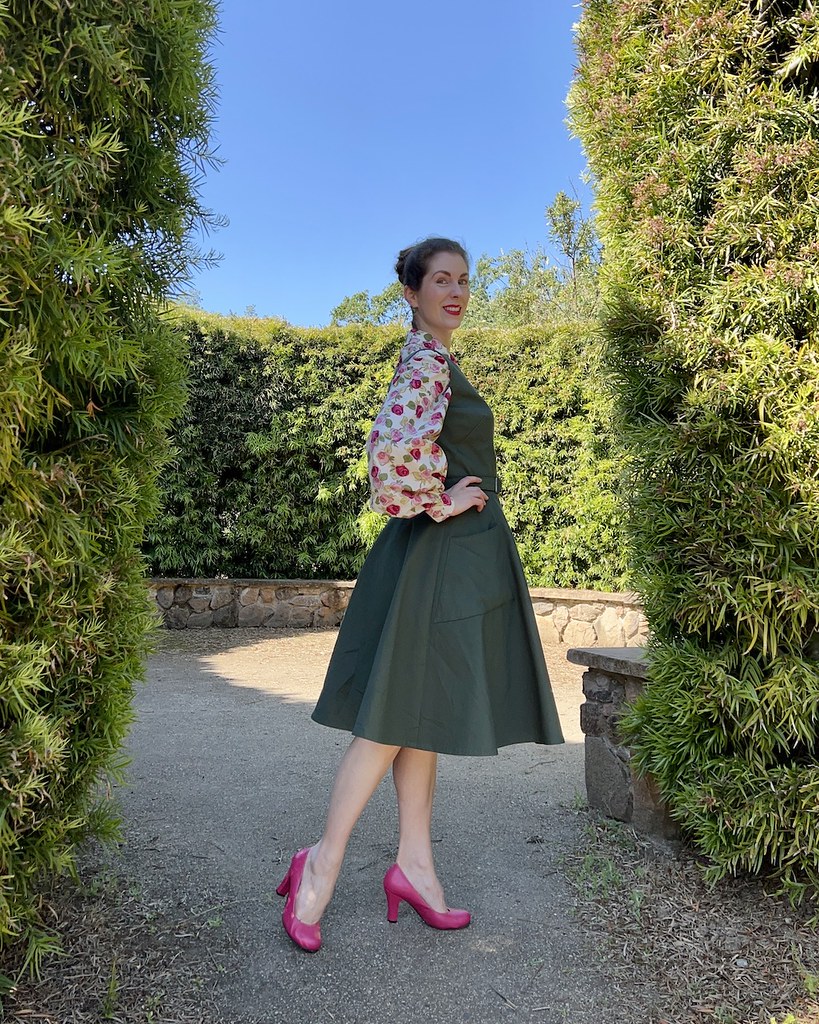
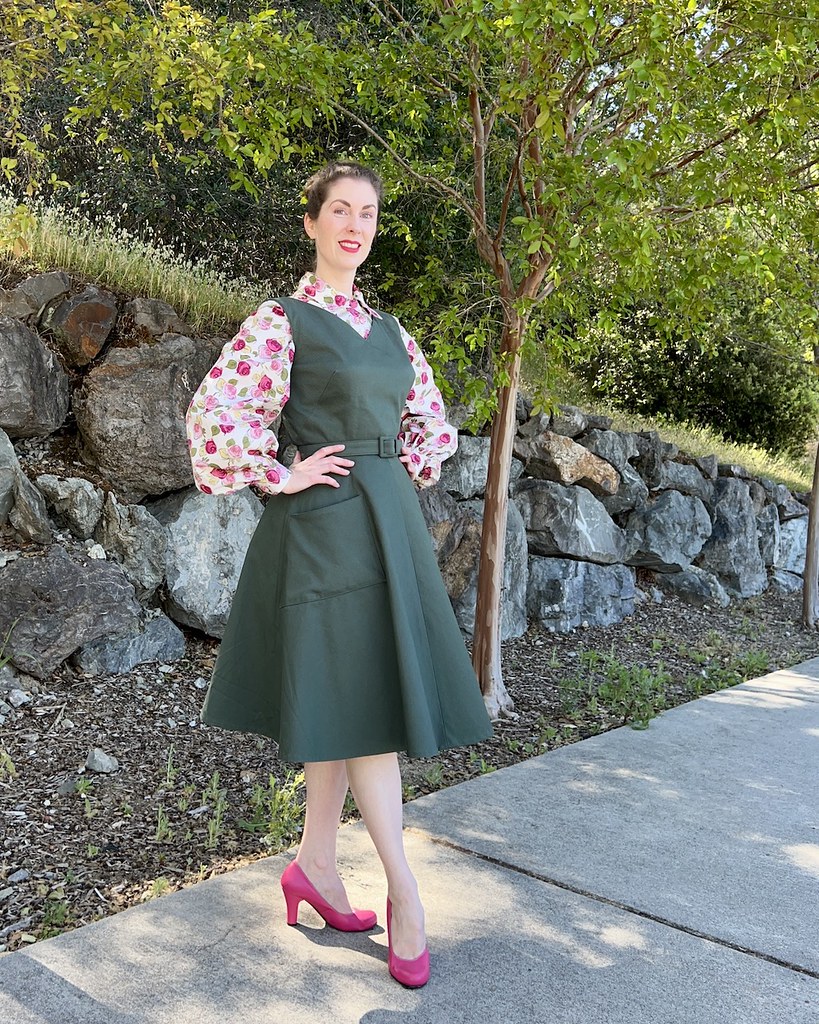
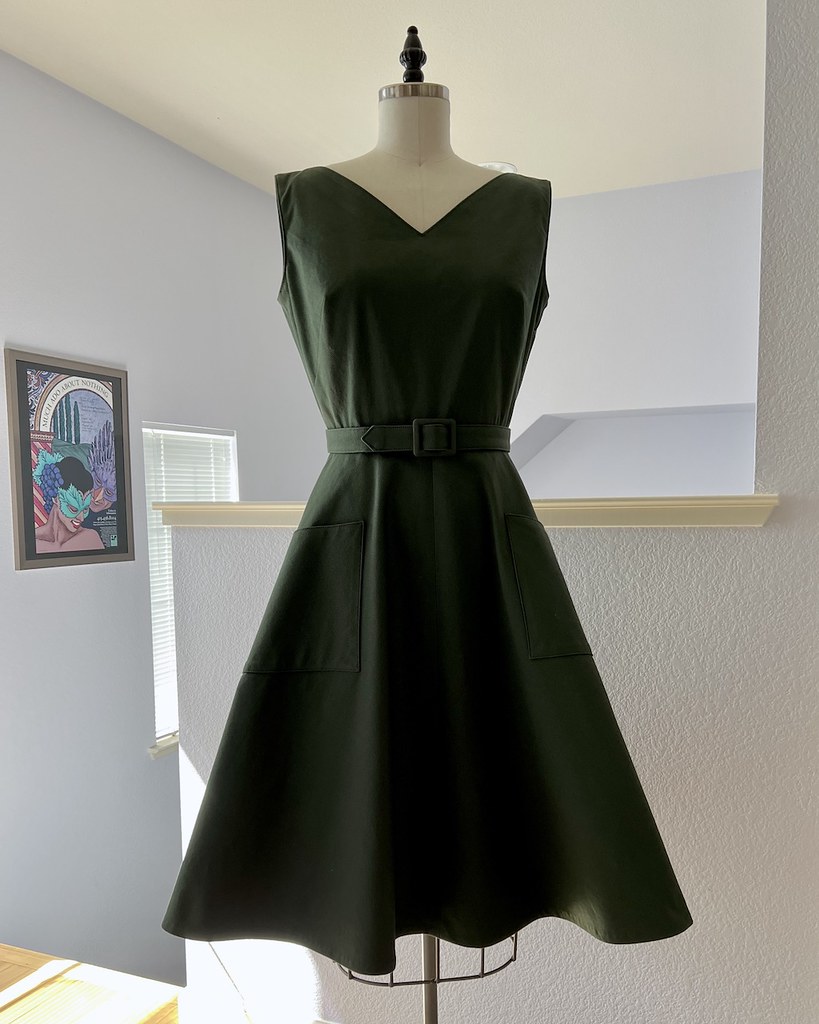
When I was picking out fabric for this jumper, I knew that this green piqué was a top contender.  What really made my final decision, though, was this blouse, because I knew that the two garments would make a great pair.  

I also had plans to pair it with one of my holiday themed blouses, which you can be sure that I did last month!

As someone who has a bad habit of making separates that don't match much of anything in my closet, two perfect outfit matches is way ahead of the game.

I do wonder if my subconscious repeatedly tricks me into making things that will require me to make more garments because I want an excuse to create, but sometimes it's nice to know that you have a few bits and bobs ready to go.

I have also rediscovered my love of jumpers in the process of adding this garment to my closet.  I may use this pattern again (in fact, I probably will), but it is certain that I will be making more dresses that allow for the wearing of an under-layer, be it a blouse or sweater.

The flexibility of such a dress, especially when made in a solid color, is wonderful.  And I do think that I have found a solution to my dislike of solids - textured fabrics, like piqué.

Although, perhaps I shouldn't use the term "jumper."  Why are the same terms given completely different meanings once a person traverses a large body of water?  In North America, the word jumper describes the outer garment that I am wearing in these photos.  In Britain, a jumper is what we here in the States call a sweater, and this green item should be referred to as a pinafore.  But it get worse.

We have pinafores in the United States, but they refer to a fancy apron rather than a dress that covers all of the important bits.  Then, of course, there is also a pinafore dress, which could also be described as a sundress, and is acceptable to wear out of doors.

I don't take issue with the same item being called by different names in different regional settings, but why do they have to choose an existing word, which completely confuses the issue?!  Come up with something new!  Which reminds me of the word "snood."  A snood is a net-like item used to corral a hairstyle; they can be somewhat casual or even fancy, depending on the mood or what they are made out of, and are often crocheted or knit.  A snood is NOT an infinity scarf or neck warmer or cowl.  But the damage has been done, and a quick google search confirms my fear that the term has been usurped by the unknowing masses that decided that knitting was a hobby they would like to try somewhere around 2010 and the chosen item that became popular to make was a "snood." In the meantime, every apparel company begins manufacturing them, and the term will forever be associated with an item that its not, in fact, a snood.

The English language is ridiculously complicated, and I pity those who are learning it as a second language.

But I have lost my way.  The point is, I am thrilled with the recent addition of this jumper/dress/pinafore to my wardrobe collection.  It has been a popular item since I completed it back in April, and I suspect that I will continue to wear it often.  This makes me want to sew more blouses to match . . . and I have come full circle with a new separate that creates more sewing "work" for me.


Jumper & Belt: Made by me, Simplicity 9449
Blouse:  Made by me, McCall 8358
Earrings:  Liz Palacios
Shoes:  Remix "Baby Doll"

Sunday, January 15, 2023

A Vintage Style Jumper

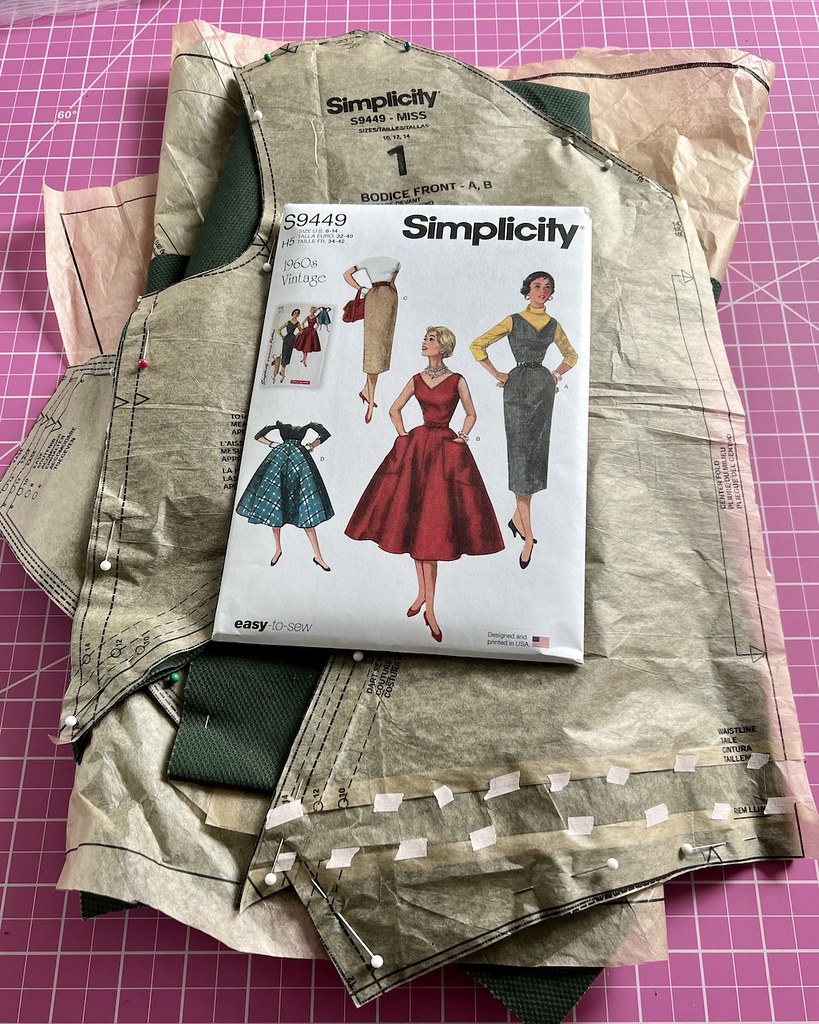
While Simplicity 9449 might not be the most interesting design in the world, I knew that I needed this pattern in my collection as soon as I saw it.  Not only that, I liked it so much that I actually decided to make the pattern in a timely fashion.  That rarely happens around these parts.

The next step was to choose my fabric, and I just happened to have the perfect cotton piqué fabric on hand, purchased from Mood Fabrics after a recent obsession with the fabric weave.  Unfortunately, I did not have enough yardage.  Drat my habit of purchasing fabric without a pattern in mind!

But I wasn't about to let that stop me.  I laid out the fabric and began the task of figuring out the best pattern piece placement.  No such luck.  Even with a multi directional layout, those pieces were just not going to fit.  My only recourse was to shorten the skirt by a few inches.  And that is what I did.

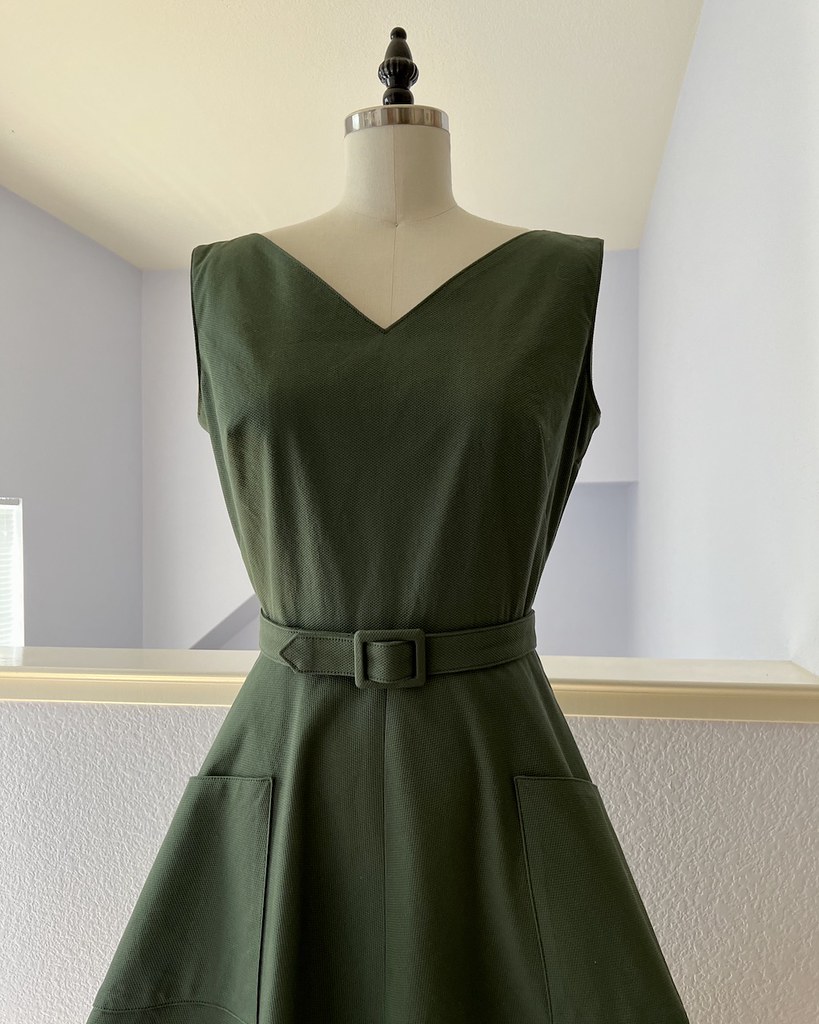
Of course, shortening the skirt meant that the large pockets also had to be shortened so that the proportions were not completely off.

I also decided to embrace the idea of top-stitching as suggested by the instructions, and even pulled out an edgestitching foot that I have never used.  But lest you think I have lost my mind, there was hand stitching involved here, if only for basting.

I am in awe of individuals who manage to apply pockets and other top-stitched items with pins, because they cause me nothing but grief.

And that brings us to a mostly finished skirt.  It was at this point that I was beginning to think that I had made a mistake with the shortening, but there was no going back.

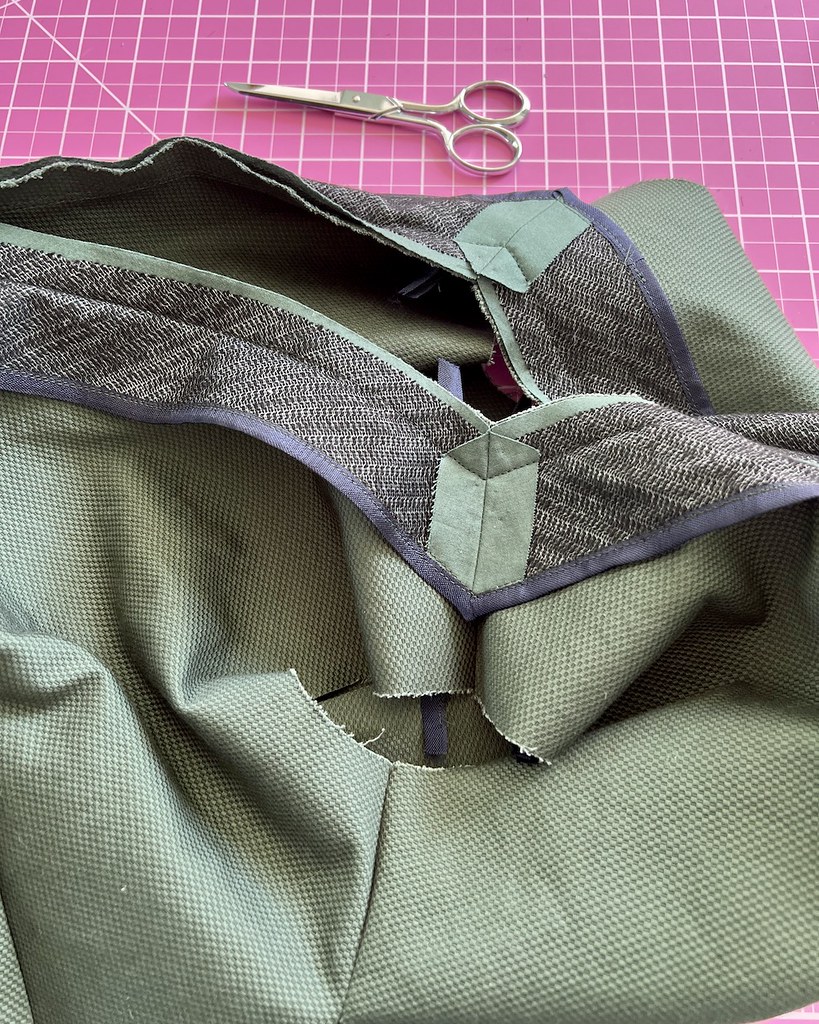
This fabric is a substantial mid-weight cotton with a bit of mechanical stretch.  The slight stretch is really the only reason I decided to use interfacing.  And, in fact, I cut the facing out of a quilting cotton since the yardage was so limited.  So did I need the interfacing? Probably not, but it worked fine just the same.

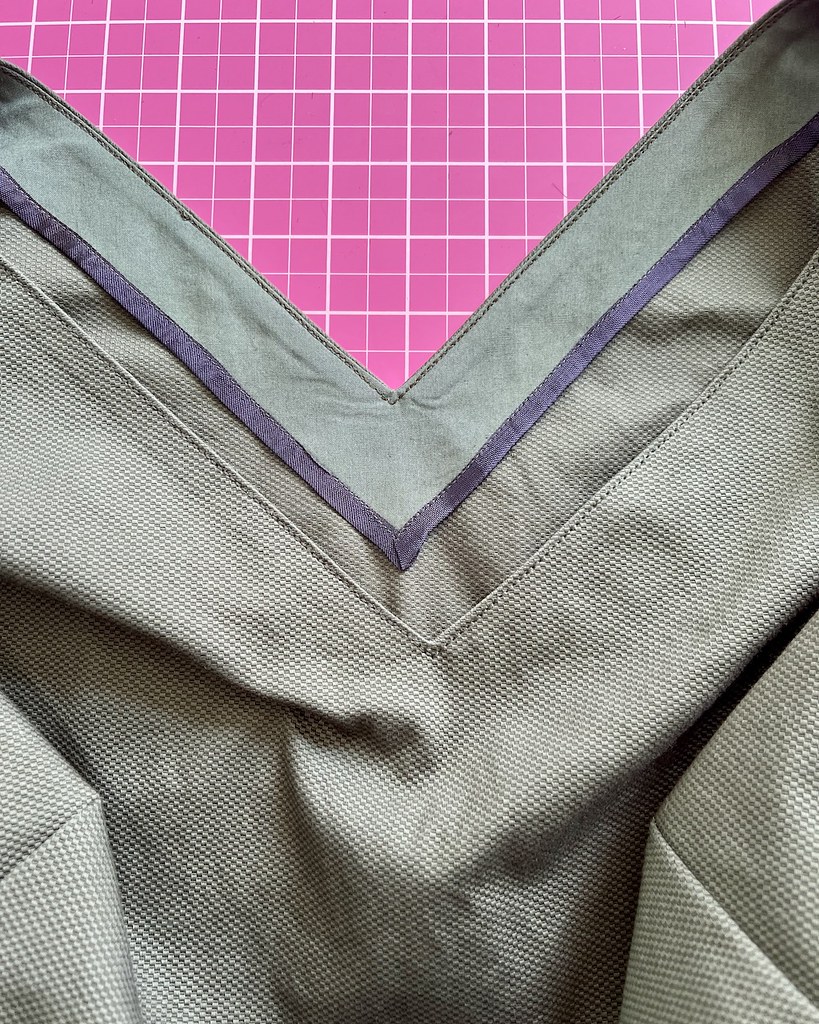
The pattern also suggested top-stitching along the neckline, so to match those pockets, I went ahead with that process.  I ended up using a triple stitch so that the stitching would not get lost in the textured fabric.

It's not perfect, but it turned out well enough.

And that brings the bodice construction to a close.

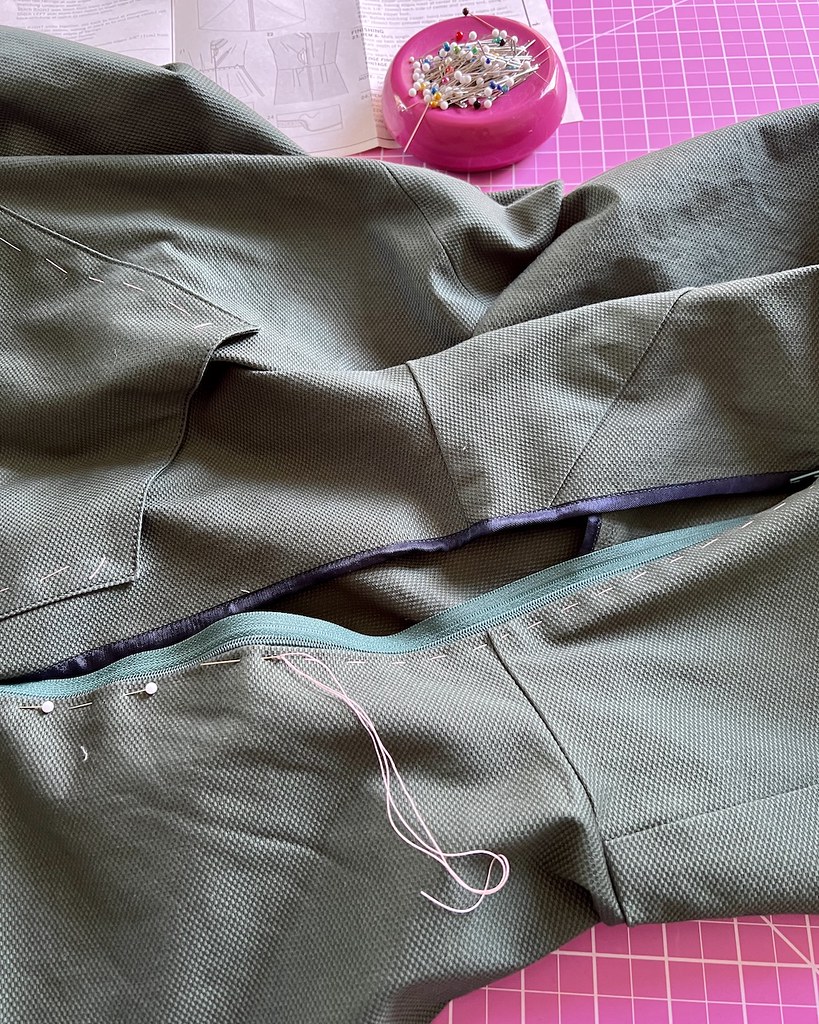
I didn't have a matching green in my seam binding collection, but I think the navy is a nice contrast with the army green.

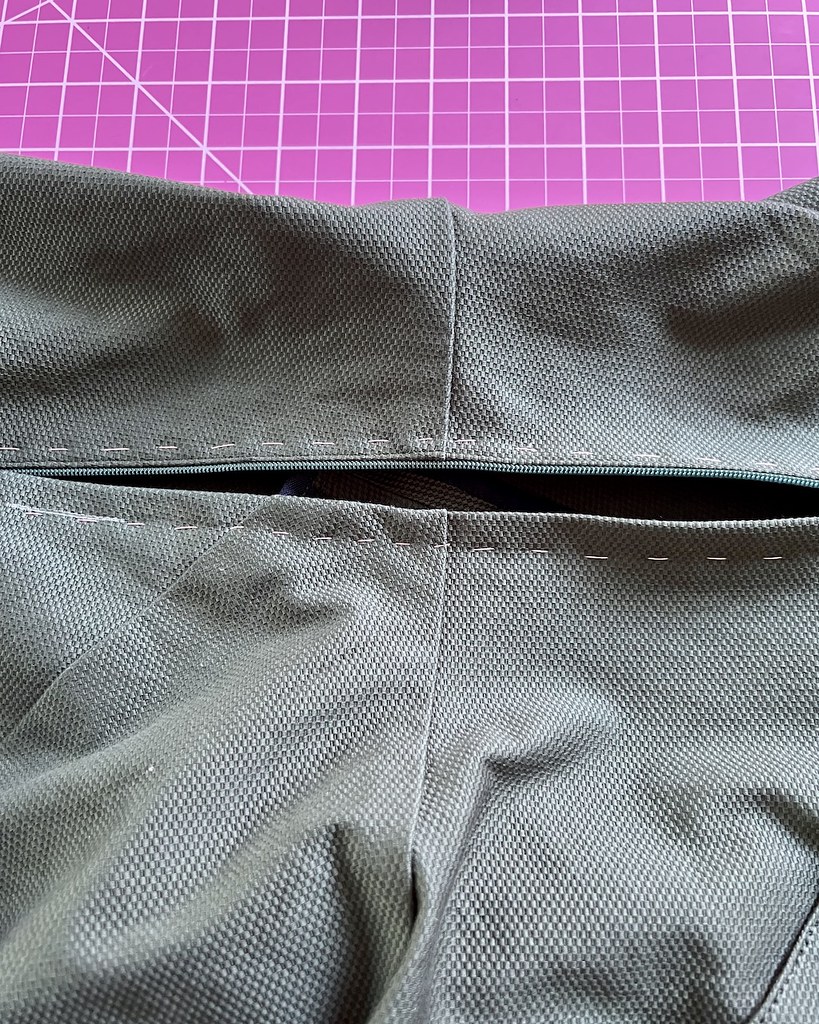
I also found color matching the zipper a bit of a problem, but since I was going to use a lapped application, I wasn't too worried about the contrasting color.

I generally like to install the zipper and/or stitch a seam before applying the seam binding to the fabric edge so that the edges do not stretch or distort in any way, but this fabric was very stable, even with the slight widthwise stretch, so I decided to live on the edge and finish those raw bits before stitching the zipper in place.

The fabric behaved very nicely, I am pleased to report.

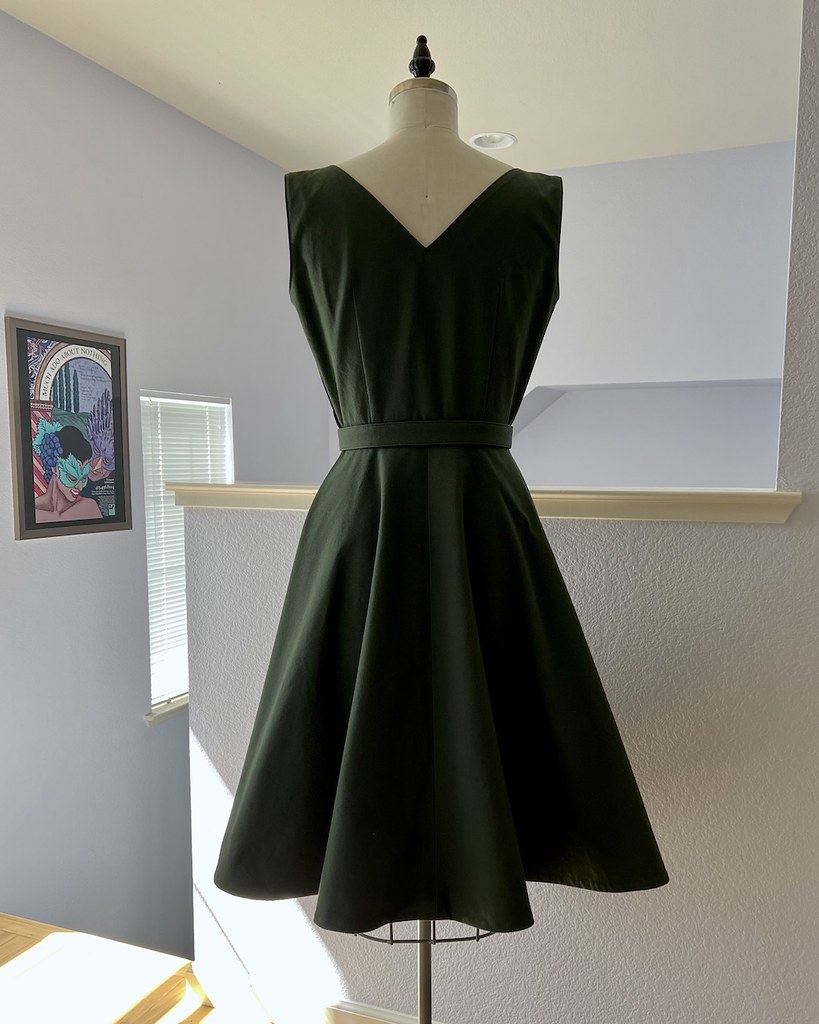
I like a wider hem in general, but again, I wanted to squeeze as much length as I could out of my shortened skirt pieces, so this is what I ended up with.

And to finish, I needed a matching belt, of course!

I was unsure whether or not the adhesive from this old kit would work, but it did!

Suprisingly enough, the weight of the fabric worked very nicely with this buckle kit.  I was worried that it might be too thick for the back piece to snap into place, but it was one of the better behaved textiles that I have used.

As for the belt, I was down to scraps, but I was able to make it work.

And my sewing clips finally came in handy, since there was no way I was going to get pins through the four layers of interfaced cotton.

I also dreaded turning the belt right side out, so I didn't even attempt it.  Instead, I just folded and ironed my fabric with right sides showing and top-stitched the edges (which I probably would have done in any case, so as to match the other top-stitched features on the dress).

From the start, I was expecting to love this dress, and while I was slightly disappointed in the length of the skirt due to fabric limitations, it turns out, I think I like this more than I would if the hem was mid-calf instead of just below the knee.

The pattern itself is slightly oversized, I would say.  I wonder if this is due to the fact that it is shown as  jumper and a dress on the pattern envelope?  Then again, I don't think that this would really work as a dress without something underneath, even though I made my standard size.  So that's something to think about if I decide to make this pattern again, as a dress instead of a jumper.  

But as it stands, I always intended to wear this garment with a blouse underneath, so it all turned out for the best.

And I really do like the way that top-stitching looks, so I am going to re-evaluate my dislike/fear of machine stitching on the outer portions of my garments.  But overall, I am very pleased with this garment.