Thursday, May 28, 2015

Buttons & Loops


My Memorial Day Weekend was not nearly as productive as I had hoped, but I did manage to get some sewing done.  Recently at a Bay Area Sewists pattern swap, I picked up this sewing pattern.  Time to try something a bit different!  


The Vintage Patterns Wikia gives this design a 1969/1970 copyright.  That makes this my first 1970s vintage pattern, complete with some funny tissue markings of tiny scissors and sewing machine parts.  


My plan was to make this version in a woven fabric to make sure of the fit and then have some fun with an Alabama Chanin inspired cotton jersey version.  I expected that the dress would have bodice pieces, skirt pieces, and a channel connecting the two with an inserted drawstring.  Turns out, the dress front and back are a solid mass of fabric from shoulder to hem.


The construction is very straightforward.  The most time consuming part was constructing the cuffs and covering the buttons.


A trip to the fabric store did not produce any suitable buttons which meant the project was going to have to go in the UFO pile.  


But then I rummaged around and found that I had enough button forms to cover.  Since they were slightly bigger than the pattern called for, I eliminated one of the buttons on each of the cuffs. 


The pattern also uses a length of purchased bias binding for the drawstring channel, which I do not have . . . so I made my own (which I think looks much prettier than the polyester stuff you can buy ready-made).


The most irritating part of the process?  Turning the button loops right side out.  I have a loop turner, and I even tried the old needle and thread trick . . . getting that first section pulled through drives me crazy!!


Hook & eyes, on the other hand, are a piece of cake!

Thursday, May 21, 2015

My Safe Place


This afternoon, the sanctity of my local JoAnn Fabric Store was destroyed by a gang of loud frat boys.  There were six of them terrorizing the fabric aisles.  


When I hear fellow customers asking questions like “how much yardage do I need?”, etc., my first impulse is to help - because, let’s be honest, the employees in a big box craft store are retail employees and generally have very  little knowledge of their wares.  This is not their fault, it's just the way it is.  And if I have the answer to someone’s question, I would like to help. 


I started to turn the corner to make a suggestion when the brutes started saying some very off-putting things.  Who knew being surrounded by fabric could be so threatening to someone’s masculinity?  I decided to retreat into the linen blend aisle and let them figure things out for themselves.


After a long and rather stressful day at work, I just wanted to zone out and look at floral prints and maybe wander through the aisles of beads or buttons.  But that was not in the cards . . .


As soon as I returned home, I pulled out this project.  The only noise to bother me was the chihuahua snoring on the other side of the couch . . . which is a sound that I find rather endearing!


Tuesday, May 19, 2015

Hemline Variations: A Tutorial

Today I wanted to share a tip using my favorite sewing notion . . . 
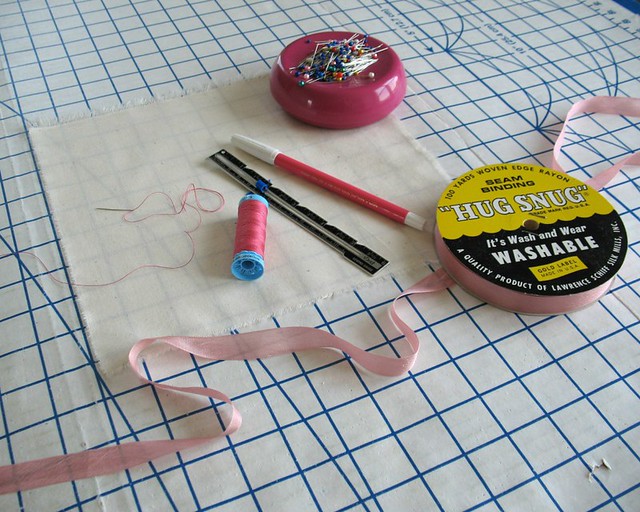
rayon seam binding!  Yes, I have found yet another excuse to keep adding to my collection of Hug Snug.

Hemming a garment is generally one of, if not the last, steps in the construction process - this means it is often rushed.  But a bit of extra time and effort can make a huge difference to the overall quality of a garment.  It really is all about the little details!


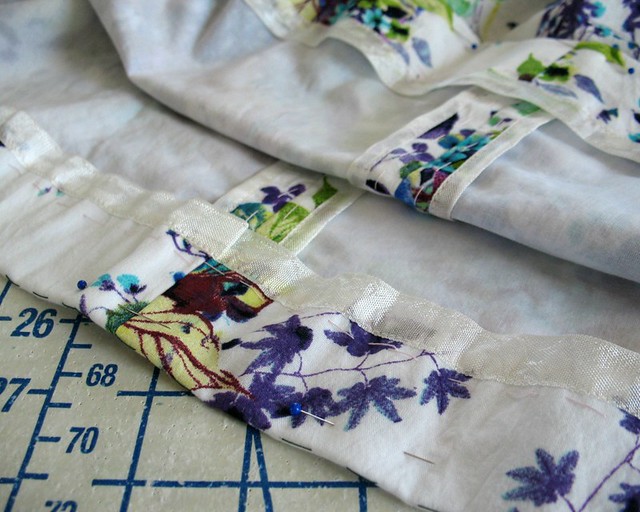
There are many, many different ways to hem a garment.  This particular option works quite well with thicker fabrics since it covers the raw edge without adding any bulk, although I also like to use it on lightweight fabrics, like this gorgeous floral cotton.


This technique involves a length of rayon seam binding (to cover the raw edge) and some catch-stitches (to contain and secure the binding to the garment).

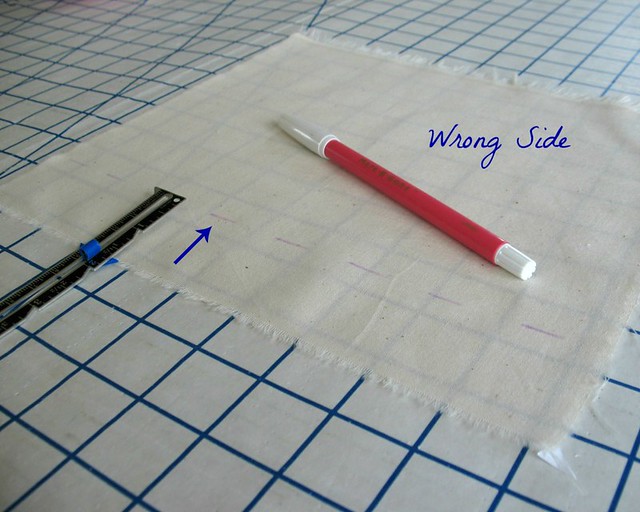
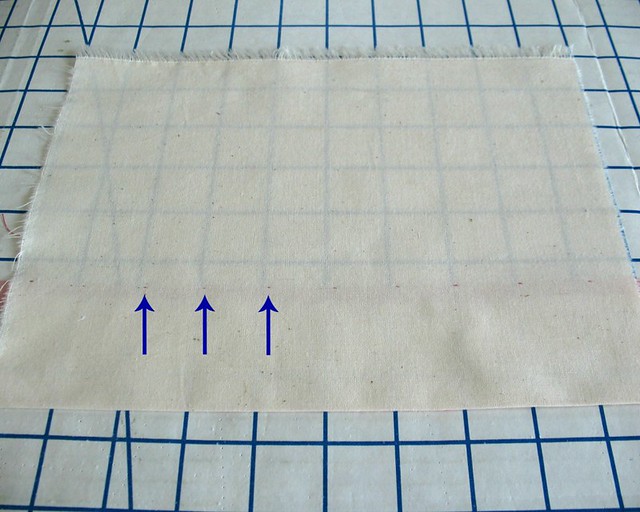
The first step is to mark the fold line.


On most fabrics, I like to use a fabric pen to lightly mark the fold line on the wrong side of my fabric.  Tailor’s chalk is another excellent option.  

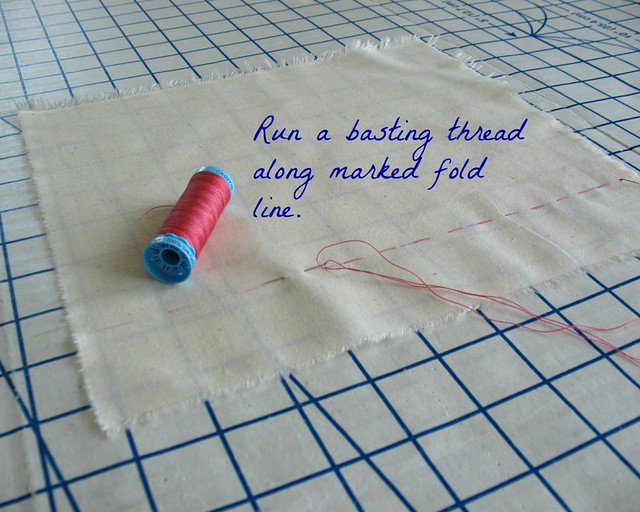
Next, a running stitch is worked along that marked line.  (I suggest using silk thread since it will be easy to remove later on.)


This basting stitch allows the fold line to be visible on both the right and wrong sides of the fabric.  It will also not disappear under a spray of steam at an inopportune moment!

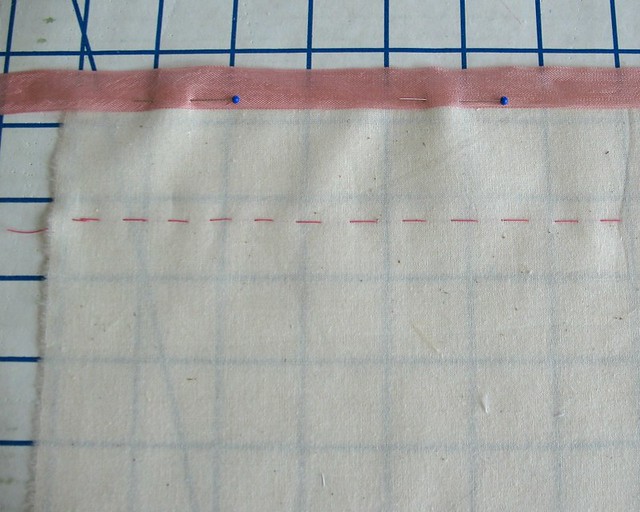
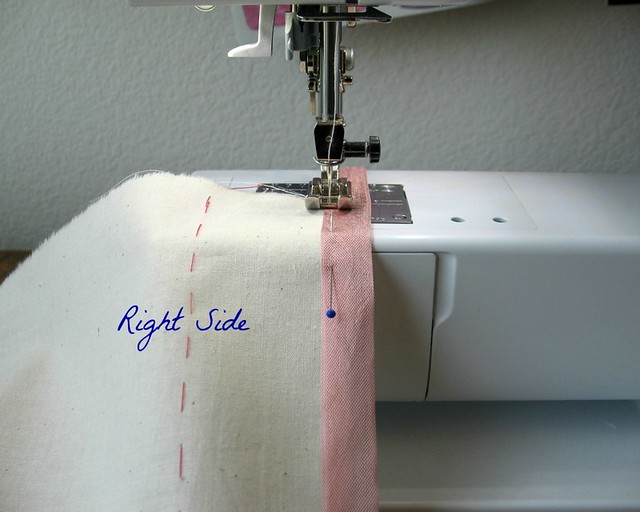
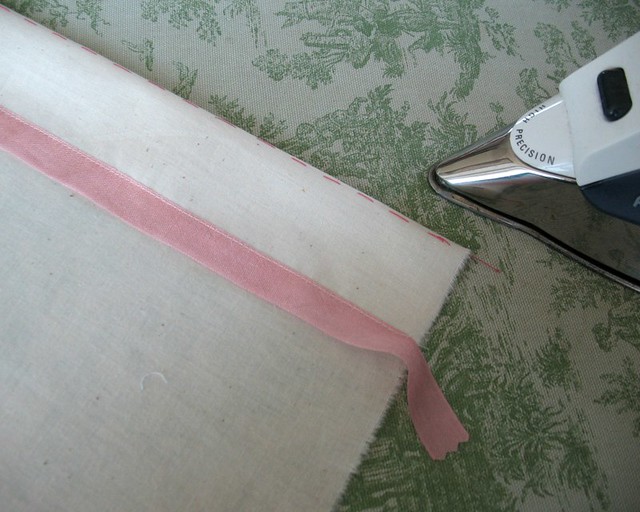
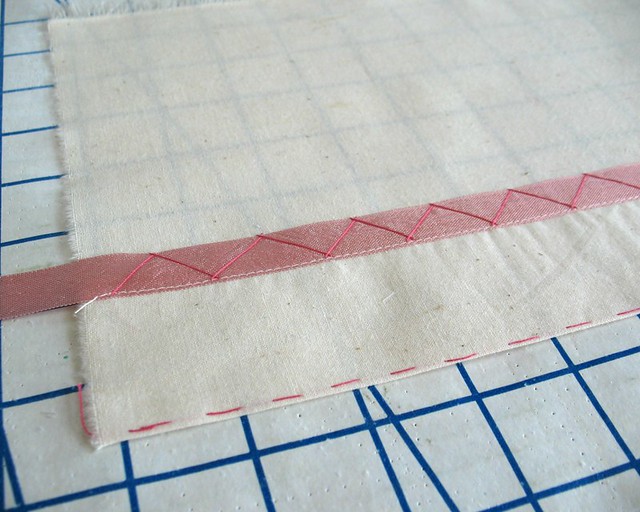
A length of rayon seam binding is then stitched to the right side of the hemline along the raw edge.  I like to drop the spool of binding next to me at the sewing machine and apply the binding without pins, but you can certainly cut a length of seam binding sufficient to run the length of your hem and pin in place, giving yourself an inch or so extra at one end.


The stitching line should securely attach the seam binding to the fabric, making sure that the raw edge is covered.  Because the rayon binding is so lightweight, you will be able to feel the edge of your fabric to keep the binding in place, with or without pins.


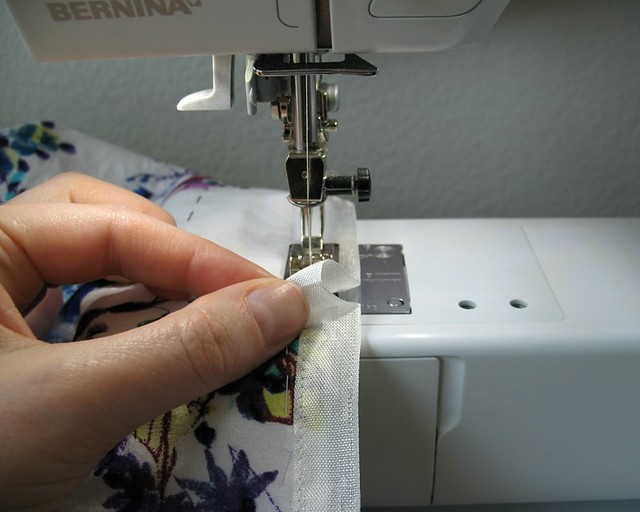
To finish the end of the seam binding, simply trim and fold under the raw edge, overlapping the initial cut edge, and stitch in place.


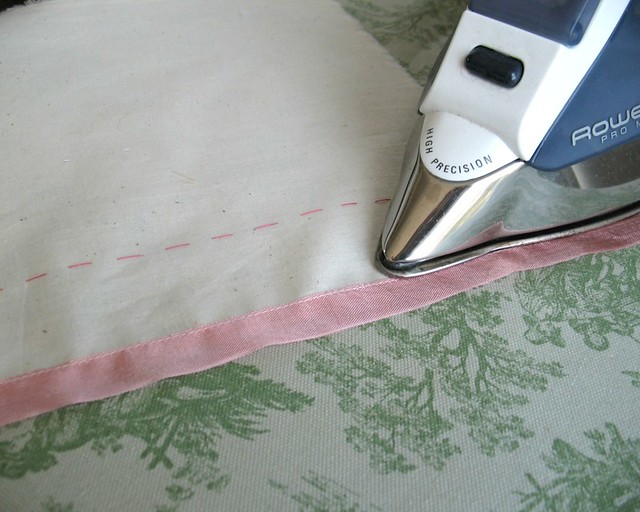
Give the hemline a quick press to remove any puckering along the stitch line.


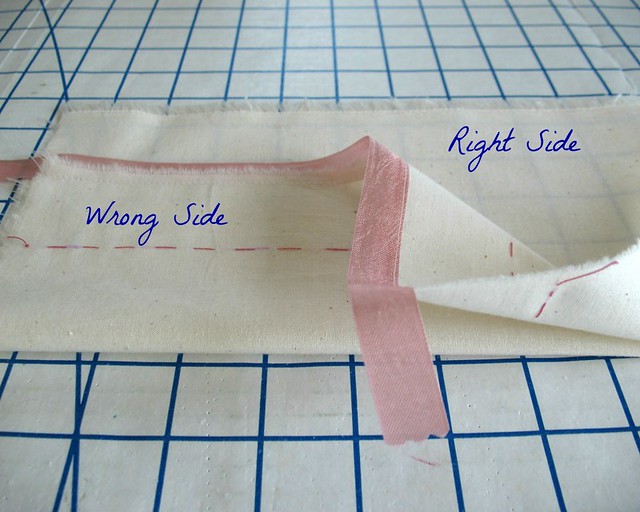
That should look something like this.


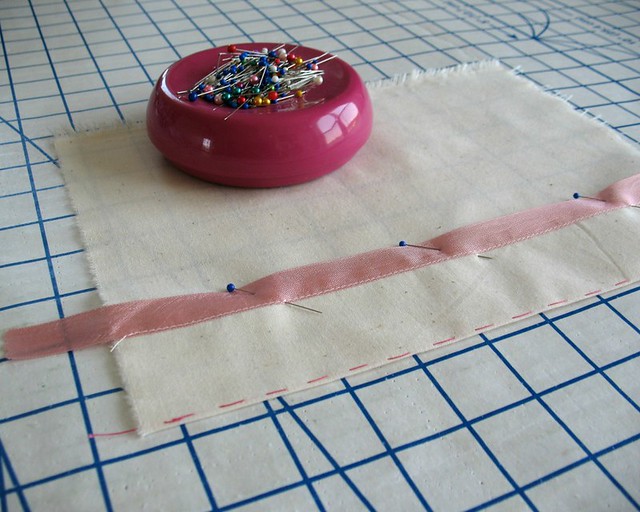
Press the hem up along the basted fold line.


Pin the hem into place.


For my initial versions of this hem variation, I would stitch through the upper edge of the binding.  While both edges of the ribbon are woven and will not fray, the application always seemed a bit unstable.

One day while I was catch-stitching seam allowances to an underlining, it hit me.  I could just as easily catch-stitch the seam binding on a hem application!


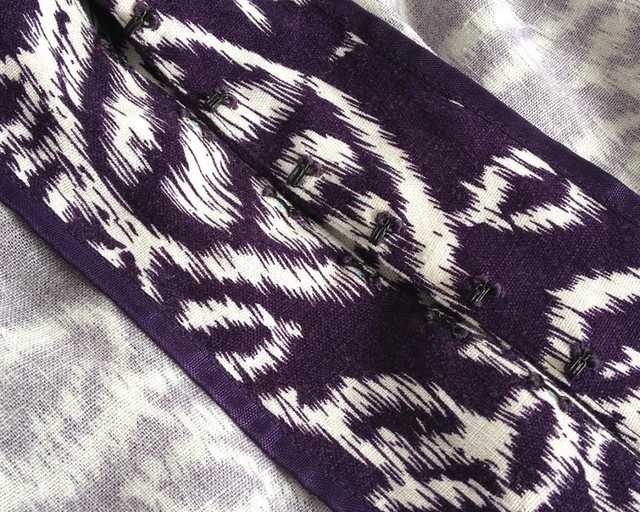
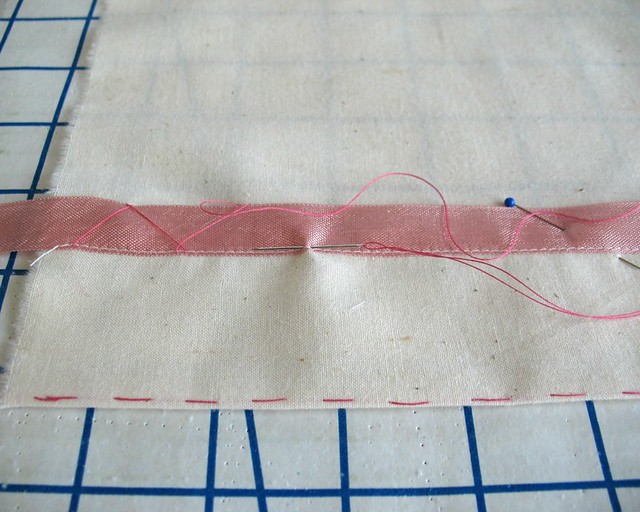
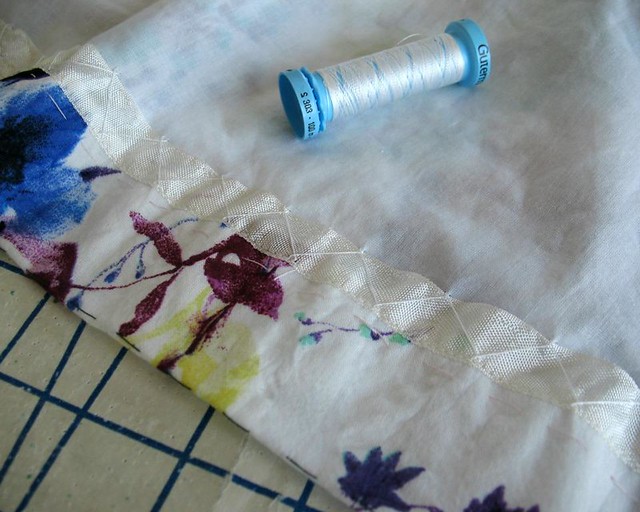
Moving left to right, catch-stitch the hemline in place, taking a bite out of the stitched edge of the seam binding followed by a tiny bite out of the fabric to secure the hem in place.


This hand stitch is best worked flat – that means no hemming while sitting on the couch watching a movie, no matter how tempting it may be!

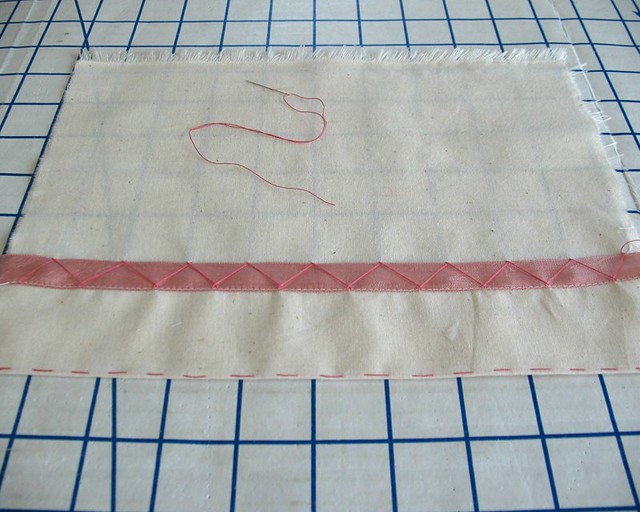
The good news is that this hand work is virtually invisible from the outside of the garment.


Make sure to give your hemline a good press.  All that hand sewing means the garment has been handled quite a lot - a bit of steam will fix that! 


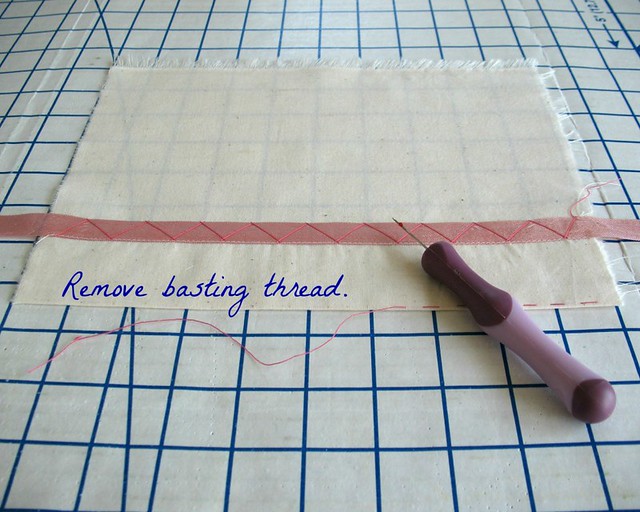
The final step is to remove the line of basting stitches.  I often leave basting threads throughout my finished garments, but in this case, they should really should be removed.


Yes, this hemming technique requires a bit of extra effort, but the end result looks so pretty!  The catch-stitch also makes for a very flexible hemline.  And beautifully finished garments really are a joy to wear!


[The fabric for this dress was received in exchange for my contributions as a Britex Guest Blogger.]

Thursday, May 14, 2015

Watercolor Impressions


Here is my latest Britex project!


My first idea for the beautiful floral fabric was nixed when I could not get my hands on a new Vogue pattern.  (My local JoAnn Fabrics has been especially bad about stocking patterns for the last year or so . . . ggrrrr.)  So I had to scramble a bit and come up with an alternative.


This Butterick vintage reproduction is one I have made up before.  I had enough cut yardage to work with, and the print worked with the style as well which made it an obvious choice. 


The fabric is quite sheer, almost gauze-like.  My first though was to make myself a slip as an extra layer.  


But I also wanted this to be an easy to wear summer dress, and some days I just do not want to wear another layer.  The obvious solution was to underline it with a lightweight cotton batiste.


I did make a couple of alterations from the first dress.


As with most patterns, I initially added ¾” to the torso length.  This turned out to be just a bit too much.  This time around, I only added ½” which might not seem like much of an alteration, but it really does make a difference.


This design has a side zipper.  The instructions only include a diagram of the zipper for the second view (a halter neck).  On the first dress, I went on my merry way, confident that I had constructed quite a few 1940s side zip dresses and stitched the upper inch of the left side seam closed before inserting my zipper.  Well, that dress requires a bit of squirming to get in and out of it.  This time around, I decided the sleeved version needed to open from the top edge to hip, just like the halter version.  And it worked like a charm!


I feel like a complete goof for not figuring that out the first time around . . . but now I know why I felt compelled to make myself another version . . . there was a lesson to be learned!


Dress:  Made by me, Butterick 5209
Earrings:  Gift
Shoes:  Banana Republic

[The fabric for this dress was received in exchange for my contributions as a Britex Guest Blogger.]


Wednesday, May 6, 2015

Pattern Illustrations versus Reality

Butterick's new Summer Collection means more designs to spark my sewing creativity and/or distract me from the stack of patterns waiting for me in the sewing room.

Butterick 6212

There are two new vintage reproductions.  The real life versions are not doing these designs or the model any favors.  To be fair to the patterns, the fit looks wonky and oversized, and the fabric choices look like they are less than ideal.  I think a petticoat would help, as would a bit of consistency in the styling . . . the hair is 1940s, the shoes look late 1990s, the clutch is just silly for a 1950s cotton day dress, and the jewelry is way too much.  

It also seems odd that both reproductions are wrap dresses from the early 1950s.  Why does The McCall Company continue to produce sister designs in the same catalog . . . why not go for two completely different looks that would appeal to a wider customer base?

Butterick 6212

But the illustrations are adorable!  Butterick 6212 reminds me of the famous Walk-Away Dress.  I am wondering if it will have similar issues, and how that back overlap will work on a moving body.  Will a front-to-back wrap have more success than back-to-front?  It appears that both of these designs are from 1952, so someone at Butterick was clearly a fan of the wrap style.  I am not completely convinced, myself.

Butterick 6212

Even in a photo shoot situation, there is some serious gaping under the arm.  The dress is too big on this lady, so that may be part of the problem.  Even with its problems, this is an improvement on the famous version, in my opinion.  The shaped waist yoke allows for a better fit through the torso (in theory).  It will be interesting to see what people do with this one.

Butterick 6211

Next up is Butterick 6211 - I adore the illustration.  The mock up, however, is not reinforcing this opinion.  I am going to hope that poor fabric choice and an over-sized bodice is at fault.  Those opening edges seem to need a bit more structure, or perhaps they were stretched out of shape during construction.  Maybe three buttons are just not enough to keep this in place.

Butterick 6211

I think the side gaping issue is a bit more resolved on this dress because the bodice wraps further around the body than 6212.  But anything more than the most basic of alterations is probably a bit of a nightmare.  I really do love the concept, though.

So that makes three vintage repro wrap dresses in the current catalog, or four if you include Vogue 8788.  Going by the mock-ups, I would say that the Vogue is the most flattering of the bunch even though I am really rooting for 6211!

Butterick 6211

The Gertie pattern has the opposite problem . . .bad illustrations, cute pictures.  The Patterns by Gertie line is clearly vintage inspired, so why not follow through with the sketches?  Am I the only one who loves the vintage drawings so much?

Butterick 6217

This particular illustration looks like something from 1996, and is probably where those pink slingbacks came from.  But the tulip sleeves and front ties have me sold, so I am just going to have to erase this particular image from my mind.

Butterick 6217

There are also quite a few cute summer options ranging from extremely basic to a bit more challenging.  It looks like Butterick (and McCall and Vogue) are continuing to listen to their customers, which is rather refreshing.  Here is hoping it will be a lasting trend.

Do you have any new favorites?