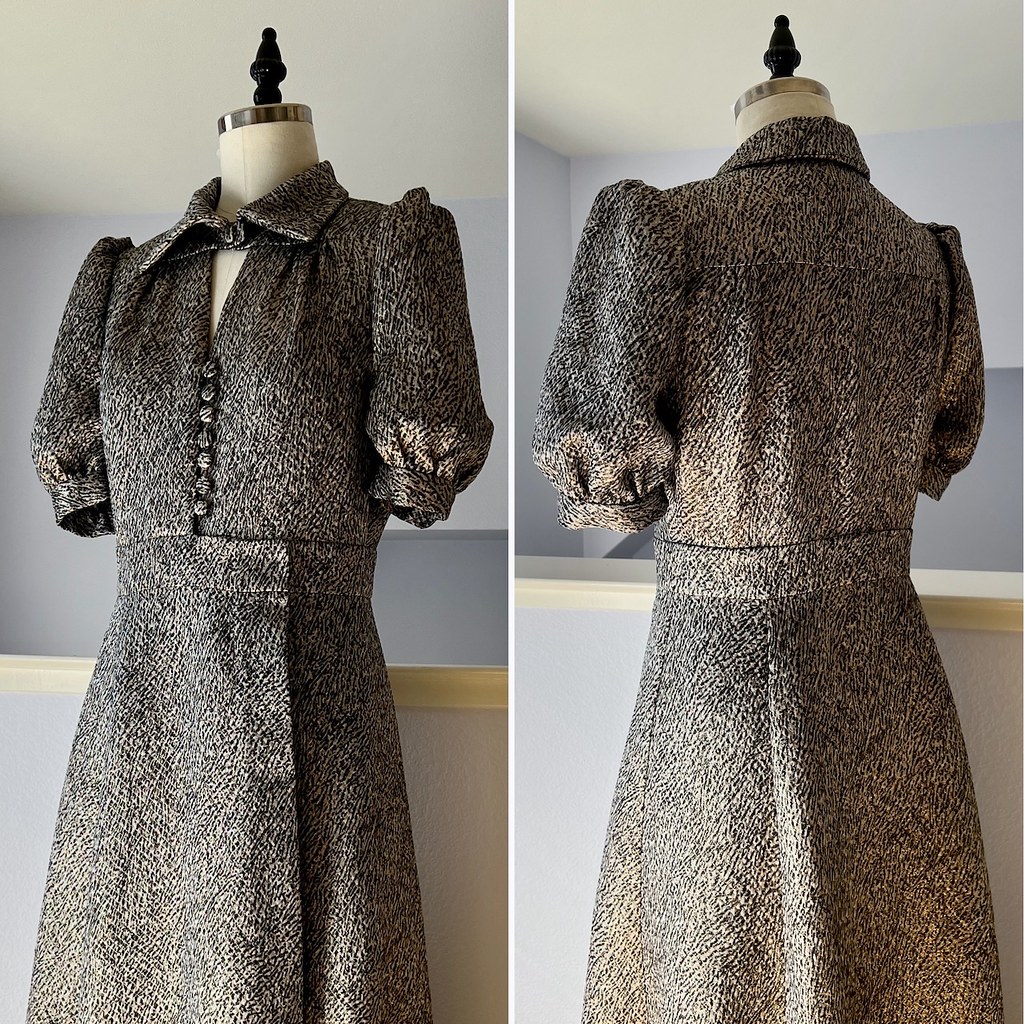
I purchased this brocade fabric from Fabric Mart back in 2019. It was not a normal fabric selection for me, but for some reason, I was drawn to the silk/acetate blend. When the fabric arrived, it was not exactly what I expected (to be fair, that happens most of the time with online fabric purchases!) so I put it aside.

After one or two failed attempts to start a new sewing project in the last few months, I came across the fabric. Vogue 1908 is a new pattern acquisition so it was at the top of the pattern pile, and the cover art made me pull out the animal print brocade to see if it might be a good match for the design. Unfortunately, the longer version of the dress uses a lot of yardage, and I didn't have enough. But I was tired of searching for something else to work with, so I dug in. My first bit of luck was the fact that the fabric allowed for a multi-directional layout. I figured that would save some yardage, and I decided to go for it.

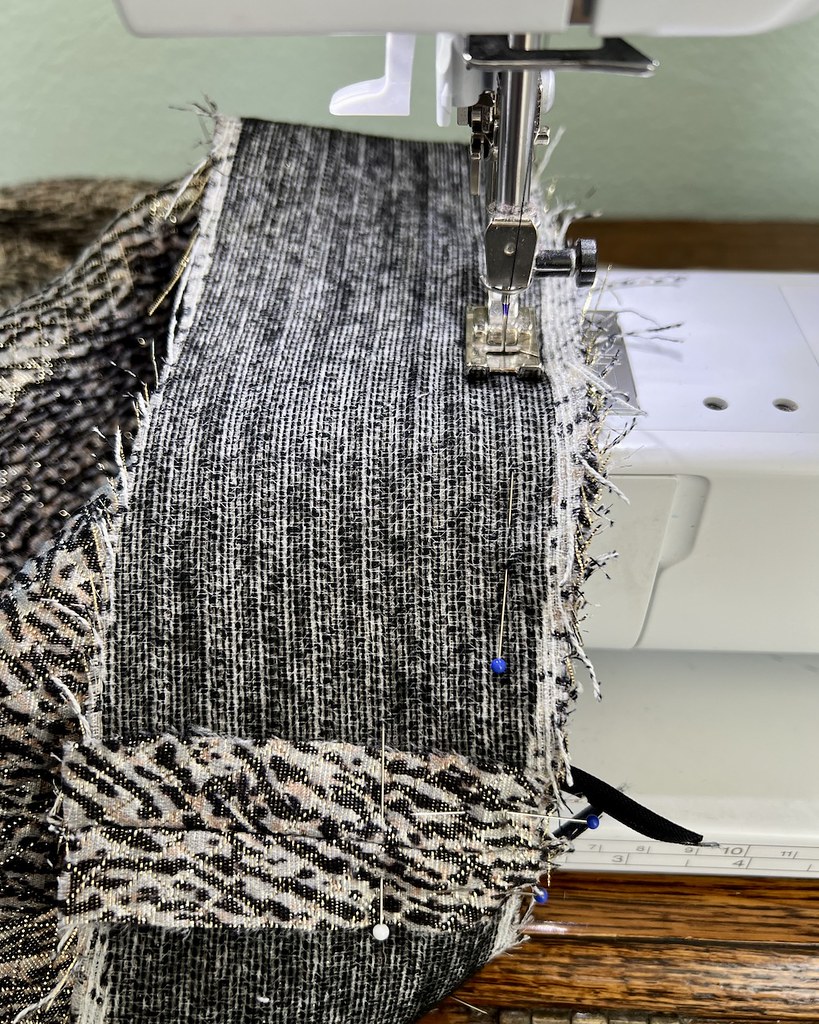
Like most brocades, this fabric shreds apart at the cut edges if you breathe on it. In fact, I am still finding gold colored tinsel filaments in places throughout the house where the fabric has never been, even after vacuuming multiple times. It's just one of those fabrics! I decided on French seams for those portions of the garment that would not be lined, because something had to be done about those edges.

The fabric has an almost spongy texture, and I was concerned that an iron might melt some of the fibers. Lucky for me, this was not the case. I suspect my fear had to do with some less than stellar experiences with poly brocade. What a world of difference it makes to work with silk! The acetate and metallic fibers did not give me any grief, so I suspect this textile is predominantly silk. The only other issue to contend with was the needle. I swapped out a sharp for a standard machine needle; if you have ever worked with brocade or jacquards, you know that a less than sharp needle can cause certain portions of the textured design to pull, which I wanted to avoid.

I wasn't sure if the hem would drop, so I took care the the skirt first, and let it hang while working on the bodice and sleeves. That also dealt with the majority of the raw edges on the skirt so they wouldn't fray any more. I used French seams on all but the front edge. That was wrapped with seam binding, and stitched down. The texture of the fabric made it easy to hide small hand stitches.

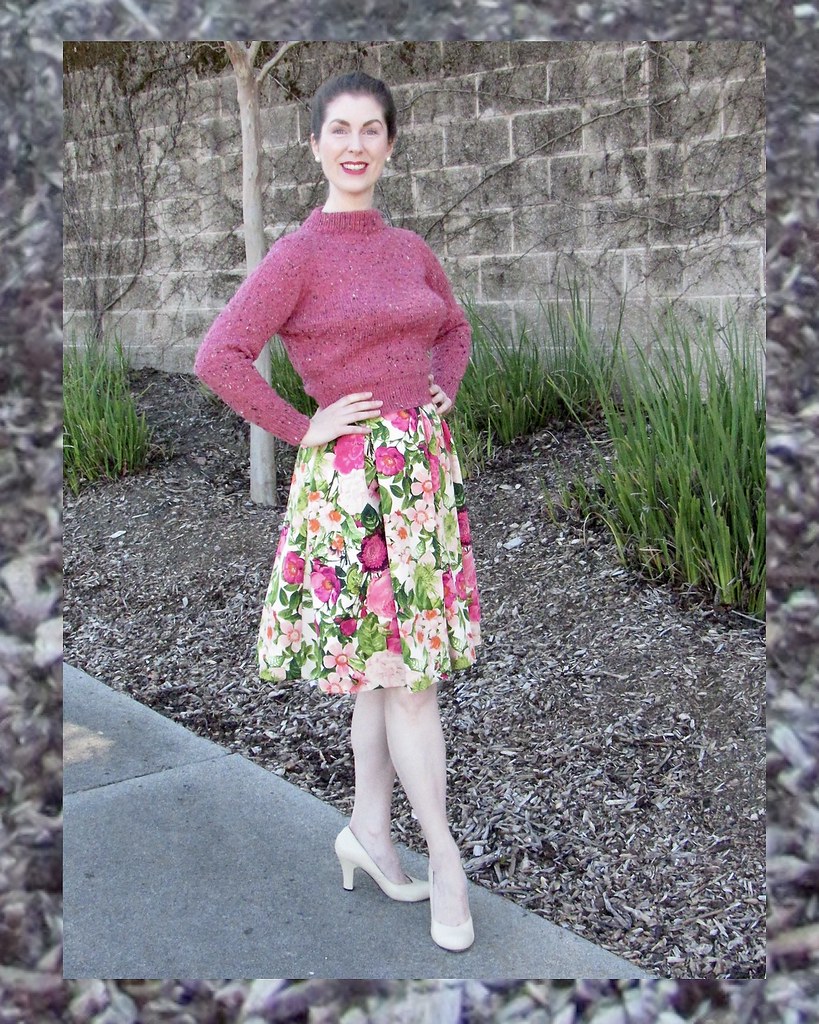
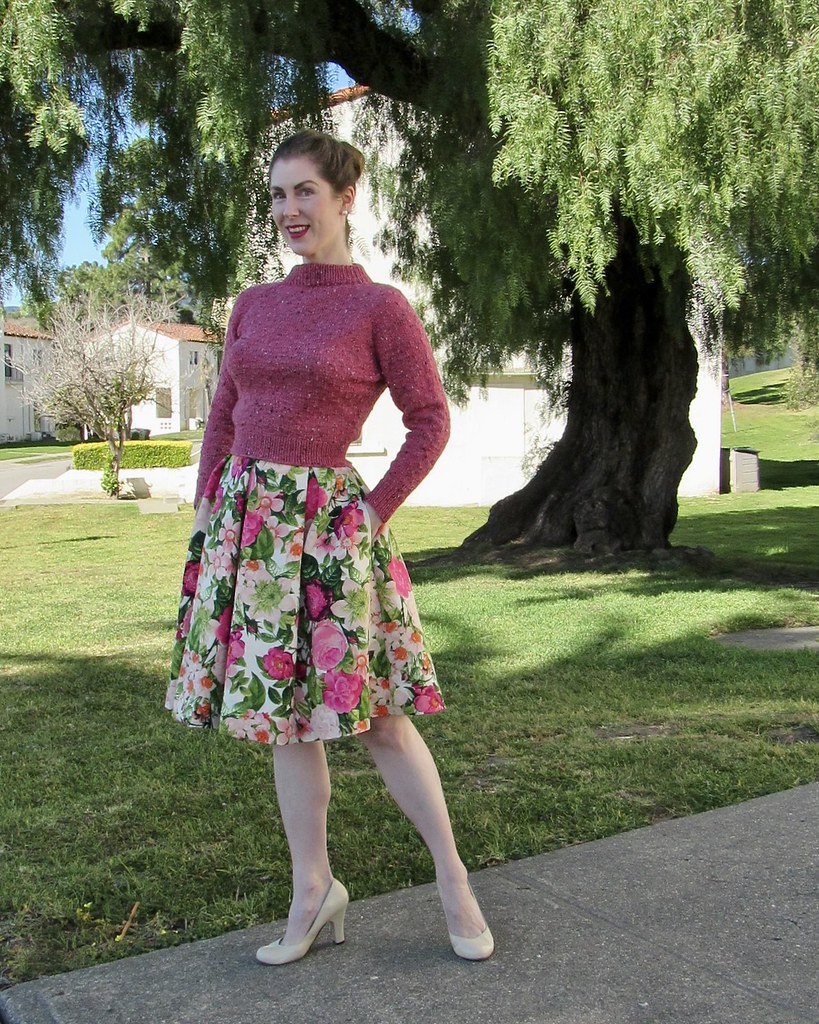
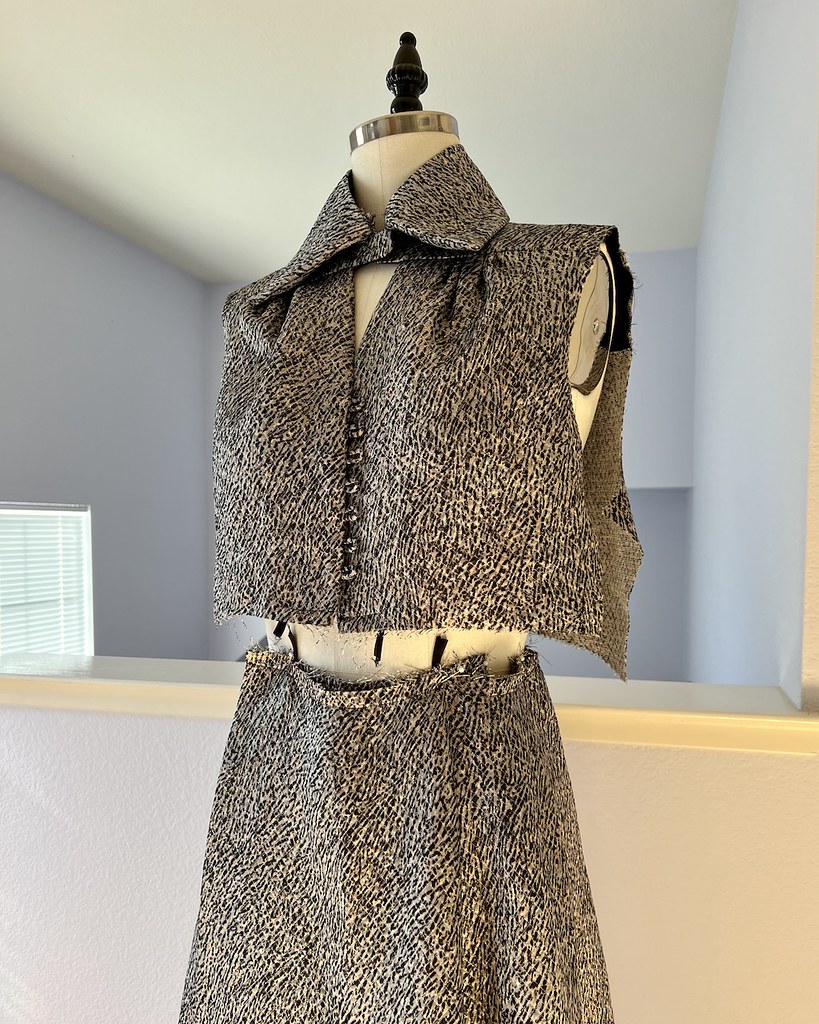
The other design feature that made me think this fabric would be a good choice was the button loops. There is a single buttonhole at the neck, but other than that, there are no zippers, which seemed like a good choice for a delicate fabric.

I am not sure why more designs don't feature button loops. Once you get past turning tiny tubes of fabric right side out, they are much less stress inducing than machine buttonholes, probably because they don't involve cutting a hole in the middle of the fabric!

But there was that one buttonhole to close the neckline. I decided that cutting open a machine buttonhole in this fray-happy fabric was going to be a nightmare, so it had to be a bound buttonhole. It's a pretty small area to work with, but it was the only real solution. I suppose I could have gone with a hook & eye or snap and covered one side with a just-for-show button, but there was a strong possibility that was going to look odd.

It all worked out in the end.

The tab is a bit bulkier than it might otherwise be, but I don't feel like it's noticeable during wear. Thankfully, the fabric presses well, so that also helped.

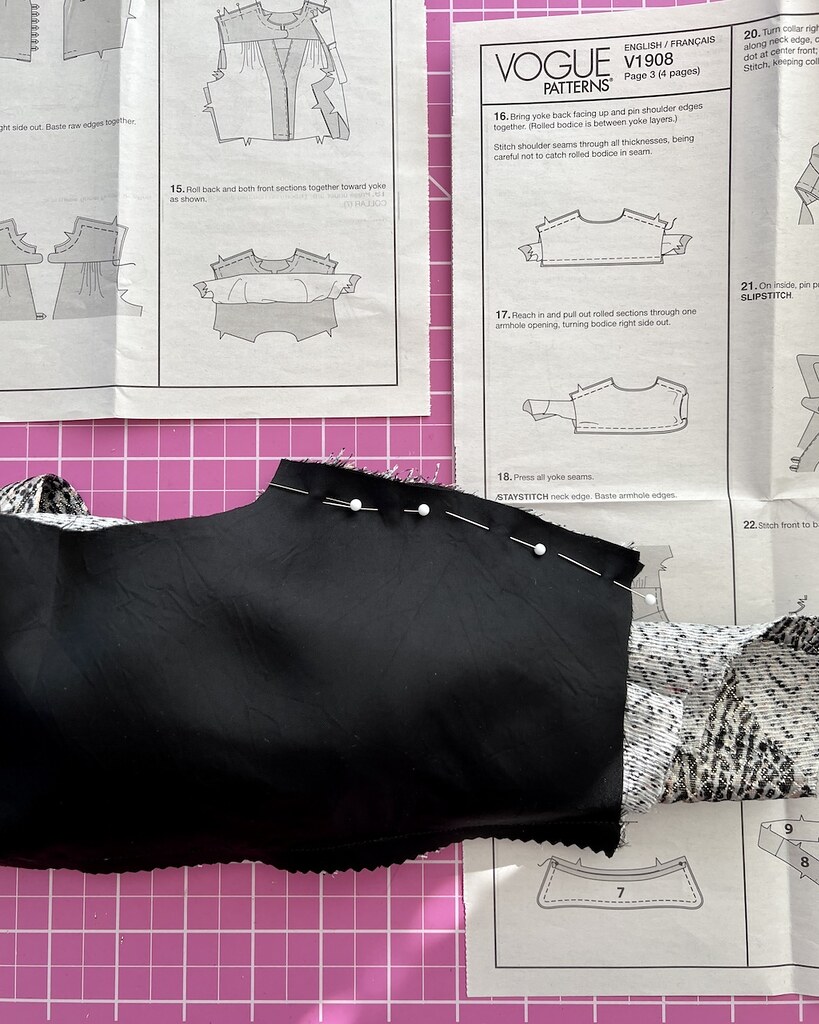
The pattern instructions have the yoke lining stitched with the "burrito method." This is a first for me, which is slightly ridiculous for how long I have been making my clothes, but hand stitching has never bothered me, so I never tried the technique. It worked like a charm, but I still prefer to set a lining in by hand.
At this point things were going great.
There were a couple of short seams that needed to be finished and I opted for seam binding instead of French seams.

And it was a relief as each raw edge was finished and I didn't have to worry about all of those fibers going astray!
When I wasn't working with the dress, it was carefully placed on the dress form to keep the remaining raw edges out of harms way.

It's also a motivating factor to see a dress come together, and having to walk by it everyday means I can't forget about it!

As far as buttons go, I was expecting to find a sufficient number of suitably sized black buttons in my stash. But nothing that I had on hand was quite right, so I decided to go the covered button route.

For the lining (which is only the yoke and waistband) I used a bemberg rayon.

I had a concern that this fabric was going to be itchy on the right side and that the seam allowances were going to be uncomfortable. I thought about lining the entire bodice, but decided against it. And honestly, I never noticed the scratchiness when I was wearing the garment.

And here comes the real issue . . . the sleeves. I was determined to have long sleeves, even though it was pretty clear from the start that my lack of yardage was going to make that impossible.

I had my heart set on a cuffed bishop sleeve. I combined the armscye of the existing sleeve pattern with another sleeve pattern. Unfortunately, there was no way to make two of those fit on my remaining fabric. The narrow long sleeve that comes with the pattern wouldn't even fit.

My only choice was to make a short sleeve, but I didn't like the one included, so I decided to alter it. The first attempt was a little too long to look right with the proportions of the dress, but that's why we make mockups!

Surprisingly, this fabric worked quite well with a fusible interfacing. I was expecting that I would have to use a sew in organza, but after applying a scrap of interfacing to the fabric for my covered buttons, I decided that the black fusible I had on hand would be great for the facings and cuffs.

Throughout the process of making this dress, I was aggravated each time I would look at the sleeves. I had my heart set on some fabulous long 1970s inspired sleeves. The fabric deserved those sleeves!

Even as the dress was coming together, I was feeling like I had made a mistake and should have used the fabric with another pattern.

But I have to say, the short sleeves have grown on me, and I think the dress turned out the way it was supposed to.

As for that bound buttonhole, it turned out great (although I wouldn't want to make more than one in this fabric!).

This dress is drafted to wrap closed with two very long tie extensions that can be brought forward or back to tie a knot or a bow. Well, as I have previously mentioned, I was not playing with enough fabric. Not only did I not have the yardage, my fabric was not 60"' wide, it was more like 50", and I did not have enough width to squeeze those ties in. Then again, I think a more streamlined look was better with my choice of fabric, so I'm not angry about the alteration.

Because I couldn't tie the wrap closed, I used a combination of hooks and bars and snaps to keep the dress closed.

The alteration to the wrap portion of the skirt/midriff worked; I was a little concerned how it would all come together, but everything went as well as could be expected.

I hand stitched the hemline, as I do 99% of the time, and I had a little bit of help from my trusty velcro chihuahua.

It's difficult to capture the shimmer of this fabric in photos, but the gradation that is picked up gives an idea of the changeable quality of the brocade.

And as for those sleeves . . . my disappointment over the inability to make them full length is over. I think the short puffed sleeves are also very 1970s inspired, so my initial vision for the project turned out as I had hoped! Sometimes having to work through issues turns out for the best . . . or, at least, I like to tell myself that!