Saturday, December 25, 2021

Oh Tannenbaum

For this year's holiday ensemble, I decided to dress as a Christmas tree.  For many years, Jay Peterman catalogs would illustrate festively adorned dress forms wearing evergreen boughs and ornaments galore in December.  Let's just say that this is my take on a much more comfortable version of the wearable Christmas tree (involving a lot less sap and pokey bits).

And then, late one night in December, I happened across an image of these super glittery shoes, and I had to have them.  They reminded me that I wanted to make an over the top dress out of this holiday novelty print, and time was running out.  After finding the perfect shoes, there was nothing that was going to stop me from making a suitably festive tree frock.

And with the addition of sequined shoes, there was certainly no reason to hold back with the dress and the accessories.

The ornaments and tinsel garlands were taken care of in the print, but vintage crystal jewelry would add some glitz and glamour.  I also festooned the dress with ball fringe, because the busy print was just not crazy enough for those shoes!  

I had an idea for a star or an angel headdress, but I ran out of time, so I pulled out a velvet bow  as a finishing touch.  Let's just call it a representation of the gifts that go under the Christmas tree, although it currently sits atop my head.

Perhaps next year I will create a shimmery tree topper, although I have to say that I am rather pleased with how the outfit turned out.

And I am very happy to say that a complete stranger that came into the office when I was wearing this ensemble said "You look like a Christmas tree!"  Success!!  The wearable Christmas tree is recognizable by all.

But no matter if there are a few people who might miss the reference . . . because the dress makes me very happy.  In fact, it would be quite difficult to be truly cranky while wearing such a print.

This is now the third dress that I have made based on this pattern, not including a petticoat version, and even a cropped top.

Am I totally finished with Vogue 4203?  Probably not!  It's a wonderful pattern with a poofy skirt that I love.  

At the time I competed the first version, I was wondering it it was worth making petticoat specifically for the dress.  Years later, I think I may need to make myself another because it gets so much wear.  I just need to figure out the best color before getting started!

For now, I have added another Holiday dress to the collection that I love, and I am already thinking about next year's festive frock!   

Dress & Belt:  Mady by me, Vogue 4203
Earrings, Necklaces, and Bracelet:  Vintage
Shoes:  Irregular Choice "Danity"
Hair Bow:  Made by me

Friday, December 24, 2021

Jingle Bell Rock

For this year's Christmas themed dress, I decided to use this fabulously over the top and perhaps slightly obnoxious quilting cotton.  I cannot recall if I found this two or three years ago, but from the moment I laid eyes on it, I knew that I needed a dress made from the fabric, and it needed to be further embellished because clearly the explosion of printed ornaments and tinsel garlands was not enough.  But I wasn't entirely sure how to go about that.  Last year I ran out of time to make a second dress for the holiday season with the fabric, but I was content to add my snowman printed frock to the collection.  This year, I was determined to get around to making the dress.

Vogue 4203 is one of my favorite dress patterns, so that was a great place to start, but I knew that I wanted more of a crew neck with this particular print.  Using Simplicity 9447 as a starting point, I cut a tighter neckline.  This alteration was not perfect, and there is slightly more fabric through the upper chest than needed, but since the print is so busy, I don't think it will take away from the finished dress.

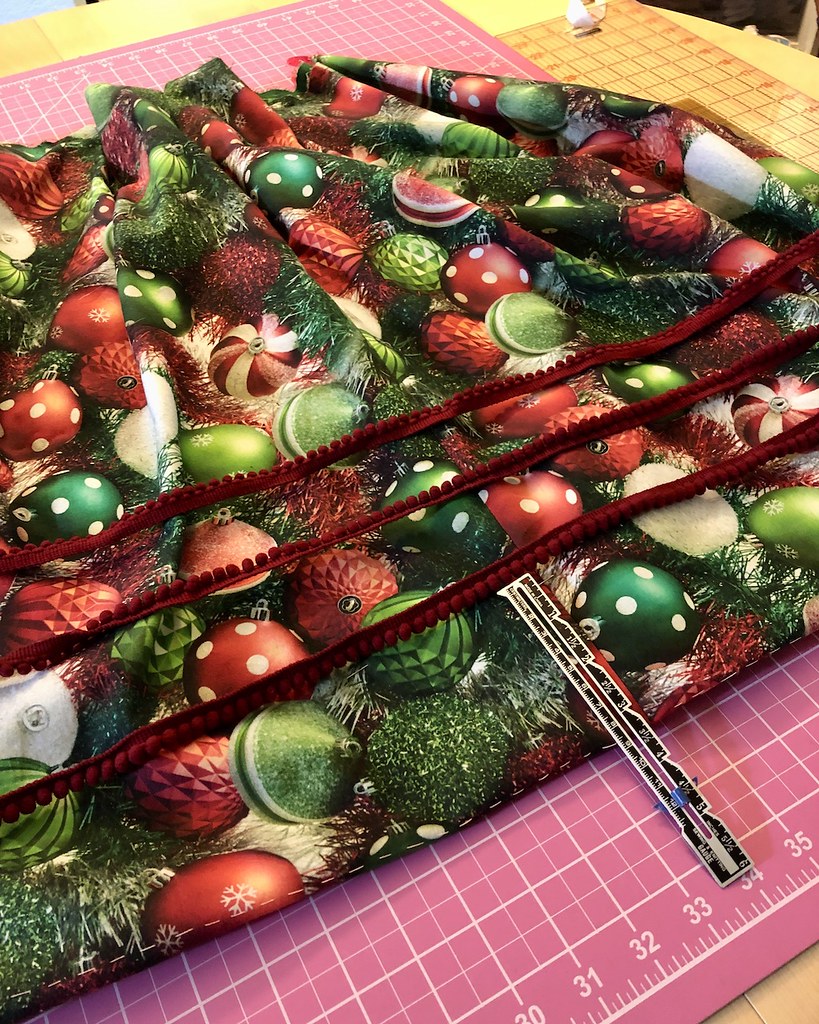
One of my favorite parts of this vintage pattern is the fabulously full skirt that balloons out from the waistband.  The hemline is straight, which means adding trim is much easier than with a curved hem.  Included in the instructions is an aid to help the hips stand out, which is what that extra strip of fabric does.  This time around I used an un-interfaced piece of cotton, but it still manages to do the job nicely.  And, of course, I will also be wearing a petticoat underneath to further exaggerate the silhouette.

The next item of business was to find an appropriate trim for the Christmas tree I was creating.

I originally intended to use a medium sized ball fringe, however, the red color that I found was too bright for this print.  What I finally found was a smaller sized ball fringe that came in a much wider variety of colors. 

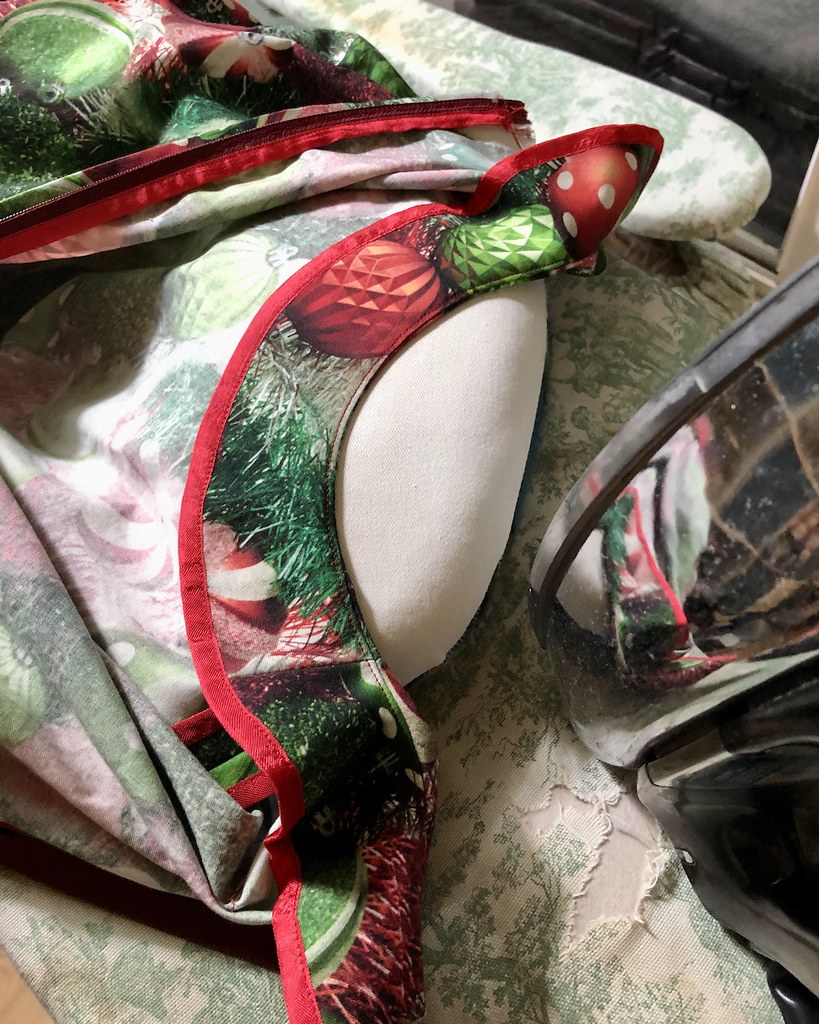
Of course, I didn't anticipate the issue of attaching the trim to the fabric.  I have worked with larger ball fringe in the past, and since the pom poms hang off of the trim, a standard machine foot works just fine.  For this stuff, however, it was necessary to get creative.  A zipper foot worked okay, although it was a bit of a fight to keep things from going off the rails.  I suppose I could have hand stitched things, but in this instance, the thought of having thread snag on all of those bumpy bits was too much for me.

I did, however, hand baste placement lines to make sure the fringe was attached in as straight a line as could be managed.

I had a bit of unpicking to do with the project.  I knew that I wanted to add the ball fringe to the sleeves as well as the skirt, but for some reason I forgot that step while sewing late one evening, which is why you see the seam binding in place prior to the seam being closed.  I don't like to finish edges until the seam is stitched, but sometimes mistakes are made.

The other issue that I encountered was what to do with all of that bulk along the seam lines.  Because there really was no way to avoid having the bumpy bits interfere with the seam line.

I attempted to sew right over the bulk, but it was never going to look great, and once again, the seam ripper was called into service.

In the end, I found that it was easy enough to clip the pom poms right off of the trim without anything else unraveling.  So any offending bumps were simply removed from the seam allowance before stitching the seam closed.

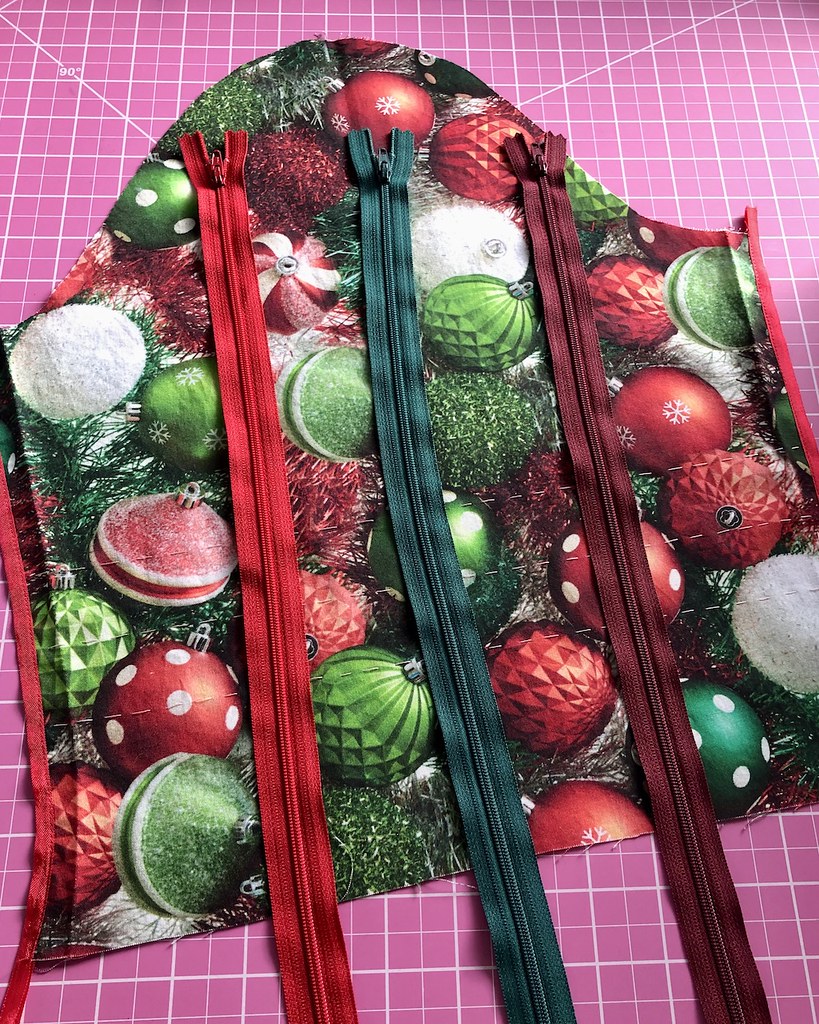
And once again, my stash of zips has not let me down.  In the end, I went with the maroon color since it blended in with the print the best.

When I was messing around with the neckline on this pattern, I knew that it was potentially going to give me a bit of grief.  And I cannot be sure whether it was that, or if my stay-stitching did not do its job, but for whatever reason, the neckline began stretching out while I was constructing the bodice.  Maybe the extra weight from the trim on the sleeves was also responsible while I was wrangling the set in sleeves?

Well, I decided the best way to handle the situation was to sew the facing on immediately.  Obviously the center back zipper still needed to be installed, so I left a few inches unstitched, but getting the front curve to stop stretching was my priority, and the facing did the job better than any stay stitching ever could.

The hems were stitched by hand, which was a little bit awkward with the lumpy trim, but even that was not enough to keep me from enjoying the process.  I love hand stitching hemlines!!

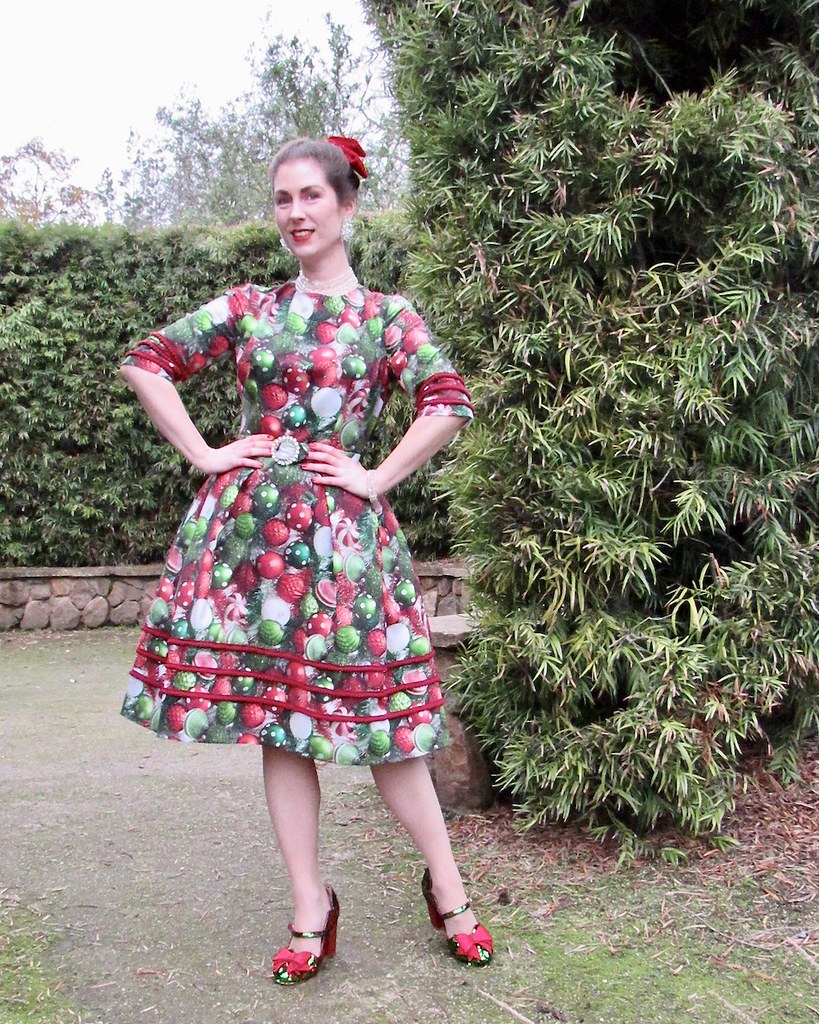
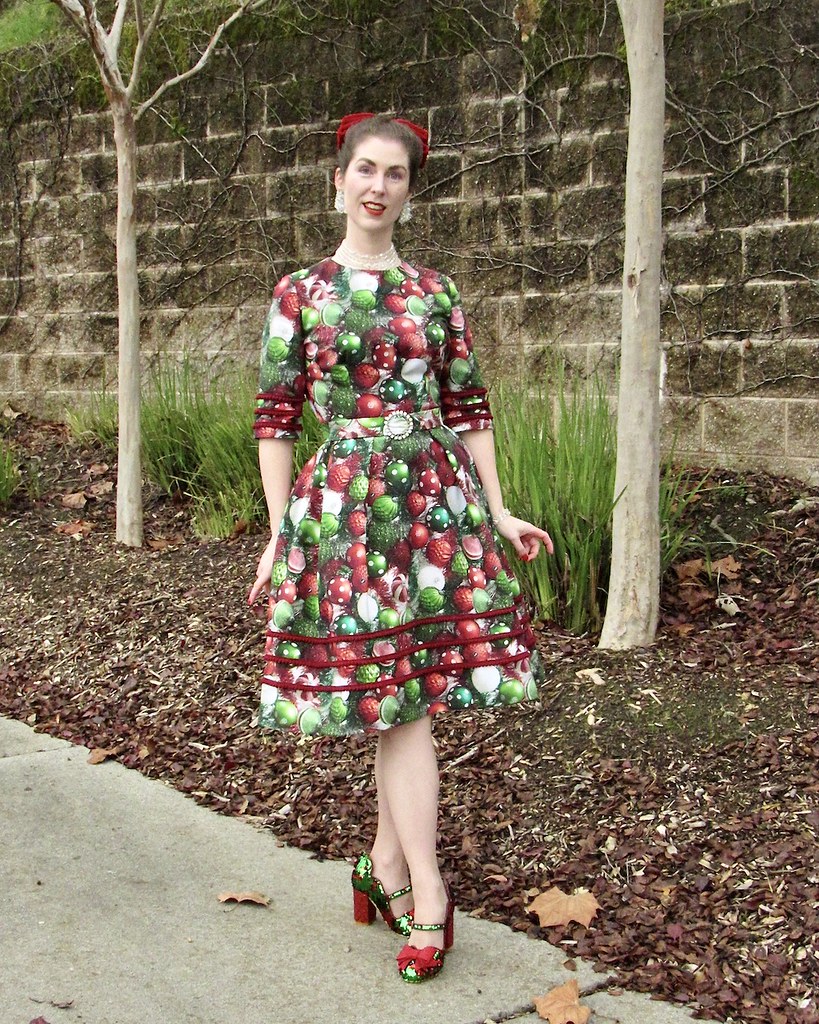
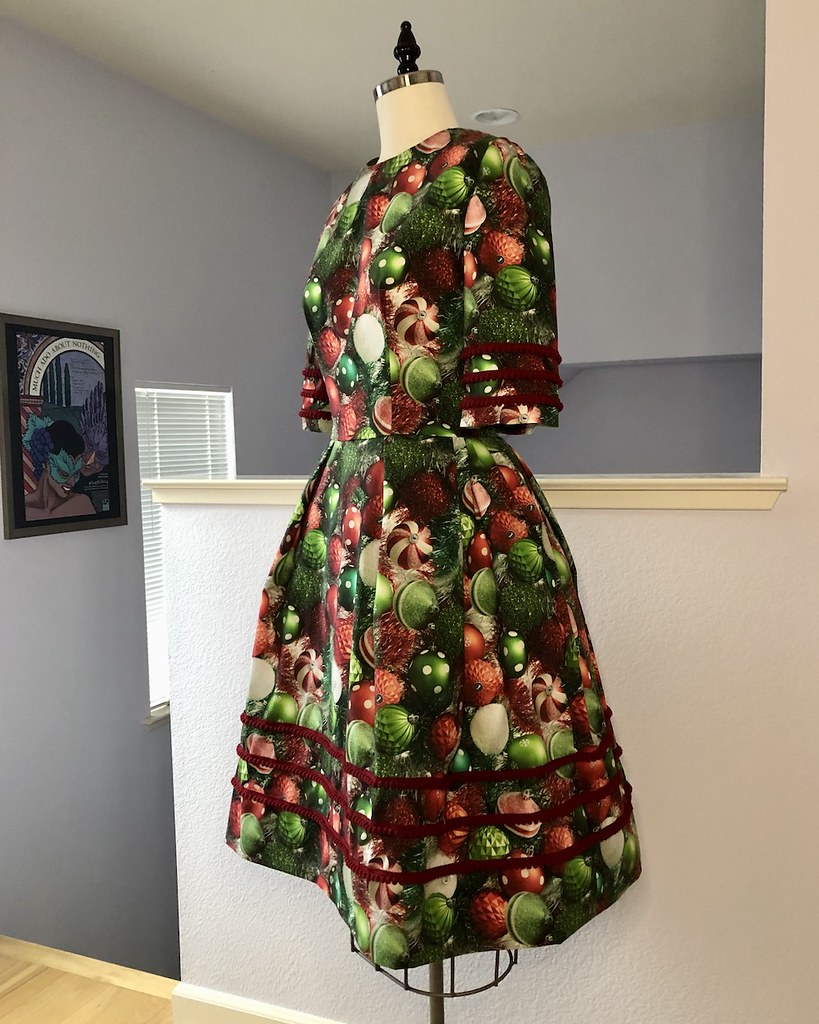
At which point the dress looked like so.

Totally over the top, and pretty darn cute, if I do say so myself.  But I still had a belt to make for the finishing touch.

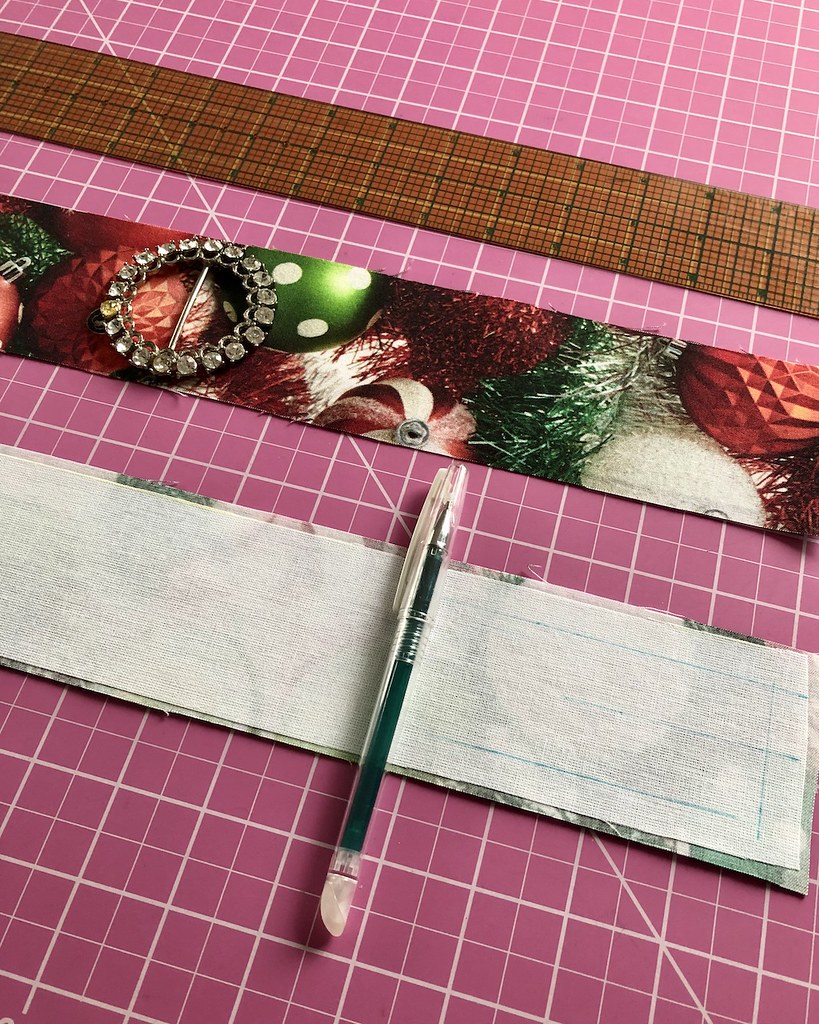
And I just so happened to have a very appropriate and sparkly belt buckle that I found at an estate sale.  At some point, one of the rhinestones must have fallen off, and someone used what looks like hot glue to put it back in place.  The glue has yellowed, but I think that the flaw will be lost in all of the craziness that surrounds it.

And here is where I made another sewing mistake late at night.  I calculated the width for the belt, but somehow forgot to double it so I could fold the rectangle in half to create the belt.  I've never done that before.  But thankfully I realized the problem before stitching anything, so I just cut a duplicate belt piece.

I love the extra sparkle from the belt buckle, and I have plans to wear some blinding crystal jewelry to further deck the halls.

And that is the story of this year's Christmas frock.

Because why should Christmas trees be the only ones getting dressed up for the season?!

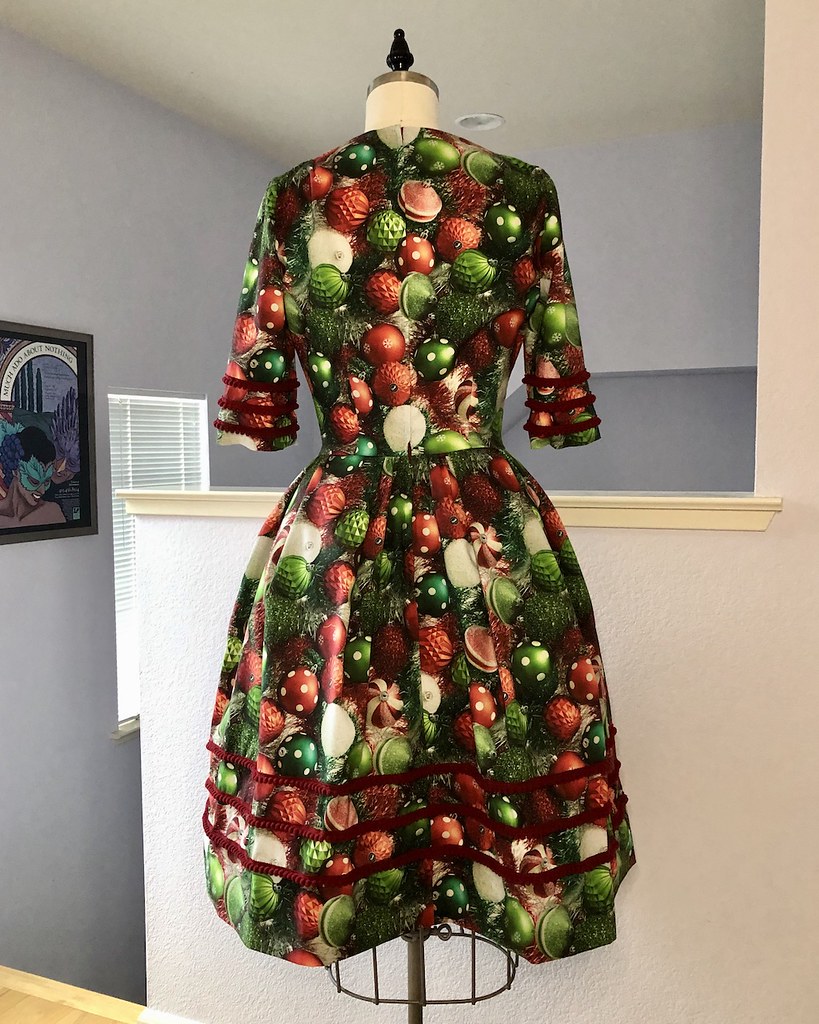
If they keep making such cute holiday prints, I am going to keep making these silly dresses.  Because they are too much fun!  And yes, I pattern matched the back bodice, because even ridiculous prints deserve attention to detail.


Sunday, December 19, 2021

Pink Cables

Ah yes, another sweater project that gets finished and then languishes in a drawer, unworn and unloved, for goodness knows how long.

In this case, the only real excuse I have is that I couldn't decide what skirt to pair with the sweater.  Ridiculous, yes, but I have a habit of doing this with sweaters that I knit.  And then after a certain point, I forget that they are waiting for their chance to see the outside of the bureau.

I repeatedly jump into projects with a color or a style that doesn't really match anything that exists in my closet . . . or, doesn't match how I imagine it should.

I made the cardigan version of this sweater many years ago, and it turned out a bit large so it doesn't get as much wear as it should.  But I love the cable pattern, so a few years ago I decided that I would make myself another, but this time the crew necked version.

One of the reasons that I chose this particular pattern was that the stitch pattern is very easy to remember; give me columns and a chart, and I am a happy knitter.  And because I knew that I was going to be on a film set sitting around for many hours during the day, I wanted an easy to remember knitting project to keep me busy.

I finished the sweater, I love the sweater, but the issue of the skirt to wear with the sweater was never resolved.

But I was determined to find something that would work, because I wanted to wear the darn thing.  Well, I finally found something suitable earlier this month.

And having finally worn the sweater, it is safe to say that I love it, and it's wonderful to wear.  Perhaps there is a more appropriately sized cardigan in my future (how many versions of the same pattern are too many?).  But first, I have to figure out which dress I plan to wear with it!

Monday, December 13, 2021

Gibson Girl

Once I decided to make a Victorian walking skirt, I needed to figure out what to wear with it.  In order to embrace my high school obsession with everything Victorian and Edwardian, I decided I should go all out and find an appropriate blouse to pair with the skirt.  I had a few reproduction patterns on hand, but I have never worked with Folkwear Patterns before, and now seemed like as good a time as any.  

I remember this pattern design vividly.  My very first sewing project using a machine was a costume for a theatre class scene from Sense & Sensibility.  JoAnn Fabrics used to carry Folkwear Patterns, and I remember my two classmates and I wondering if we should choose the Folkwear Pattern or a McCalls pattern.  We had been given strict instructions not to choose something too complicated, so we went with McCalls, but I definitely had my eye on that Empire Dress along with the Edwardian Underthings and this very Gibson Girl Blouse.

I also never realized that the company was local, but there it is, right on the pattern envelope:  San Rafael, CA.  This probably explains why a local JoAnn Fabrics was carrying the patterns back in the late 90s.

Since I was using Organic Cotton Plus cotton twill for the skirt, it seemed fitting to find an appropriate fabric for the blouse from the same website.  After trying to narrow down way too many cute cotton prints, I decided to go with a cotton sateen.  I used their cotton sateen to make this dress years ago, and it is really lovely to work with.  Already knowing that it drapes very nicely, I though it was a better bet to take than a quilting cotton that might end up a little too stiff for the voluminous blouse pattern.

I went with French seams for most of the construction.  I think that using seam binding on a single layer of this fabric was going to be too much, so an enclosed seam was the option I chose.

And while I would love to play with lace insertion at some point, this was not the right fabric.  There was no way I was going to find a matching lace, at any rate.  But I do love the lace details on this design along the yoke and collar.  The obvious solution was to make my own ruffle by folding bias strips in half and gathering them.  

I ended up cutting each ruffle 1.5X the length of the seam.  This seemed like a good proportion, and it turned out well; it's not too much, but the gathers look intentional.  I think two times the length would have been too much for this application.  

I also added the ruffle along the back yoke.  The pattern does not call for any lace at the back, but I always think it looks lazy/cheap not to add an embellishment all the way around a garment unless that portion of the item will never be seen.  And let's face it, in the real world, everyone is seen from all angles.

The pattern offers two separate options for the closing at center back.  One is buttons and buttonholes; the other is snaps.

Sateen is a glorious fabric, but it does like to fray.   Bound buttonholes would not work for this design, and hand worked buttonholes seemed a bit much for a fairly lightweight fabric.  I really didn't want to take a chance on machine buttonholes, so snaps and hook & bars it was.

At the more closely fitted areas I like to use a hook & bar.  For instance, the neck and at the waist (where the two ties are likely to pull at the back opening) I sewed hooks & bars.  I have had issues with snaps popping open at stress points while wearing theatre costumes in the past, and I've never looked back.

But for the blousey areas, snaps are going to stay shut, where a hook & bar needs a bit of tension to remain closed (at least, most of them do).  Some of the older hooks that I have come across have a portion of the wire that creates a little hump so that you have to tug it into place, and it will stay put.  But for me, in places under no tension, snaps are best, and in places where there will be potential pulling, it's a hook & bar or hook & eye.

There is one other thing to note with this pattern.  The blouse is drafted for a very short-waisted individual!  I usually add a bit of torso length to my bodice pieces, but even though I added 1/2" to the hemline, this garment still feels very short.

If I make this again (and there's a good chance that I will) I plan to add another 1" at the hemline.  And that is more of an adjustment than I have ever made in that area.

The ties are optional, but I think the silhouette created with the definition through the waist really makes this design.

As with the torso length, I should have lowered the placement of the ties.  But they are top-stitched in place, and I don't think the sateen would take well to a seam ripper.  As it stands, the waistband of my skirt is wide, and I should be able to keep the ties hidden.

While I know that the waistband on the skirt I am going to wear with this blouse would look fine with a tucked-in blouse, I thought that a belt made of the blouse fabric would be a nice finishing touch.  I know that Victorian shirtwaists often had matching belts.  Whether or not they were stitched together is discussion for another day, but I think that for my purposes, this will work just fine.

I cut one shaped belt piece on the cross grain and then interfaced it for stability.  This will be worn over a boned skirt waistband, so I didn't feel the need to bone the belt as well.  A second piece was cut 1.5" wider than the first piece and on the bias.

Those two pieces are stitched together along both long edges and turned right side out.

The extra fabric creates a nice bit of texture without looking like a pleated cummerbund or crumb-catcher!  When I purchased this buckle on Etsy years ago, I was a little disappointed that the actual item was extremely lightweight and a bit more chintzy looking than I had hoped.  But I think that the notion was just waiting for the right project.  Thankfully, I keep all of my buckles stashed together in two boxes, so it was easy to find.  And I am really thrilled that I added the belt - it really finishes the look.  My dress form is a too large for the finished belt, but here is an idea of what the finished item looks like.  And now it's ready to be paired back with my new skirt!