Saturday, December 31, 2011

The Soul of the Rose

"The Soul of the Rose" by John William Waterhouse
Image from jwwaterhouse.com

In high school I was absolutely obsessed with Pre-Raphaelite art.  And while it is not all pretty ladies and knights in shining armor, I will admit, the beautiful ladies and their fabulous titian hair and long flowing gowns are what originally caught my attention.


So it is not surprising that when I was able to choose my own pattern and fabric, this is the dress that I came up with.  I can clearly remember that the beautiful rayon fabric was the most expensive yardage I had ever purchased, but once it caught my eye, I had to have it!  And I think Waterhouse would have approved!


Although the dress is no longer my favored style, it sure is fun to pull out early projects.  Back then, if it covered the ankles and wrists, it was okay with me.  The more old fashioned, the better. 


The only thing that can account for this bout of nostalgia is my recent birthday (and the reason this dress was pulled out of the closet).  Silly, right?  The more things change, the more they stay the same . . .


"April Love" by Arthur Hughes


Dress:  Made by me, McCalls 9107
Shoes:  Nine West “Burg” in Medium Pink

Sunday, December 25, 2011

Happy Holidays!


I have loved The J. Peterman Company ever since I first became aware of the catalogue from Elaine Benes of Seinfeld fame.  Urban Sombrero, anyone?  Well, not today.


Instead, here is a little inspiration for the perfect Christmas frock.  Sure, they are a bit over the top, and probably not the most practical outfits in the world, but utterly fantastic, don’t you think?  Without a doubt, my favorite holiday catalogue covers ever!


And if you are looking for a good laugh, each item in the catalogue has a wonderfully descriptive narrative for each item.


Take a quick peak – wouldn’t this make the perfect New Years dress?

Wishing everyone a Merry Christmas and a Happy New Year!

Saturday, December 24, 2011

1944 Was a Good Year for Suits


I fell in love with this suit design as soon as I saw it in Vogue’s pattern catalogue back in 2005.  So much, in fact, that I copied the dark green color choice of the sketch illustrator – now I just need one of those fabulous tilt hats to complete the look!


This suit was pulled out of the closet for a special occasion:  my Emerald Green Gown was featured in an article on December 18th by a local paper.  


So when a photographer came to my apartment to take some photos for the article, I had to find something special to wear. 


Now that I remember how much I love the skirt, you can bet that the pattern is going to be pulled out when I find some suitable fabric.


And although it is now out of print, the pattern is still available from Vogue.

Now if only I would hear some news about that Bernina sewing machine . . .


Suit:  Made by me, Vogue 2885
Fishnets:  Hue
Shoes:  Via Spiga “Unit” in Black suede
Earrings:  Liz Palacios
Ring: Macys

Wednesday, December 21, 2011

A Taste of Peppermint for the Holidays


Guess what this yummy yarn color is called? . . . peppermint!  I found the merino wool over at colourmart.com a couple of years ago.  The cabled pattern was fun, and I finished the cardigan in late 2009, at which point it took up residence in my bureau.


The sweater turned out a bit larger than expected, and I never seemed to find the right dress or skirt to complete the ensemble – yes, it’s another one of those projects.  


A belt, of course, is a quick solution for the fit problems.  And most of the vintage style dresses in my closet have self-fabric belts that I have made to match, yet I usually manage to forget that they exist until I pull the corresponding dress out of the closet to wear.  Silly, right?  


So this belt was borrowed for the day – little miss 1955 is just going to have to deal with being separated from her baby belt for a bit.


And while the color suggests more of a wintergreen, I am now christening this my Peppermint Holiday Jumper (in deference to the colourway and my long standing tradition of attending Christmas dinner with a lovely British family, complete with Christmas pudding!).  Can “jumper” refer to a cardigan or just a pullover?  Anyway . . . Happy Christmas to you!


Jumper:  Made by me, Symphony Cardigan by Martin Storey
Skirt:  Banana Republic
Shoes:  Nine West “Health”
Fascinator:  Made by me
Nude Coloured Fishnets:  Simply Vera from Kohls
Belt:  Made by me, borrowed from this dress

Friday, December 16, 2011

The Perfect Weather for Wool


This is one of my favorite creations.  The pattern is Butterick 5556, another vintage reproduction - big surprise, right?!  


The wool was a fantastic find from Fashion Fabrics Club (and makes up for some of the less than wonderful cuts I have received in the past). 


It is hard to tell from the pictures, but the wool is purple with navy and fuchsia running throughout a tiny diamond pattern.  More information about the construction process may be found over at PatternReview.


I often hesitate to wear brooches because I am afraid that the pin will permanently mar the fabric.  With a woven wool, this becomes less of an issue.  Accessories can be so much fun.  And they do look so pretty! 


And although I would love to complain about the chilly weather, it is a great excuse to wear my wooly outfits.


And look, more twirling – it really is addictive.


Dress: Made by me, Butterick 5556
Petticoat:  Made by me
Shoes:  Banana Republic “Nelda” in Elephant
Hat:  Made by me
Gloves:  Vintage from mom
Brooch:  Antique Store in Sonora, CA
Earrings:  Macys
Bracelet:  Gift
Stockings:  Hue
Purse:  Harveys Seatbelt Bag “Flutterfly” Large Tote

Thursday, December 15, 2011

A New Wool Coat, Part 3


Thank you to everyone for your lovely comments on my new coat.  And in case you were curious how she looks on a real person, here we go!


My new wool coat.


I had grand ideas about making a new fuchsia blouse to look super snazzy with the open neckline, but I did not have time this weekend, and I did not want to put off wearing the finished product!  So I made do with a bright pink scarf instead.


I pulled out one of my favorite wool pencil skirts (made early this year out of leftover yardage from this dress).  


I love when I can squeeze two projects out of one length of wool!  I try to convince myself that the skirt cost nothing.  Sure, I needed a zipper, and some lining, but the skirt was basically made from scraps, right?


And I will leave you with a few superfluous twirls – I dare you to be in a bad mood after spinning around in a full skirted dress or coat.  Try it, you’ll like it!


Coat:  Made by me, Vogue 8211
Skirt:  Made by me, Simplicity 4047
Blouse:  Banana Republic
Shoes:  Ann Klein “Foxy” in Black Patent
Stockings:  Banana Republic
Purse:  Harveys Seatbelt Bag “Lola” in Emerald
Scarf: Ross
Necklace:  Shadows
Earrings: Kohls

Wednesday, December 14, 2011

A New Wool Coat, Part 2


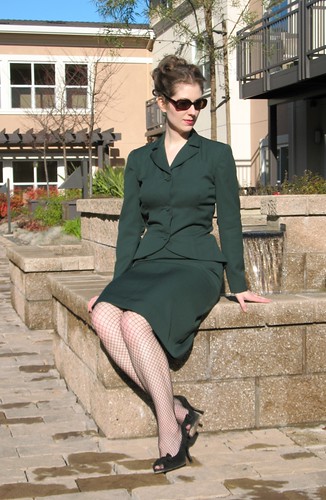
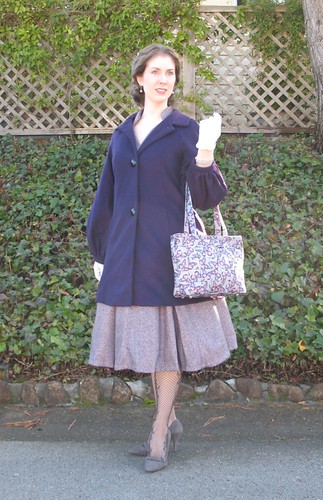
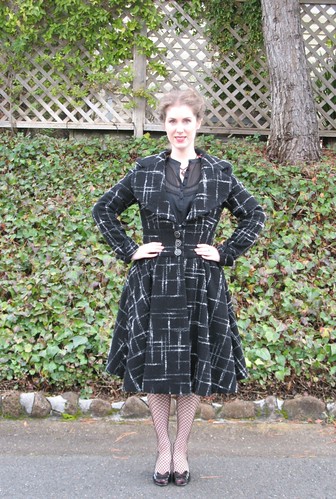
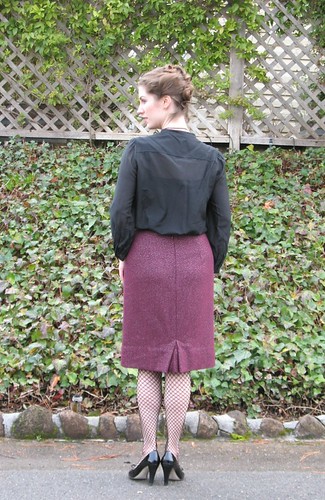
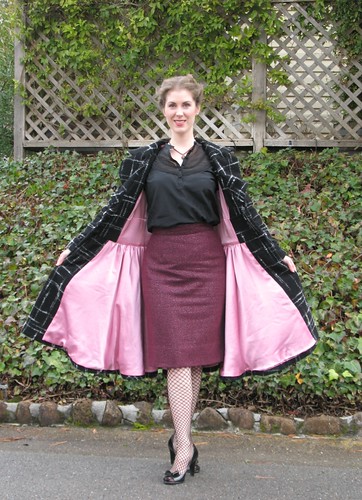
Here is a sneak peek of my new coat!


There were a few moments at the sewing machine when I was lamenting the thickness of my wool, but I persevered and am extremely pleased with finished product.  It may not be the most practical garment I have ever made, but I have a feeling I am going to get a lot of wear out of it despite the fact that my new winter coat has a wide open neckline.  Scarf time!


The most tedious part of the construction was catch-stitching all those seam edges to the flannel underlining.  But I got into a rhythm and ended up enjoying the process.  Where it was necessary to press both seams in the same direction I made sure to trim and graduate the covered seam, and then catch-stitch the top seam to my flannel.  Don’t get me wrong, there is still a bit of bulk there, but it is much more manageable.

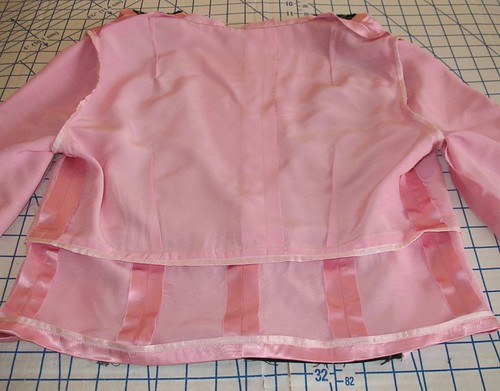
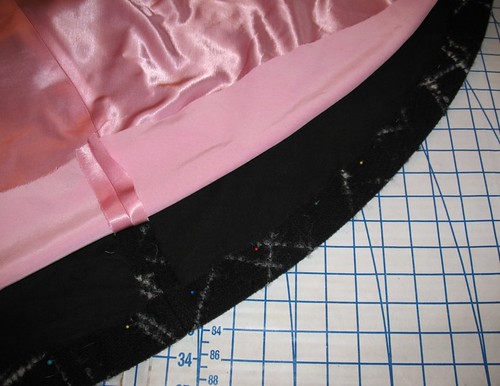
Thankfully, the edges of the wool did not fray terribly.  My rayon satin, however, was not quite as easy to work with.  I was concerned that the seams that get more stress than others might continue to fray, so I covered them with Hug Snug rayon seam binding (yes, I really am obsessed with this stuff).  


I trimmed the armhole seams and covered them, along with the horizontal seams above and below the waistline.  The seam binding also came in handy for my sleeve facing – instead of having to fold the wool and adding thickness, I just bound the raw edge.


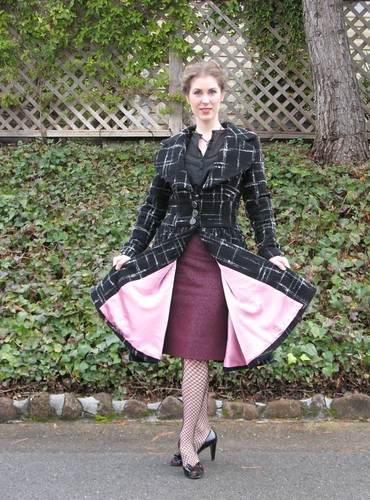
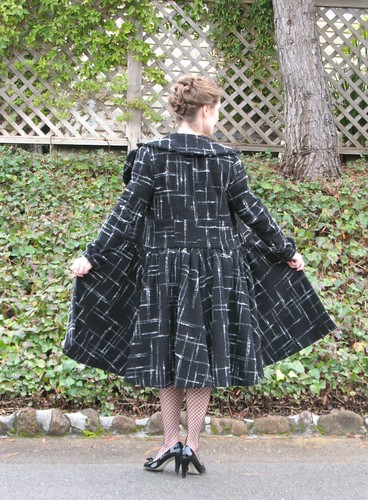
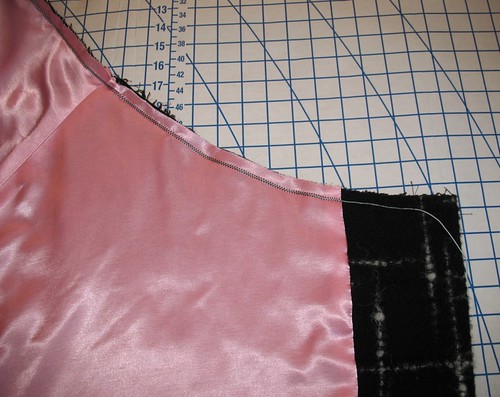
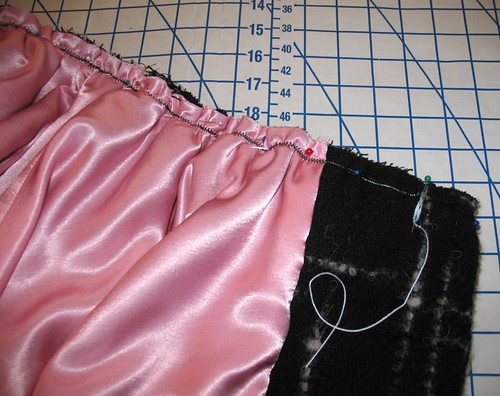
I realized early on that gathering wool coating underlined with cotton flannel was going to be almost impossible – silk thread or not, this fabric is too thick for a simple basted stitch!  To avoid tears and frustration, I used a technique that I came across many years ago.  I believe I first saw the tip on a pattern instruction sheet.  They suggested using dental floss!? to gather thick or unruly material.  


Well, the idea of dental floss living inside my garment freaked me out a bit, however, I always have crochet thread on hand and I thought it would make an excellent substitute.  Turns out it does.  
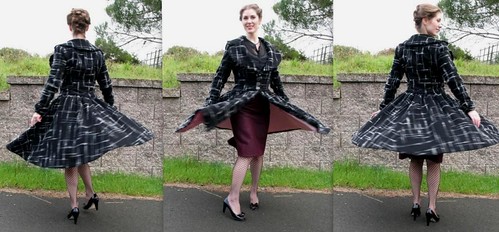

The trick is to zig-zag over the crochet thread/floss without catching it.  The crochet thread is then pulled up and, unlike sewing thread, will not break under pressure.  It works beautifully!  


(And I will let you in on a little secret – if you happen to catch your crochet thread up in the zig-zag stiches, just use a seam ripper to remove the offending stitch – unless you have to remove quite a few bits of the stitching in a concentrated area it will not affect the gathering at all.)


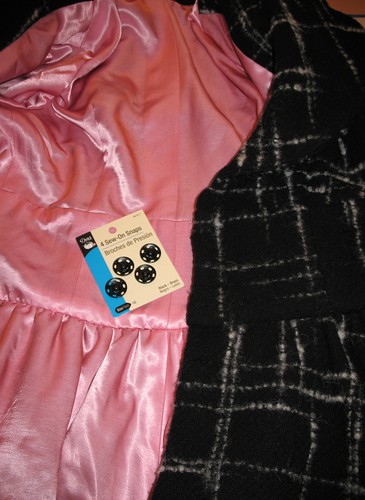
This coat uses snaps as a fastening.  And while it is somewhat thrilling to start a project that requires no buttonholes or zippers of any kind, I was not convinced that snaps could close such a heavy coat.  Off to my local JoAnn Fabrics I went, and purchased some size 10 snaps which are just a skosh under 1” in diameter.  A larger size was available, but they looked ridiculously large and scary - like once you get them snapped  you can never get them apart, so I decided that the size 10's would have to be sufficient.


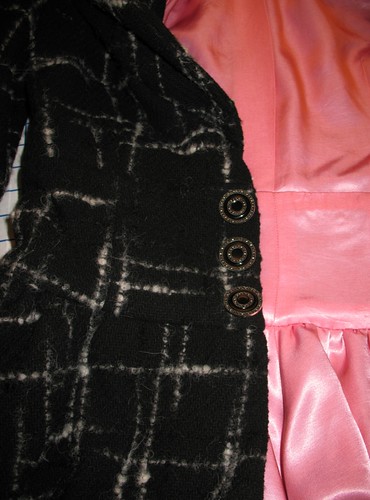
I am happy to report that three of these babies easily keep the coat shut.  I ended up covering my snaps with some bemberg scraps that I had on hand using this Threads tutorial because the black paint was already chipping away after unsnapping them from the card they came on.  The rayon is probably too delicate for this task and may not hold up very well, but for now, it works just fine.


The buttons I decided on have a bit of a shank, and I probably should have used something that was a bit more flat because they are sitting on top of the coat instead of sliding through a buttonhole and holding fabric in place.  Live and learn, right?  And I can always swap them out for something different if I find something that will work better!

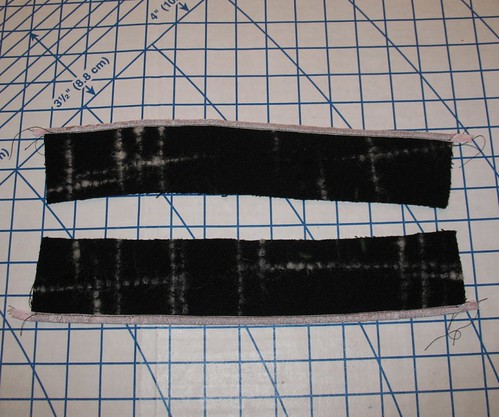
I ended up adding cuffs to my coat.  Because the cuffs were drafted with the three-quarter length in mind, I had to take about 1” out of the width of the pattern piece.  


I underlined the cuffs with cotton to substitute as interfacing.  As it was, the two layers of wool, plus flannel, plus cotton, plus lining, plus small wrist circumference was a bit of a bother to get under the sewing machine, but I prevailed.  Hand basting is miraculous!


The lining was bagged.   The directions suggested finishing the lining separate from the coat but I think sewing the lining to the coat gives a much nicer finish - and it is an excuse for more hand sewing with silk thread!


And now my arms need a good rest from hoisting this thing up onto the sewing table and to the ironing board, and back to the sewing machine, and back to the couch for some hand sewing.  It doesn’t feel heavy when being worn, but boy was it obvious during 
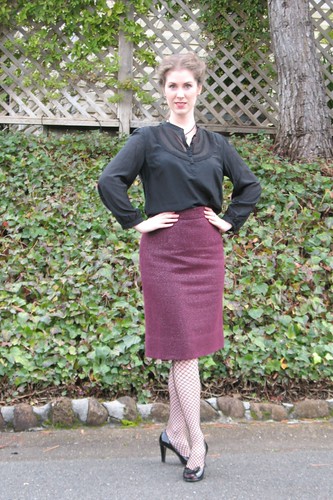
construction.  I have some pink wool yardage that I hope to make into a coat before the cold season ends this year, but I think I am going to take a break from thick wool for the moment!


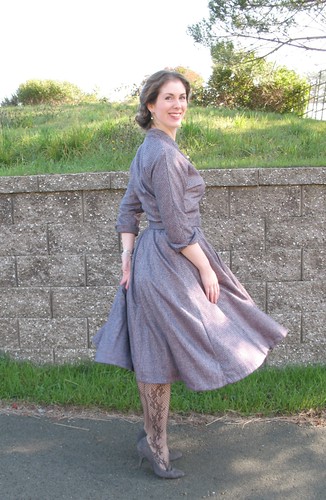
So that about covers the construction of this thing.  And as soon as I sort through them, I will post pictures of the finished product on a body!