Tuesday, September 26, 2023

Pleated Florals

Give me a squared neckline and I'm on board with a design; add to that a pleated bodice, throw in darted sleeves, and I definitely need that dress in my wardrobe.

This pattern from Daria Patternmaking doesn't take a massive amount of fabric, but it does require 2.5 yards of 55" wide fabric.  And since I was going to be testing this design, I didn't want to go searching for and spending more money on fabric.  Luckily, I had a queen size sheet set worth of this cotton print.

Which is not to say that this design wouldn't work in a more sturdy textile.

If the right fabric comes along, I would definitely think about making another version.

It might also be fun to raise the back neckline slightly so that the ribbon is not necessary to keep the shoulders in place to give the dress a different feel.

That would require a bit of fiddling with the shoulder yokes and the back of the dress, so who knows when I will get around to it, but it's on the rather long list of projects that lives rent free in my head.

But I'm not saying that I don't love that back bow, because I do!

I have re-discovered my love of white/off-white background prints in the last couple of years.  Because of my pasty skin, I often feel that white tones don't do me any favors.  But in this case, I think that there is enough color in those fabulous florals to make up for mine as well as the fabric's lack of pigment.

Because the print is pretty darn amazing!  I can't really decide if it's the design or the print that I love more; or maybe it's just the combination of both.


Dress:  Made by me, "Lily Dress" by Daria Patternmaking
Shoes:  Soludos Lace Up Espadrille
Necklace & Earrings:  Etsy

Saturday, September 16, 2023

Pleated and Puffed Sleeves

Back in January of 2022, I was a tester for the Lily Dress from Daria Patternmaking.  I didn't get many photos of the construction process because there was a quick turn around for completing the pattern and communicating feedback to the designer, and I was doing most of the sewing on this project at night when the lighting was not great.  (I mostly blame the crummy lighting and lack of daylight hours.)

I loved this design as soon as I saw it and was excited to be a part of the testing process.  I did make a few alterations to the pattern.  First, the skirt was a bit short for my taste, so I added 2.5" to the length.  I will note that the only reason that I was able to fit the rather wide front skirt piece on my fabric is that I was using a sheet set (this print may look familiar as I recently made a blouse from it!).  If I was to make this using a standard width fabric, I would probably add a center front seam to that front skirt piece so that I could lengthen the skirt, perhaps an inch or two more than I did on this version.

I also added sew-in cups to the bodice since the rather wide-set shoulders were going to make finding an appropriate bra somewhat challenging.

It's a quick alteration that involves tacking the cups to the lining fabric and proceeding with the rest of the construction as directed.

Besides the lovely pleated bodice, the other design detail that caught my attention was the sleeves.  The exaggerated puffs are made by pleating the excess into the armscye instead of the standard gathering option.  This is a technique that is commonly seen in 1940s designs, but I rarely see it being used in contemporary fashion.  Now if only more basque waist styles get released as new designs, I would be quite pleased!

I definitely enjoyed making this design and should pull the dress out to wear again before it gets too cold for a lightweight cotton dress.

And one more thing I should mention . . . this pattern calls for the use of a ribbon to hold the wide-set shoulders in place.  I didn't have any suitable ribbon stashed away, so I just made my ties out of self-fabric.

Overall, I definitely like the way this turned out and would not be adverse to making another version in a solid colored, slightly more heavy weighted fabric for a cool weather version.  I'll just add that to the list of projects that I would like to get around to at some point!


Tuesday, September 12, 2023

Peter Pan Collars and Pleated Skirts

Making myself another version of Simplicity 8736 was a wonderful idea.  I just love this blouse!

And I never knew that I needed a lavender skirt in my wardrobe . . . and yet I obviously did!

I wasn't entirely sure that I would love this skirt design, but I am now thinking that I should make myself another version in blue denim because it would be a great wardrobe builder and match a whole bunch of items in my closet.  So I guess I like it!

As for that waistband, the boning channels are helpful, but the front does develop horizontal wrinkles throughout the day.

This is probably unavoidable, and I don't think it would be as obvious in a darker colored fabric.  I guess I should just get over it, because other than that, it's the perfect easy to wear skirt.

I don't mind the front pleats, and I do think the cut-away pockets are fabulous.

And as for the blouse, it's wonderful.  The cotton is so soft and the design is easy to wear, and it doesn't get much better than that.  

I am not sure that I am completely finished with the pattern, although I will put it away for the moment.  But should the right fabric come along, I would probably make myself another one.  And I could always make one of the other versions to add some variety to my collection of Simplicity 8736 blouses.

But there are plenty of long sleeved blouse patterns to distract me for more Fall/Winter appropriate items should I feel the urge to make a blouse.

Because I always miss my window for Fall sewing, and I am going to try not to do that this year.  And I do have that linen fabric that I meant to make into a top of some kind, so I should probably get to that.

But then what shall I do with all of the warm weather dresses that I want to make this year?  There just aren't enough hours in the day . . .

Blouse:  Made by me, Simplicity 8736
Skirt:  Made by me, Vogue 9249
Shoes:  Marc Fisher "Chela Platform"
Earrings:  Etsy


Monday, September 4, 2023

Picnic Ready

When I found this fabric at an estate sale, I was immediately drawn to the print.  I normally avoid bright yellow, but the blue, yellow, and green florals were too fabulous to pass up.

Unfortunately, once I got it home and unfolded it, I realized that the fabric was only 12" wide.  I had more than 3 yards, but it was going to be a challenge to find something that would work with that extremely limited width.  My original thought was to make a 1960s style shift dress when I found the fabric, but that was obviously out.

And then I had a revelation.  I wanted to try out the Charm Patterns "Picnic Top" in order to use up some remaining yardage that I have leftover from making a skirt, but I wanted to make sure that I would like the pattern before cutting into that particular fabric.  And then I remembered that I had this print stashed away.

I actually managed to find it exactly where I thought that I had left it (that doesn't always happen with the amount of stashed yardage I have) and so it felt like it was meant to be.

Now, these days 36" wide fabric is considered quite narrow, and I only had 12" to work around. Plus, there were a few stains that were not lifting and I was hoping to avoid those sections altogether.

Turns out, that was all I needed!  I even managed to do a fairly good job matching that center back seam.  It wasn't going to be perfect with the cut section of printing that was remaining once I happened upon the yardage, but it's close enough to look intentional, which is all I could ask.

I found yellow buttons in a stash, and even though these were slightly wider than the pattern calls for, I decided to use them anyway since I have a rather limited choice when it comes to a lemony shade and I didn't want to purchase anything new for this project.

And since it had been a minute since I worked some bound buttonholes, I decided that I might as well add a few to the project.

I actually find the process relaxing.  Maybe not if I am in a hurry, but in a stable cotton like this, I would much rather trust a tried and true process than subject my finished garment to a machine buttonhole that I am always slightly suspicious of, even with my lovely vintage buttonholers.

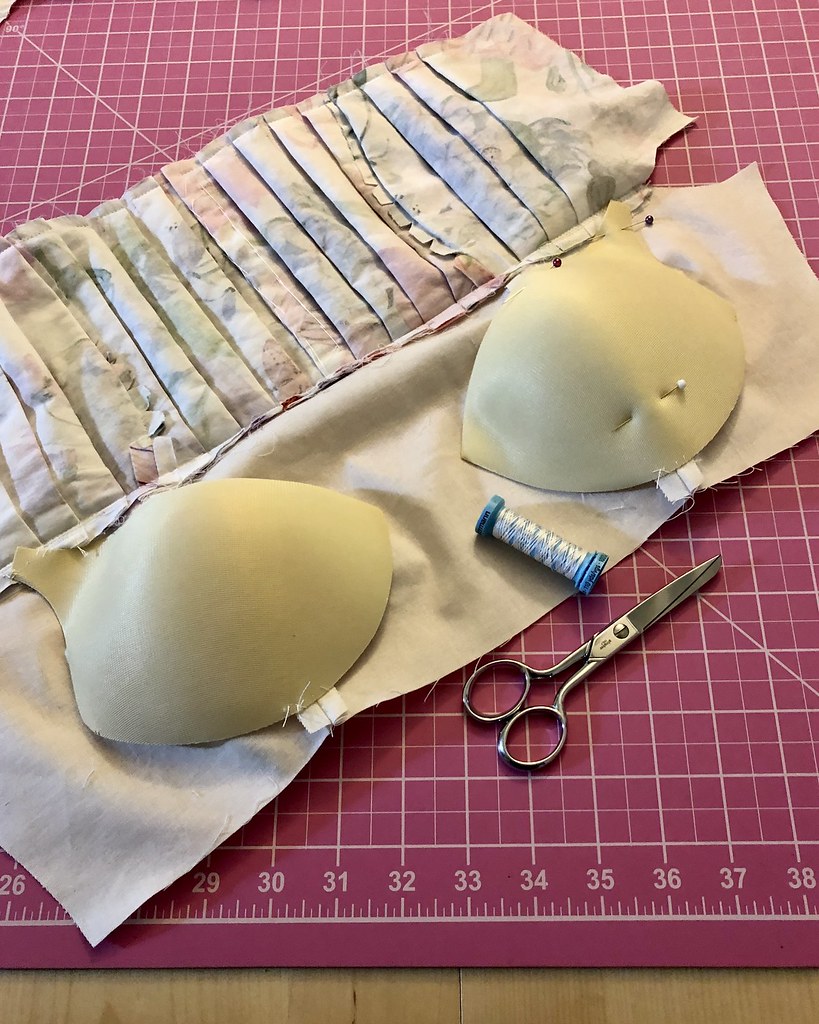
Since the background of this fabric is rather light, I had some slight misgivings that the extra square of fabric might show through, but I decided that if I avoided the print and cut out plain little squares, it would probably work out.

And this is going to be worn close to the body, not held up to a window full of sunlight, so a shadow of extra fabric is probably never that big of a deal.

I have shown this method here on the blog many times, and it's my favorite.

And the plain white fabric squares worked perfectly - the show through was not a problem.

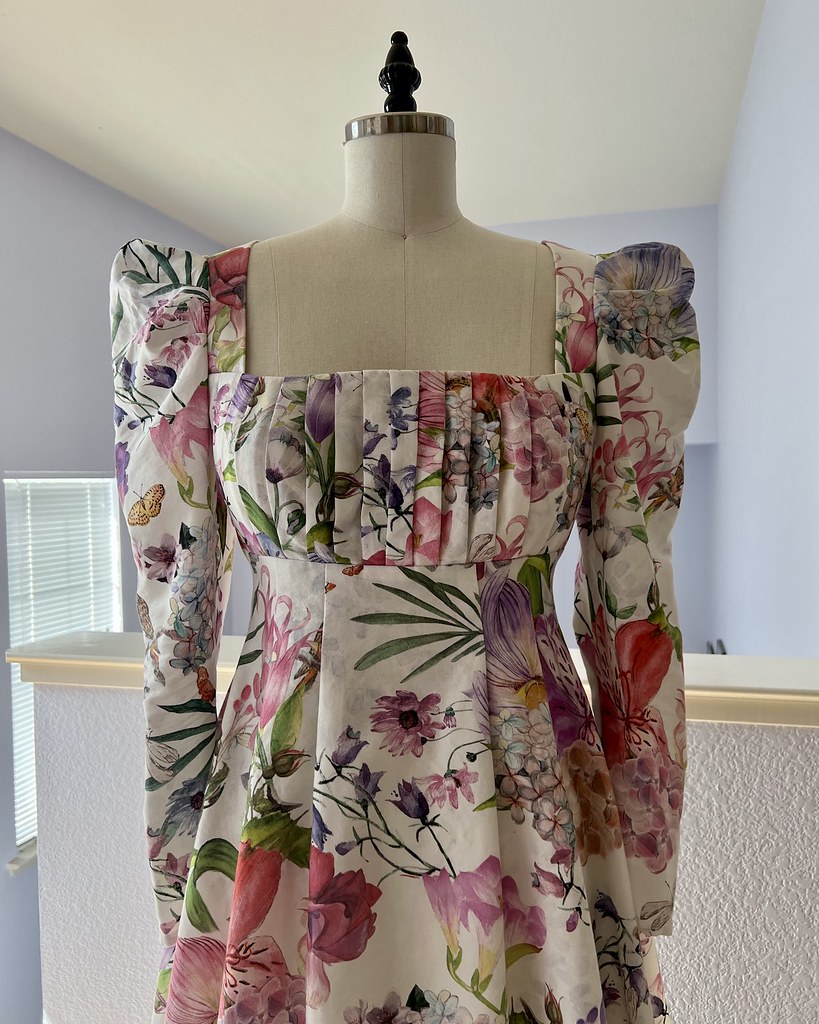
The main alteration that I wanted to make to the design was the sleeves.  As drafted, the high cap sleeve cuts my arm at it's widest point and I don't find it very flattering.

My first thought was to substitute a puffed sleeve (I've been making a lot of those lately), but my fabric limitations weren't going to allow for that.

My initial addition of fabric at the bottom of the sleeve was a little too much, though.  I pinned it in place and tried on the top and it felt quite restrictive.  Now granted, it was ridiculously hot up in the sewing room that day and I was feeling rather grumpy which could account for part of my discomfort, but I still thought it best to shorten my altered sleeve just slightly.

The slightly longer sleeve did not affect the construction method recommended by the pattern instructions, so I went ahead and followed them.

This creates a fully lined garment.  It's not my usual method, but it works nicely with a cap sleeve like this.

This project was a real pleasure.  I just love when a fabric behaves so nicely, and bonus points that the print is so cheery.

I was unable to match the center front seamline at all because of my limited yardage which slightly bums me out.  On the other hand, I found a use for 12" wide fabric, so I call that a win!

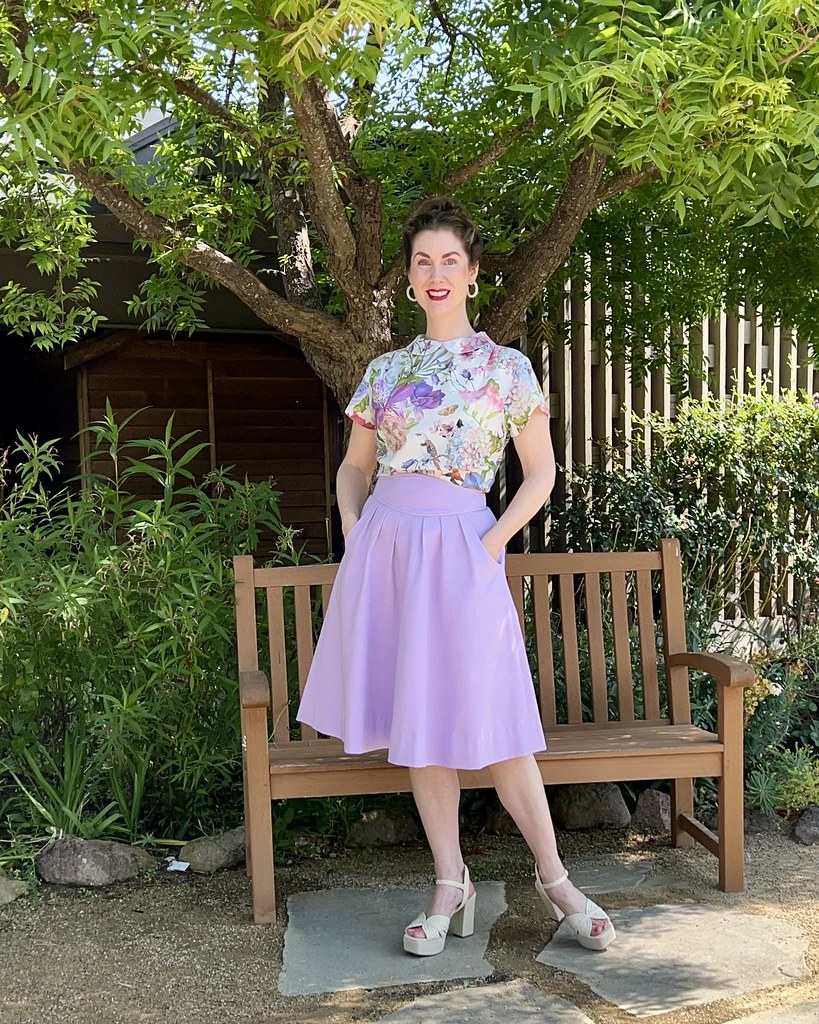
And now I have an idea of how the pattern fits and if I would like to make any additional changes before cutting into my fabric remnant that will match this skirt.

And I have a cute garment to wear in the meantime.

So while the extra time spent on things like bound buttonholes may seem silly for a wearable muslin, there is always a chance that the practice garment may turn out even better than expected, so why not make an effort on the details?!

And that's the story of this little project.

The oversized buttons turned out fine, although this version is probably a bit tighter than the pattern sizing originally intended because of the change.

But this will definitely be a great option for wearing during the Summer months.

And it feels like the pattern was meant for this particular patterns seeing that I can't think of another that would have worked with this vintage textile remnant.

And that makes me very happy!  Sometimes things are just meant to be.