Thursday, December 31, 2015

And now for something completely different . . .


So this was fun!


And surprisingly enough, I really like wearing this dress.  Is it the most flattering garment in my closet?  Probably not.  Will I be abandoning all of my dresses with fitted waists?  No way. 


And I have to admit that it feels bizarre to have a bunch of loose fabric around my waist, but the experience was not unpleasant.  It was actually quite fun to make and wear something so far out of my comfort zone.


The pleats are what initially drew me to the pattern, and they are, without a doubt, my favorite design element.


I did add 3/4" to the torso length so this slightly longer than the original, but if it was much longer, I think the dress would be quite difficult to wear.


The pegged hem also helps to keep the shape interesting.


So will I make another?  I am probably finished with this particular pattern, but I am definitely going to take a second look at garments with little to no waist definition.  And I would call that a successful experiment!


Dress:  Made by me, BurdaStyle 109b

Tuesday, December 29, 2015

A Flattering Line


Lately, I find myself drawn more and more to these odd sack-like silhouettes from the 1950s and 60s.


But as excited as I am about this pattern, I had serious misgivings that I would love the finished dress.  After all, how many hours of my time do I want to spend working away on something that I am not going to like in the end?  Then again, how am I going to know if I like the look until I finish the darn thing.


Do you have to be shaped like Audrey Hepburn to pull this off?  Some of these dresses are so shapeless, I am beginning to think that a waif-like frame is not required.


But I still feel as though this sort of silhouette is going to look best on someone six feet tall and very thin.


Is this Balenciaga frock inspired by a Miró painting flattering to the female form?  Probably not . . . but it sure is stunning.  And if the garment does not even attempt to flatter the body does that, in fact, make it easier to wear?


It seems like all you really need to wear a sack dress is some confidence.


Should clothing styles be flattering?  And what the heck defines something as flattering?  What do you think?  


[Click on image for source]

Monday, December 21, 2015

Back in the Sewing Room


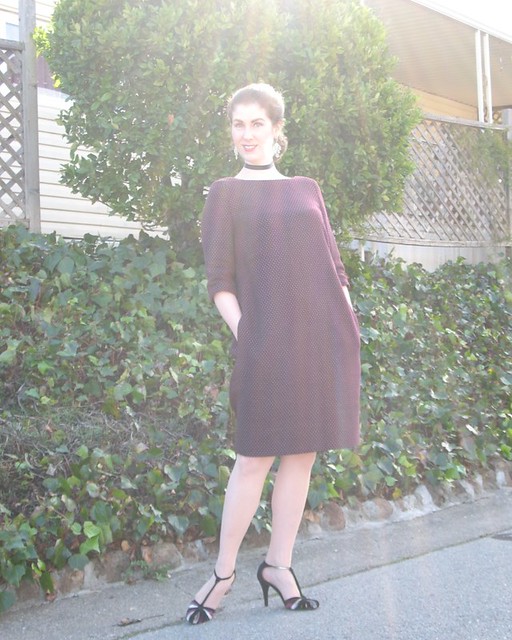
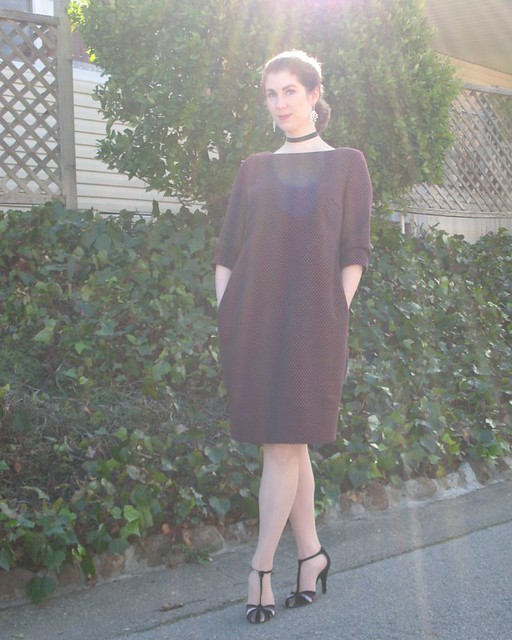
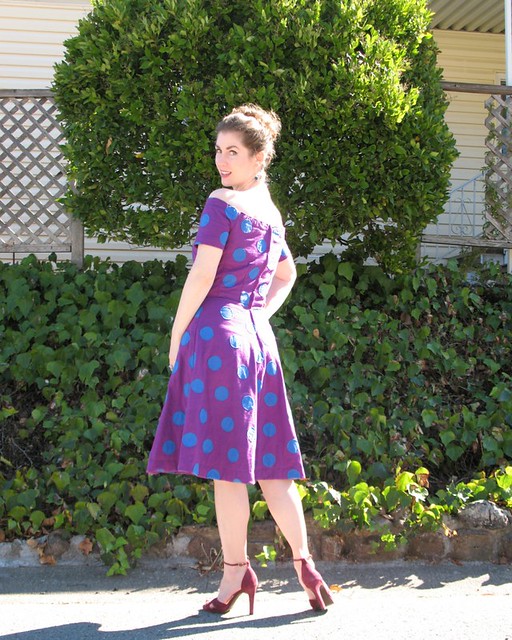
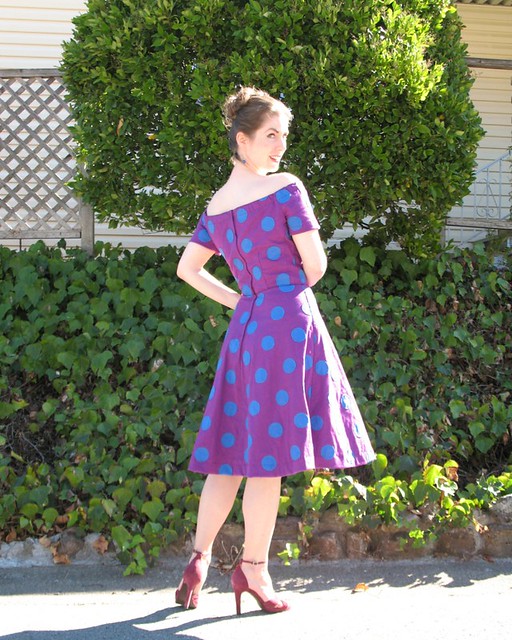
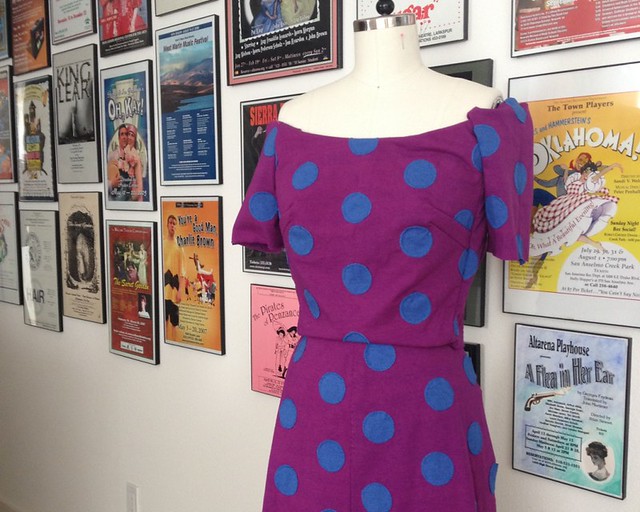
I decided to try something a bit different for my latest sewing project.  I noticed 
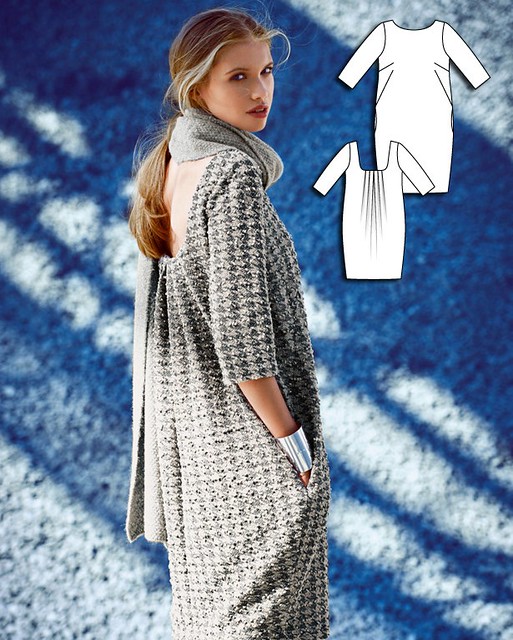
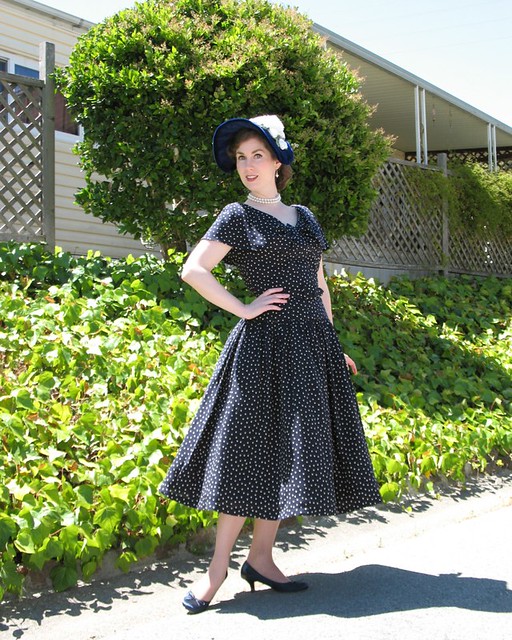
this pattern on Burda's website a few weeks back - not something I would normally be drawn to, but the design stuck in my mind for days.


The problem was, I could not find the pattern on the site when I went to purchase the pattern.   I searched "pleated back dress" to no avail.


Well, silly me, this is a “Gathered Back Dress.”


Say what?!  
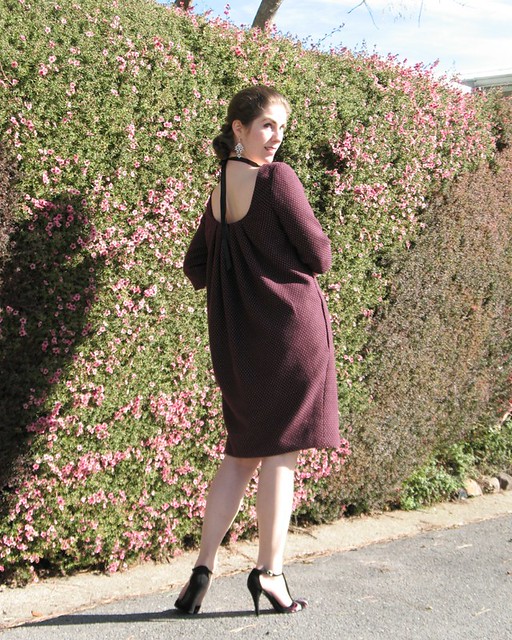
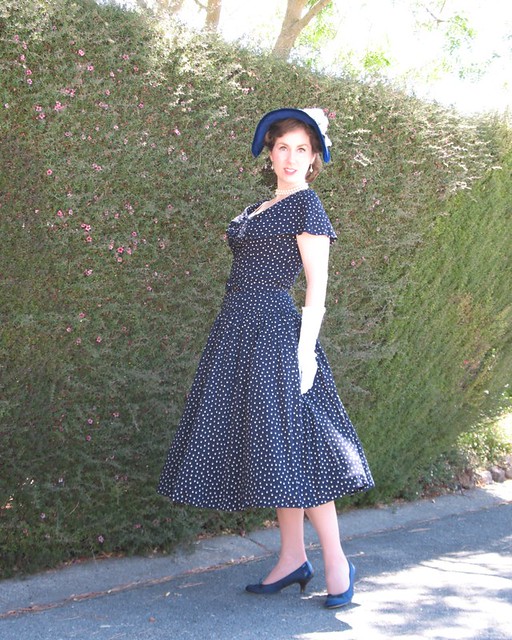
Is this some weird translation issue?  Because there is no gathering in this entire garment.  Well, I suppose I used an ease stitch to set my sleeve in place . . . but other than than, no gathering whatsoever.  I think they need some help naming their patterns over at BurdaStyle!


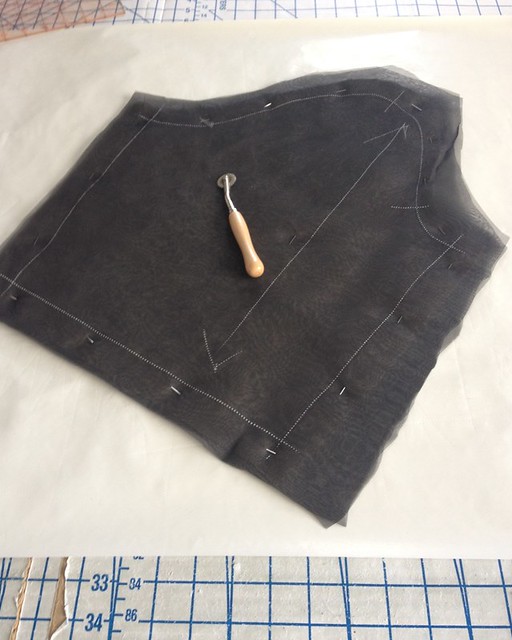
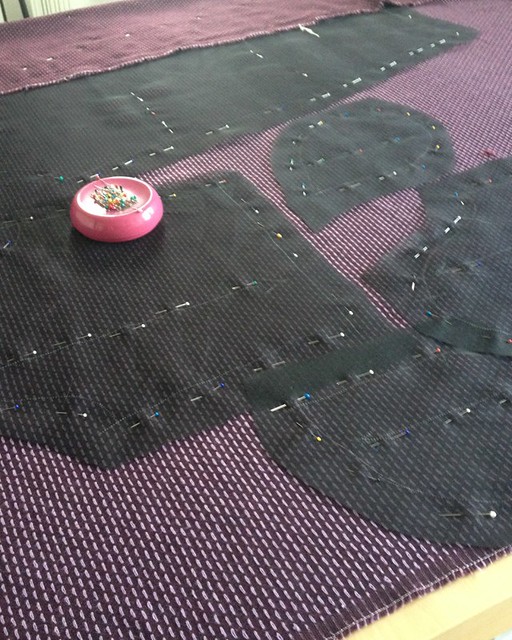
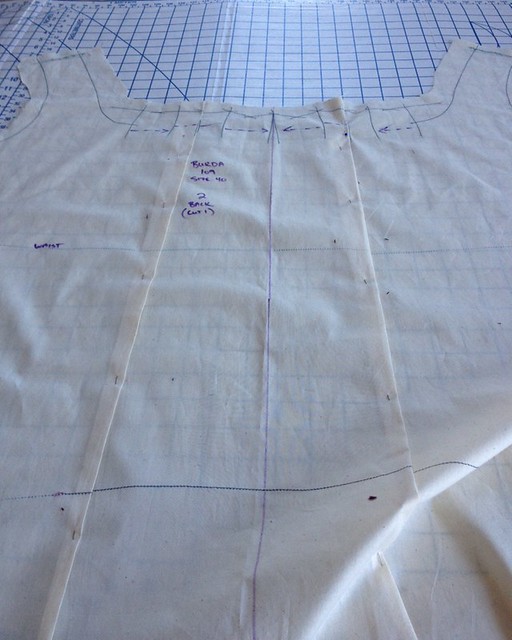
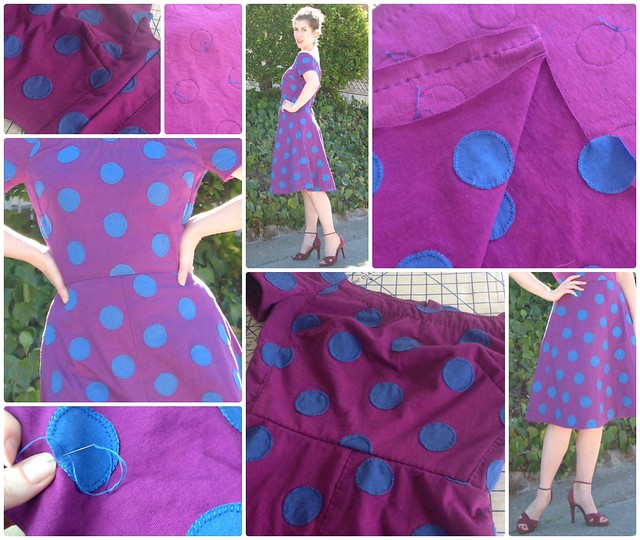
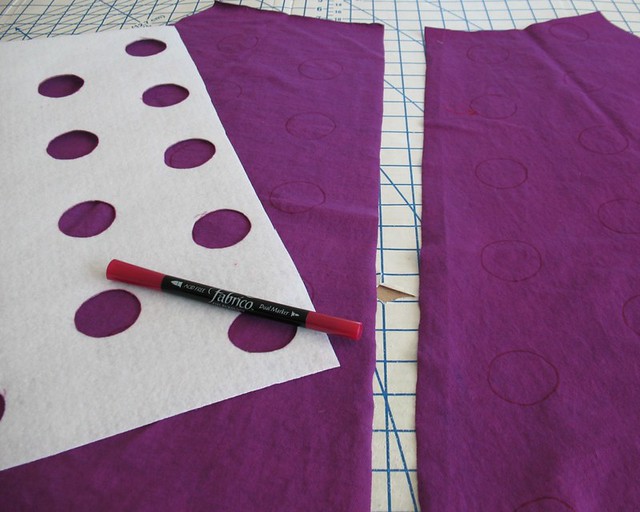
For my underlining, I used black organza.  Because of the dark wool fabric, I thought it might be easier to see white chalk lines when the two were layered together.  It worked great!


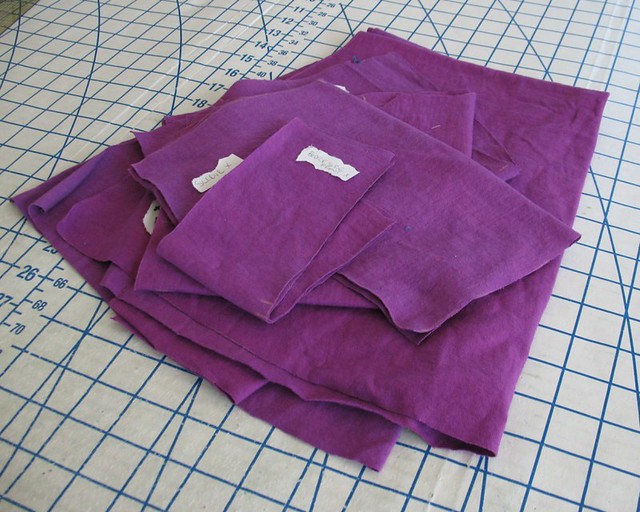
Next came a lot of hand basting.


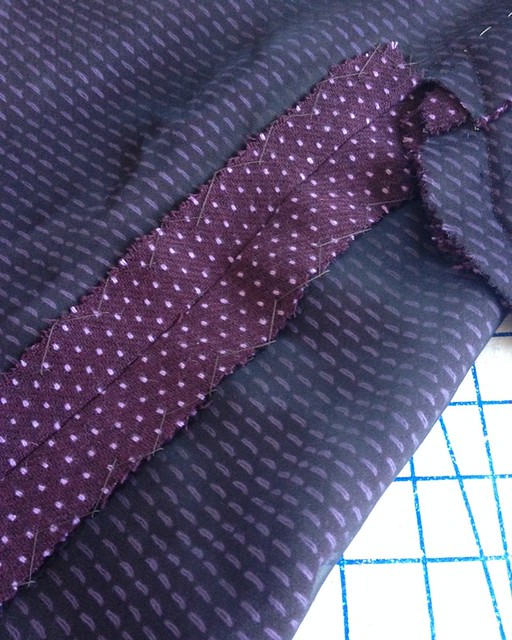
I have had some back luck with printed designs being slightly off grain, so this woven pattern was a nice change.  It is really nice having a constant reminder of the grainline built right into the fabric!


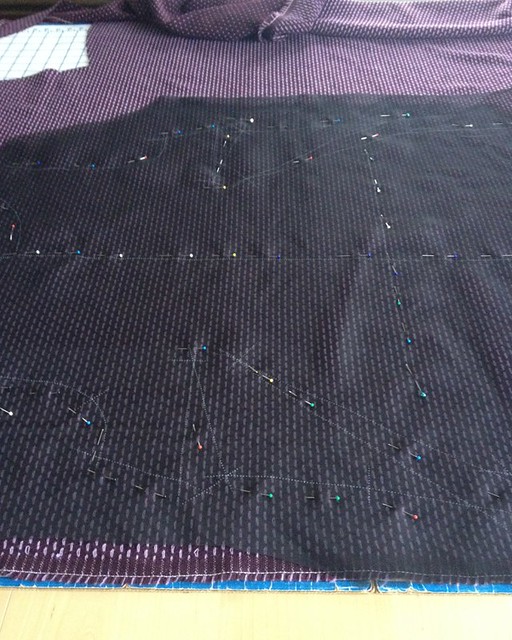
Having worked with a similar fabric for this project, I can say that the underlining was useful for more than just marking my stitching lines.  The back of the wool is easily pulled by my standard presser foot when two layers of fabric are run through the machine.  With the organza covering the loose threads, that problem was resolved.


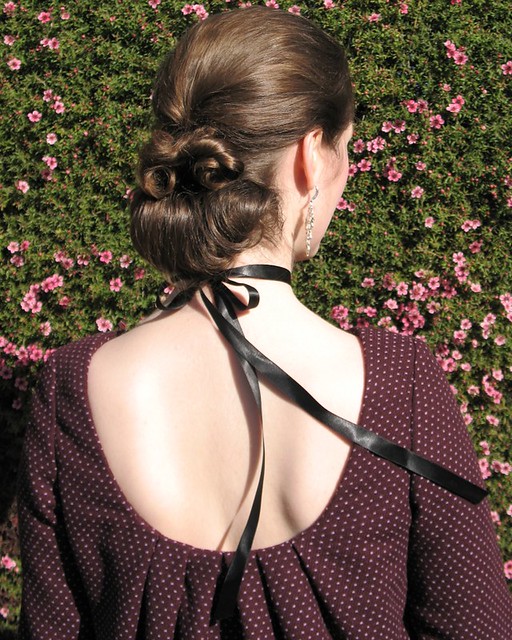
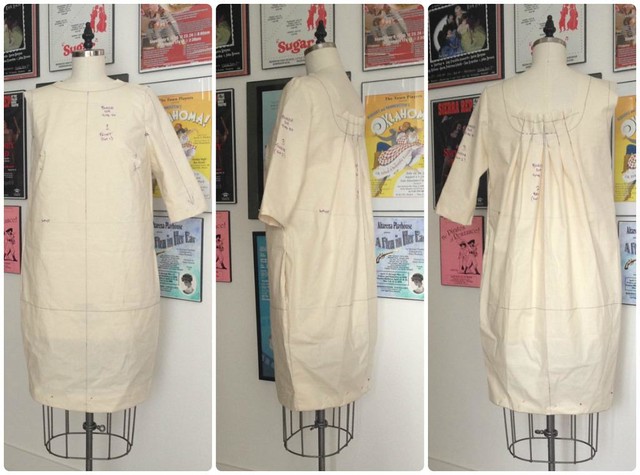
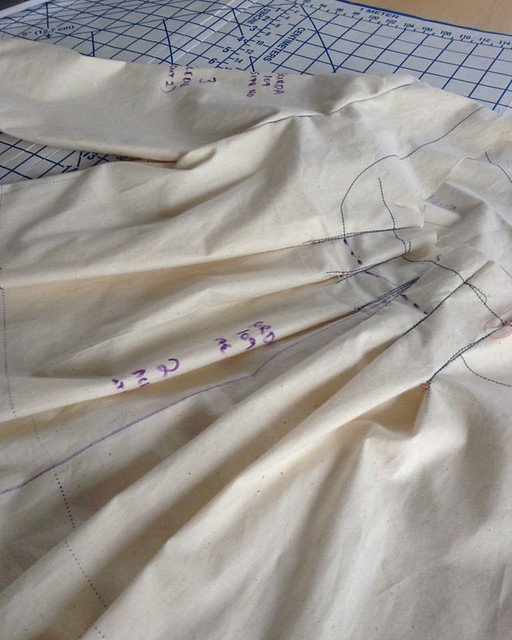
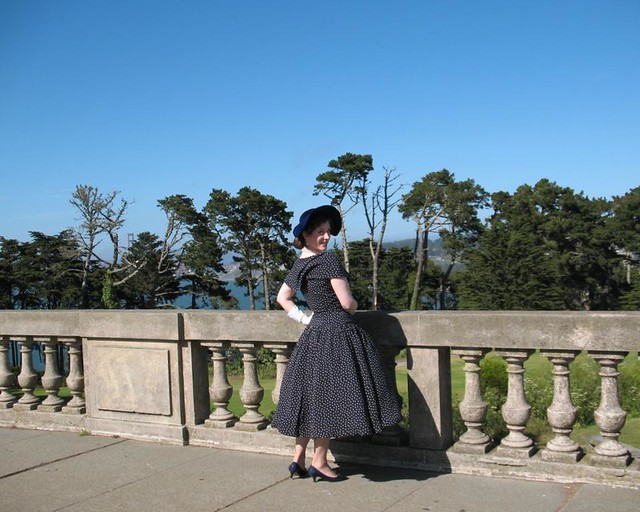
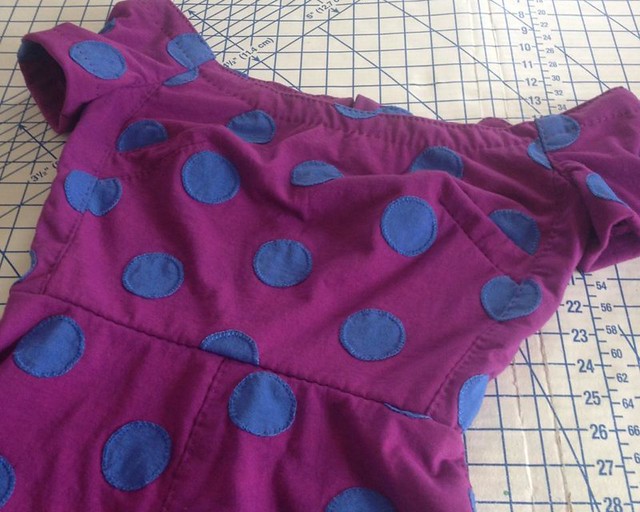
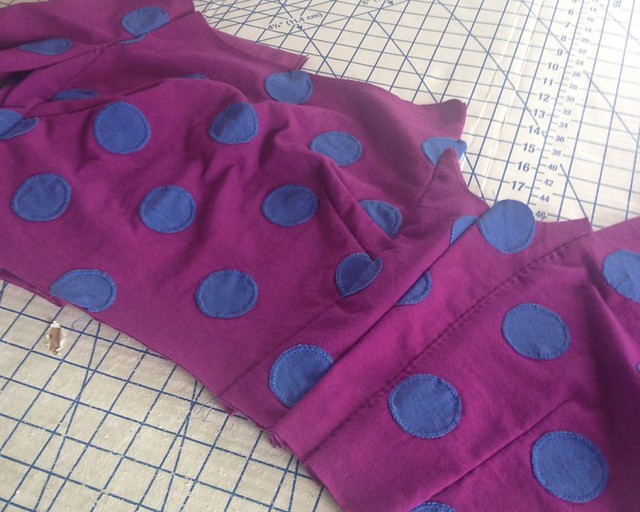
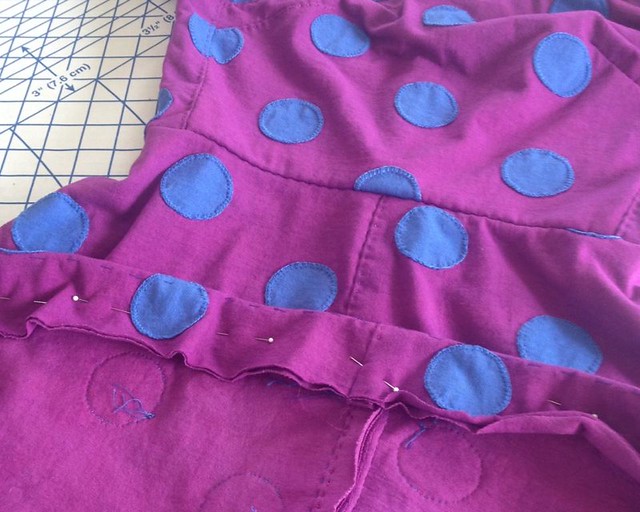
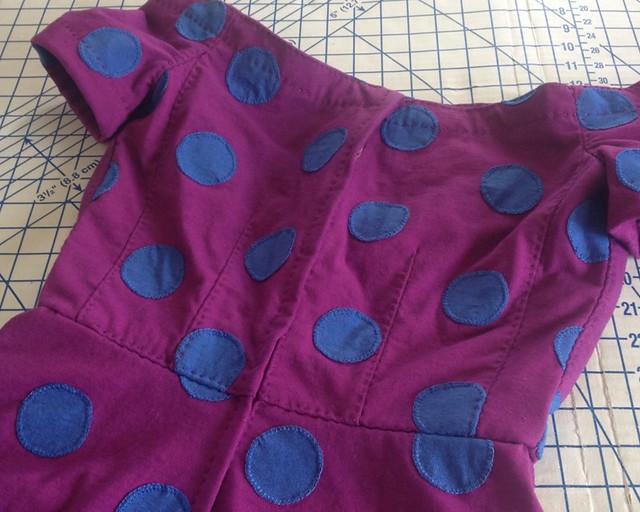
The only real construction challenge was what to do about those pleats.  The arrows on the pattern suggest that they be folded toward center back.  This is not possible with the way the two center pleats are drafted, so I looked at the online version (the directions are no help).  Turns out, they should be folded towards the side seam – which works so much better!


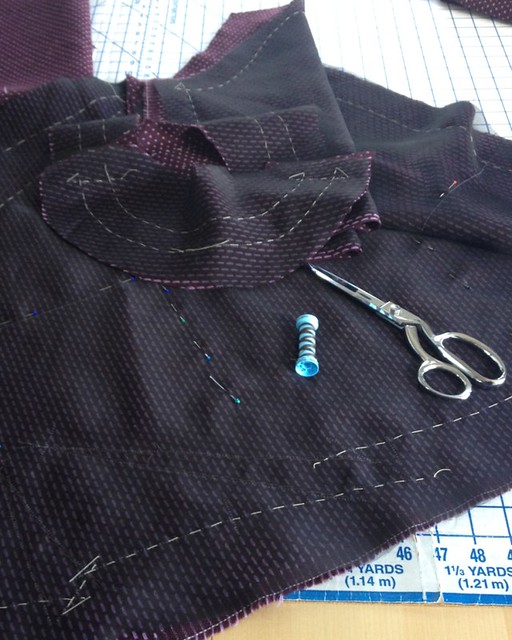
I debated removing the pockets because this dress is rather sack-like, and I did not want added bulk in the front half of the dress.


But since I was catch-stitching seam allowances in place, I figured I could just as easily catch-stitch the pockets to stay nice and flat.


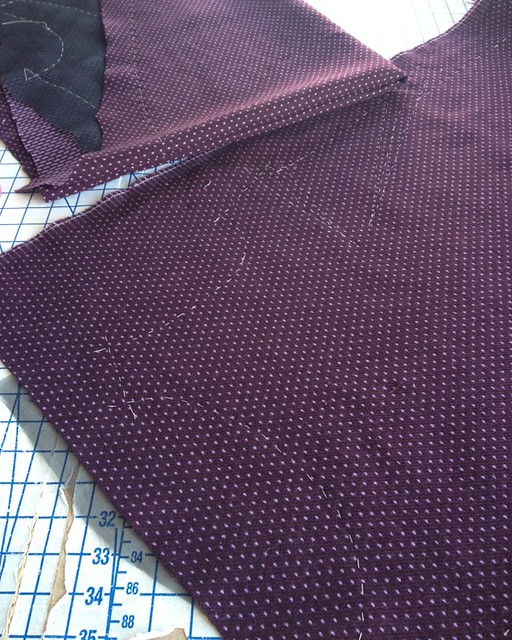
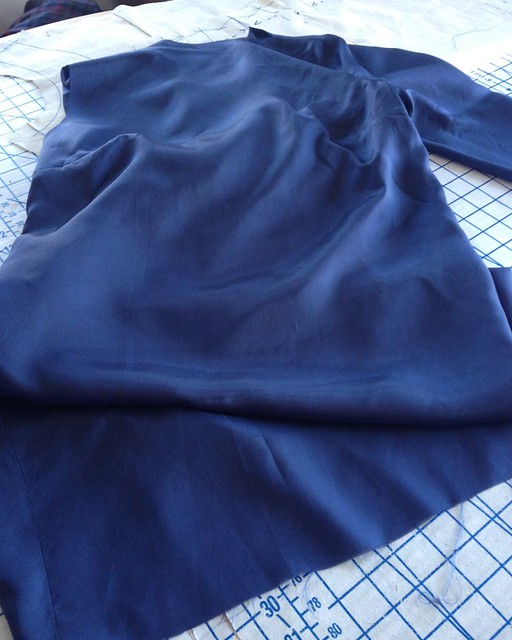
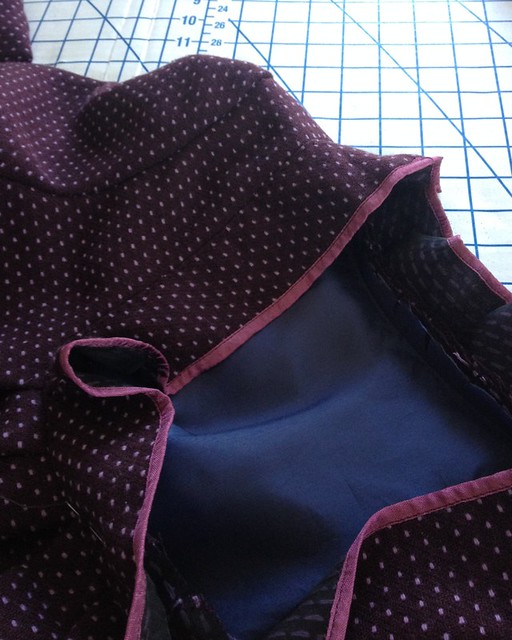
Although not called for in the directions, I added a lining.  Two of the pleats were removed by folding out the excess ease at the neckline, being careful to leave enough room through the hips as the silhouette narrows.


I suppose I could have redrafted the top to remove those pleats completely, but the bemberg rayon is lightweight, so any added bulk is really not that much of an issue.


I added some width to the neck facing and finished the raw edge with rayon seam binding.


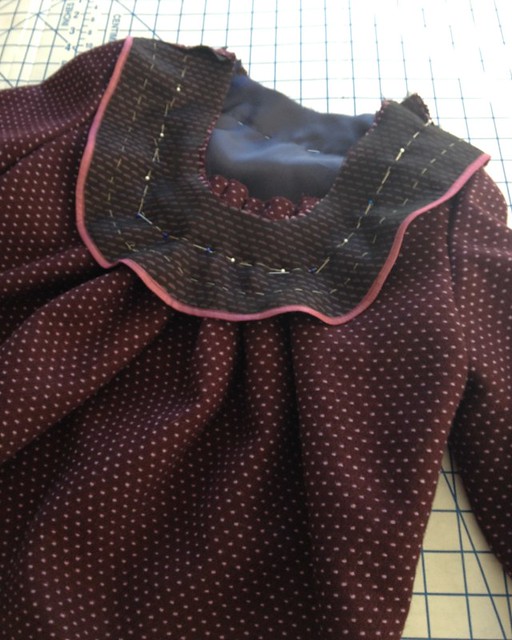
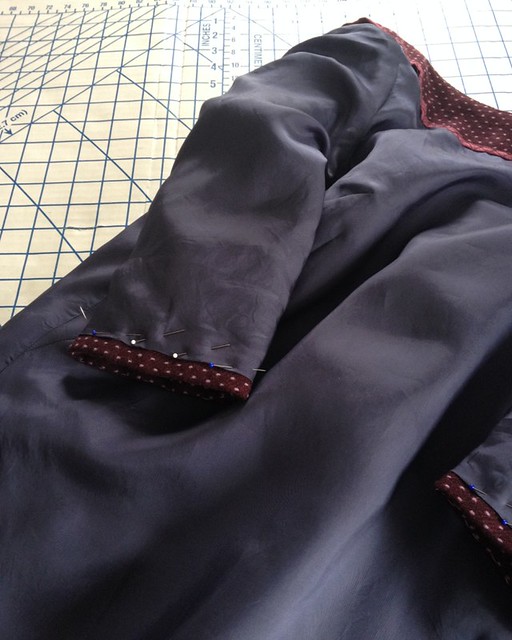
The facing was under-stitched by hand, and the sleeve lining stitched into place.


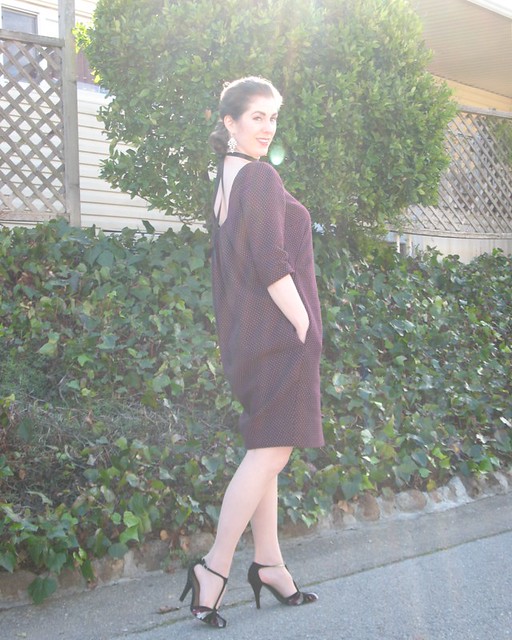
And because of the extreme pegged hem, I made a facing for the skirt hem.


The only thing left to do is to make a couple of thread chains to anchor the lining to the hem facing and check for any stray basting threads!

Monday, December 7, 2015

The Velvet Hat


This summer, I knew I would be attending the High Style exhibit at the Legion of Honor.


I have been meaning to make a version of Vogue 8276 for years, and this was just the push I needed.  Of course, I was temped to make a whole new outfit for the occasion, but that is just silly when I have so many dresses that deserve a day out.


In June of 2014 I managed to finish this dress for a symphony event, but there was just not enough time to make a hat.  So the pattern was put away . . . again.


Without a specific event, it seemed silly to make such a head covering.  (This style of hat is a little too much for a day at work, even for me!)  


It is perfect, however, for an afternoon at a museum.


Although, a windy day in San Francisco does make for an interesting hat wearing experience!


Dress:  Made by me, McCall 9245
Hat:  Made by me, Vogue 8276
Necklace, Earrings, & Bracelet:  Made by me
Gloves:  Vintage
Shoes:  Franco Sarto

Monday, November 23, 2015

Connect the Dots


There has not been much in the way of sewing happening around these parts.  I seem to have lost all my creative motivation.


But I did manage to get through the photos of this dress.  


The weather has started to turn cold which means this dress will get stashed away in the closet for a few months.  But it will definitely see some wear next year - these Alabama Chanin style clothes really are extremely comfortable!


And as to what my next project will be . . . I have absolutely no idea.


I have been meaning to make myself a new coat for the last couple of years, but never manage to get to it while the garment would be weather appropriate.  And working with heavy wool in the Spring just feels wrong.


A hand sewing project actually sounds rather appealing, but I think I want to take a bit of a break from cotton jersey.  Hopefully a few days of vacation will get me back in the sewing room.


Dress:  Made by me, Butterick 6129
Shoes:  Banana Republic

Tuesday, November 10, 2015

A Portable Project


It was only a matter of time before I jumped head first into another Alabama Chanin project.


First up was a dye job.  This time around, I had a slightly streaky outcome using Dharma’s Fiber Reactive Dye.  I cannot explain what I did wrong, except perhaps I was trying to squeeze too much yardage in my kitchen sink?  Because I was not happy with the color, I cut the yardage in two and sent one half back in the dye bath.  I actually like the darker color better, so all is well!


The polka dot stencils from the Alabama Chanin website were not quite right (mostly because I was paranoid that my periwinkle leftovers from this top would not be enough to cut the number of appliqué pieces needed).  In the end, I just drew a grid and traced my own dots to create my own stencil.


Since I love this dress so much, I thought it would be worth it to make another version.  The skirt pleats seemed like a bad idea with double and triple layers of cotton jersey, so I swapped it for Sewaholic’s Hollyburn Skirt.


A running stitch did not seem like the best option for the appliqué.  Instead, I pulled out some scraps and re-familiarized myself with how to work a blanket stitch.  I am hoping it will also keep the fraying at a minimum.  


Because I knew that I was going to travel with this project, I tried basting my polka dots in place on a couple of pieces.  This did not work well at all.  The jersey started to curl at the edges, and the hasty basting started falling out when I handled and stitched things together.


What ended up working best was pinning as I went.


And although I did not get as much sewing done on my trip as I hoped, it was certainly nice to be able to work on something without needing a machine!


The many layers of jersey was challenging at times, and my fingers are still recovering, but I sure do love me some hand sewing!


I did manage to ruin three needles on this project.  Top-stitching those seamlines required the use of jewelry pliers, and my tiny needles were not up to the task.  But sacrifices must be made!


I would like to say that these projects have made me less fearful of knits, but I was just in the fabric store today and those super stretchy fabrics still make me very nervous.


Until I get over myself, I suppose 100% cotton jersey is a nice substitute without the crazy stretch.


Except for the finishing . . . look at those raw edges . . . the Hug Snug is getting pretty jealous of all the time I am spending with this knit fabric!


But this process is pretty addictive, and I have a feeling there will be more of these projects in the future.