Wednesday, November 25, 2020

Button Up

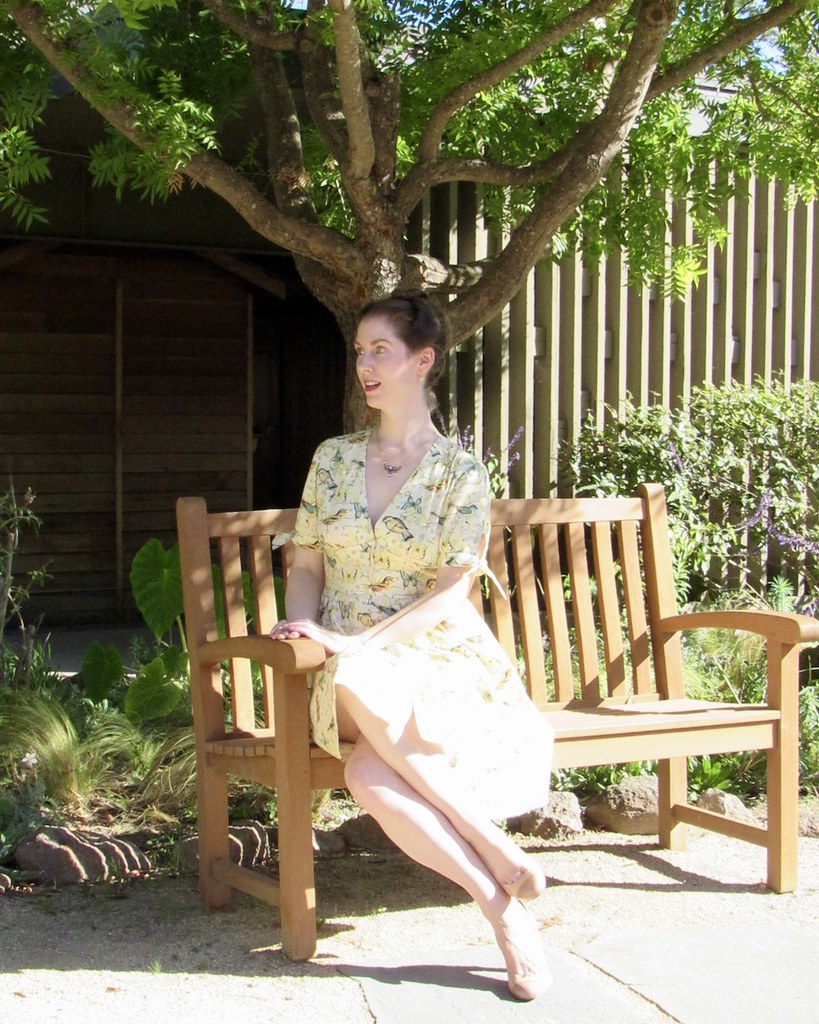
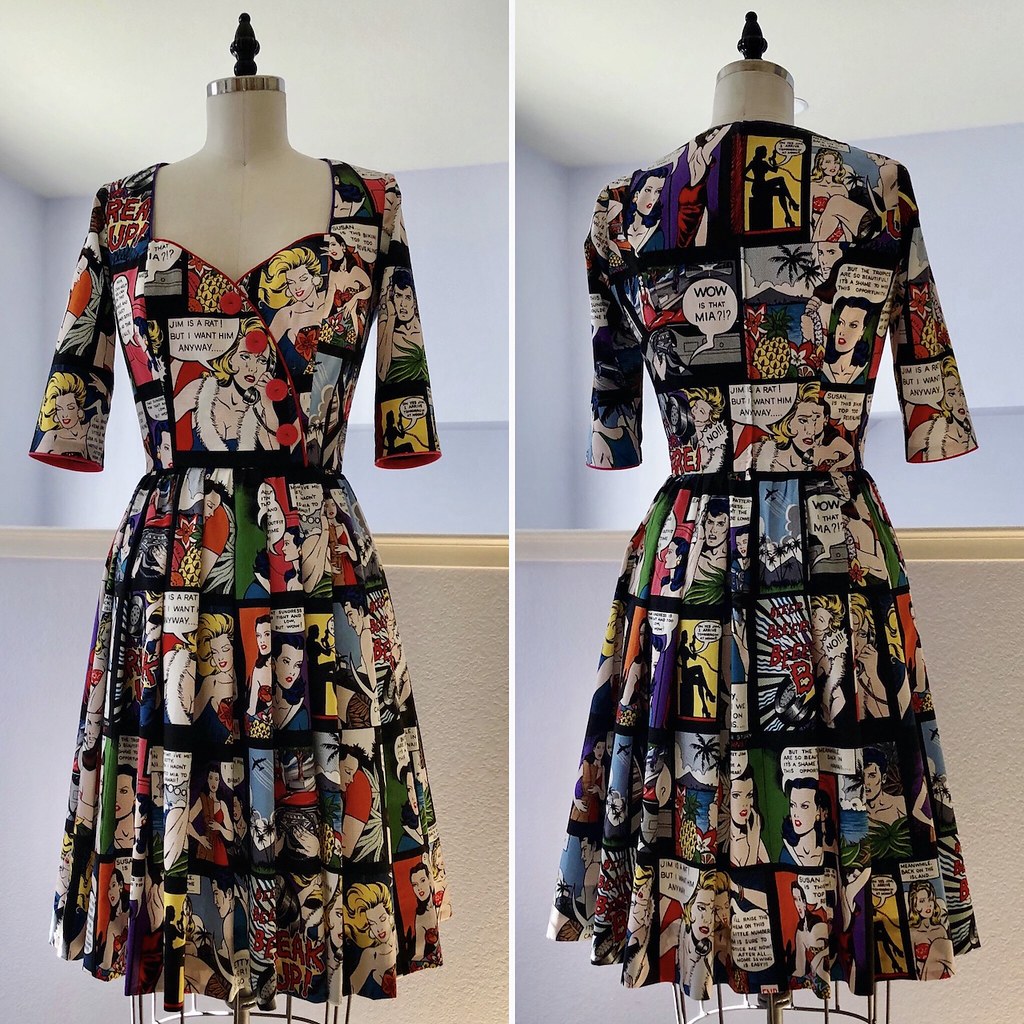
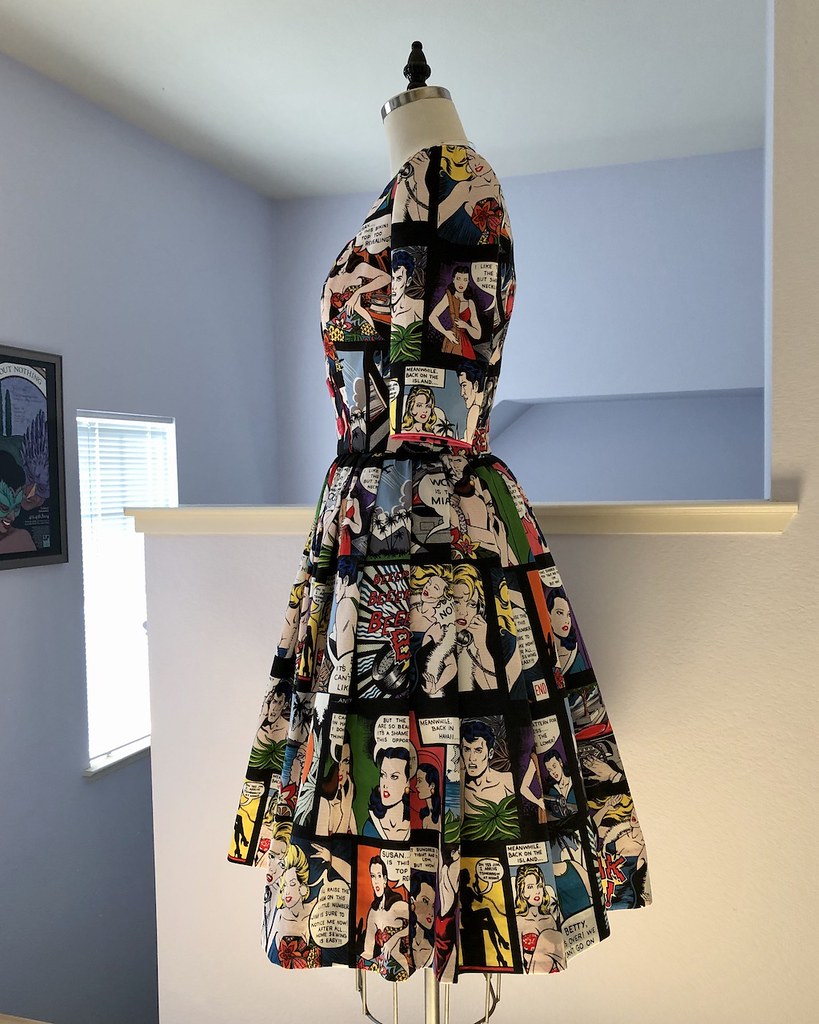
I normally post progress shots before the finished photos of a garment, so this post is overdue, but I had a few things to say about this pattern, so here we go.

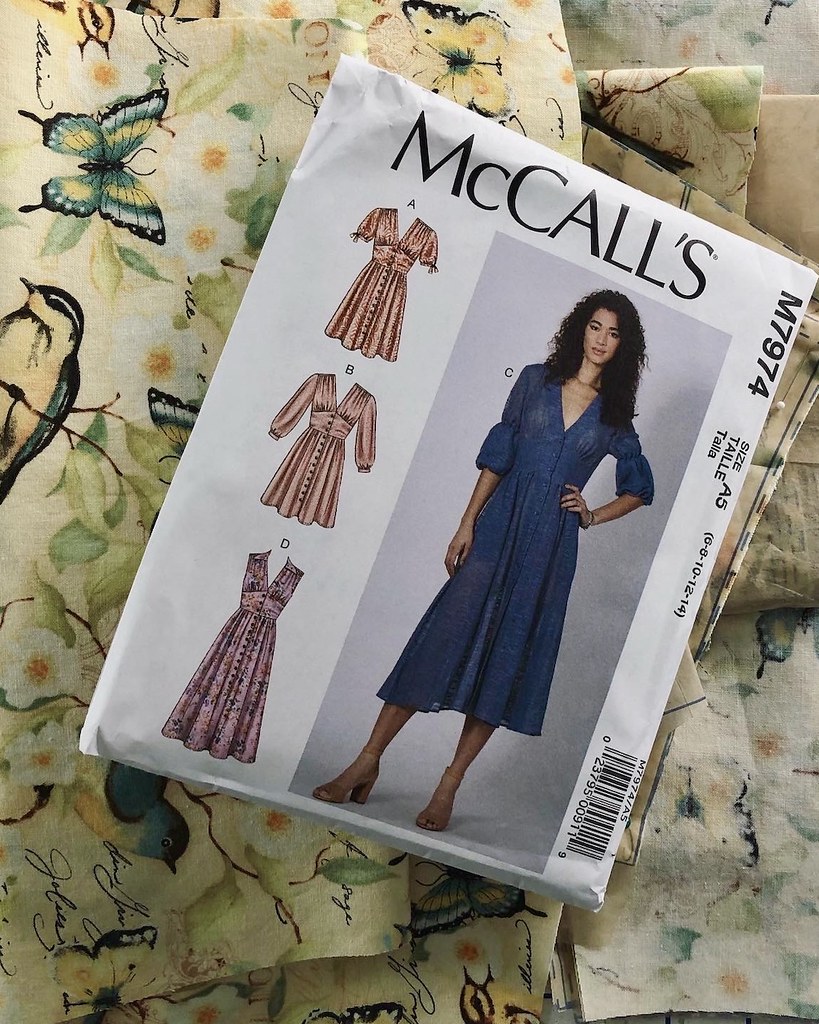
You have probably seen this pattern floating around the internet; it has been wildly popular this year.  The style lines mimic a couple of designer dresses, which may account for some of the popularity.  And while I do love fashion, I could really care less about what is "current."  I like what I like, and if it is outdated by a few years, or by 50, I will wear what I want.  I also have gotten pretty good about reading the differences between pattern envelope photos and the technical drawings that are included with pattern art.  And I knew that I was going to like this dress right from the start!

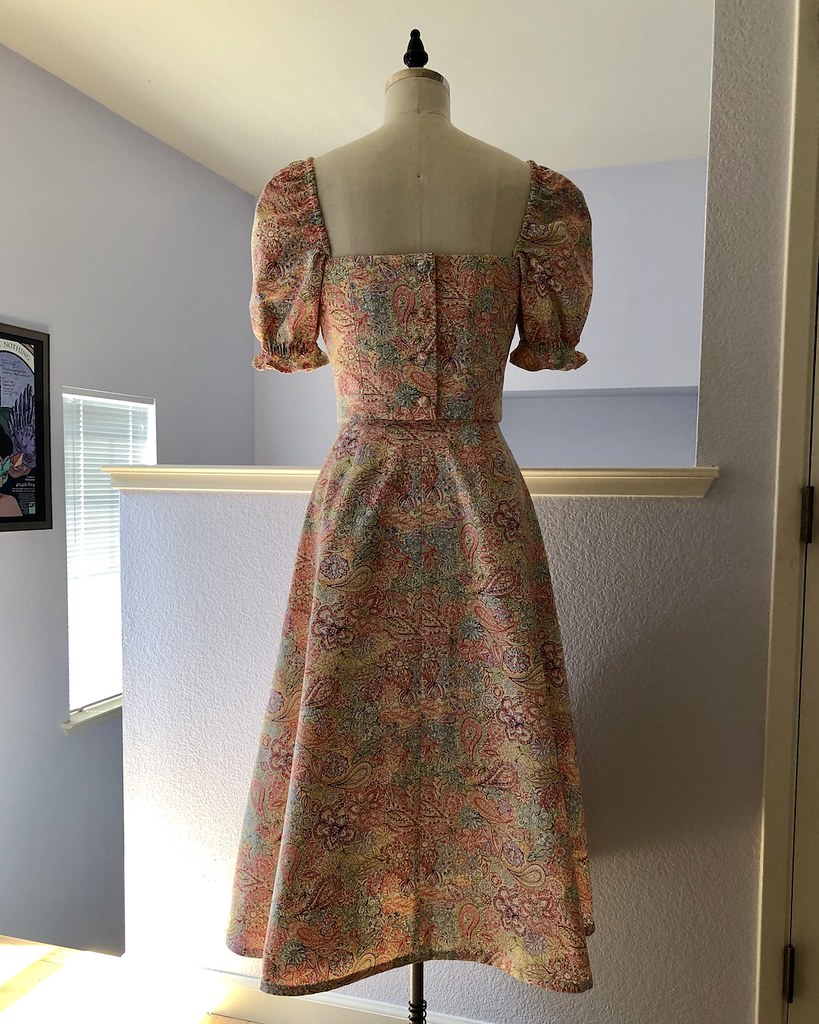
This dress is a fabric hog, for what it is.  I was working with less yardage than is suggested for View A.  This is generally not an issue, however, I was a little surprised with the length of the skirt.  I would have like it to be just a skosh longer and have a little more hem width to play with, but sometimes you just have to make do!

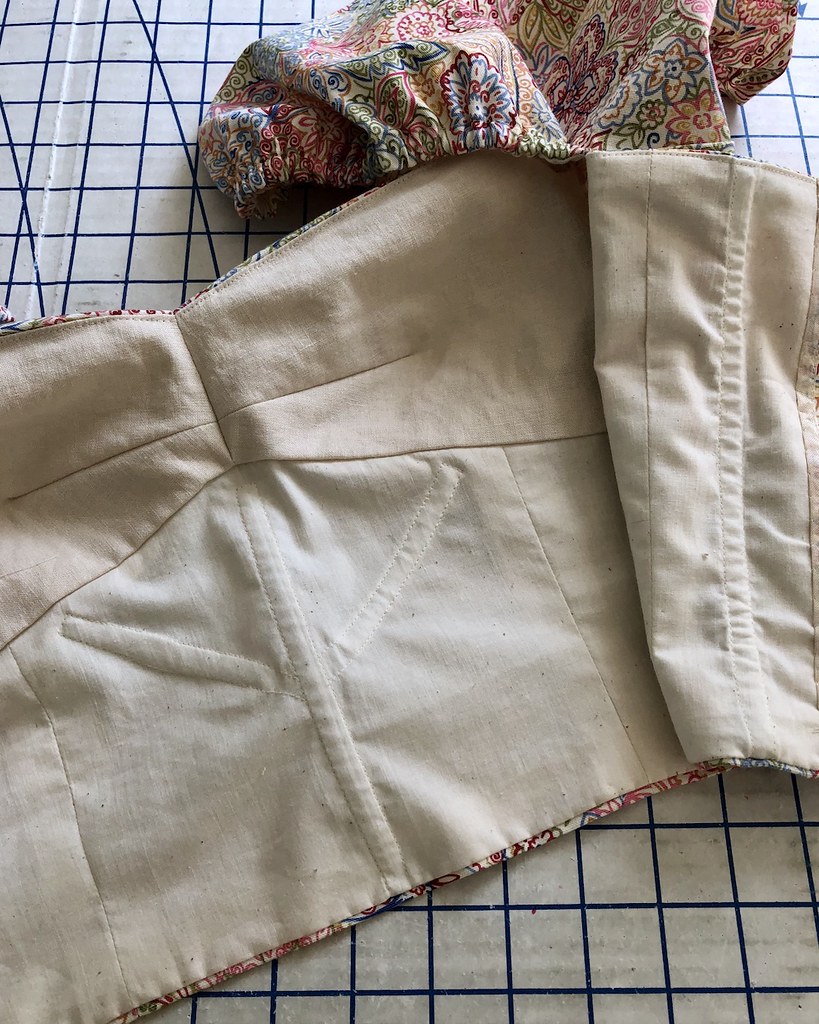
If I had more yardage, I would have cut the skirt panels a little differently to change print placement, but honestly, when the dress is worn, I don't think the repeats are that obvious.  I did have to cut the yoke facing out of a cotton remnant that I had saved from another project.  All in all, I think I did quite well with my limited yardage.

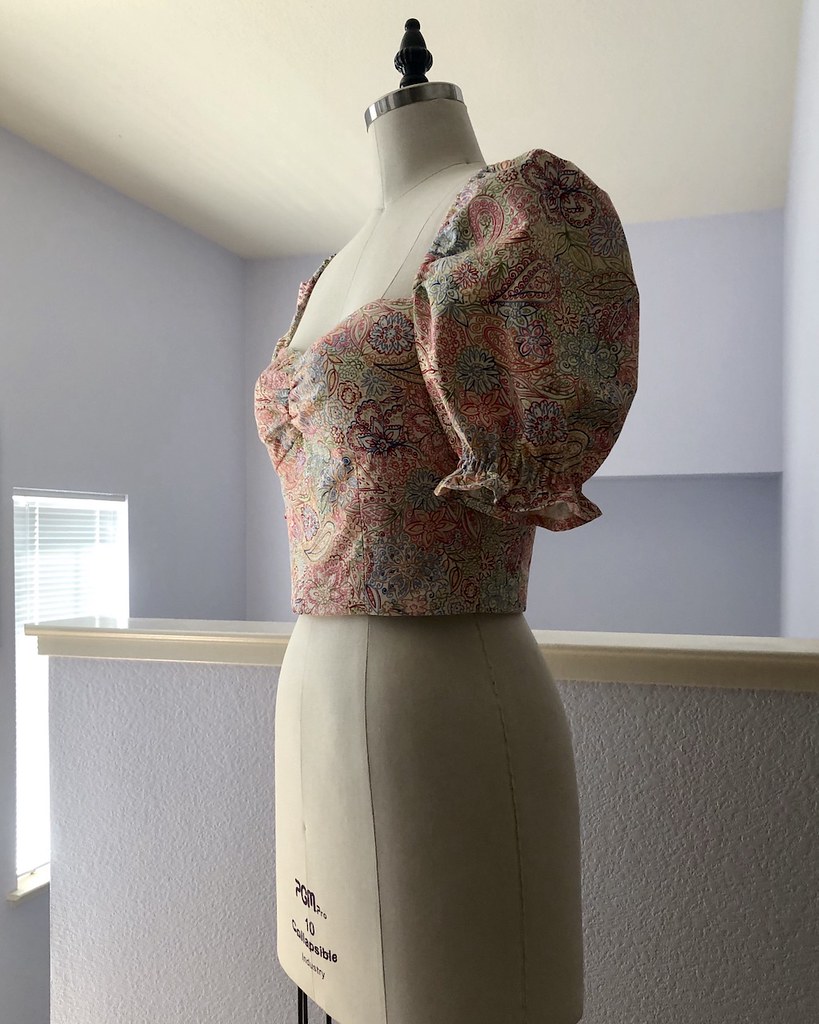
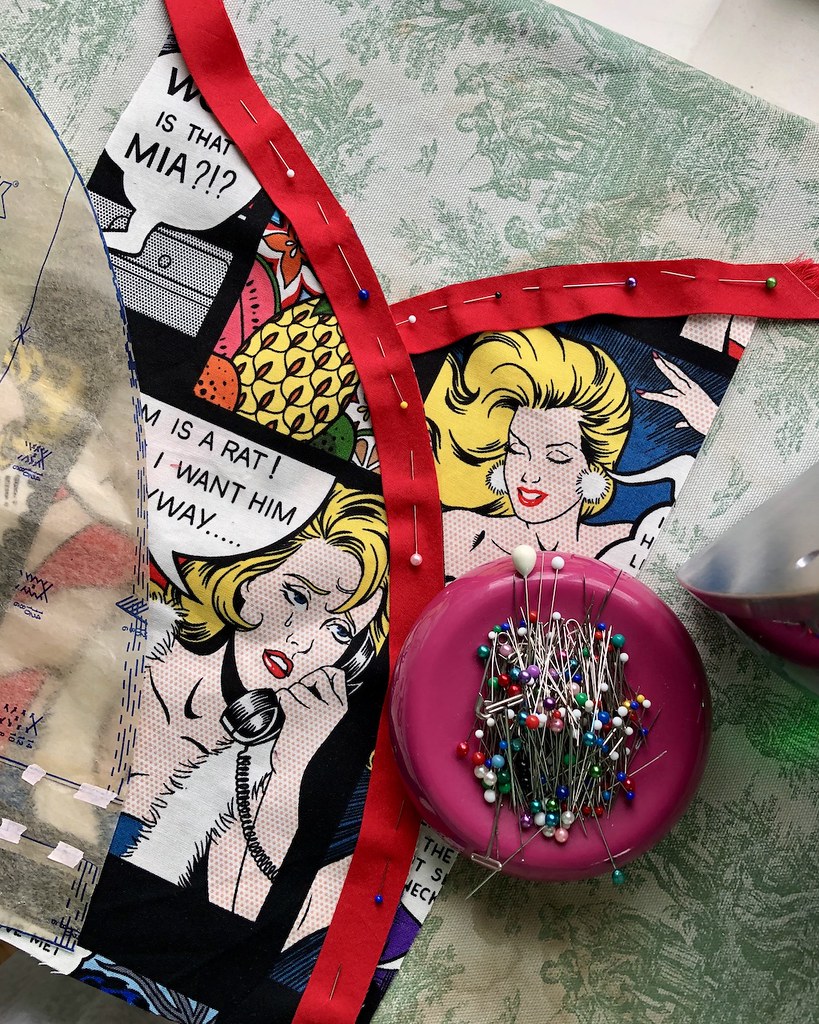
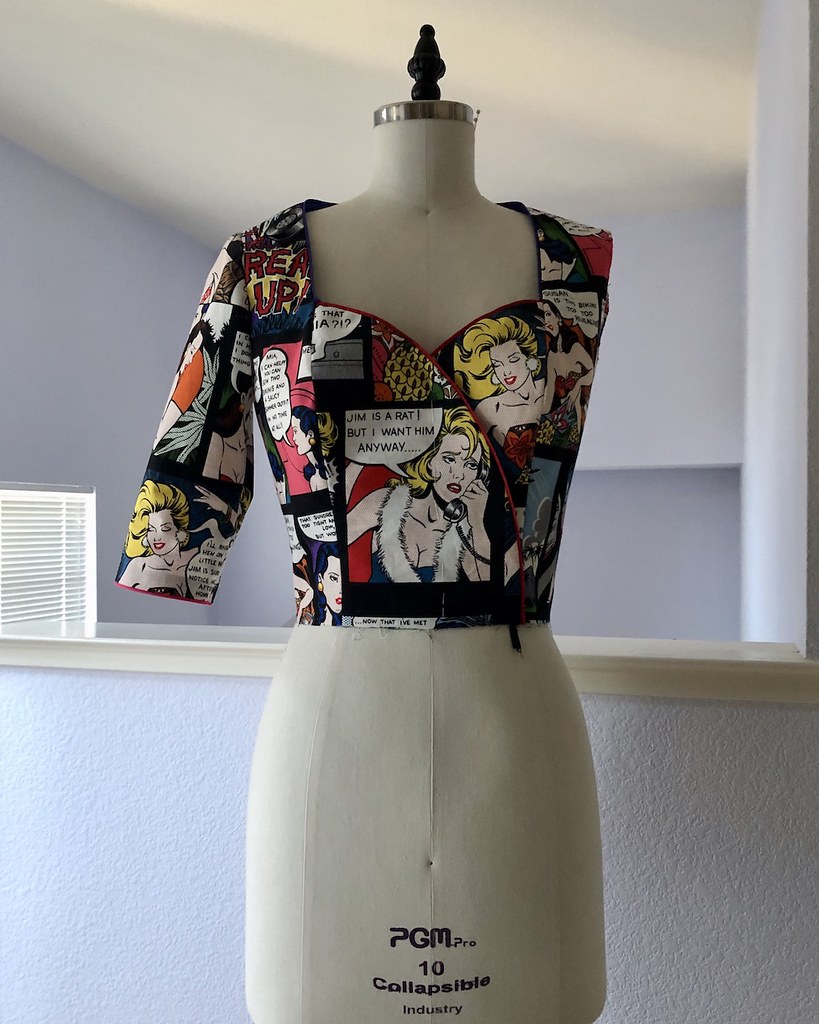
Some of the order of construction is not what I would have chosen, but I went ahead and followed the instructions.  My main gripe was not with order of construction, though, it is with that little keyhole opening on the sleeve.  Of course, I didn't get great photos (maybe because I was slightly ashamed of not taming the bias tape beast), but I think there is an inherent flaw with the directions.

You can tell in the above photo that the opening sticks out at the top curve.  This is due to the fact that even bias fabric can't make a tight curve like that unless you are binding the edge (which is not the case here).  I pre-curved the bias piece of fabric, I clipped right to the edges, and even with a compliant cotton, I could not make that curve lay flat.  Next time around I would make a very narrow facing; I think that's the only way that curve is going to lay flat.

And then we come to the buttons and buttonholes.  There are a whole lot of them on this dress!  The construction isn't exactly bound buttonhole friendly, and since I found a vintage buttonhole foot, I have been a little more brave about subjecting my finished garments to the whim of the machine.

There are some quirks with the foot, but I love that you can take two runs at the buttonhole which gives a nicer finish than a single layer of zigzag.

I also have a fair amount of neutral colored buttons from estate sales that I have attended over the last few years (definitely missing those since Covid slowed things down).  But it means that I had suitable button on hand - which is always a good thing!

And here we have the old toothpick to make a shank on a non-shank button trick.  It's not very glamorous, but it works great.

And, of course, there is a bit of seam binding thrown in there as well, because how could I resist!

It's a great dress.

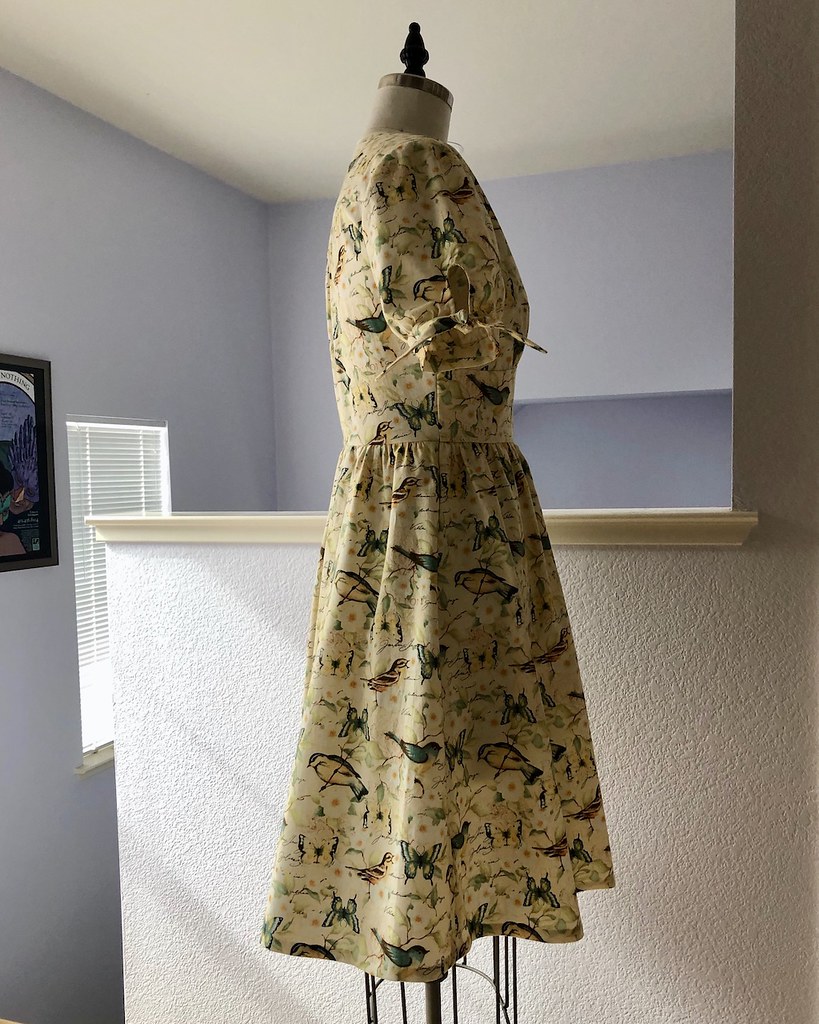
And there will be at least one more version made, probably with the same sleeve, just so I can conquer that keyhole opening!

Monday, November 23, 2020

A Pastel Hued Aviary


This pattern (McCalls 7974) was extremely popular this year.  I knew I liked the design as soon as it was released, and I decided that the pattern would jump the line on all of the other projects I have queued up in my mind.  I started working on this in March, and finished it in just a few days.

But first I had to find the perfect fabric.  I am not a huge fan of yellow, because it often makes me look rather sickly.  But a pale yellow works with my pasty skin, and I couldn't resist the bird print.

It was a stretch, but I managed to fit all of the pieces on my limited yardage, excluding the facings (which were made from solid colored cotton scraps I stashed away from some old project).

It may have taken me until October, but I finally managed to get photos of the dress while it was warm enough outside to wear such a garment.

Because I was determined to post at least a few projects on this blog that were started and finished in this calendar year!

As for all the hype, I will say that this pattern lives up to its reputation.

I found the construction a bit odd, but I went ahead and stitched this together as the instructions suggested.  It made me slow down and think instead of ploughing ahead, which is good every once in a while.  One change I would make is that keyhole opening on the sleeve tie.  It's just too fiddly and doesn't lay totally flat.

Working with the print inspired me to pull out a long forgotten project and finally finish it since I thought the two pieces would make a nice pairing.

Which means this project was a definite success.

And yes, I will probably make another version of this dress someday.  Just not until the weather turns warm again.  (It is currently rather chilly for this California based weather wimp and I am trying to acclimate to the cold, so I am thinking of wool fabric, long sleeves, and sweaters!)


Dress:  Made by me, McCalls 7974
Shoes:  Nine West

Sunday, November 8, 2020

A Pastel Pairing


 I just love having fabric leftovers - especially when I am making separates.

After finishing my skirt, I knew exactly what I wanted to do with the remaining yardage.  


So I pulled out McCalls 7929, which was actually living on my cutting table because I have wanted to try the pattern since I picked it up.  Somehow I always forget just how much fabric a peplum actually takes.  The peplum was a no-go, but I figured it was worth a try to make the top without it.

Since my skirt has bound buttonholes, I decided the top must also have them.

Which meant that I had to make a few changes to the construction of the top, since the machine buttonholes are created after the lining is in place and everything is finished.

My first step was to make the opening in the main fabric.

Next, I stitched most of the upper edge of the lining in place.

A slice was made in the lining fabric to allow my bound buttonhole windows to slip through.

The facing is cut in one with the back piece, so I had to make my lining windows through both the outer and lining layers.

The raw edge was finished with seam binding, and folded into place.

The other change I made was to add boning to the garment.  View B is a sleeveless option with the peplum added.  And yet I cannot find a single mention of boning in the instructions, or on the back of the envelope with the other notions needed.

I have no idea how the pattern drafter expected the strapless version to be wearable.  I ended up adding boning channels to the side seams as well as the back bodice, and the front bodice.

Elastic is not something I commonly use, and it seems like whenever I do, I have to fuss with the length of said elastic; the suggested lengths never seem to work for me.  Negative ease is something that I need to get more comfortable with.

But once that issue was resolved, it was smooth sailing.  I did have to stop and think about how those bound buttonholes were going to work, but I think it's always a good idea to step back from the given instructions and think about how best to move forward with each project.

And that is the story of this top.  The fabric may have humble beginnings (picked up from a fabric swap and first purposed for a mock-up) but I think it turned into a perfect pair of separates.  And I am so glad that I didn't waste it on something that I wasn't sure I would love.

Sunday, November 1, 2020

Jim is a Rat! But I want him anyway . . .


Deciding where to make cuts in this fabric was difficult enough when I was cutting large skirt pieces, but little did I know that I would have days of indecision over cutting out the bodice. 

I could have made things easier on myself and chosen a basic bodice with a single front piece, but as I was rifling through my pattern stash, I came across Butterick 6412, and had a vision of the finished dress.  I even had the perfect pink oversized buttons in the stash.

I also knew that I wanted to add piping along the neckline.

Instead of deciding on a single color, I thought that with such a bold and crazy print, a variety of colors would work even better.  And how often will a print like this come up.  So I went all in.

I did have to rethink the construction of the bodice with the addition of piping, but it was fairly straightforward.  

The piping created a clean edge along the neckline and shoulders, with the lining applied to the piping itself, just inside the seam line.

This created the need for a bit more hand sewing than the instructions suggest, but since I love that part of the process, it was no big deal.

There was also a bunch of hand stitching on the hemline of the skirt.  Because the skirt is a rectangle, a nice deep hemline was possible; no need to draw up the extra circumference that goes along with a flared skirt!

I do love the way that red lining pops!

And my indecision over print placement on the bodice turned out fine in the end.  I managed to match the center back seam/zipper opening, and I think the motif repeats are nicely spaced throughout.

I always planned on adding a belt.  In order to get the most of that center front image and the accompanying text, I had a large black band front and center.  But it could easily get covered up and evened out with a belt.  And I placed my four buttons with this in mind.

What I didn't expect to add was a petticoat.  Most knife pleated skirts wouldn't work with added bulk spreading the pleats out.  However, since the skirt has pleats on top of pleats, it is fuller than most knife pleated skirts.

While I was trying the dress on to check fit and figure out where exactly my hem would be, it occurred to me that the addition of a petticoat might add to the overall look.

And I love it!  It could certainly be worn without, but I love a bit of extra floof, so for now, the petticoat stays.

With that decision made, I had to figure out a belt.  My piping is red, purple, and pink.  I had originally planned to add a strip of green at the hemline, but when I tested the look with a scrap of fabric, I thought it broke up the lines of the dress too much and decided against it.


That left me with orange, a bright blue, and yellow.  And it just so happens that I have a bunch of yellow grosgrain stashed away.  In order to give the belt a bit more oomph, I stitched two layers of the ribbon together on each side.  To play back to the graphic print, I used black thread, although it doesn't read all that well from a distance.  Perhaps I should have used a triple stitch.

I was having a tough time deciding if the dress really needed the belt, so I posted a poll over on Instagram.  Turns out, the results mirrored my thoughts on the subject . . . just this side of keeping the belt.  

Peter suggested a black patent leather belt, which I think would also work great, but the only one I have is much too wide for this dress.

I was so busy thinking of all the crazy colors to add, the idea of a black belt didn't even cross my mind.  But since I am quite certain this dress will get more wear in the future, I can always swap out accessories!


And after my boss suggested that the fabric would make a great mask, I pulled out the leftover cotton and made myself one.  Once again, print placement was a challenge, but I thought "I don't have a thing to wear" was an appropriate gripe to make on my face mask!  Can anyone else relate to a closet full of clothes and not a thing to wear?!