Sunday, October 30, 2022

Scallops & Sloths

Back in July, I was approached by Michelle of OldPatterns.com, who asked if I would like to choose a few patterns in exchange for blogging about them.  I find that one really cannot have too many vintage patterns (okay, maybe one can, but that is not the point), especially newly found vintage patterns to inspire my creativity, and I said yes, please!  Of course, there are a whole lot of goodies to choose from on OldPatterns.com, so it took a bit of time to choose which patterns I wanted to take home with me.  The first pattern that caught my eye was McCalls 4587, from 1958.  I have seen images of this design online in the past, and I just adore that neckline!

Of course, by the time that I had decided on my patterns, it was September.  And what follows September?  Why, October, of course!  And October means that it's time to make a silly Halloween themed novelty print dress.  So the idea of this year's Halloween frock was percolating right about the time that I received this pattern in hand.  And you can probably guess where this is going.

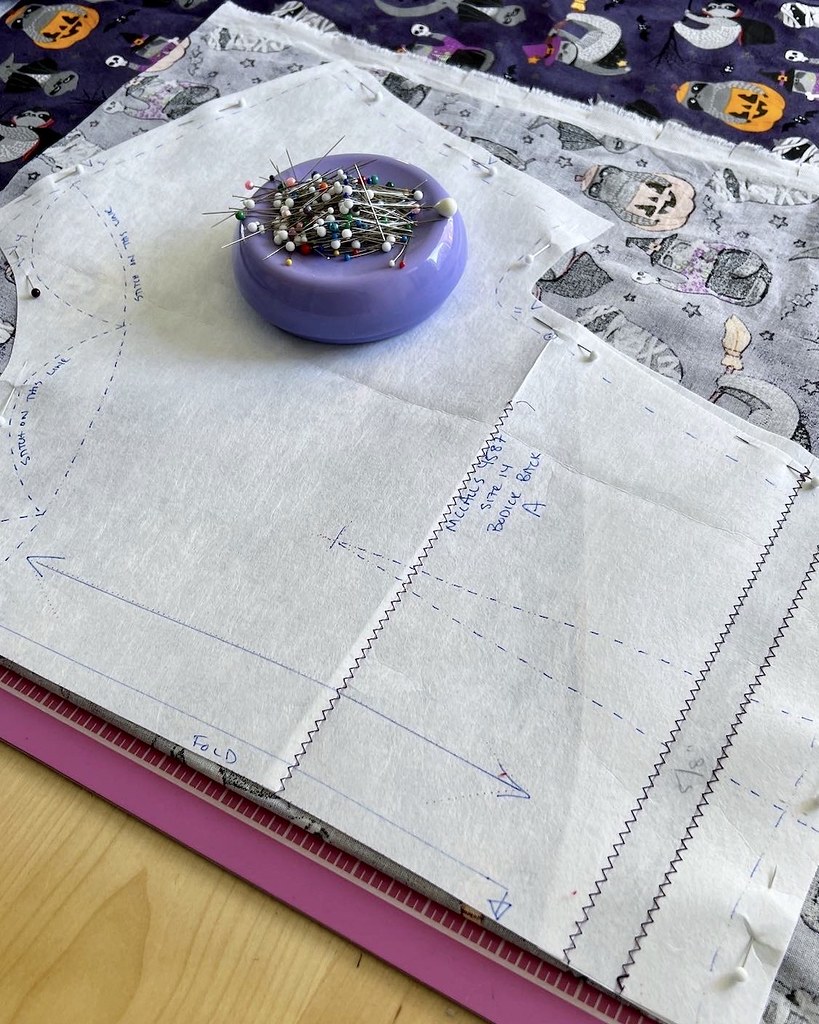
The pattern tissue is in very good condition, however, I am loath to cut into vintage patterns (I am not as reverent with the contemporary ones) and I knew that I would need to length the bodice, at the very least.  Sometimes I trace onto muslin fabric, but I have been using non-woven interfacing lately and it works quite well for me.

I was also planning to use transfer paper and a tracing wheel to transfer those lovely scalloped shapes on my fabric, and I figured the Pellon was going to hold up much better to that treatment than tissue paper.

And let's face it - this pattern is all about the scalloped neckline!  Both the facing pieces and the bodice include the scalloped edges along with all of the other printed markings, but I thought that marking the wrong side of my facing would be sufficient.

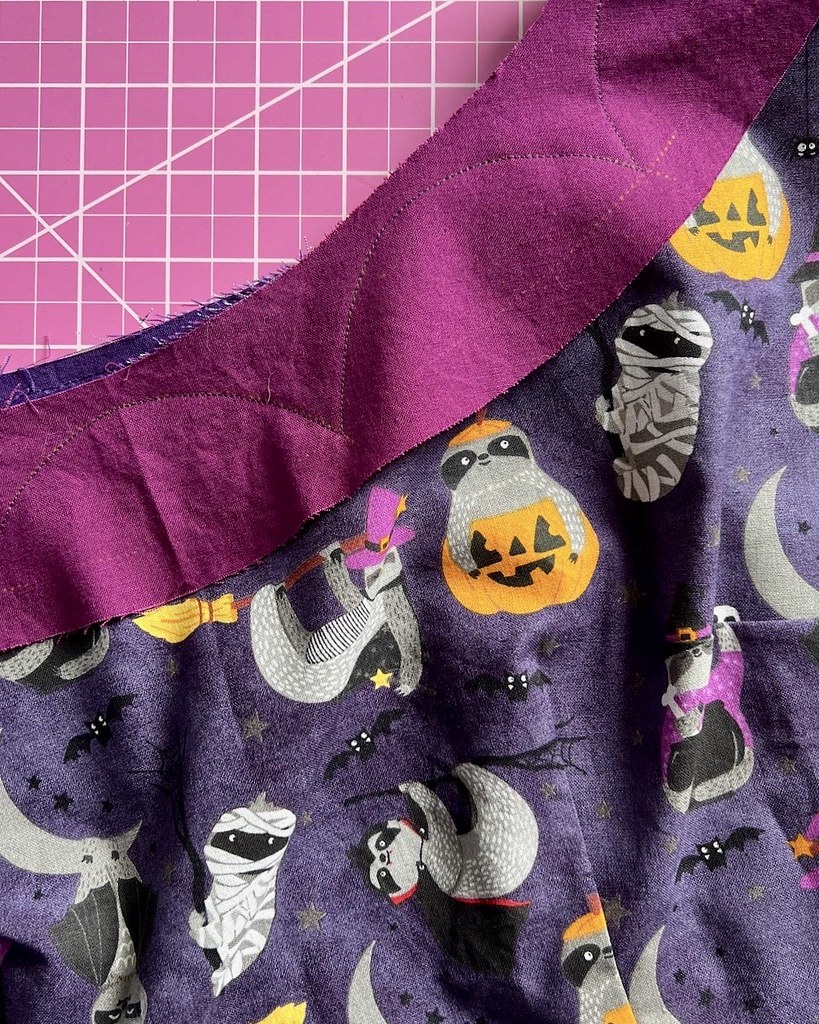
And since I knew that I was going to use a contrasting fabric for the bias strip on the bodice just below the scallops, I though it would be a nice touch to use that same contrasting color for the facing.  It won't be visible from the outside, but I will know it's there!

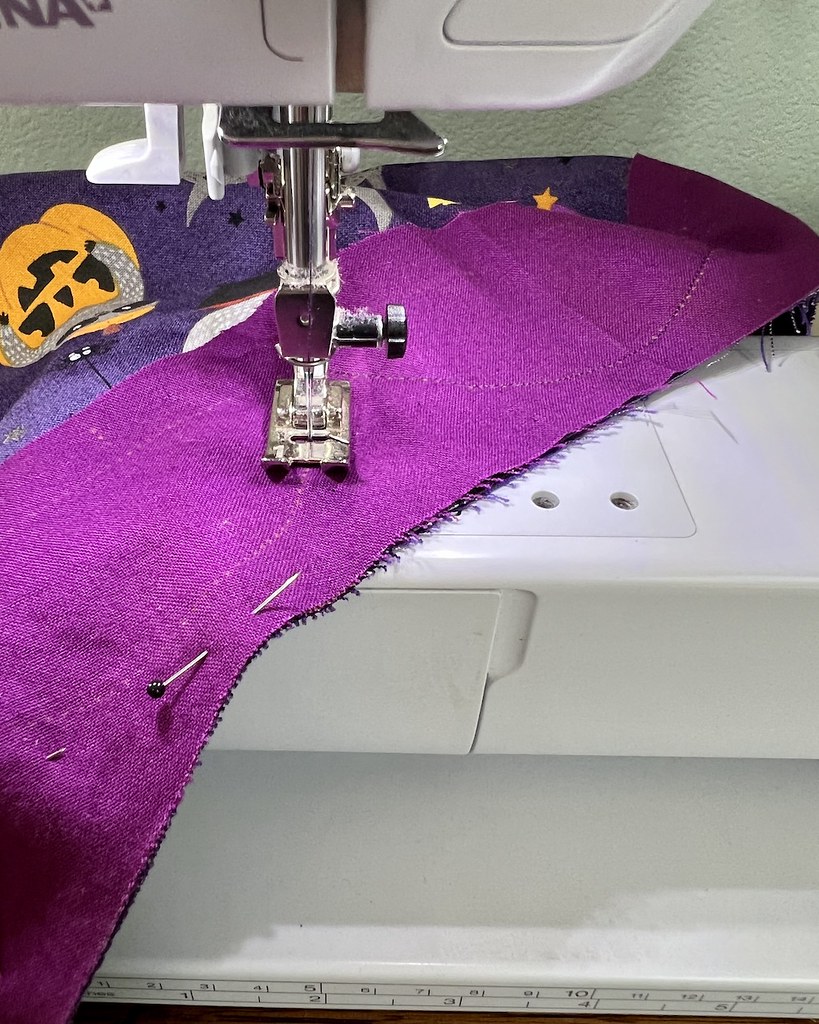
The process is slightly tedious, but the scallops are worth it!  I like to use a small stitch length and stitch at a slow speed to make sure those curves are nice and smooth.

My other suggestion is to trim those seam allowances down nice and small before clipping into the points.

One final trick is to clip out wedges of fabric from the curve.  This keeps the excess fabric from the convex curve from bunching up in the seam allowance when the layers are turned right side out.  It makes a bit of a mess, but clipping curves is important for convex curves, not just the concave ones.

And then everything gets a nice press.  I was slightly concerned about the narrow facing fraying, but this cotton was okay on that front.

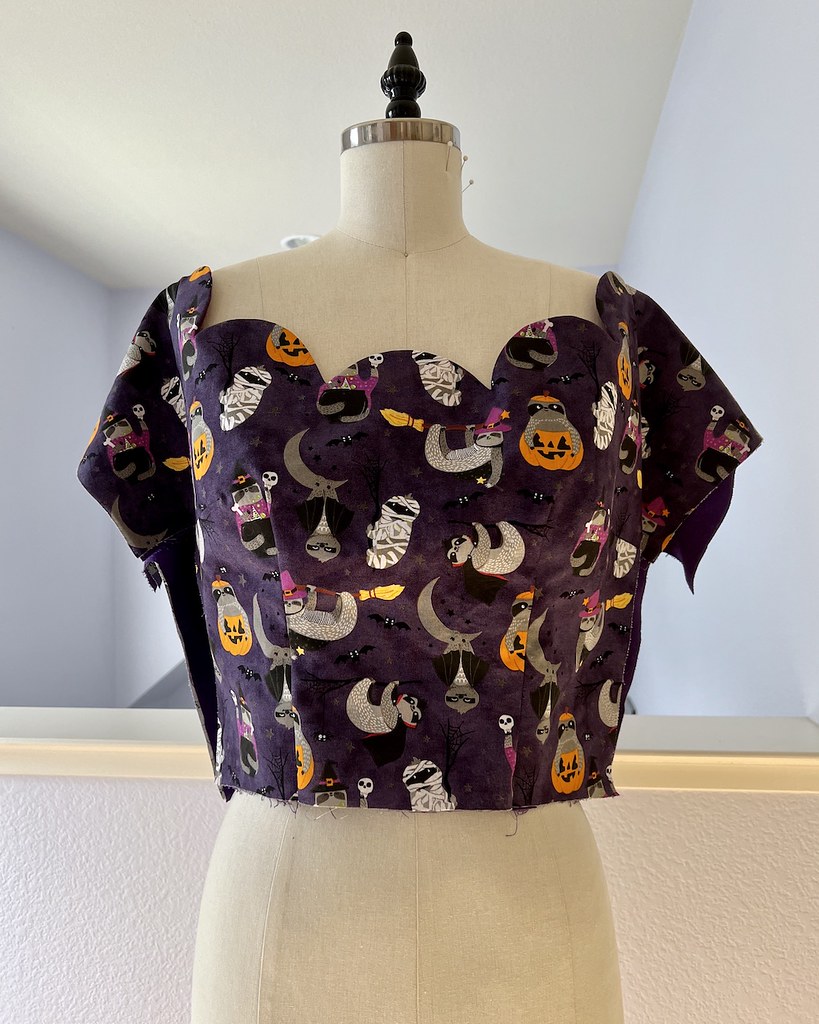
Which leaves the bodice looking something like this.

The instructions suggest basting the outer curve, but my cotton fabric was behaving, so I basted the lower edge since that seemed like a more advantageous option.  I also added a lining since my fashion fabric was slightly thin, and with the added layer, the basting seemed like a good thing to do.

And so far, I love it!  But how could I not . . . hundreds of adorable sloths dressed up in their Halloween costumes is just too much cute!!


Saturday, October 29, 2022

A Bevy of Birds

Ah, yes . . . Vogue 9253, otherwise know as Vogue 1735 - which is perhaps one of the most popular patterns that Vogue has produced in the last decade.  It feels as though just about everyone has made this pattern at this point.  Well, I finally joined the club.  

I missed out on the pattern the first time around, but I kept seeing fabulous versions pop up online.  Eventually, I picked up a copy of the re-released Vogue 1735.  I even left the pattern out on my sewing table as a constant reminder to try this pattern in a timely fashion.

And then we come to the unfortunate part of this pattern . . . the necessary yardage.  Because it requires a massive amount of fabric!  And that goes double for the full length version, which is, of course, the one that I wanted to make.  I tend to choose yardage heavy designs (hello, circle skirts) but this dress needs over 6 yards of 45" wide fabric.  That's a whole lot of fabric for a non-historical style dress.

But then I remembered a set of cotton sheets that I picked up at an estate sale.  A queen set of sheets contains a whole lot of fabric because of all of that extra width.  And I just love the ornithological print!

These particular sheets are a very tightly woven poplin like weave.  It's lovely and crisp, but a bear to hand stitch.  This pattern suggests topstitching, and normally I would hand stitch instead, but this was essentially a wearable muslin, and I didn't want to fight through that tight weave.  Pinning through it was difficult enough!

There isn't a whole lot more to say.  It's a great pattern, as so many before me have proven.

I do wish that I could have done a bit more pattern matching.  But even with massively wide pieces of fabric to work with, the oversized print repeat did not make that possible.

But other than that, which the tie belt actually manages to disguise slightly, I am very pleased with this project.

And yes, the pattern is a keeper!  (But I suspect everyone in the sewing community already knows that.)  But for anyone who might need a reminder that this pattern exists, here it is.  I think a tea length version would also be fabulous, and save a bit on those pesky fabric requirements.  And yes, if the right fabric comes along, I would absolutely make this again.  


Monday, October 17, 2022

Finishing Details

One great thing about vintage patterns are the extra little details that are included.  Some of those details are part of the design itself, and others are construction tricks that are often overlooked or excluded from contemporary patterns.  And I greatly appreciate getting to learn from both!

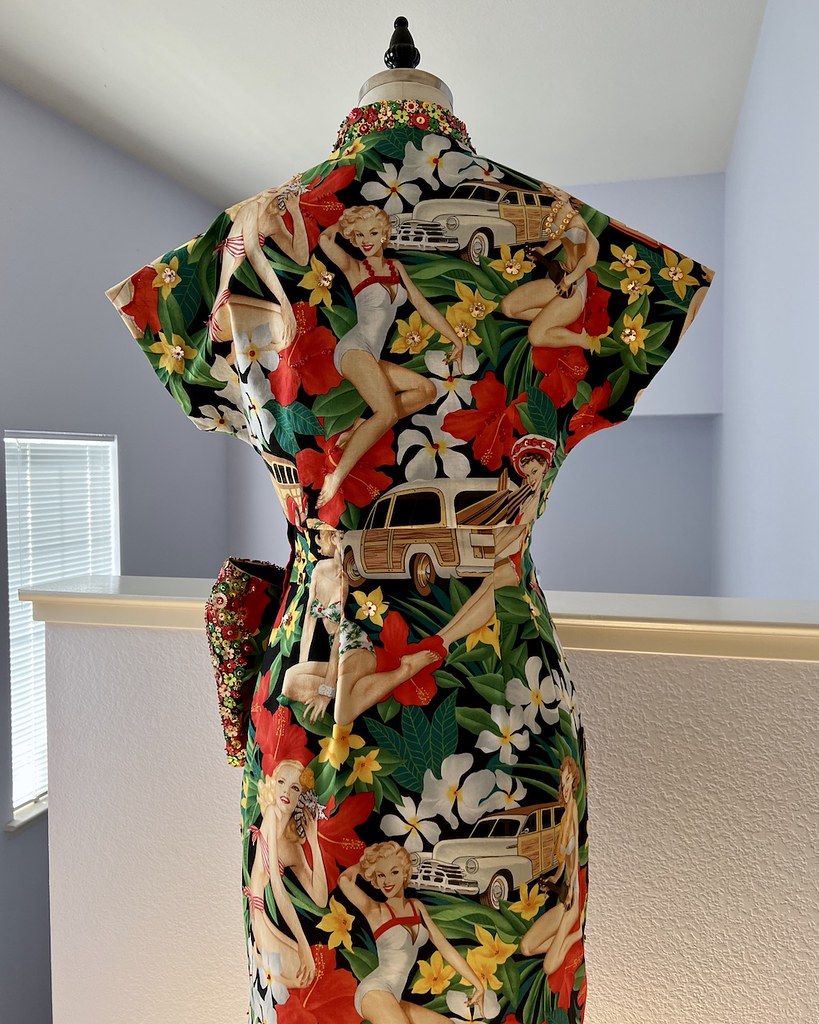
So after a whole lot of fun with adding a metric ton of sequins to this dress, there were a few other things to do.  This dress is essentially a dress front and back with a side opening.  The drape adds interest, but that's just a single piece that is attached to the dress front.

Noted on the pattern tissue is placement for boning channels.  As expected with a pattern that is drafted as a strapless garment, the pattern has four bones to be added to four of the darts on the bodice front and back.  Because this dress utilizes an underlining instead of a lining, and the boning channels were going to be visible, I decided to make my own out of the dress fabric.

There are two additional bones added to the front bodice above the bust.  These keep the dress from collapsing and falling down.  It's a small detail, but it does a lot for a strapless bodice and is something I will remember for future projects.  As suggested by the instructions, all of the boning is catch stitched to the darts/underlining.  I believe this is similar to a technique used on antique bodices, but I have never come across it in vintage pattern instructions before.  It is a quick and easy way to attach boning, and I am definitely a convert.  That being said, I do prefer full linings . . . but if I ever need to add boning to a finished garment, I will be keeping this technique in mind!

Although not included in the instructions, I always like to add a hook and bar tack (or two) to the lapped zipper closure to keep the fabric nice and flat.  I find that waist level is a good place for the hooks.

And then, of course, there are the straps.  This dress has both a strapless and strapped version, and the dress that I made would stay up just fine wihtout the straps, but I also felt that the straps would give me another opportunity to tie in all of the sparkles.

I originally intended to use gold sequins in this spot, but decided it might look jarring with all of the color throughout the rest of the dress.   I laid out a few options to decide which would look best.

This is not a random pattern like the drape on the dress, but I think the multi colored sequins mirror that portion of the dress nicely.

And since the hemline of this dress is shaped, a facing (or two) is in order.

Although the instructions did not suggest it, I understitched the facings.

The neckline is also faced.

And here is an opportunity for more hand stitching!

And that about covers it for the construction of this dress.

This was one of those projects that I was excited about from beginning to end.  That doesn't happen all the time.  From the initial idea to the finishing stitches, I was extremely pleased with how everything came together. 

And I am so happy that there was enough fabric for the matching bolero.  It's the perfect finishing touch!

I find myself avoiding princess seamed garments because I think that the back portion of garments fit much better on my body with a waist seam, but this one works rather nicely after a few minor adjustments.  And I can even see myself making this pattern again.

Oh, and one of my favorite parts . . . I even managed to do a pretty good job pattern matching the bolero to the dress!


Thursday, October 13, 2022

Baubles, Bangles, & Beads


And now for the fun part!

At the same estate sale where I found McCalls 4425, there was a craft room filled with all sorts of items, including most of the sequins seen here, which also followed me home.

I made a dress this year and added a smattering of sequins to the dress, and encrusted a bow with sequins and beads.  I loved the way it turned out.  When it came to this project, my first thought was that the hip drape would look fabulous covered in sequins.  The fact that I found most of the sequins at the same place where I happened upon the dress pattern felt like kismet!

Of course, there were a few issue with making that change to the pattern.  First, I had to figure out how the pattern was drafted and if it was going to be necessary to alter the construction to allow for the addition of embellishments.  I knew that I would have to steer clear of seam allowances until those seams were stitched for the sake of all of the sequins involved.  But it looked as though it was possible!  So I started with random placements, and then kept going until most of the drape was covered.

The drape is finished with a facing on two edges and then folded in half, and pleated to give it shape.

And here is where it gets a bit tricky.  

Obviously, it is much easier to apply embellishments to a flat surface.  But this drape has pleats which are then stitched in place directly on the dress front.  Of course, there are a fair amount of layers involved at this point, and I didn't really want to hand stitch all of those layers to the dress front, both for my sanity and for the stability of the stitches themselves.

That meant that I had to stop adding sequins at a certain point, the only question was where exactly was that point.

The sarong and the drape, which are a single piece, are added to the front of the dress and stitched to a clipped corner at the start of the pleated area of the drape.

Any additional sequins added after this stage would have to be added to what is essentially half of an entire dress.

This was certainly more awkward than a flat piece of fabric, but it wasn't as bad as I had expected.

And now I finally had an end in sight, since I had to cover that line of stitching where the drape is stitched to the dress front, but no further.

The only real change that I made to the construction of the dress was to add a few stitches from the inside of the folded drape to the dress front to tether those two pieces together.  I suspect that the added weight of the sequins and beads was the cause of that portion falling forward slightly.  But it was well worth the few extra stitches for the finished result!