Showing posts with label McCalls 4425. Show all posts

Saturday, December 31, 2022

Tiki Queen

I think it's safe to say that 2022 was the year of the sequins as far as my sewing adventures are concerned.
I finally finished my spangled circle skirt, made a matching top, encrusted a belt with super sparkly stuff, and finished a second top, sans peplum (even if I still haven't gotten around to blogging about it).

There were also a fair amount of novelty prints sprinkled in there for good measure.  So as a final post for the year, this project seemed like a good choice.

In fact, a large part of the inspiration behind this dress and bolero was the fact that I thought that applying a metric ton of sequins to the hip drape was a great idea.  After snagging the pattern at an estate sale, I left it out on the sewing table for quite some time, just within sight should the right fabric and/or inspiration come along.

Right around that time I was invited to a party with a Tiki theme, and I just knew that the combination of a fabulously kitchy novelty print, and my vintage pattern, plus those gorgeous sequins that I came across at the very same estate sale where said pattern was found would make the perfect outfit for the party.  Not to mention that it was an excellent excuse to make myself a new dress.

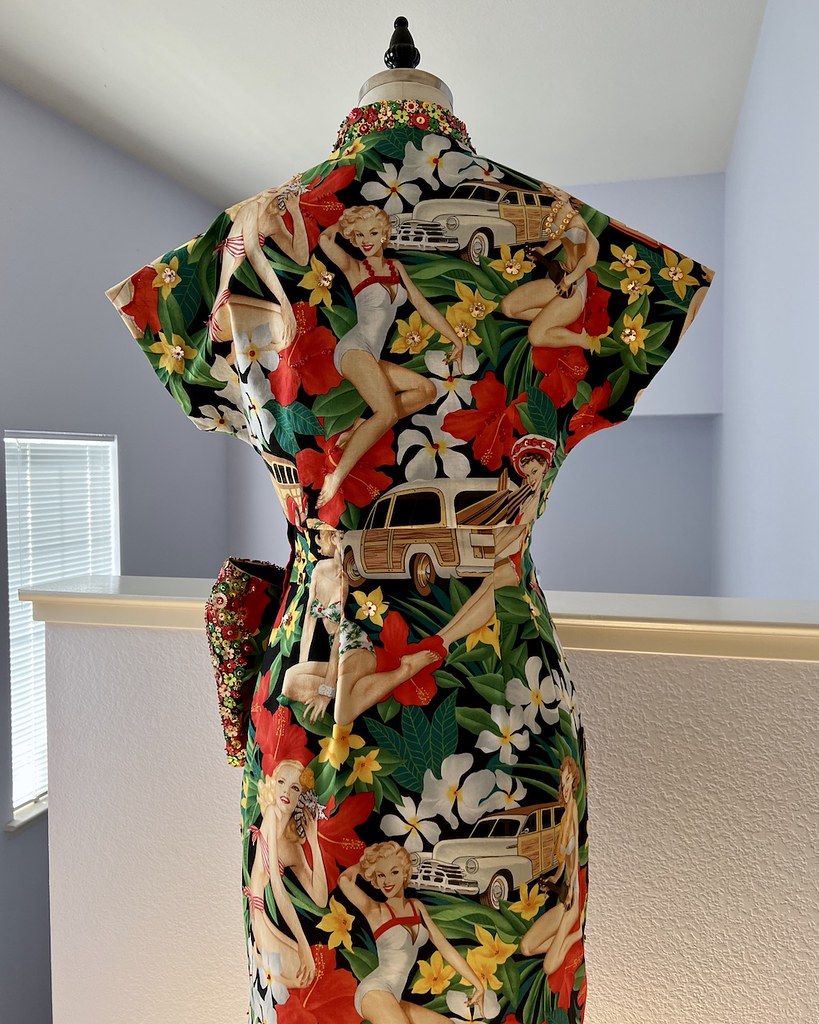
This project had a mind of its own, and it grew into an entire outfit.  The Dorothy Bolero was a perfect coverup, and I knew that I would need to pull in the sequin theme somehow.  The obvious solution was the collar.

I am also particularly proud of the fact that I managed to match the print motifs from the bolero to the dress.  Because I cut my pattern pieces out of Pellon interfacing, they were somewhat see-through.  This allowed me to draw directly onto the bolero pattern pieces while the dress was on the dress form.  I then matched those pencil markings with my yardage.  It may have be a slightly questionable tactic, but it did the job!

Thankfully, I had enough fabric to make the matches work.  With such an oversized print, I was concerned about running out of yardage, but in the end, I had just enough!

I can't quite decide which I prefer . . . with or without the coverup.

But no matter, now I always have both options.

Either way, I love the way this project turned out.  And don't think that I am through with sequins . . . I have a feeling they will be sneaking back into my sewing adventures in the New Year.

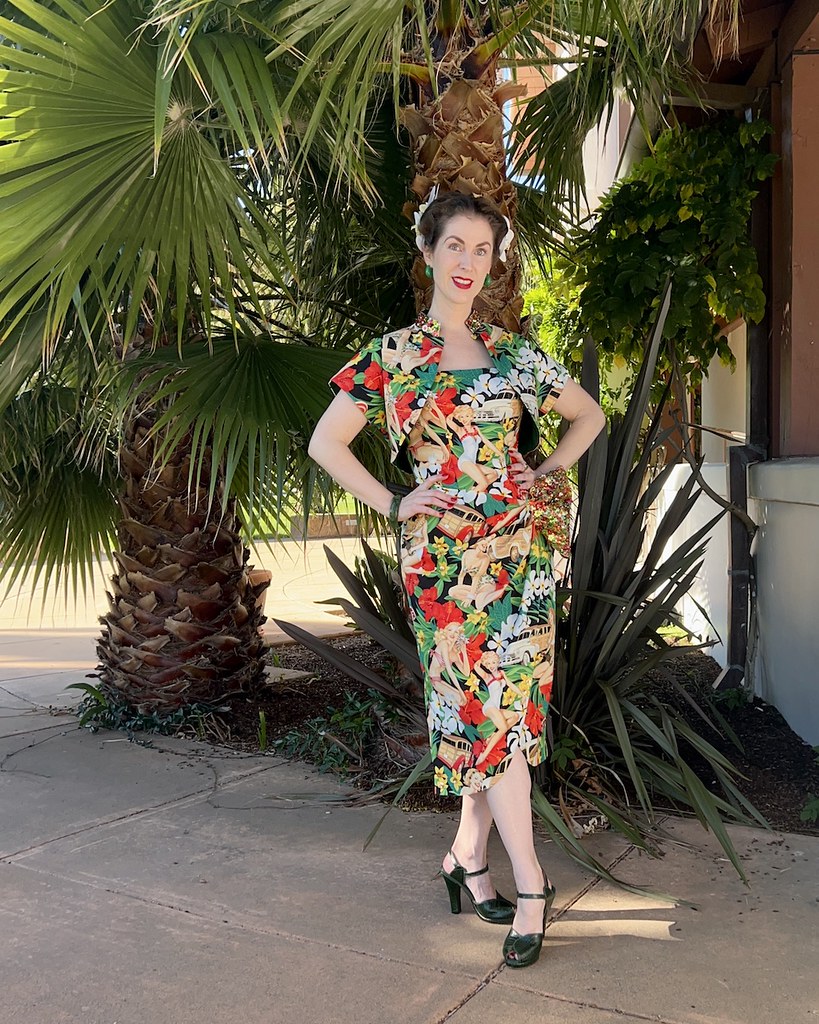
Dress:  Made by me, McCalls 4425
Bolero Jacket:  Made by me, "Dorothy Bolero" from Charm Patterns
Shoes:  Remix "Miranda"
Hair Flowers: Made by me
Earrings:  Etsy
Bracelet:  Etsy, Mrs. Polly's Lucite

Monday, October 17, 2022

Finishing Details

One great thing about vintage patterns are the extra little details that are included.  Some of those details are part of the design itself, and others are construction tricks that are often overlooked or excluded from contemporary patterns.  And I greatly appreciate getting to learn from both!

So after a whole lot of fun with adding a metric ton of sequins to this dress, there were a few other things to do.  This dress is essentially a dress front and back with a side opening.  The drape adds interest, but that's just a single piece that is attached to the dress front.

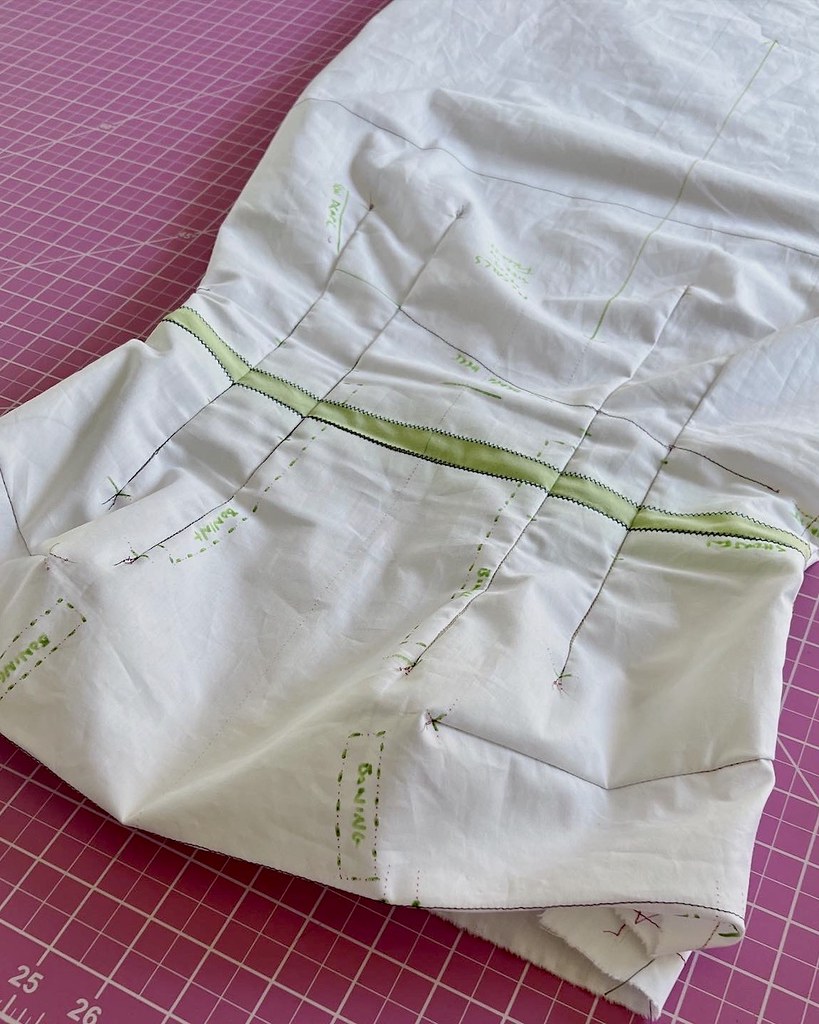
Noted on the pattern tissue is placement for boning channels.  As expected with a pattern that is drafted as a strapless garment, the pattern has four bones to be added to four of the darts on the bodice front and back.  Because this dress utilizes an underlining instead of a lining, and the boning channels were going to be visible, I decided to make my own out of the dress fabric.

There are two additional bones added to the front bodice above the bust.  These keep the dress from collapsing and falling down.  It's a small detail, but it does a lot for a strapless bodice and is something I will remember for future projects.  As suggested by the instructions, all of the boning is catch stitched to the darts/underlining.  I believe this is similar to a technique used on antique bodices, but I have never come across it in vintage pattern instructions before.  It is a quick and easy way to attach boning, and I am definitely a convert.  That being said, I do prefer full linings . . . but if I ever need to add boning to a finished garment, I will be keeping this technique in mind!

Although not included in the instructions, I always like to add a hook and bar tack (or two) to the lapped zipper closure to keep the fabric nice and flat.  I find that waist level is a good place for the hooks.

And then, of course, there are the straps.  This dress has both a strapless and strapped version, and the dress that I made would stay up just fine wihtout the straps, but I also felt that the straps would give me another opportunity to tie in all of the sparkles.

I originally intended to use gold sequins in this spot, but decided it might look jarring with all of the color throughout the rest of the dress.   I laid out a few options to decide which would look best.

This is not a random pattern like the drape on the dress, but I think the multi colored sequins mirror that portion of the dress nicely.

And since the hemline of this dress is shaped, a facing (or two) is in order.

Although the instructions did not suggest it, I understitched the facings.

The neckline is also faced.

And here is an opportunity for more hand stitching!

And that about covers it for the construction of this dress.

This was one of those projects that I was excited about from beginning to end.  That doesn't happen all the time.  From the initial idea to the finishing stitches, I was extremely pleased with how everything came together. 

And I am so happy that there was enough fabric for the matching bolero.  It's the perfect finishing touch!

I find myself avoiding princess seamed garments because I think that the back portion of garments fit much better on my body with a waist seam, but this one works rather nicely after a few minor adjustments.  And I can even see myself making this pattern again.

Oh, and one of my favorite parts . . . I even managed to do a pretty good job pattern matching the bolero to the dress!


Thursday, October 13, 2022

Baubles, Bangles, & Beads


And now for the fun part!

At the same estate sale where I found McCalls 4425, there was a craft room filled with all sorts of items, including most of the sequins seen here, which also followed me home.

I made a dress this year and added a smattering of sequins to the dress, and encrusted a bow with sequins and beads.  I loved the way it turned out.  When it came to this project, my first thought was that the hip drape would look fabulous covered in sequins.  The fact that I found most of the sequins at the same place where I happened upon the dress pattern felt like kismet!

Of course, there were a few issue with making that change to the pattern.  First, I had to figure out how the pattern was drafted and if it was going to be necessary to alter the construction to allow for the addition of embellishments.  I knew that I would have to steer clear of seam allowances until those seams were stitched for the sake of all of the sequins involved.  But it looked as though it was possible!  So I started with random placements, and then kept going until most of the drape was covered.

The drape is finished with a facing on two edges and then folded in half, and pleated to give it shape.

And here is where it gets a bit tricky.  

Obviously, it is much easier to apply embellishments to a flat surface.  But this drape has pleats which are then stitched in place directly on the dress front.  Of course, there are a fair amount of layers involved at this point, and I didn't really want to hand stitch all of those layers to the dress front, both for my sanity and for the stability of the stitches themselves.

That meant that I had to stop adding sequins at a certain point, the only question was where exactly was that point.

The sarong and the drape, which are a single piece, are added to the front of the dress and stitched to a clipped corner at the start of the pleated area of the drape.

Any additional sequins added after this stage would have to be added to what is essentially half of an entire dress.

This was certainly more awkward than a flat piece of fabric, but it wasn't as bad as I had expected.

And now I finally had an end in sight, since I had to cover that line of stitching where the drape is stitched to the dress front, but no further.

The only real change that I made to the construction of the dress was to add a few stitches from the inside of the folded drape to the dress front to tether those two pieces together.  I suspect that the added weight of the sequins and beads was the cause of that portion falling forward slightly.  But it was well worth the few extra stitches for the finished result!


Wednesday, October 5, 2022

Testing a Theory

And so begins the saga of McCalls 4425.

I found this pattern at an estate sale not too long ago.  I had seen images of the design online for years, and was thrilled to come across a copy, and not only that, it was in my size!  Strangely enough, this was the only sewing pattern in the entire household that I could find in a small hallway closet with some other sewing notions.  These days, I generally find 1990s patterns, and maybe a few 1980s thrown in for good measure, so to find this design was pretty special.  This project also utilizes other finds from this very estate sale, but I will get to that later.

It has been some time since I did a full muslin for a project, and I though it would be a good idea to do that with this pattern since the skirt is somewhat fitted.  

At this stage in my sewing game, I feel fairly confident about doing a couple of quick measurements and determining if a bodice on a pattern is going to fit.  I tend to choose full skirts, so the lower portion of a garment isn't too important when it comes to fit, so long as the waist measurement works.

This pattern was going to be a bit tight through the hips.  I added a bit of length through the torso and left myself some extra room to play with along the side seams.

I left off the front drape on my muslin since it wasn't going to alter the sizing at the hipline and I didn't have very much spare yardage of plain muslin, so the mock up looks a little askew.  But it did its job with regard to fit.  I get nervous about designs without a waistline because the fit gets complicated for me at the back of the garment, but this one worked out better than expected.

My little guy snuck into a couple of these photos.  Tino likes to be included in everything these days, and does not enjoy being left downstairs alone anymore since his hearing is not so great and he likes to keep me within view.

As you can see, he is very helpful!

After adding some width to the hips and making a slight swayback adjustment, I was pretty happy with the fit.  This fabric repeat is rather large, and I didn't want any unfortunate placement of the motifs, and the overlapping pieces needed to be somewhat matched, so cutting everything out was a process!  I did purchase slightly more fabric than I thought I would need for this very purpose, and thankfully, it all worked out.

Once that was accomplished, I cut out my underlining and transferred the pattern markings to that layer.

I generally prefer lining to underling, but in a case like this, it sure makes things easier.  I was able to trace the lines of the darts directly on my underlining, which always feels slightly naughty.  Basting stitches that are within seam allowances are also left in place on most of my projects which feels rather lazy, but since they aren't seen on the outside of a garment, I let them be.

Next, the fabric and underlining were joined together just inside the dart stitching lines.

I also thread traced the placement line for the drape, which definitely came in handy later on.

Because I was using a muslin as my pattern and I had marked both my cutting and stitching lines, I decided to leave extra fabric at the top of the bodice.  While trying on the muslin, it seemed like the neckline was rather low and I wasn't able to determine if it would be necessary to add more coverage until after the bodice boning was in place.  Also, I figured that this would make it impossible for that edge to stretch out since it had not been cut.

I used a scrap of organza to reinforce the clipped edge where the drape is attached to the front of the dress.

This is one of my favorite things to do when corners need to be clipped.  I no longer trust a simple line of stitching - I figure wrapping those edges with a tightly woven piece of fabric will do a much better job in the long run!

And that completes most of the work on the front and back of the dress.  But this over the top print needed something extra, in my mind, and so next up is the fun part  . . . the embellishments!