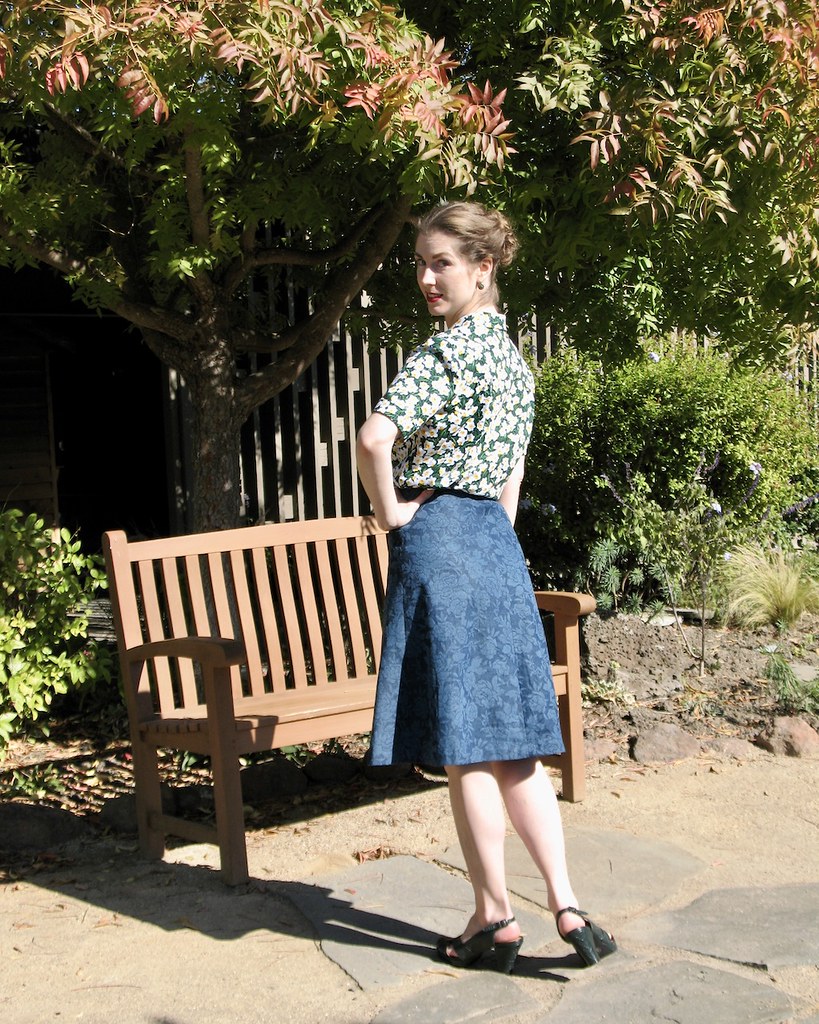
As I recall, this pattern (Vogue 9182) was very popular when it was first released in 2016. I don't believe I purchased this one right out of the gate, but I have had the pattern for at least a couple of years. Well, I finally got around to trying the pattern for myself, and it's safe to say that the hype is true. This really is a great dress design!
I think one of the main reasons it took so long is the fact that this is a bit of a fabric hog. The longer version, which is what I really had my heart set on, requires 4.5 yards of 45" wide fabric. I kept searching for a suitable piece of fabric that I had stashed away, but the only ones that interested me were far too small.
And then I came across this fabric that I picked up at a fabric swap many years ago. Turns out, this is not quilting cotton, which I had always assumed it was. The width of this was almost 51" and I had just over four yards!!
Besides being a fabric hog, the only other thing that gave me pause was the bodice construction. I have never been a huge fan of this method that involved finishing neckline and armhole before stitching the straps together at the shoulders. However, it had been quite a while since I had tried it, so I thought I would give it another go. My conclusion after sewing this together is that it's still not a favorite method of construction for me, nor is it likely ever to be. When I use this pattern again, I am most likely going to try something different for the construction of the bodice.

For all of those pocket fans out there, yes indeed, this skirt has pockets. The following photo is probably a bit confusing, but the two left-most bound seams seen here are those of a pocket, and I am pinning the lower bodice into place along the waistline. And look at my perfectly matched seam binding! (Please ignore the filthy ironing board cover, which has two large rips, and desperately needs replacement.)
Which leaves the garment looking like this . . . . something is missing.
Time to make some buttonholes. I decided that I needed to get a little more practice with my hand worked buttonholes, and this seemed like the perfect opportunity.
But first I had to find suitable buttons. With my massive stash of buttons, I was hoping to find something appropriate, but I needed ten of them, and it was not to be. Miraculously, I found inexpensive ones at JoAnns. They are definitely cheap looking plastic, but the color is a great match to the darker teal dots in the print, and the price was right, so it is what it is.
I did have to play around with button placement slightly since I lengthened the bodice pieces, but once that was sorted, it was time to get to the business of more hand worked buttonholes.
I don't care how long I have been garment sewing, cutting into an almost-finished dress is always stress inducing. Which could be why I love a bound buttonhole - you usually get those out of the way right at the beginning.
First up is a whipstitch around the opening which serves to camouflage the print a little.
Next, it's onto the buttonhole stitch. Once again, I am using a heavy weight cotton thread since it seemed like overkill to use silk buttonhole twist on a cotton sun dress. Right?
And now for the most surprising part of this project: the circle skirt did not drop one little bit.
Say what?!?
The only explanation I can come up with is that this is a very densely woven light-weight cotton poplin, and for some reason the weight wasn't enough to pull on the bias sections of the hem.
It still doesn't make any sense to me. And perhaps in the future it will need to be evened out? All I know is that I left it to hang for over a week, and it was still as even as can be. Well, that means less work for me! This is a first for me, and I don't expect it to happen again in my lifetime. In fact, I can't believe my luck!!