A few months ago, I started seeing versions of the Rose Cafe Bustier Dress showing up on my Instagram feed. I like to steer clear of most new indy designer pattern companies I come across until I am sure that they know what they are doing. And it looks like Daria of Daria Patternmaking has some excellent sewing skills, so I thought I would give her patternmaking a try. One skillset does not necessarily follow the other, but I was curious enough to try this pattern.

As I was mostly interested in the bodice portion of the pattern, there wasn't a whole lot of sewing or even paper to waste should something go horribly wrong. This design did not disappoint. In fact, it is rather interesting for a couple of reasons. First is the sizing: to determine your bust cup size, you measure over the fullest portion of the bust (there is no full bust minus underbust kind of measuring) and refer to a chart; the bodice measurements are similar to every other fitted bodice I have come across. It's a very interesting method, although it has issues just as any standardized draft has, which I will discuss later. The second surprise was in the construction of the bodice. And we will get to that as well.
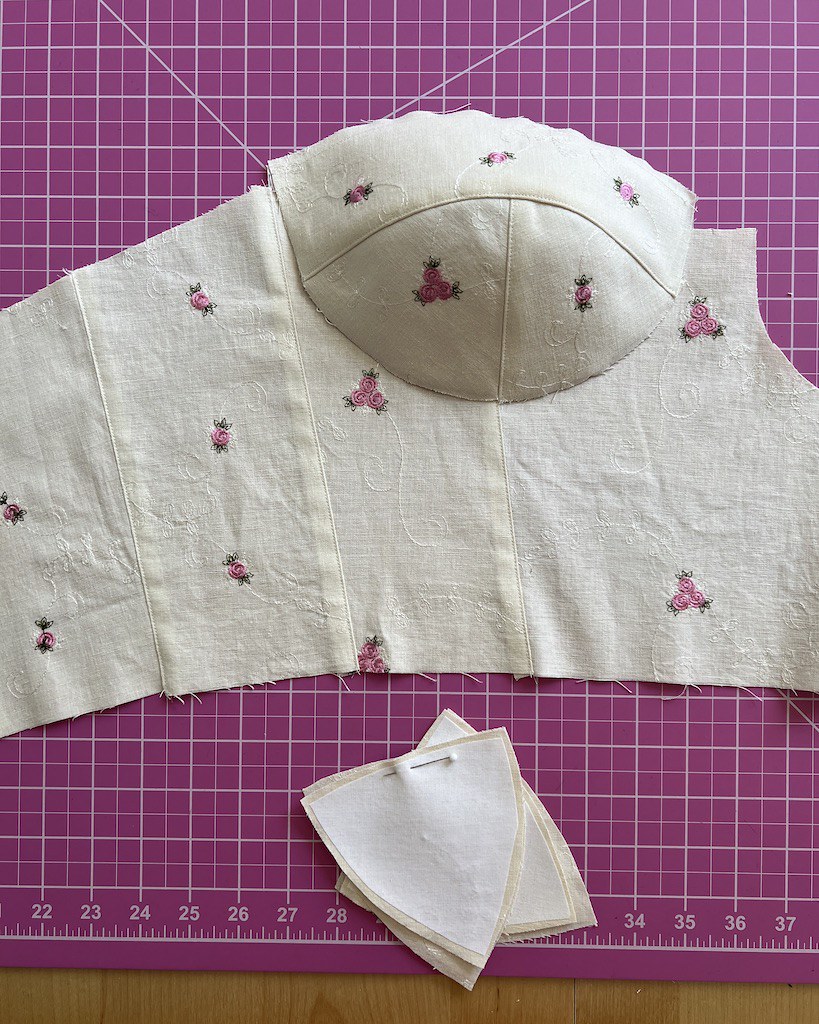
I had a tiny bit of this embroidered linen blend left after making a dress with it many years ago, but I didn't want to get rid of it, so I kept the scraps. And there was just enough for this pattern since all of the pieces are rather small!
All of the fabric pieces were interfaced according to the instructions. I am usually against using fusible interfacing, but I thought I might as well follow the instructions and see what happened.
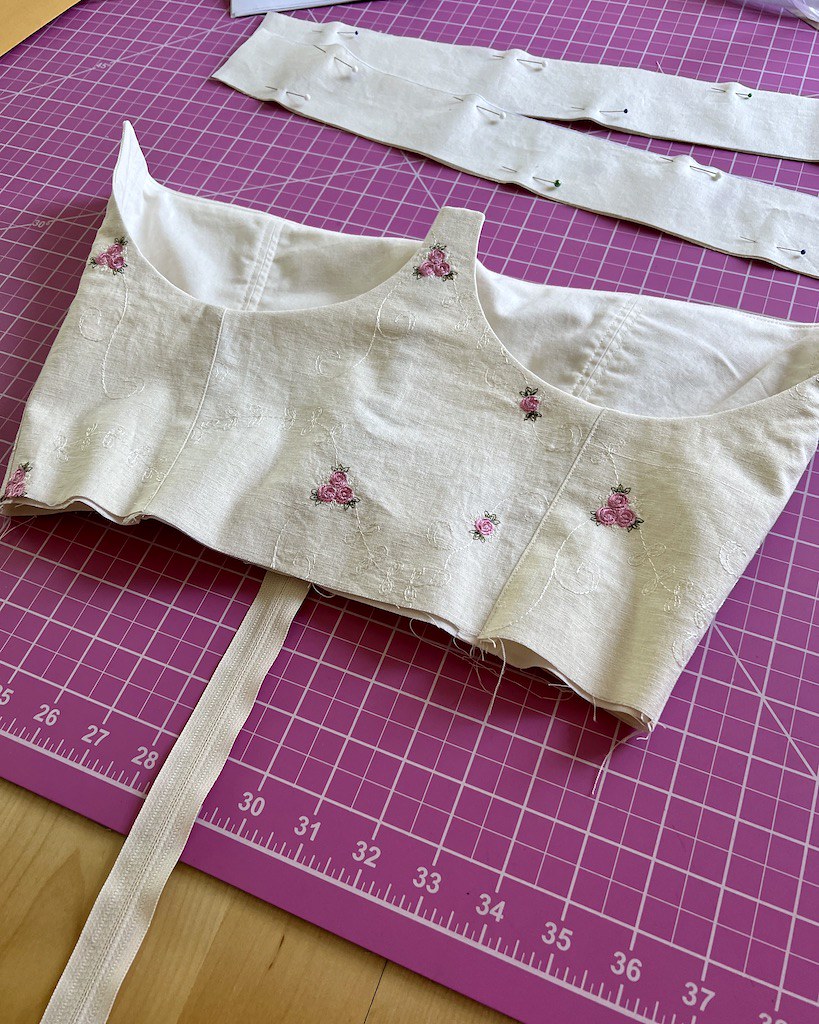
A duplicate lining was made with some quilting cotton leftovers from the stash.
I added to the torso length, per usual, and took a wedge out of the back, also standard for me.
The rest of the pattern was cut out as-is.
I also went ahead and added a few pieces of boning to the lining because my choice of fabric was rather drapey.
Everything went together as expected.
I didn't have a separating zipper, so I used a standard zipper which gets folded up and out of sight during wear. But that does mean that the bottom edge has to be finished before installing the zipper.
So far, so good.
And here is where things get interesting. Instead of stitching the cup into the bodice cradle, the entire bodice is finished and the cup is finished along the upper edge as well. The curved edge of the bust is finished, and then both the finished bodice and finished cups are stitched together.
Perhaps this makes the curved stitching line of the cups easier? I am not really sure on the why, but it does work. It's not my favorite method, however, because it makes for a somewhat bulky join at either end.
But it definitely works. Is this standard for lingerie making? I am not often surprised by sewing instructions at this point in my garment making adventures, but this one was new to me.
I believe that I will go for a more standard construction method the next time I try this pattern, but it's always nice to learn something new!
And now for that zipper tail . . . The extra length makes it easy to get in and out of the garment. I use a couple of snaps to keep the zipper tucked up inside the garment during wear.
Overall, I'm pleased with the outcome. But back to what I was mentioning earlier about the manner in which a size is chosen . . .
The bridge stands slightly away from my chest, and I think I know why. Cup size here is determined by measuring over the fullness of the bust. However, that does not take into account how the bulk of the bust sits on the body. This particular pattern is drafted so that the cups are rather shallow and wide. There are a massive number of examples on the internet (did I mention this was a popular pattern!). And at first glance, everyone looks fabulous. But my issue with the center bodice not sitting flush with my body seems to be fairly common upon closer inspection of those online photos. I believe that I need less width and more depth in the bust area. I am currently testing that hypothesis with another version of the pattern and will let you know how it goes.
But for the first go at a new pattern, from a new pattern company, with a new manner of sizing, I am very happy with the end results.