Ah yes, the annual Halloween novelty print dress project. I do enjoy this process!
I picked up this adorable owl print last year after the aforementioned holiday had passed. There was slightly less than four yards left on the bolt, and I had to have it! I didn't know what I would do with the fabric, but I was quite certain that it was worth taking home.
Fast forward to this year, and a rummage through the seasonal printed fabrics in my stash reminded me of this print.
Unfortunately, McCalls 8401 requires more than what I had on hand. Ggrrrr. But I was convinced that this pattern was the perfect option for this print. And once I get an idea in my head, my stubborn streak rears its ugly head.
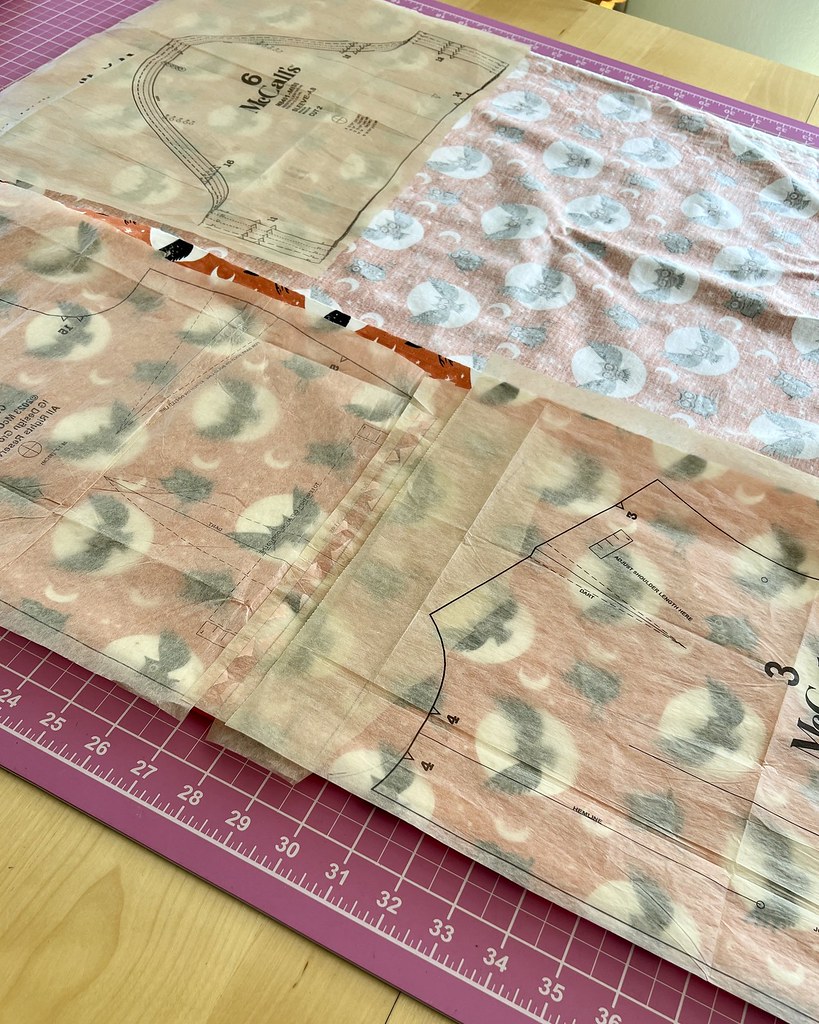
But as you might have guessed, I figured out a solution. As is pretty clear from the illustration, the skirt is a dirndl; in other words, just a bunch of rectangles stitched together. After a quick look at the fabric layout, it was clear that the four skirt pieces were the biggest fabric hogs, and was the obvious place to make some adjustments.
So after laying out the bodice and sleeve pieces, and figuring out exactly how much fabric was required, I measured the remaining yardage and divided by four.
I actually ended up cutting out two sizes larger for the skirt width to give myself even more fullness in the skirt (and utilize as much of my fabric as possible). Why leave a narrow scrap when it can be incorporated into a full skirt?!
The next question was whether or not to add rick-rack trim.
That was an easy decision!
I wasn't sure how obvious the scalloped edges would be laid next to the black and white gingham, but it was worth a try.
The rick-rack that I found ended up being slightly narrower than I liked, so I stitched it in place favoring one edge instead of right down the middle - which ended up working quite nicely.
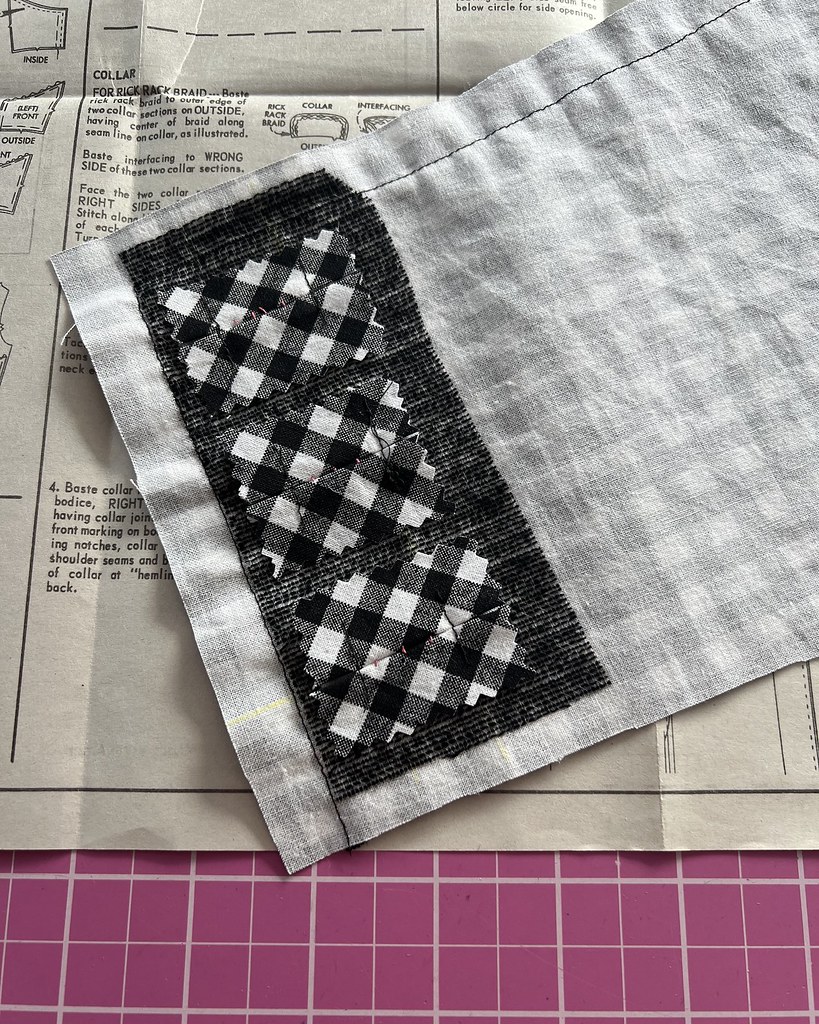
And just to make things interesting, I made a rookie mistake on my sleeves. Can you spot the problem?
The sleeve in the back of the above photo has the facing pinned right side to wrong side. I don't think I have ever done that before. Not only did I pin it, I stitched and trimmed that seam before realizing what I had done. Thankfully, the cotton is pretty sturdy and I was able to salvage the sleeve. Which is a good thing, since the scraps that I had remaining would not have fit another sleeve piece.
The midriff overlay had me a bit stumped. I kept browsing the instructions looking for where the buttonholes were mentioned. The pattern piece itself had three circles indicating where to place the buttons, but no lines for the actual buttonhole. Turns out, the pattern has you sew the buttons through both layers to secure the pieces with no functioning buttonhole.
Well, that just wasn't exciting enough for me, so I added bound buttonholes, cut on the bias to contrast with the gingham checks.
I had already chosen my buttons, which included a pretty significant shank, so the buttonholes just seemed necessary in my mind.
And I think they look rather jaunty, so the extra bit of effort was absolutely worth it!
That contrast gingham also came in handy for my facings. My fabric was about 41" wide without the selvedge, and even though the pattern layout suggested that I would be able to fit the collar pieces next to the skirt pieces, that was not possible.
But I actually think that the contrast is fun, so I'm not mad about it.
This particular design has a side zipper. As mentioned above, those button are not meant to be functional, and the back bodice midriff is cut on the fold. The center back bodice opens for about six inches to allow the dress to be pulled over the head. If I was to make this dress again, I would think about adding seam allowance to the back midriff section and using a center back zipper. The skirt already has a center back seam, so this would be a fairly easy alteration, and I find a center back zipper so much easier to get in and out of instead of a side zip.
The instructions call for single fold bias tape, but I like to make my own, so I used the contrasting fabric for a nice bias finish to the neck edge.
I actually love the rick-rack trim on the collar with this fabric. I think that detail would have been easily lost in this busy print without the extra bit of contrast on the edge.
And as for for the skirt, since I added a bit of width to the skirt pieces, I was slightly nervous that they might not gather down to the bodice waist. It was a tight squeeze, but I managed to keep the extra floof.
I contemplated adding the piping that the pattern suggested to the waist seam, but I thought that the skirt gathers were just a little too bulky for it to work.
And I think that there is already enough going on here!
I installed a side lapped zipper by hand, per usual.
I did make sure to match my center front midriff in the gingham check, but I didn't think enough about the side seam match. Oh well, most of the time it will be covered by my arms, so it's not the worst mistake in the world, but it's still aggravating to have missed that match.
But I do love the way that the contrasting prints work together.
As you might have noticed, I was inspired by the cover illustration.
This is one of those projects that was just sort of meant to be.
I only have a very small pile of scraps left of this fabulous novelty print, and I think that it really suits the style.
I did have to purchase the black and white contrast fabric, as well as the rick-rack. But I guarantee I will find a use for the rest of that rick-rack. And everything else (including the buttons) were from the stash, which always feels good.
I do love the way this turned out. In fact, I wouldn't be opposed to making this pattern again if the right fabric comes along. It's a wonderfully classic silhouette, and I do love any excuse to pull out a petticoat!