Friday, October 30, 2020

Pleating a Pop Art Print

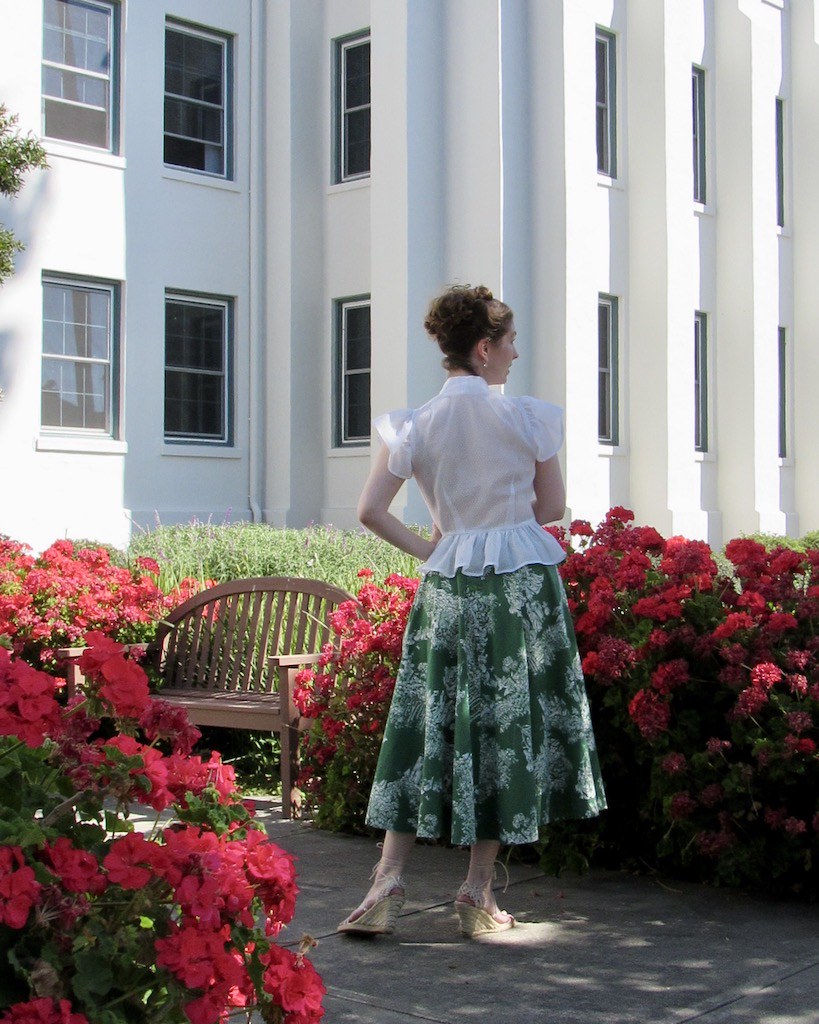
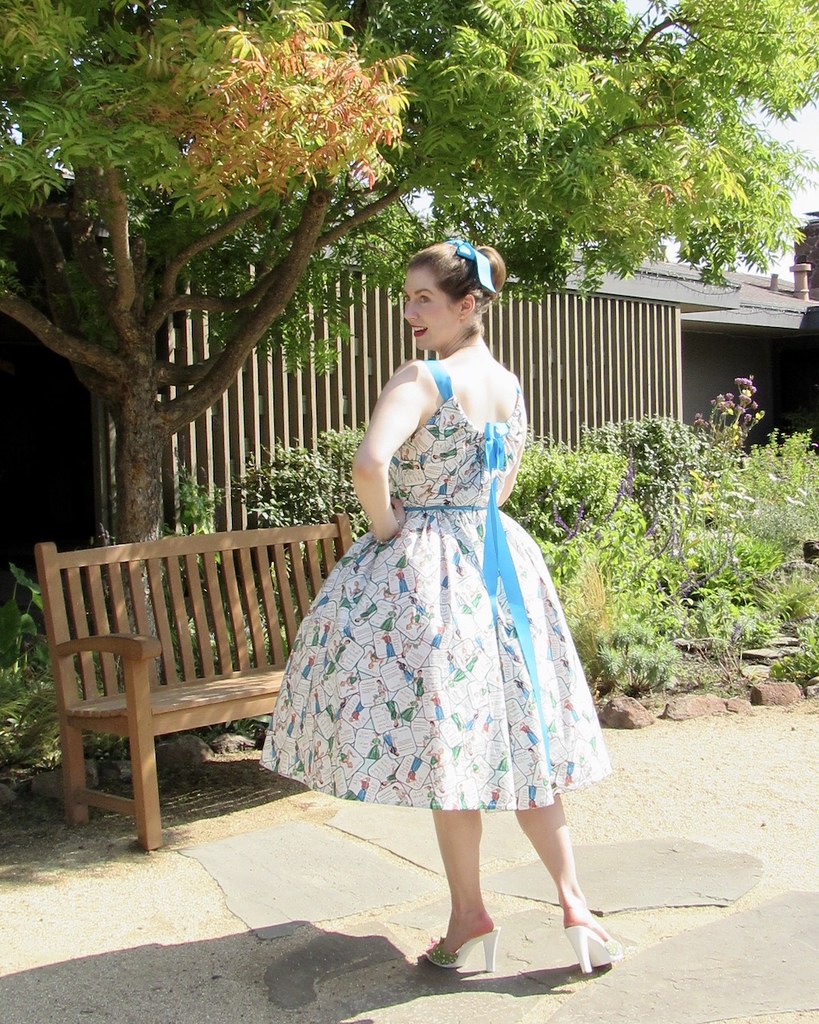
A couple of weeks back, I was rummaging through some of the fabric stash and I came across this quilting cotton.  While it's not exactly Halloween themed, it is very over-the-top, and I thought it would be fun to make myself another brightly colored dress for October since last year's bright green Peanuts themed frock was so much fun to make and wear.  Of course, with a print that is directional, there are limitations.  I decided that a shaped skirt was going to be too much of a pain, and that the very linear print would never look right if the majority of the print was not facing right side up!  Which leaves pleating, or a straight skirt.  Well, I had a little over four yards to work with, and a full skirt is so much more fun than a pencil skirt, so my choice was quite easy.

A couple of years ago I found a Singer Featherweight at an estate sale.  It was a good deal, and I couldn't resist taking her home with me.  She came with a few feet, one of which was a ruffler.  I have been haunted by the attachment ever since.  I couldn't wait to try it out, but no project seemed quite right.  Sure, I have gathered a few pieces of fabric here and there, but how would I figure out what settings to use to make it match another piece of fabric of determinate size?  Well, here was the perfect opportunity, so I finally took the plunge!

There are a number of online videos that show how this attachment works; the Featherweight manual also has directions.  But there is no substitute for actually putting a strip of fabric underneath the foot and playing around with stitch length, and all those wonderful adjustable doohickies on the ruffler itself.

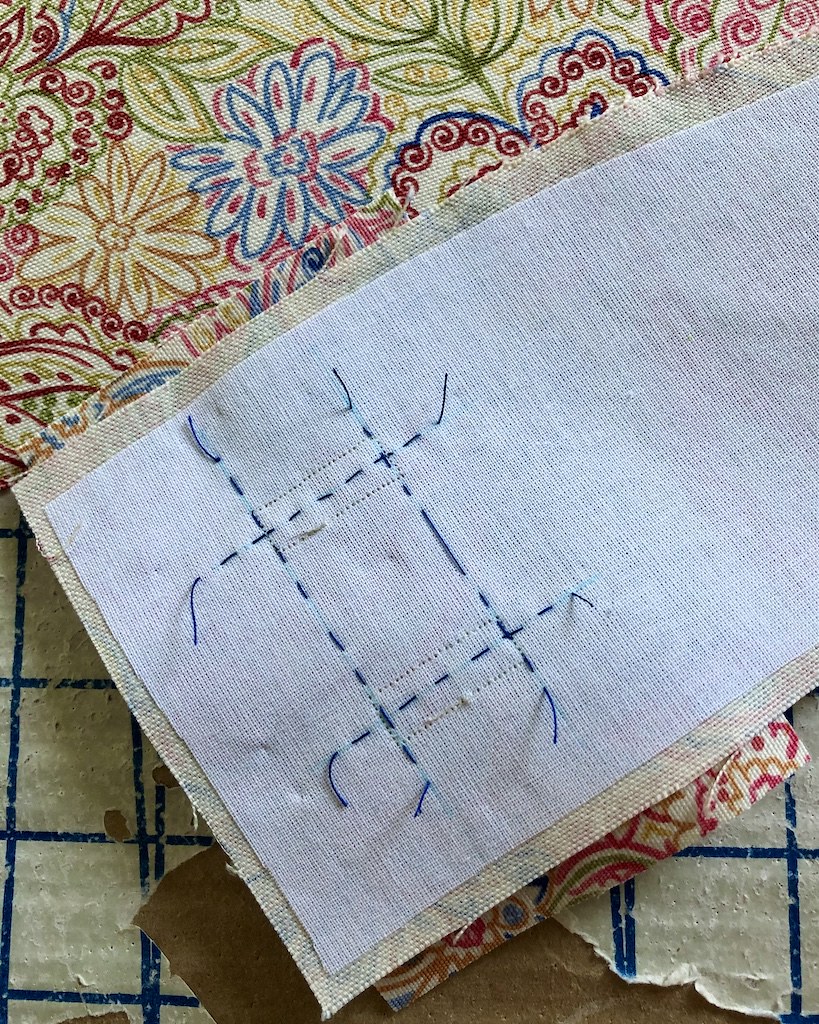
Of course, I needed to do a few calculations to figure out how I would get three widths of 42" wide fabric to match the waistline on the bodice.  I knew that a simple knife pleat would only eat up a third of the fabric, which would not be enough.  So I tried a few things, and in the end, decided to use the ruffler to tuck every twelve stitches at a very small stitch length.  This ate up a bit of the fabric width.  Next, I would pleat the fabric using those tucks as a guide.  Once I messed around with numbers on a piece of paper, I tested it out on some scrap fabric.  And it worked quite well. 

I originally thought that I would use four panels of full width fabric.  I'm not entirely sure what I was thinking, but thankfully, as I was measuring out repeats and seeing what would be left for my bodice and sleeves, I realized there would not be enough yardage.  A full skirt is fabulous, but a hem circumference of 160" is a little extreme, even for me.  I went back to the drawing board and quickly realized that three panels would be plenty, I just had to refigure the pleats.

The most challenging part was deciding where to make those cuts in the fabric.  In the end, I went with three matching panels.  Thankfully, that would leave enough fabric for the bodice and sleeves to fit, and I would have three separate pieces of fabric to play with pattern placement on the top half of the dress.

After I had the three panels cut out, it was time to pleat the top edges.  I decided that I would use the ruffler before stitching any side seams together to give myself some wiggle room.  I was also not sure if the foot would play nicely with seam allowances.

The machine and the ruffler worked perfectly with my fabric on the first go.  Thank you, vintage machinery, for being so reliable.

Next, it was time to stitch up the side seams.  I almost always cut away any selvedge because it rarely lays flat.  This particular cotton selvedge wasn't too tight or loose.  Having recently come across a few images of vintage Alfred Shaheen dresses, it reminded me of the fact that selvedge edges with print titles are often included in his finished garments.

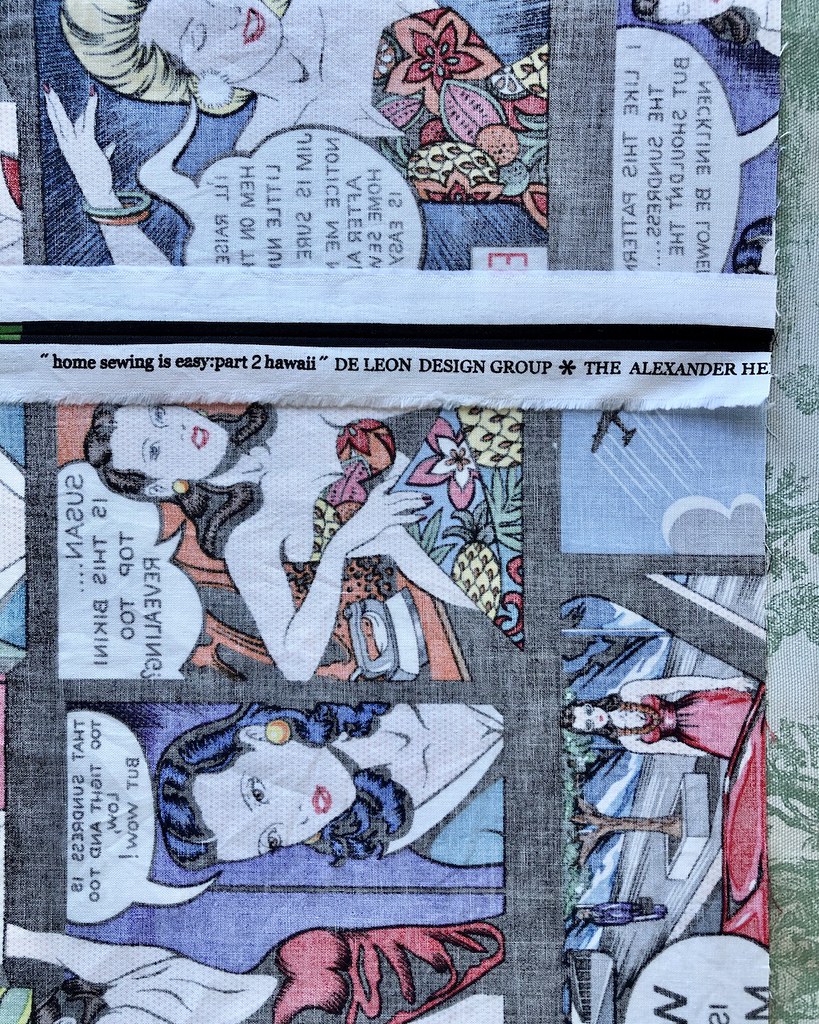
This fabric is most definitely Hawaiian inspired, which reminded me of the trend, and my skirt seam allowances now include the title of this fabric:  "Home Sewing is Easy: Part 2 Hawaii."  It's a fabulous Roy Lichtenstein/Pop Art inspired print from Alexander Henry Fabrics.  I now NEED the first of the series as well, of course.

But back to pleating the already ruffled/pleated fabric.

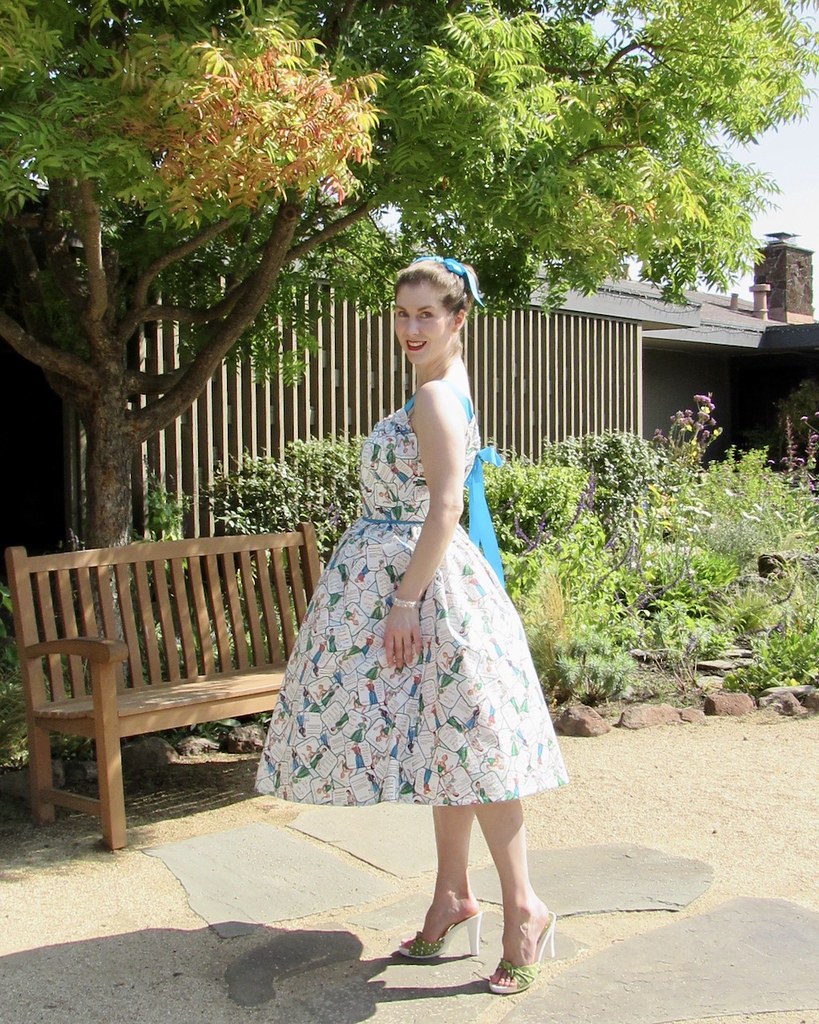
It may not be the most accurate of knife pleated skirts in the world, but it looks pretty good, and all of those lovely frames of comic brilliance are intact.  Which is a win in my book!  And confirmation that home sewing is easy (at least most of the time)!!

Monday, October 26, 2020

Pastel Paisley


I have been meaning to make this skirt pattern for YEARS.  I started with the blouse view about five or six years back, and then finally completed that project a few months ago after I found the bag with the pattern inside (which was what I was looking for).  All the project needed was buttonholes and a hem, so I took care of that.  Thankfully, I had kept the buttons with the folded up project so I didn't have to go searching for them.

And once that was complete, I started on the skirt.  I picked up this bottom weight cotton at a fabric swap a couple of years ago.  The fabric design has grown on me over time, and what I originally thought would make a good wearable muslin of some dress or other, needed to be something I was really going to wear and love (hopefully!).

I have pulled the yardage out a few times when trying to pair fabric with a pattern, but nothing seemed quite right.

And then I started working on this sweater and realized the colors would be perfect together.

I have been getting a bit more brave about machine buttonholes as of late, but I decided to take the time and make bound buttonholes for this project.  I also thought that the lower buttonhole on the waistband would give me grief with the added bulk of the seam paired with this substantial cotton fabric if I tried to make machine buttonholes. 

It was during this project that I ran out of fusible interfacing and finally decided to splurge and get some quality interfacing from Fashion Sewing Supply.  And it's definitely better than what I had been using!

I even had enough leftover yardage to make myself a matching top with this fabric (not the design I had originally conceived of in my mind because there wasn't that much extra to work with) which I am pretty pleased with as well.  So that's two tops that match back to my new skirt.  And the blue blouse I made with this pattern also matches the blue in the design, so I guess that makes three!  Which must be some kind of record for me!!

Thursday, October 22, 2020

A Classic White Blouse

Back in May, I decided it was finally time to pull this skirt out of the closet.

I purchased it from Xtabay Vintage.  I rarely buy clothing of any kind, vintage included, but I just fell in love with the print.  The waist measurement was a little too big, but I figured I could fix that.  The center back opening is a button placket, and while it was a little finicky, and I had to unpick more of that seamline than expected, I made the waist fit properly in the end.  It also makes me want to use that finish on one of my own skirts, so add that to the list of projects in the queue.

Then I went looking for an appropriate top.  Sure, I have a couple of white shirts in the wardrobe, but none of them looked quite right.  As it happens, I found a lovely white swiss dot at an estate sale a couple of years ago, so I had the perfect fabric.  Next, I went looking for a pattern.

I decided that I would try the Rønne Blouse from How to Do Fashion.  It's always a fun challenge working with a new pattern company, and while I did have some issues (starting with printing the PDF file), I got there in the end. 

This particular version is without alteration.  I suspect I will make more of this design, and I will take a wedge out of the bodice back and lengthen the torso a bit (both of which are standard pattern alterations for me).

The blouse is incredibly easy to wear.  It's a bit loose at the waist, which will be exacerbated if I lengthen the bodice pieces and the waist seam line sits at my actual waist.  So I am going to have to go back and see if I should be using one size smaller, or if I just want to adjust that portion of the pattern.

But for a quick project made completely with materials I had on hand, I am going to call this one a success.

And I am thrilled about how it works with this skirt.  I have also reaffirmed my love of peplums.

I could absolutely see this blouse pattern as a coverup/jacket for a full length 1930s or 1940s style formal gown.  Not that I need any formalwear in my life at the moment, but the design is giving me ideas, especially since it's been quite a while since I dug into a really involved project.

And while I will probably not be wearing any white blouses in lightweight cotton until next Spring, I see myself getting a whole lot of use out of this garment.  And this skirt is making me want to stitch up a few more white tops.  I've never really been a fan of plain white when it comes to wardrobe pieces, but textured white fabrics could make me change my mind.


Blouse:  Made by me, Rønne Blouse
Skirt:  Vintage, from Xtabay Vintage
Shoes:  Colin Stuart
Necklace:  Vintage

Saturday, October 17, 2020

A Cropped, Coral Colored Sweater

In July I had a hankering to knit.  Go figure, right?!  But the urge struck, and so I gave in, despite the temperature.

A few months earlier, Poison Grrls had a sale on their knitting patterns.  I kept seeing lots of cute patterns designed by Amy Appel show up on my Instagram feed, so I decided to try one for myself.

I had this coral colored wool in my stash for a few years, and since I had enough for the project, I decided to go for it.  Coincidently, the yarn works very nicely with the beaded circle skirt I have been stitching.  And a cropped silhouette works perfectly with a circle skirt, so hooray for at least one separate in my wardrobe that will work with the sweater.

I don't wear my hand knits nearly enough, and one of the issues is that I tend to choose patterns and yarn colors without a whole lot of thought to what I will wear with the sweater once it's finished.  I don't have this problem with sewn items, but for some reason, sweaters seem to exist in some alternate wardrobe universe for me.  But I'm working on the problem!

This particular design is knit from the top down.  It's a technique that I am not very familiar with, but the instructions were clear.  They didn't always make sense while reading through the words in my mind, but like so many knitting pattern, you just have to have needles and yarn in hand to figure things out.

I can see the appeal of working on a garment in this way since you can try it on as you go.  Am I going to switch to knitting only top-down sweaters in the future?  I doubt it, but I am pleased with the way this pattern worked out for me, and I am not against trying something similar in the future.

This design also gave me a chance to pull out the double-pointed needles.  One of these days I am going to try the magic circle trick with circular needles, but for now, the old stand-by double pointed set does its job.

The only real change I made to the pattern is the neckline ribbing.  The pattern comes with a mock turtleneck shaping.  The instructions suggest a loose bind-off technique that I have never used before, and it certainly is stretchy, but it looked gapey and odd to me.  I tried a couple of other bind-offs, but one was too tight, and the other didn't look great.  

Instead of getting frustrated, I folded it in half and stitched the bind-off to the base of the ribbing.  And you know what?  I love it!  I am definitely going to use this neckline style again.

The weather these days is even hotter than it was in July, so I still haven't worn the sweater, but I have a feeling this one is going to see a lot of wear.

It turns out, another skirt I made this year is a perfect color match to this sweater, so that's already two matching skirts in the closet!  And I can definitely see myself making another version.

[Ravelry notes on this sweater may be found here.]

Tuesday, October 13, 2020

Vintage Pattern Illustrations and Novelty Prints


I haven't been all that interested in the recent Vogue Pattern offerings, which is probably a good thing.  I have plenty of other patterns on hand to try, and they are taking over my sewing space.  And I definitely need a better storage solution, because the one pattern I want to lay my hands on is never anywhere to be found.  But I find it so very hard to part with any of them because I can see myself needing something similar in the future.  What I need is a pattern hoarding intervention.  

And I was doing so well on my pattern purchasing ban.  But then I caved and made an exception for Vogue 1696.

On a positive note, I actually managed to make up the pattern almost as soon as I got my hands on it.  And I am so very glad that I did.  I can say with certainty that I felt the most "me" I have in a long time getting dressed in a petticoat and putting a ribbon in my hair for the day.  It might seem trivial, but it's the little things that are getting me through this very bizarre experience we are all living through.  I have also taken to wearing lipstick each day, even if it might stain the inside of my face mask; because it makes a difference to me in feeling ready to face the day.  And I don't think I am the only one!

While sewing this, I was very curious to see how ribbon straps fed through the bodice neckline channels would actually work on a body.

There really is no way to know how this garment is going to feel until the ribbon is in place, which happens at the very end of construction.  I suppose you could mock up the bodice, but without the weight of the very full skirt, I don't think it would give an accurate read.

When I first tried it on, I was a little concerned that the straps were not going to stay put.  One thing I did was add a waist stay to make sure that portion of the dress was secure on the body.  It also helps to pull the ribbon a bit tighter than you think you want and re-adjust the neckline of bodice front and back once the ribbon is tied.

Having worn this dress for an entire day, I can say that I did not have any issues with having to pull at the straps.  

One thing to keep in mind, though, is that you don't want to sit on or pull the ribbon ends - if that bow comes un-tied, the whole bodice is going to fall down to the waist.  You could certainly cut a shorter length of ribbon, but I rather like the drama of the ties falling almost to the hemline.

I previously noted that the pattern illustration must have influenced my color choices with this dress.  There is even a vintage photograph of what appears to be the same dress design, also with a turquoise hued ribbon.  I am sure that I have come across that photograph in the past, and perhaps it subconsciously suggested this combination of fabric and ribbon choice to me.

What I am certain of is the fact that I need more turquoise colored clothing in my life; and some turquoise shoes would also be lovely; and perhaps some turquoise jewelry.  It is absolutely one of my favorite colors! 


Dress:  Made by me, Vogue 1696
Petticoat:  Made by me
Shoes:  Colin Stuart