I thought it was time to do a petticoat tutorial since I have had so many requests for one.
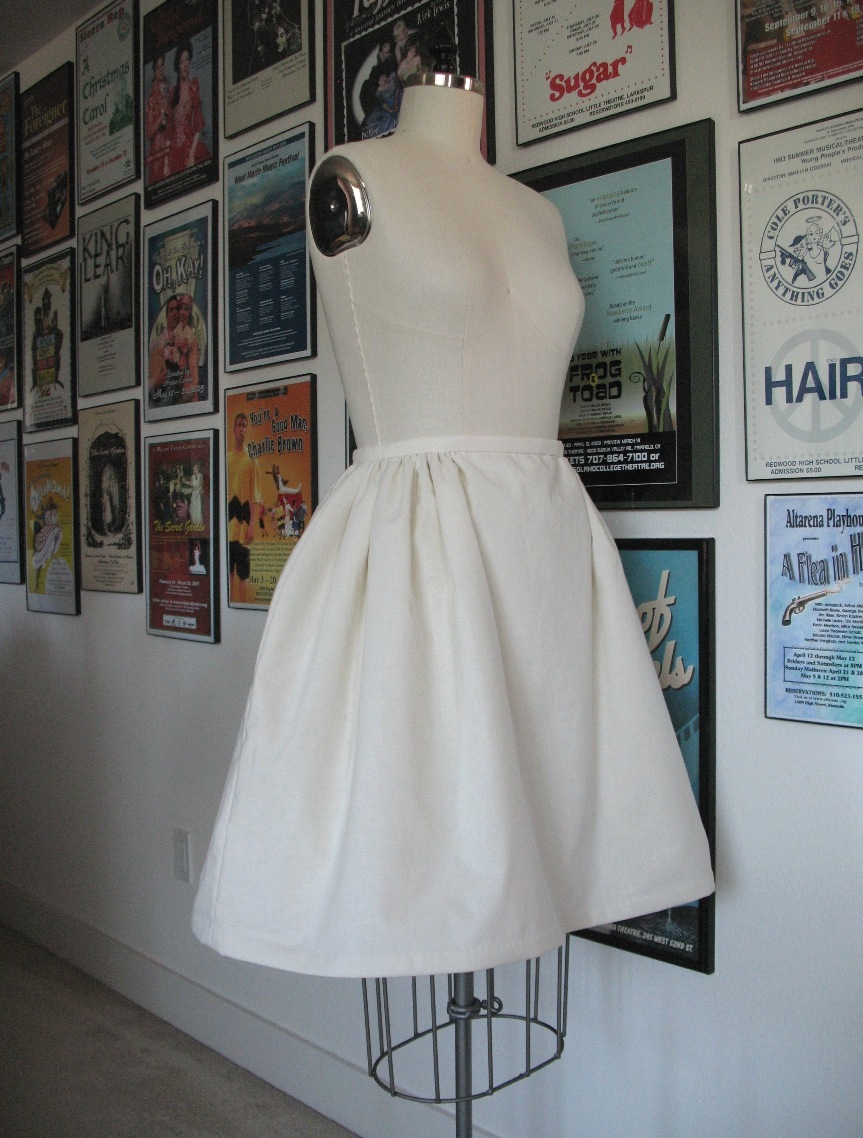
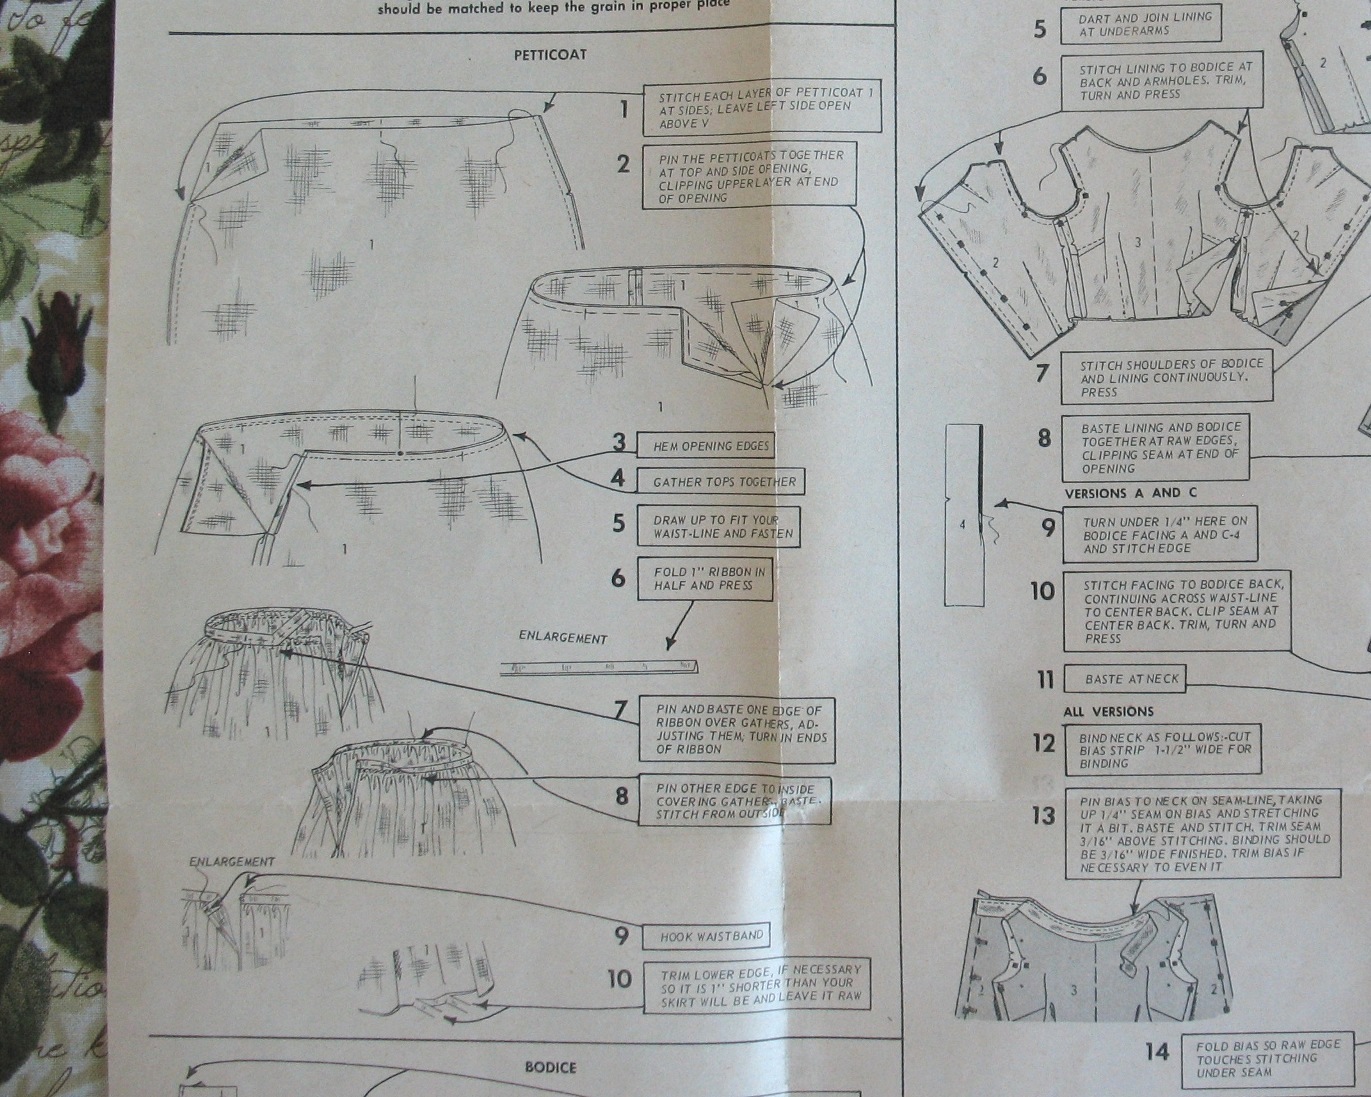
I should preface this by saying that there many, many different silhouette options; this is just one which happens to be very suitable for a 1960s bell shaped silhouette, which is what I am currently working on. I did not take many in-process photos, so
please bear with the line drawings.
Generally, I prefer more of an a-line silhouette in a
petticoat with the poof starting at mid-hip, but Vogue 4203 requires something different – something I do not currently
have in my closet . . . and here we are.
The pattern actually includes a petticoat made from a double layer of netting, although that
pattern piece is missing from my copy. But never fear . . . I just used my front skirt piece to create the petticoat pattern by smoothing out the jagged upper pleated edge. One was cut for the front of the petticoat, and one was cut out and then cut in half for the back (I prefer to have a center back opening so the side gathers are more even on both sides). But really any gathered skirt pattern should work with minor modifications - just look for one that is similar to the silhouette you are looking to create.
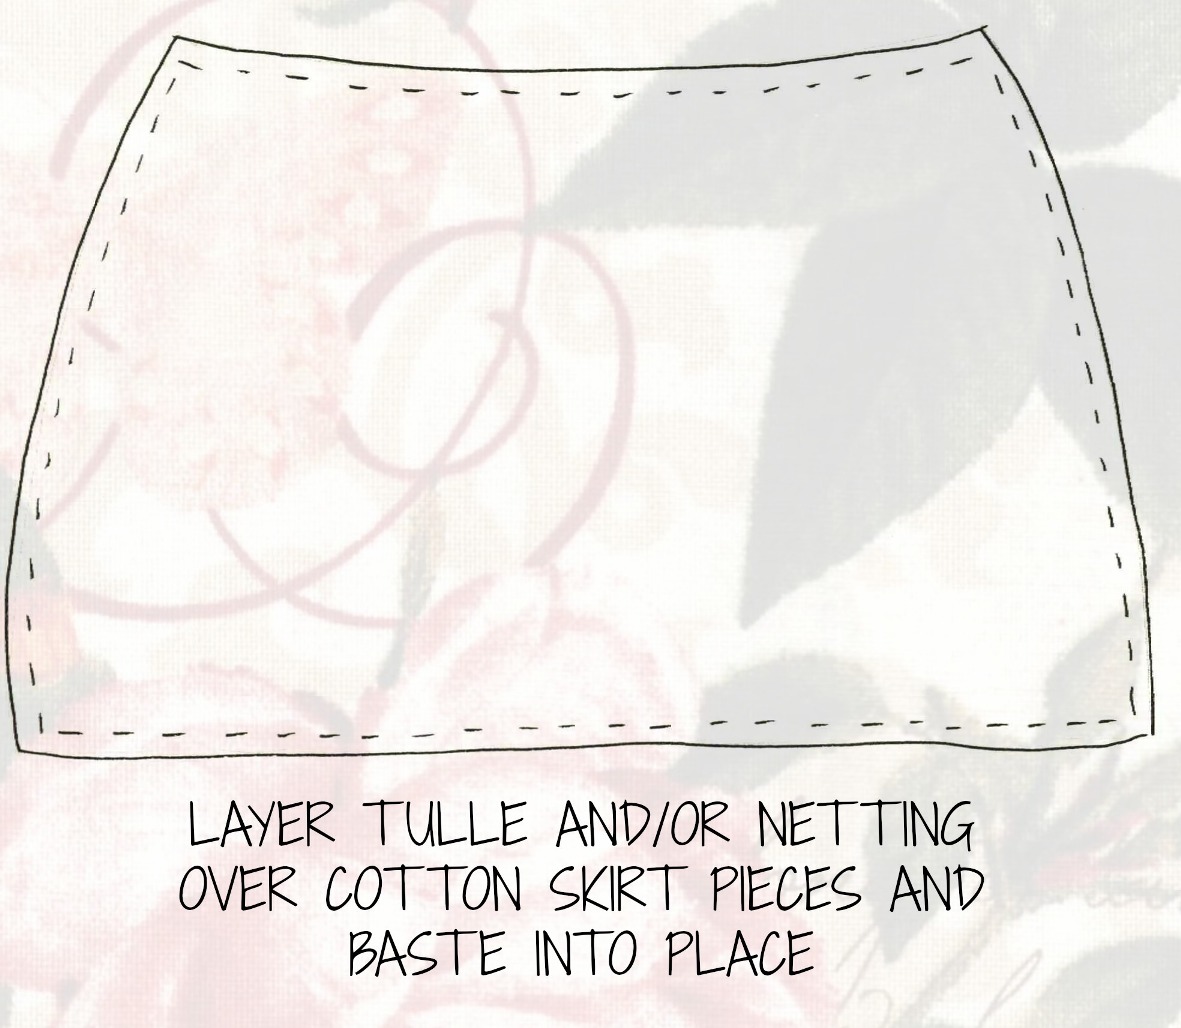
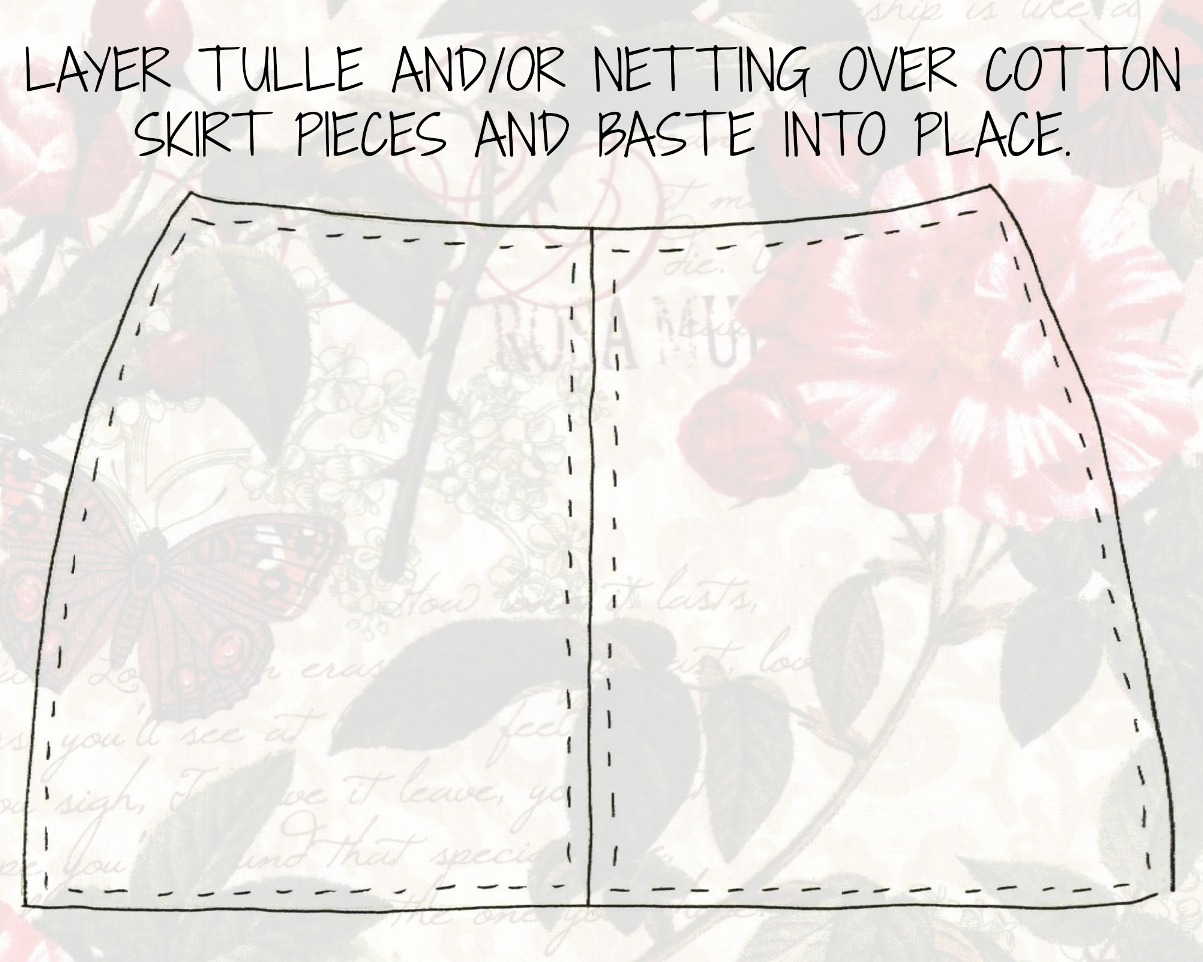
Layer your tulle and/or netting over a layer of cotton and
baste into place along the edges. Repeat for the back pieces.
Many petticoats are made exclusively from netting. I find this rather itchy. Tulle is a less itchy option with less body
than netting, but it can still irritate my skin. My solution is to layer the itchiness between layers of cotton.
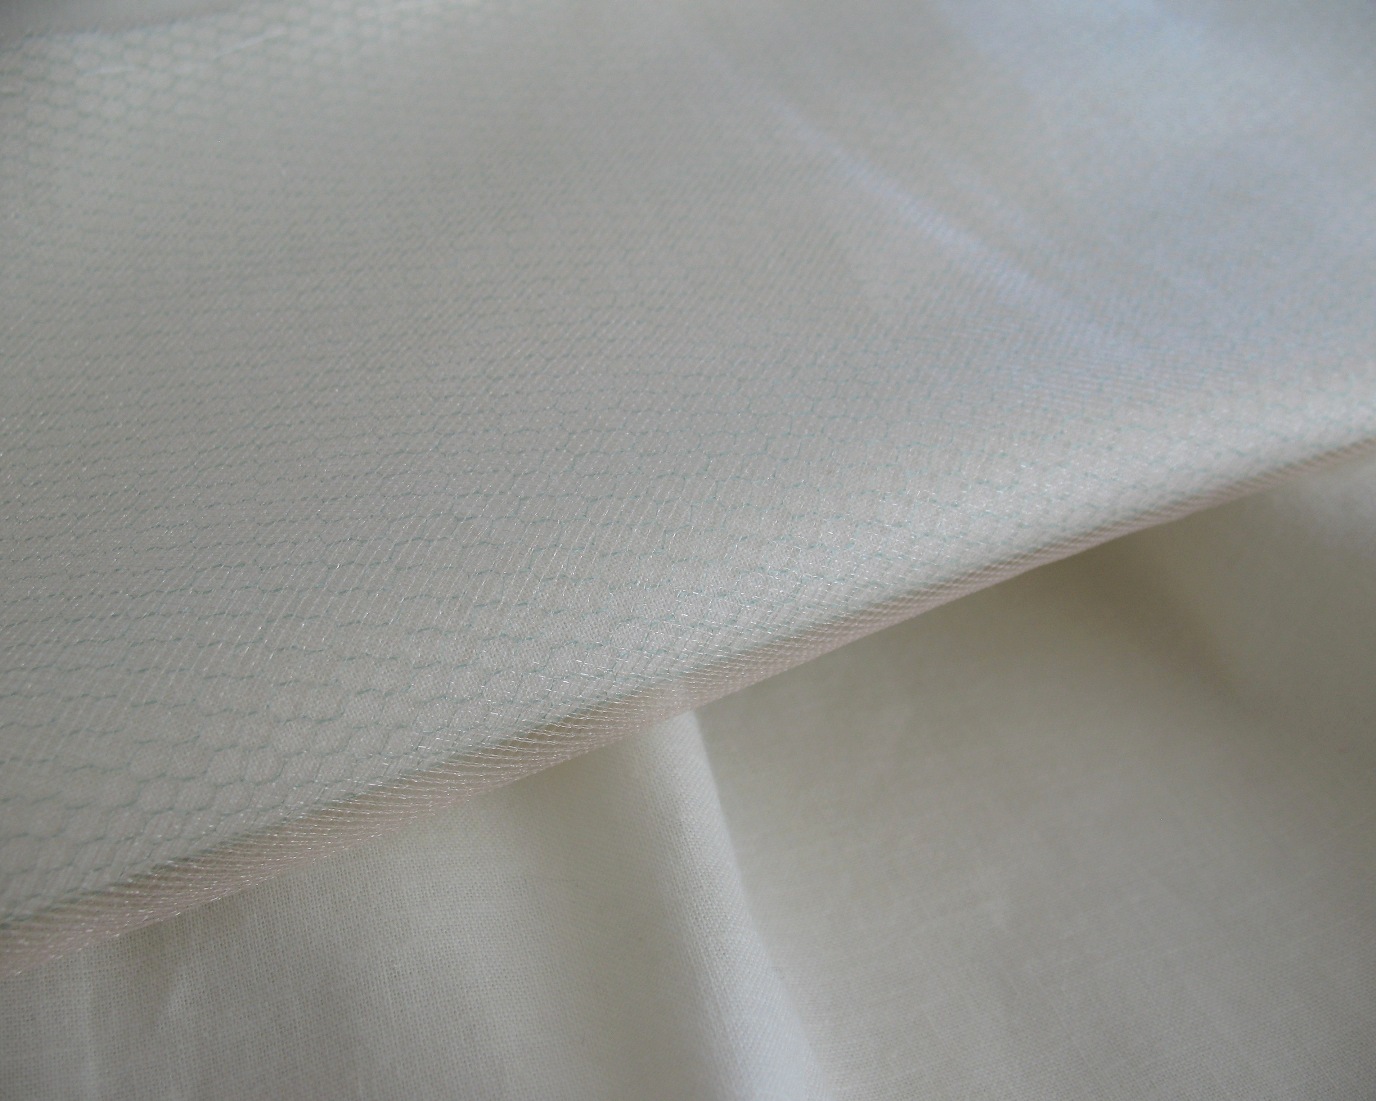
For this particular petticoat, I used a single layer of tulle (pink) over a single layer of netting (green) basted to a layer of cotton.
For this particular petticoat, I used a single layer of tulle (pink) over a single layer of netting (green) basted to a layer of cotton.
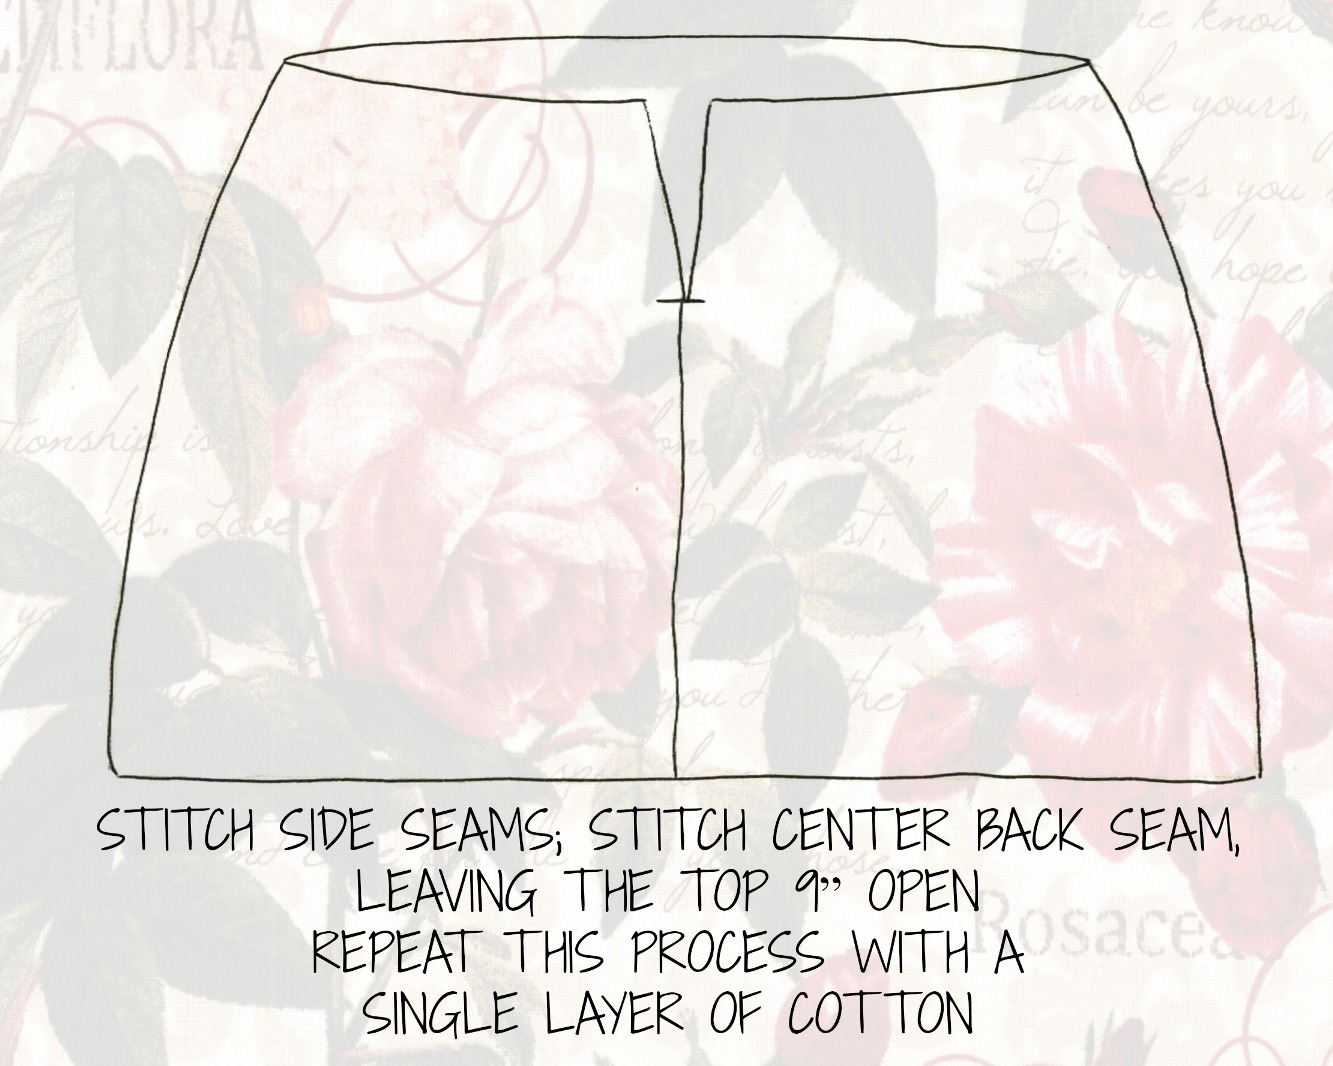
The tulle, netting, and cotton will now be treated as a single layer. Stitch the side seams together and stitch the center back seam, leaving an opening at the top.
Repeat this process with a single layer of cotton. Now you should have the beginnings of two separate skirts, one that contains layers of tulle, netting, and cotton, and a duplicate lining made of cotton.
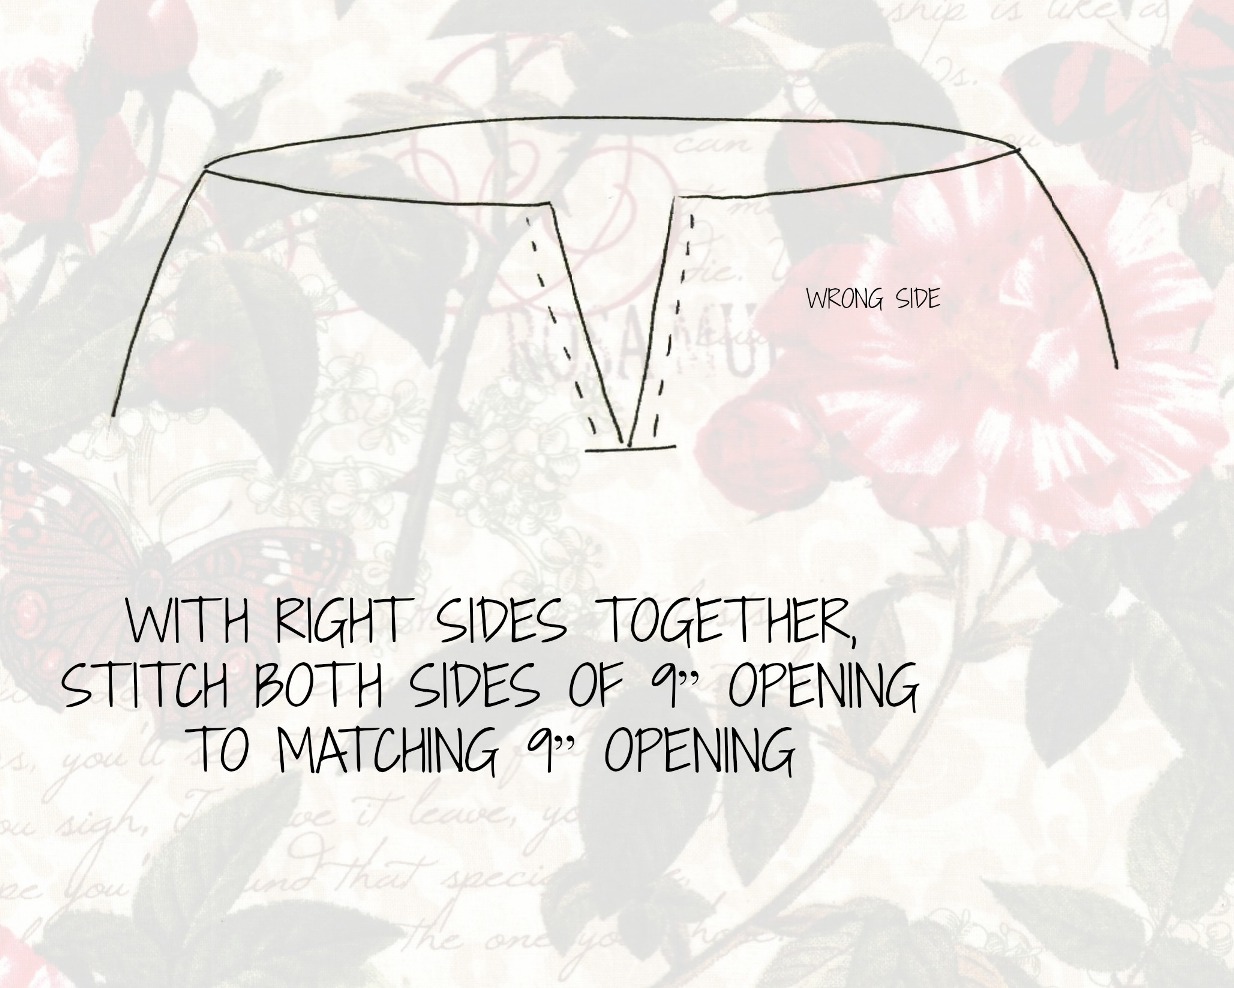
With right sides facing, join the two layers together along the center back opening.
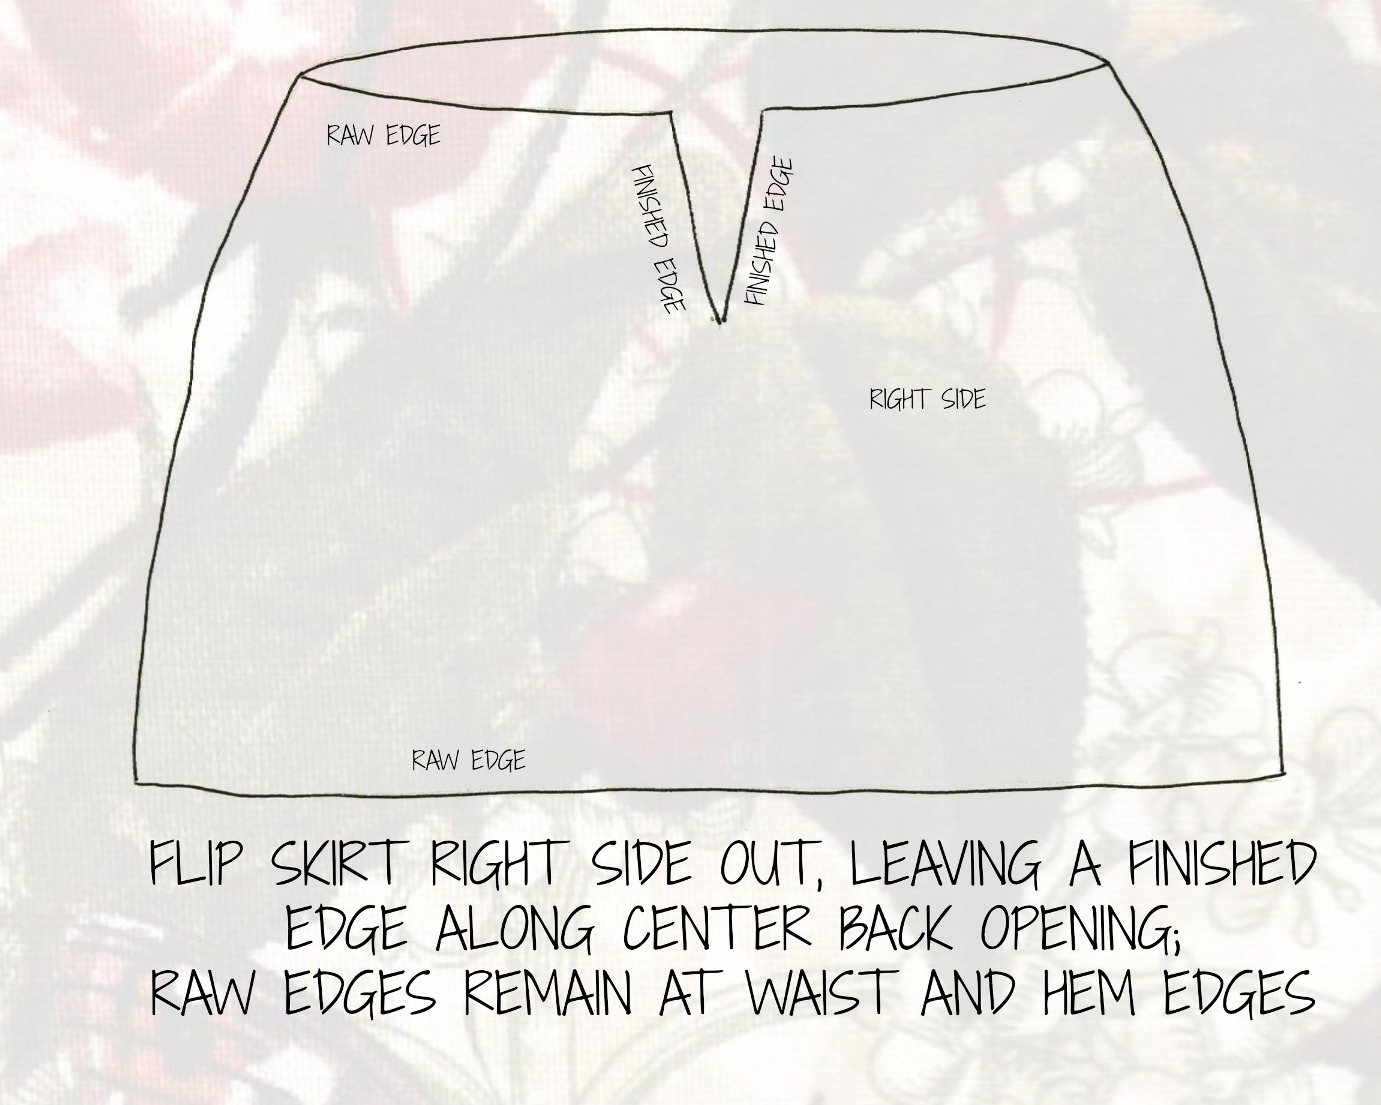
Flip the skirt right side out, leaving a finished edge along the center back opening; you will still have raw edges at the waist and hem edges. You could certainly insert a zipper instead, but they are really not necessary for a petticoat.
Baste the raw upper edges together.
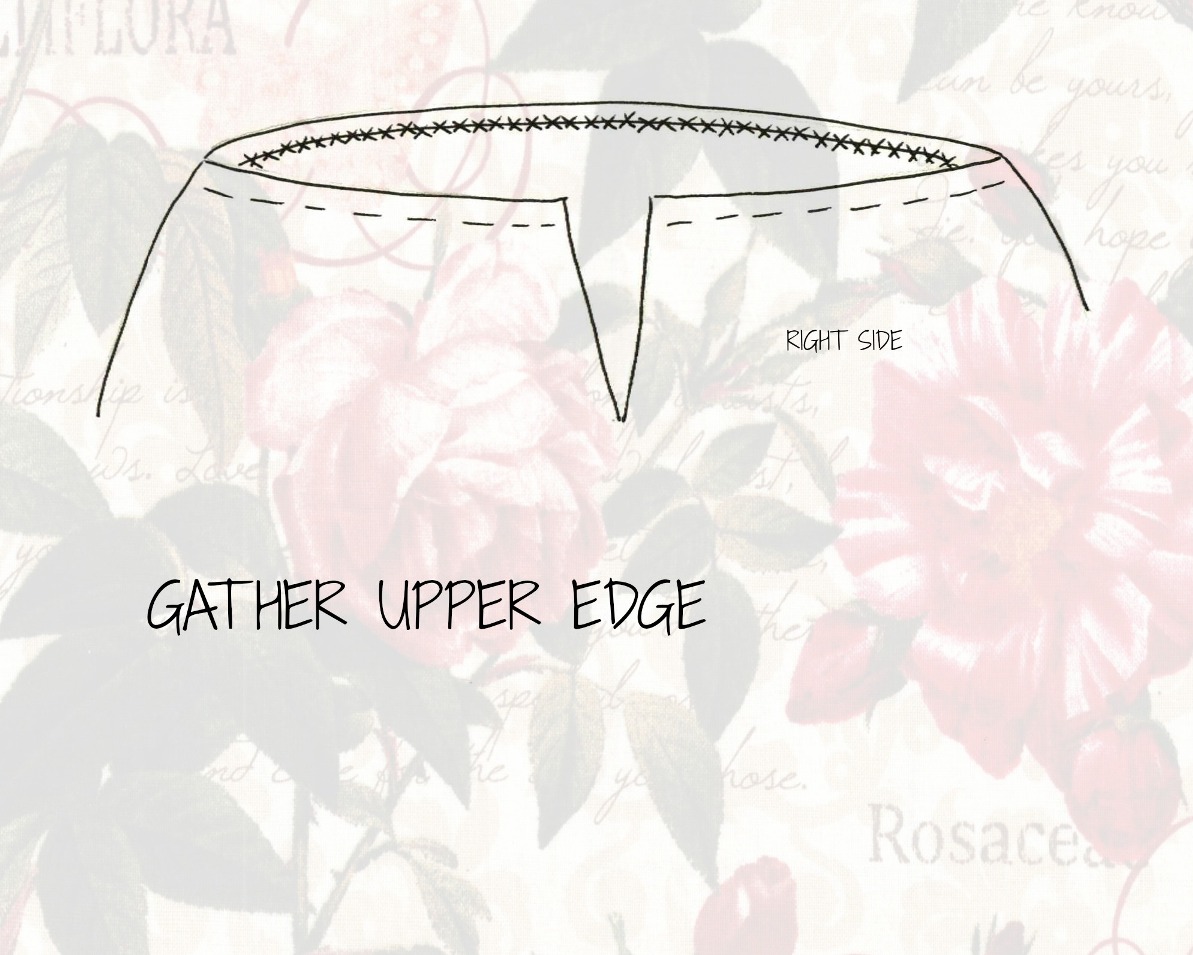
Gather the upper edge. I prefer to push the majority of the gathers to the hips, leaving the center front and center back relatively flat.
Because of the bulk created by two layers of cotton plus two layers of netting & tulle, I like to use a zig-zag stitch and a length of crochet thread to gather petticoats (and anything bulky, for that matter). This saves on the frustration of snapped gathering threads.
Because of the bulk created by two layers of cotton plus two layers of netting & tulle, I like to use a zig-zag stitch and a length of crochet thread to gather petticoats (and anything bulky, for that matter). This saves on the frustration of snapped gathering threads.
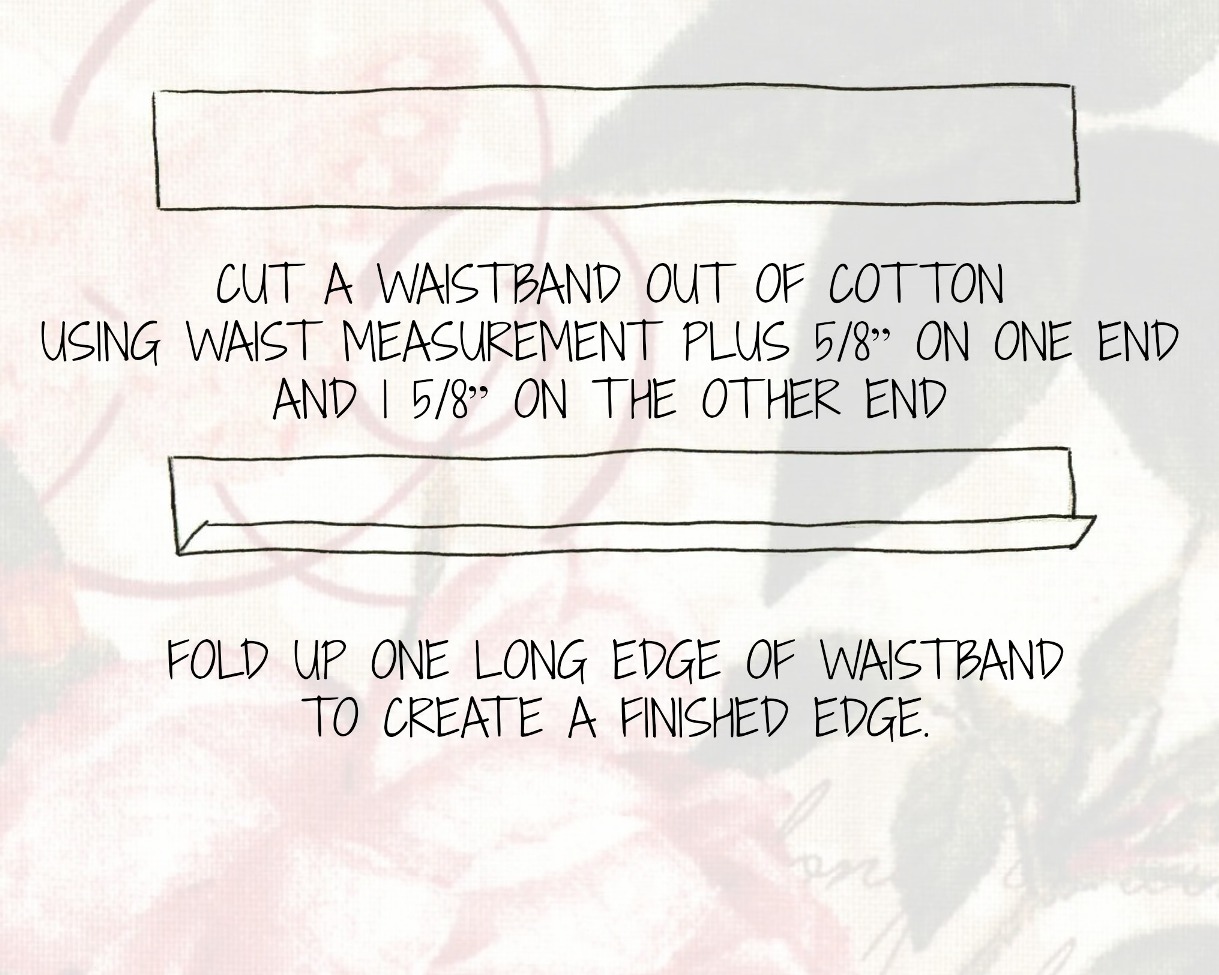
Cut a waistband out of cotton using the
measurement of your waist plus 5/8” on one end and 1 5/8” on the other
end (I like to interface this portion as with any other waistband). I like my skirts to be snug at the waist, but you can certainly add extra ease into the waistband if you like. Fold up one long edge of waistband
to create a finished edge.
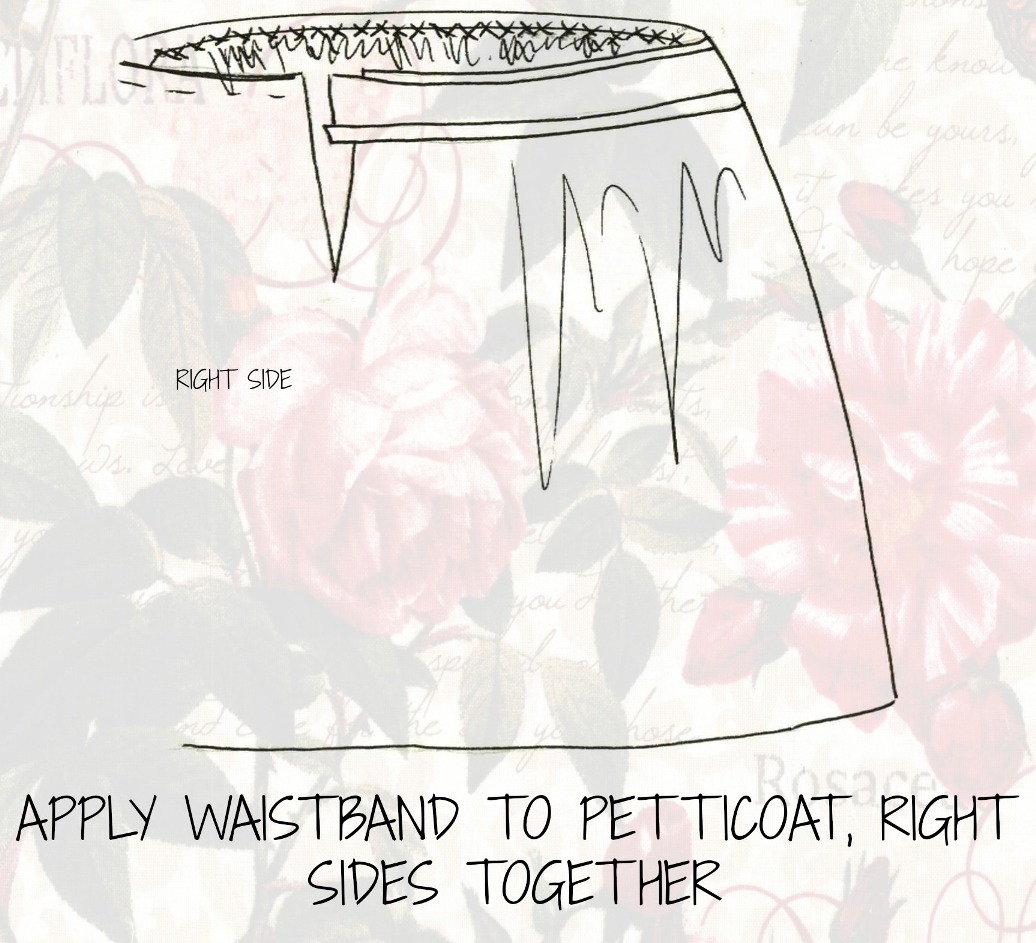
With right sides together, stitch the waistband to the gathered upper edge, making
sure to leave the appropriate amount of overhang at each of the opening edges.
With the right side of skirt facing, fold waistband in half,
right sides together. Stitch the folded edge in place,
trim, and turn waistband right side out.
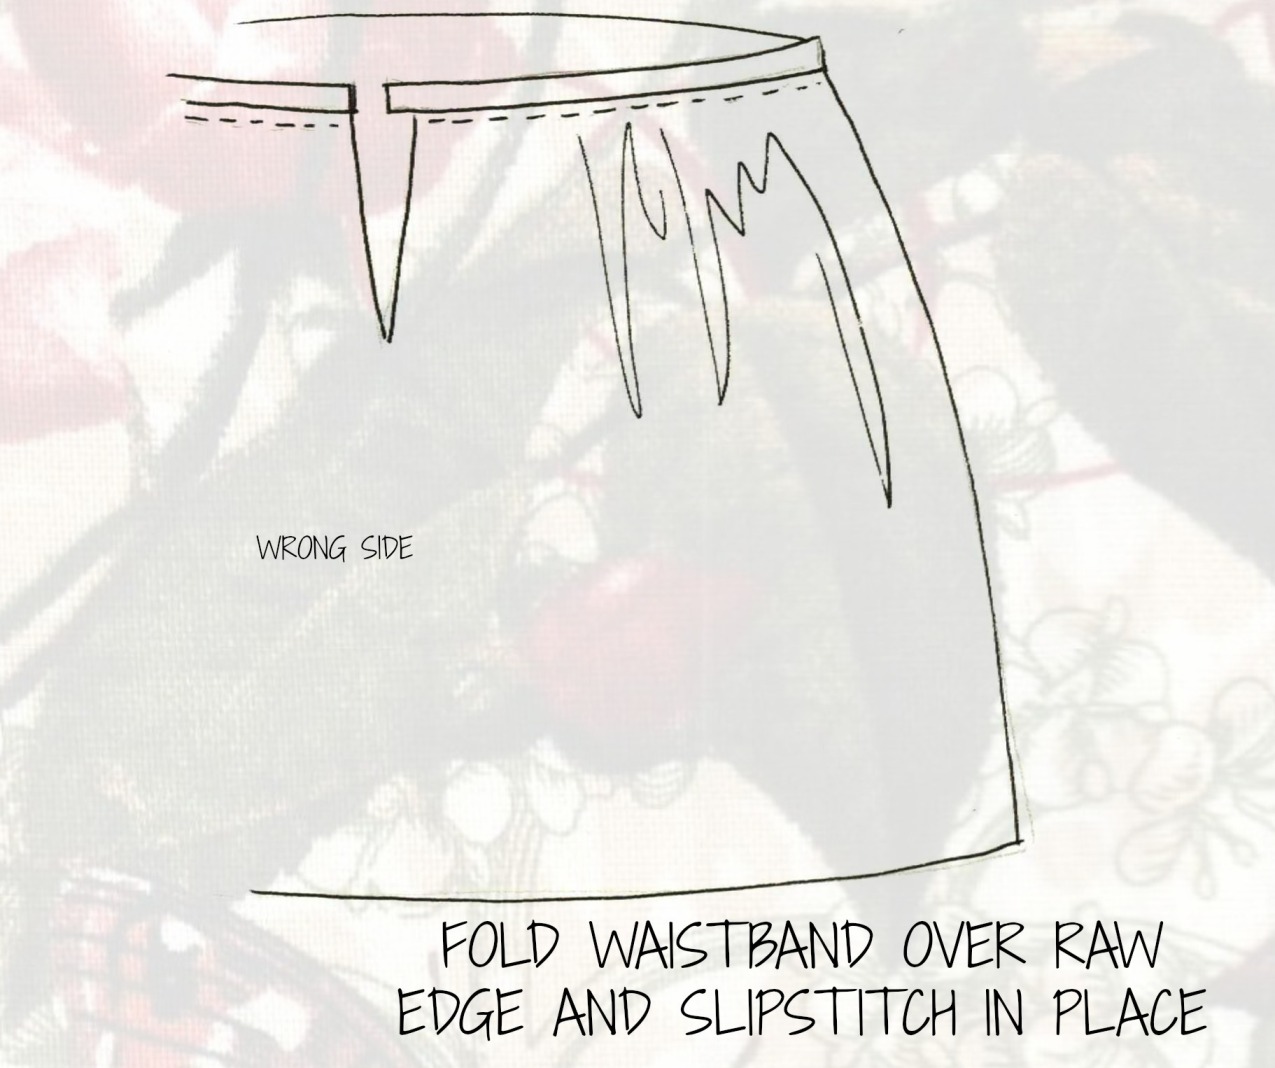
Fold the waistband over the raw skirt edge and slipstitch in place.
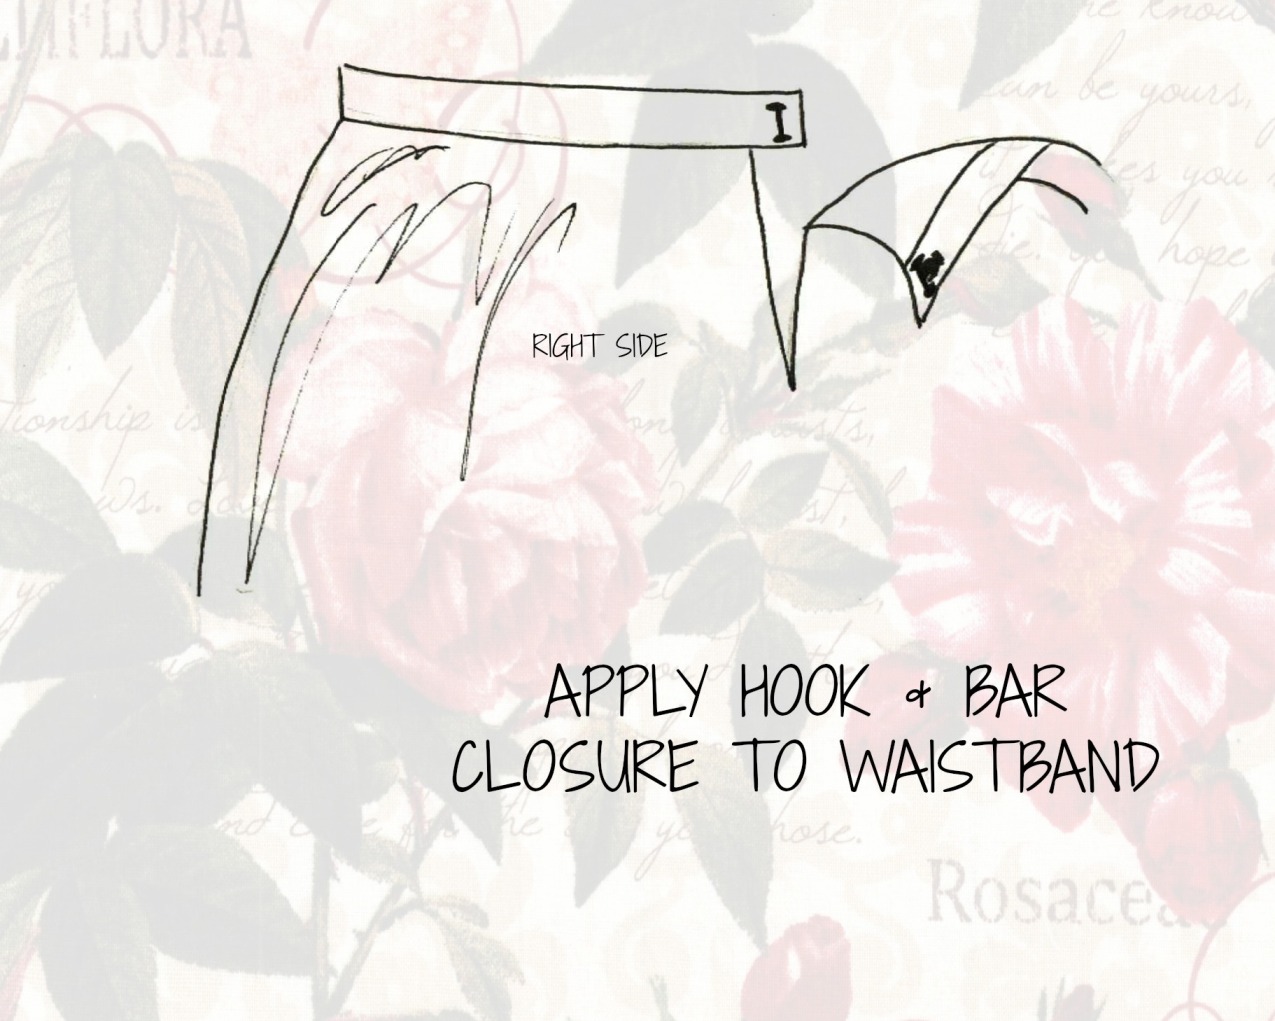
Apply a hook & bar closure to the waistband. I believe these pictures actually depict the
“wrong” way to close a woman’s skirt, but it has always been easier for me to
reach around to my back and hook the right side over the left – and that is
more important to me than following standard protocol. If you are looking for a more standard application, you may want to make that alteration.
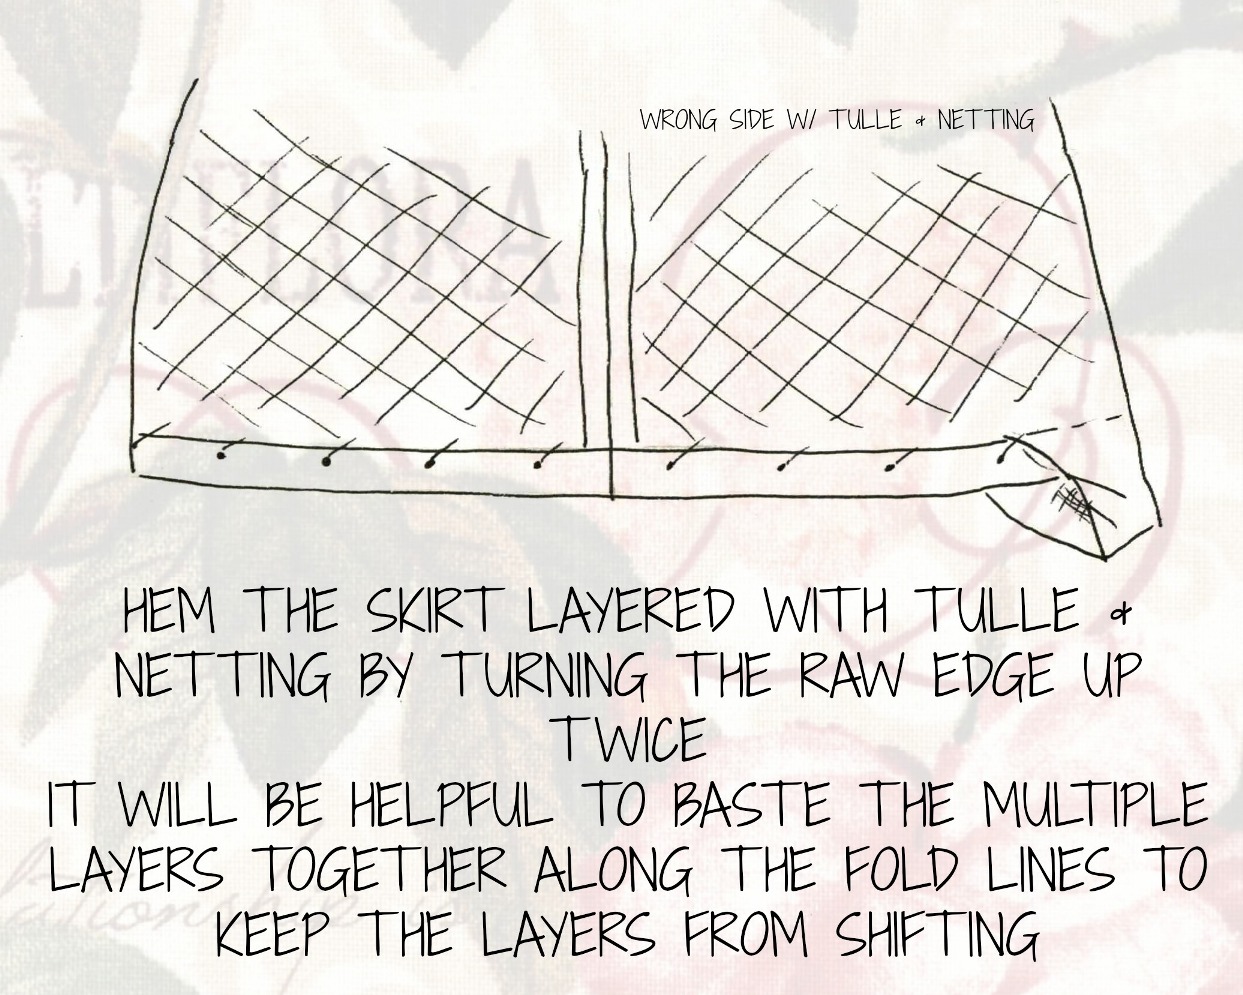
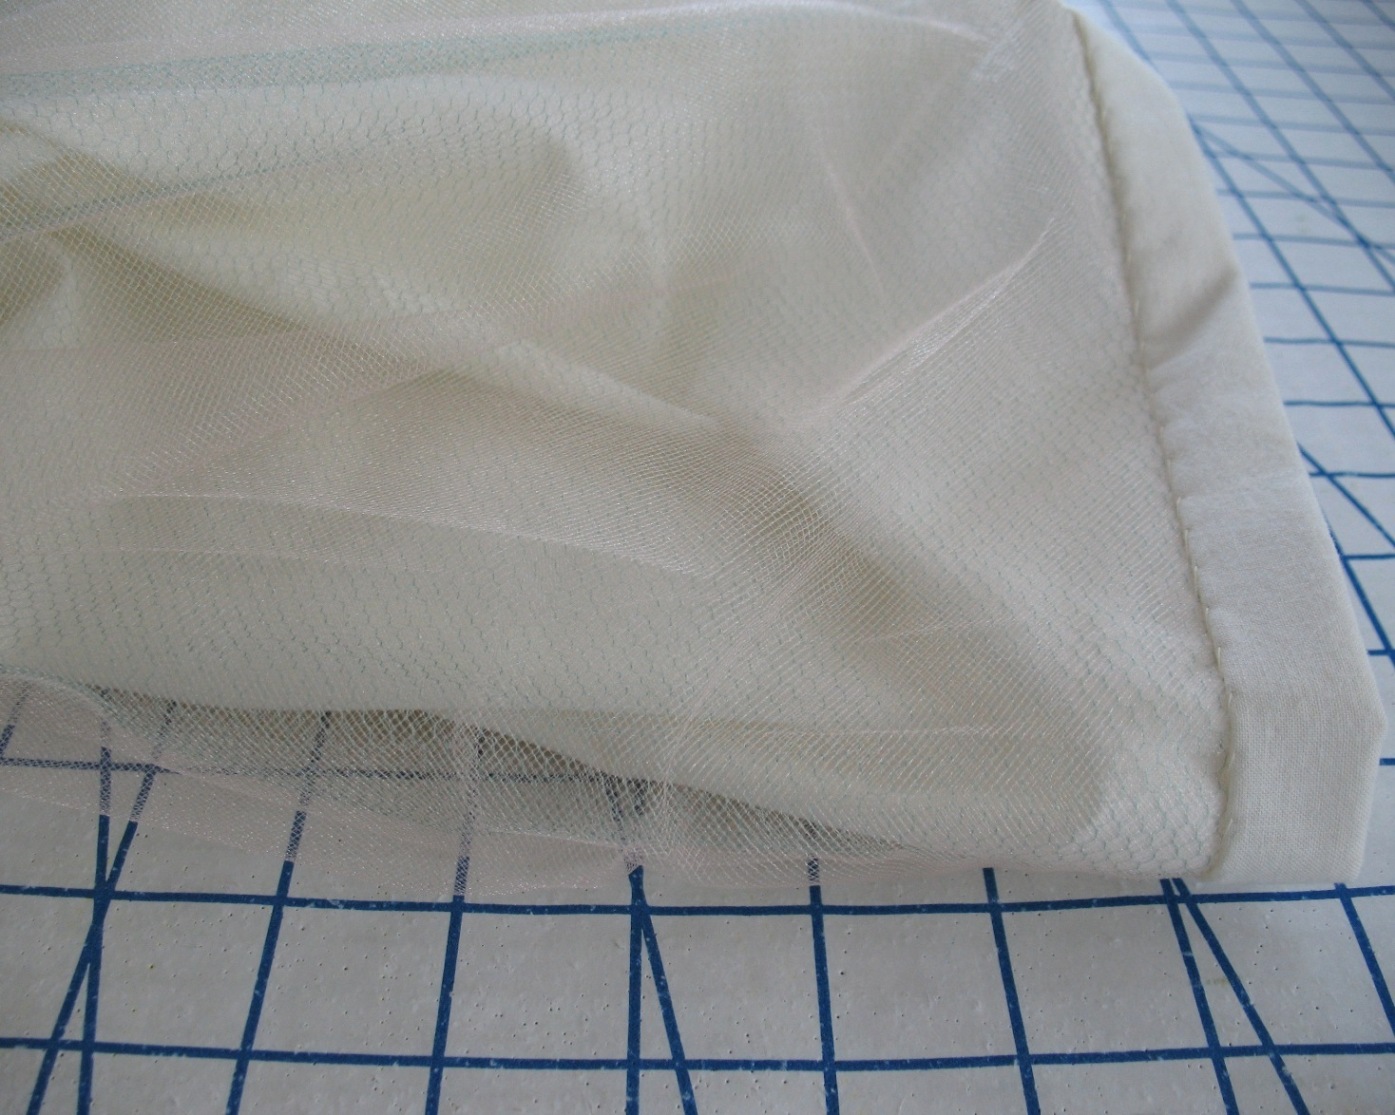
Hem the skirt layered with tulle & netting by turning
the raw edge up twice. It will be
helpful to baste the multiple layers together along the fold lines so they cannot shift. And make sure to use a presscloth when you iron over tulle & netting - it will make a huge mess if you don't!
Once everything is stitched into place, don't worry about the layers of tulle, netting, and cotton separating - that just adds to the poof!
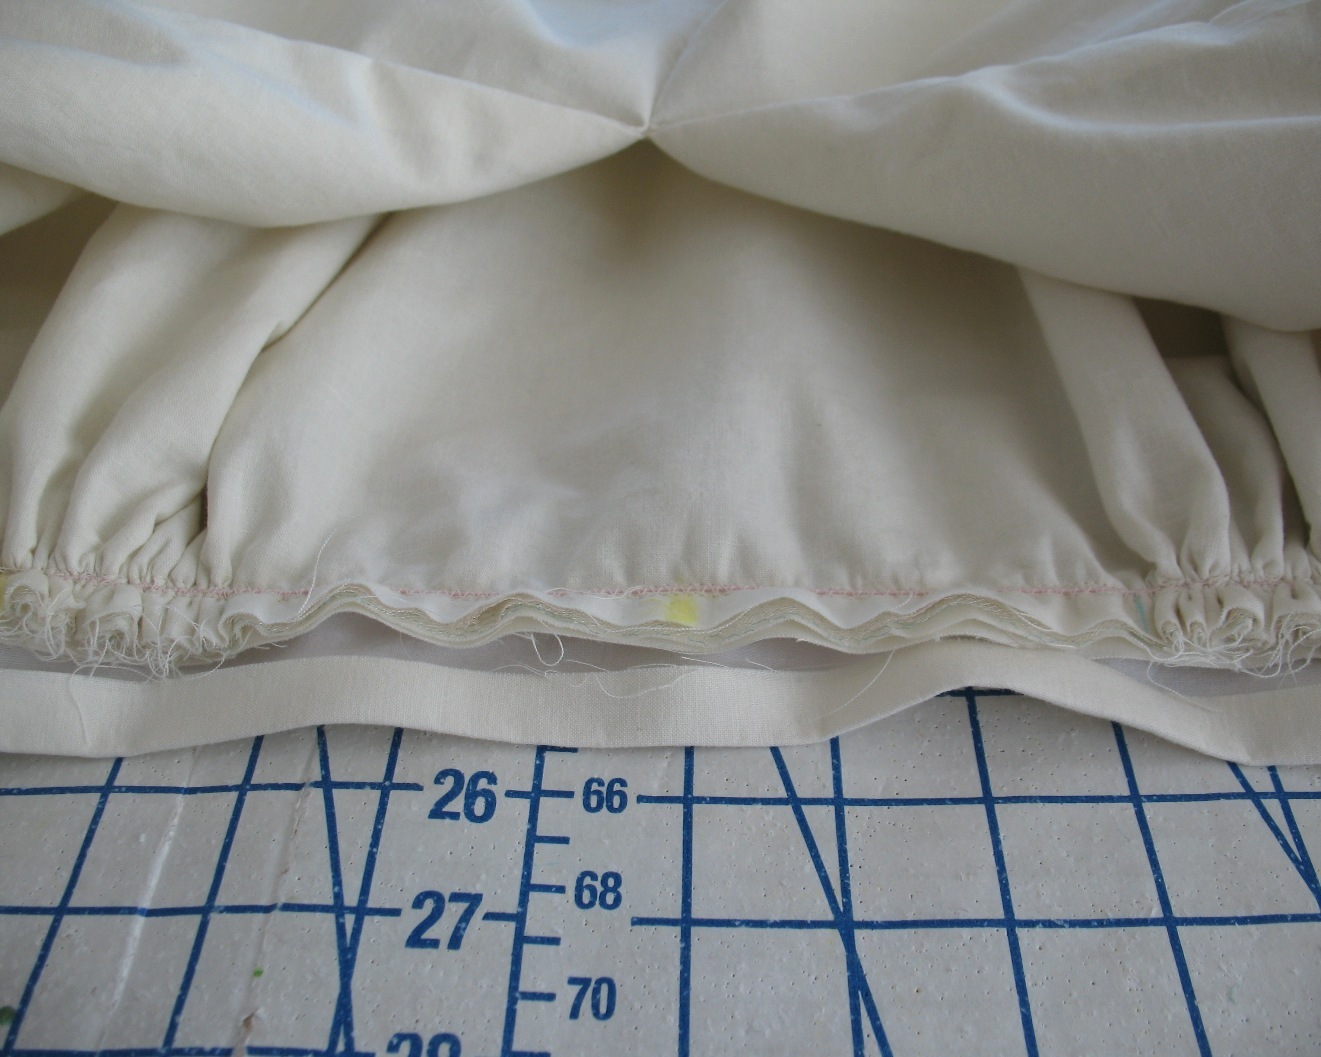
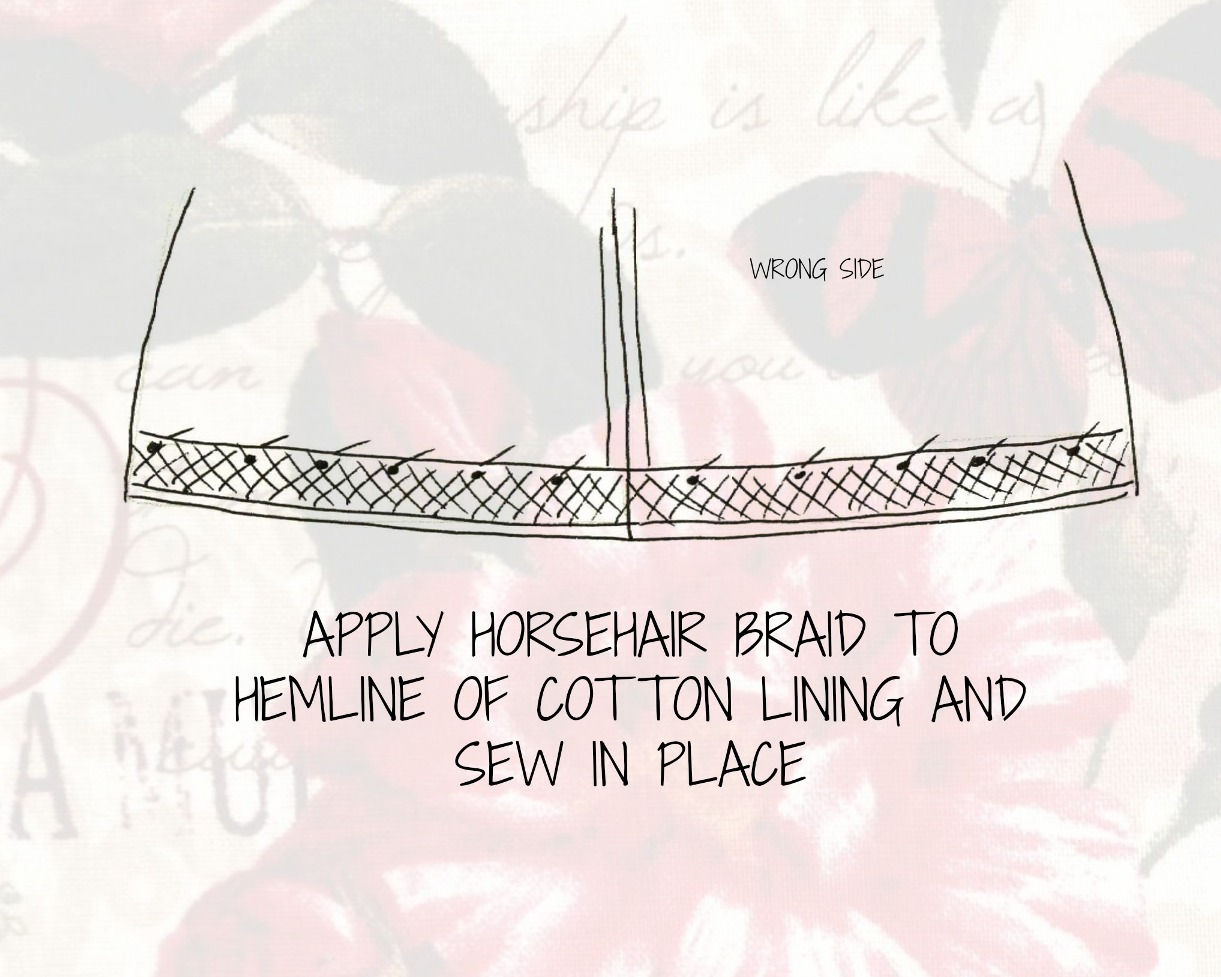
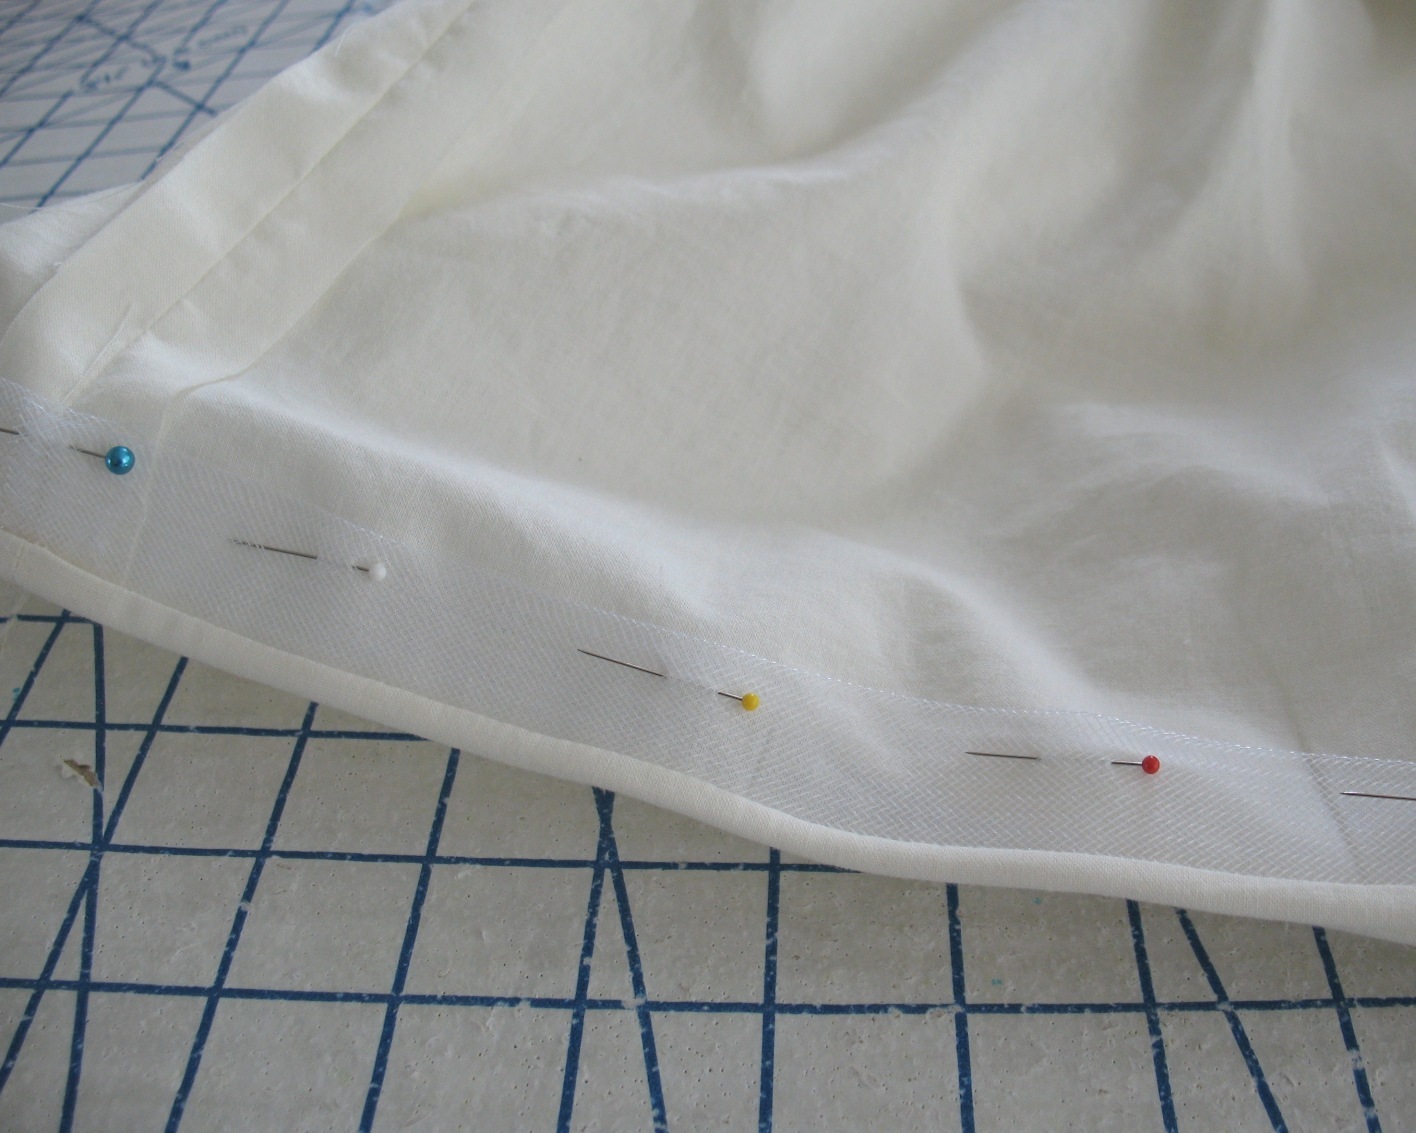
Apply horsehair braid to the hemline of the petticoat lining (the single layer of cotton) and sew in place.
Apply horsehair braid to the hemline of the petticoat lining (the single layer of cotton) and sew in place.
The first petticoat I made was not done this way, and the
lining has a tendency to get caught between my legs when I walk – the horsehair
will push that inner hemline away from the body and will stop that from
happening.
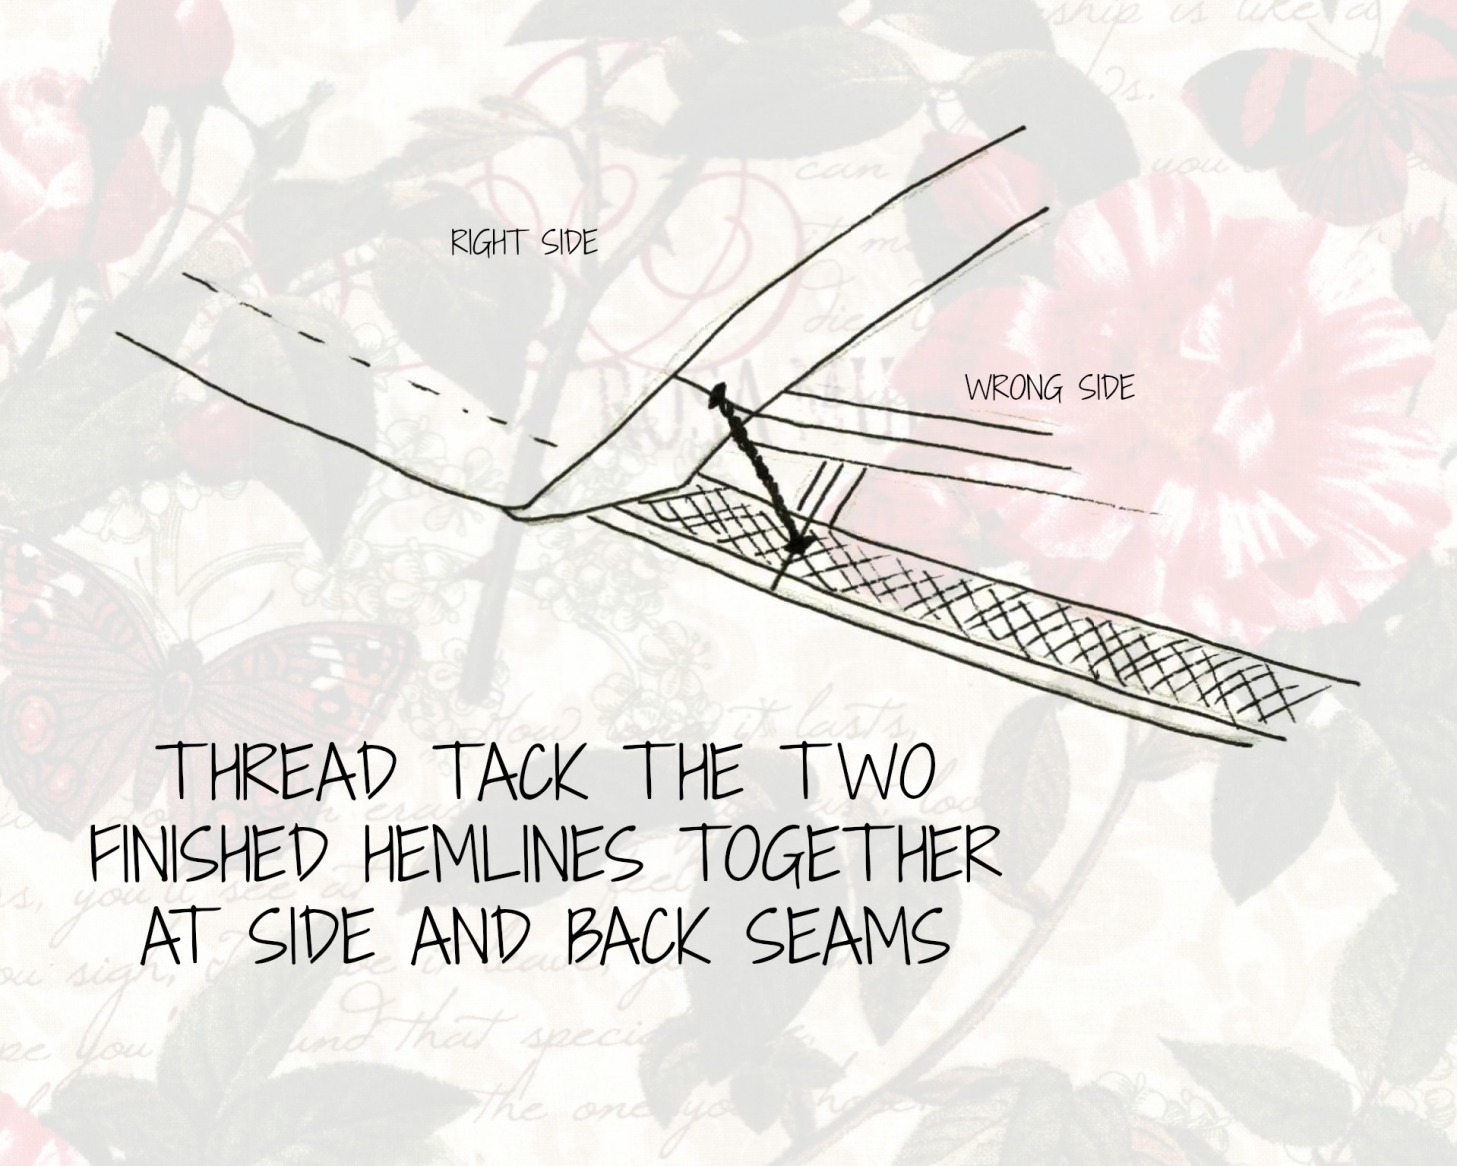
Thread tack the two finished hemlines together at the side and back
seams.
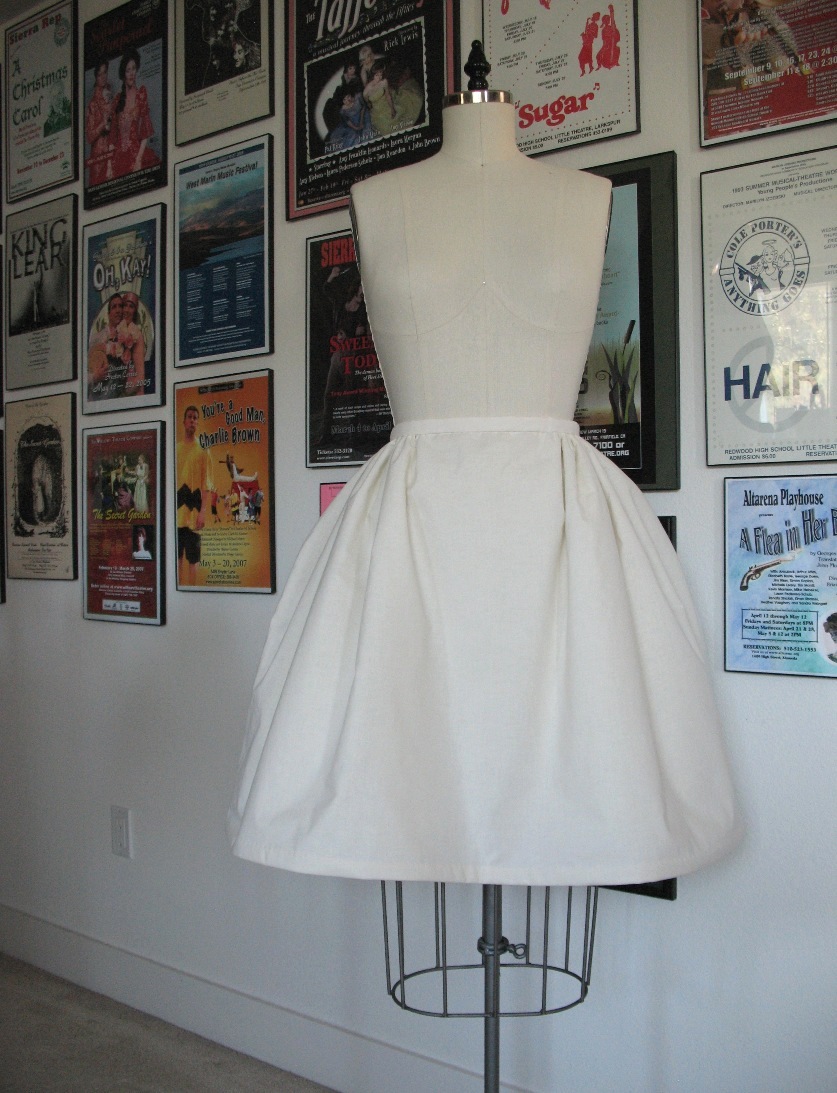
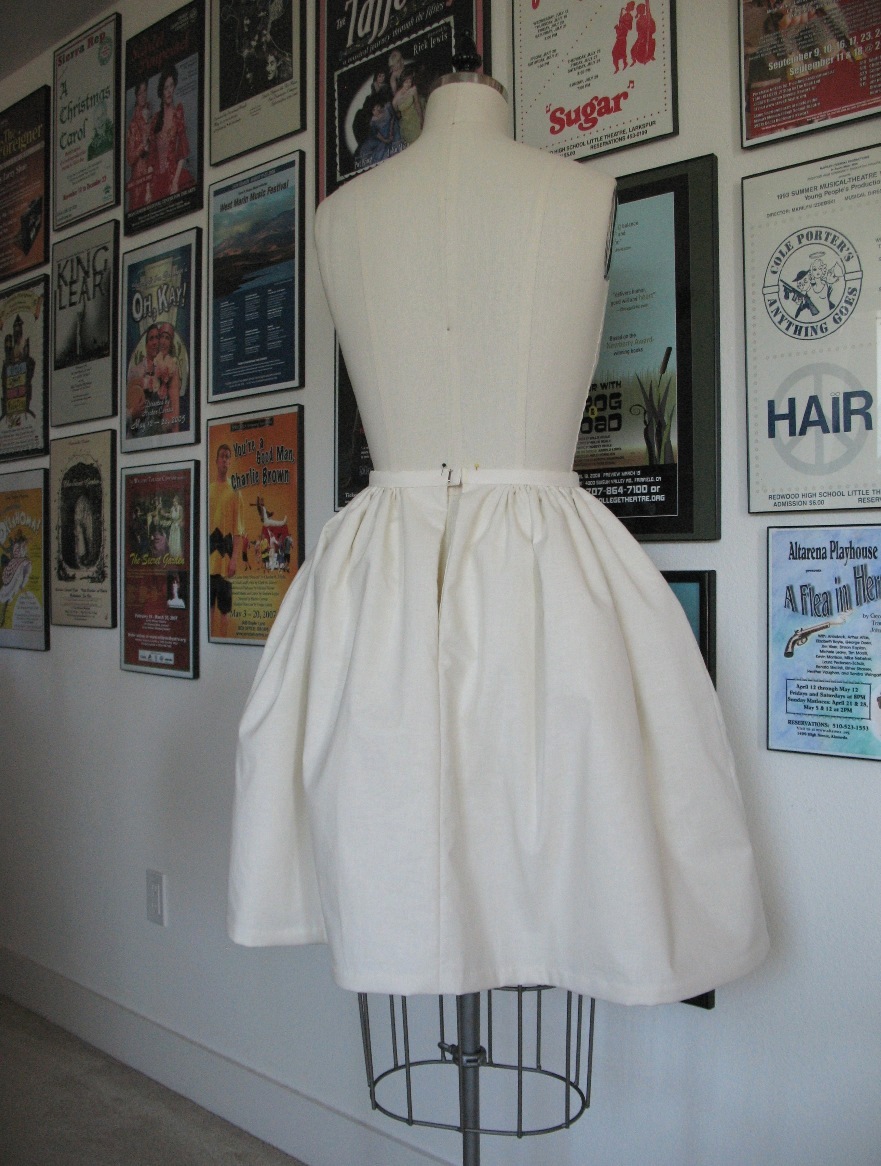
And they really are incredibly fun to wear - just know that you are going to take up more space than you are accustomed to! Swing wide when maneuvering around coffee tables and the like, or you may clear the surface! This is also an excellent choice if you wish to increase your own personal space in crowded areas - a built in buffer zone, if you will . . .



I would love to see the effects of this under a skirt/dress, ie a before and after picture to see the difference? Thank you for making this tute!
ReplyDeleteI love the idea of sandwiching the net between cotton.
ReplyDeleteA very good tutorial. I really like that most of the gatherings are at the hips. My petticoats have the pouff distributed evenly around, and I think it makes it difficult to walk - all the pouff ends up between my legs. The horsehair braid also helps to avoid that of course.
ReplyDeleteThanks so much. This is the best petticoat tutorial I've seen.
ReplyDeleteOh my! What is the line from "A Funny Thing Happened on the Way To The Forum": "Stand aside! I take large steps!" Miles Gloriosus! What a great tutorial! What wonderful advice! I had the itchy petticoat for my wedding dress - such misery! I'm off to get a time machine and rewrite a day in my life. Maybe I will be smiling in my photos now.
ReplyDeleteI'm curious what are you thoughts on your petticoat vs the vintage petticoats? I have a couple of petticoats but they aren't quite full enough. Such a lovely tutorial, thank you for sharing.
ReplyDeleteThat is just ADORABLE!!! I love it. Thank you for the lovely tutorial.
ReplyDeleteGreat ! It's soooo beautiful :)
ReplyDeleteMY LOVELY BLOG FOR ALL UNICORNS
When it comes to support for the skirt, have you ever made something like this?: http://www.pinupgirlclothing.com/white-canvas-underskirt.html
ReplyDeleteI happen to own one of these and I find it gives a good fullness to skirts but doesn't give one the same issues with space as a petticoat. What are your thoughts?