Sunday, October 9, 2011

Ceil Chapman Cocktail Dress, Finishing Touches


In my rush to finish the gown in time for the gala, I stopped posting specific construction details.  There have been a few questions,  so I will do my best to answer those!  And thank you all for your lovely comments - I feel so lucky to be part of a community that appreciates all the work and love that went into my gown!

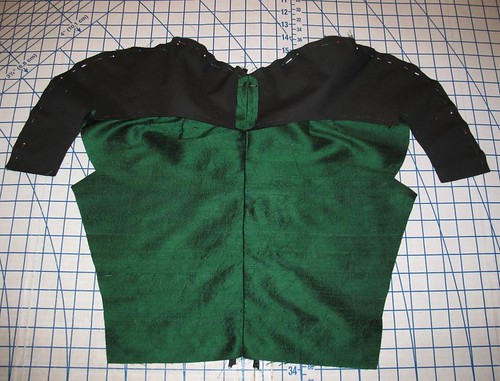
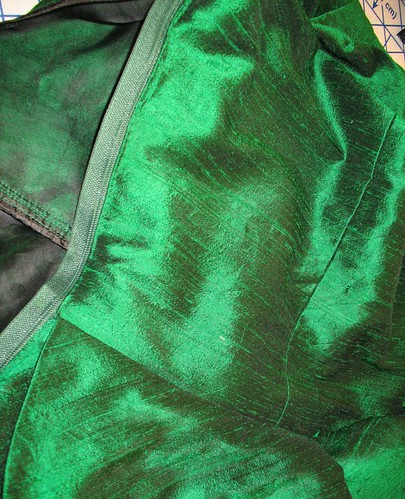
The lapped zipper was hand picked.  The more I use this technique, the more pleased I become – I think all of the invisible zippers in my stash may have to be abandoned for the moment.


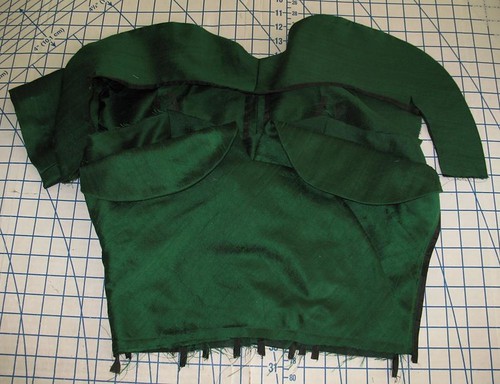
My original plan was to embellish the visible portion of the front under bodice with encrusted beads.  Well, I could not find the exact beads I was looking for, and to be perfectly honest, I have never done that much beadwork, so I felt it might be a bit overwhelming to do with a limited time-table.  I also wanted to “sprinkle" beads along the left side skirt hem but as time was running out, I realized this was out of the question.


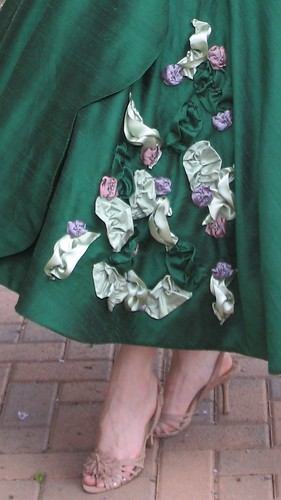
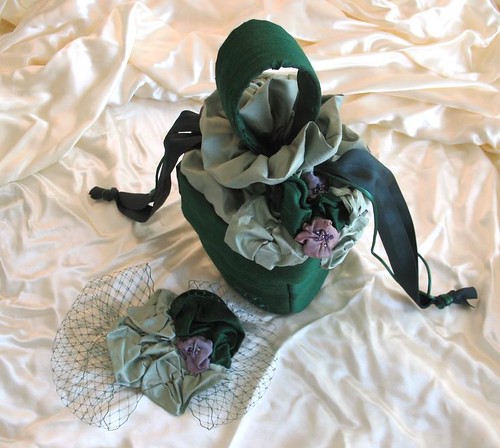
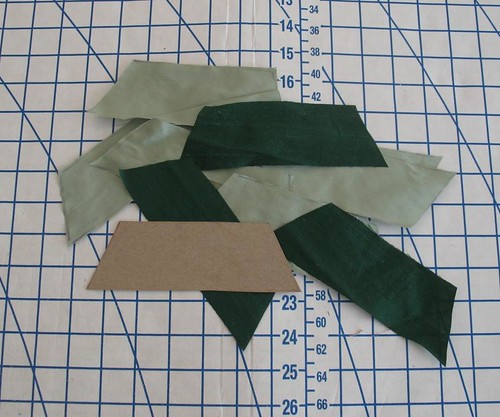
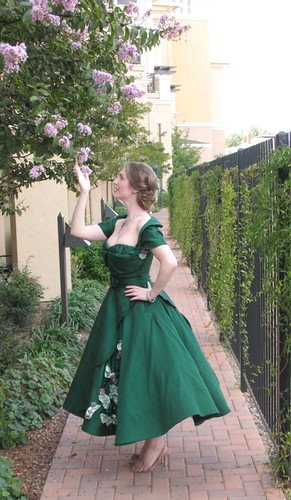
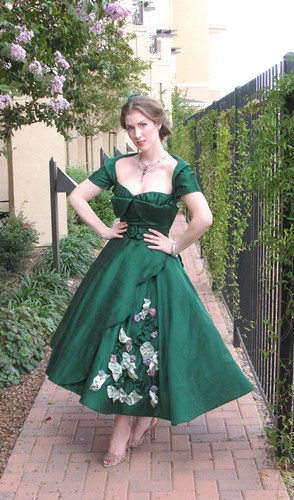
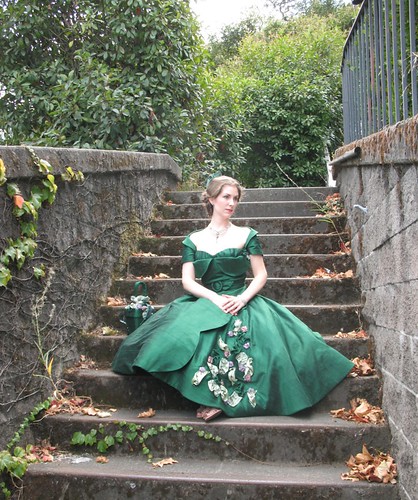
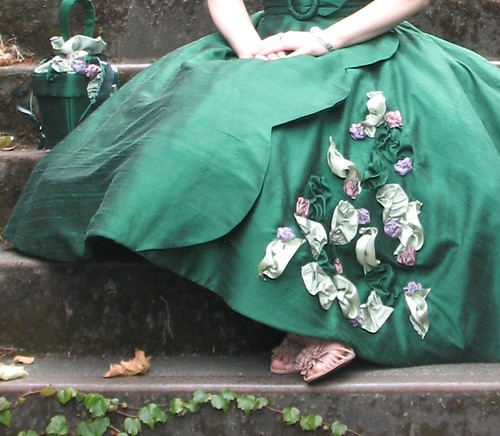
The embellishments I decided to use are a combination of leaves constructed from satin ribbon and silk dupioni, and flowers made out of silk dupioni and topped with beads.  For the leaves, I was inspired by a recent blog posting from Eva Dress.  As for the 
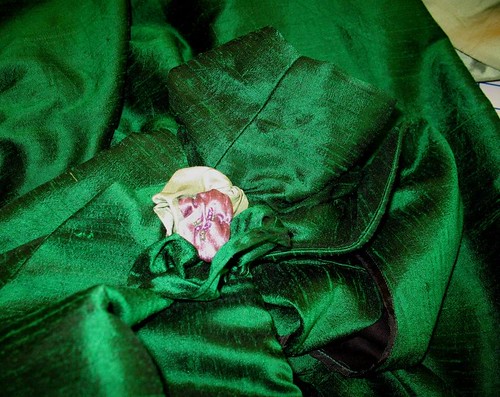
flowers, I sort of make it up as I go along.  
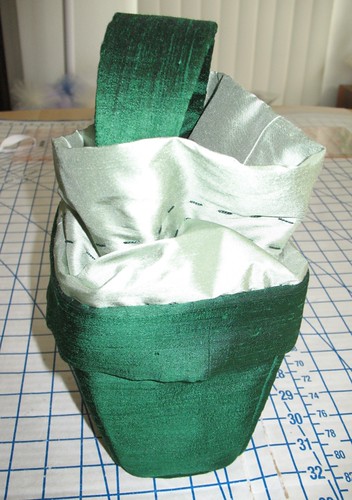
I have used the same idea for a hat and improved on it by adding a small scrap of fleece to the inside of the gathered square of silk to add extra dimension.  I use beads and a few randomly placed stitches to make the puffy circle look like a flower.


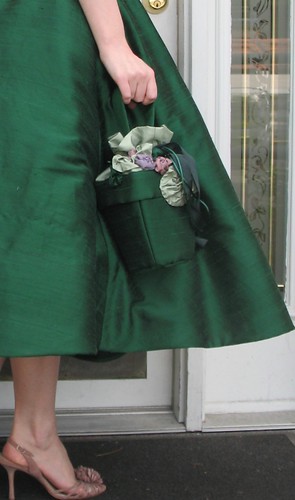
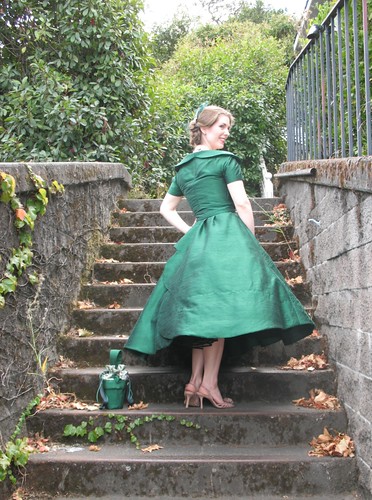
The hem is finished with 6” horsehair braid using Gertie's tutorial.  I had never used the braid as a finishing technique, but rather, always encased it in a hem or covered it with a facing.  However, I am very pleased with the way it turned out.  If there is no petticoat between your skin and the braid, I would imagine it could be a bit rough on the legs, but it sure does do a great job of giving body to a hem, and you could always cover the braid with a fabric facing after turning it to the inside of the garment.  


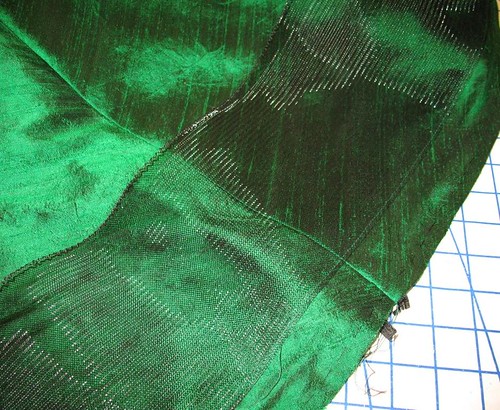
I first hand basted the braid to the right side of the skirt, then sewed the permanent seam with the machine.  The excess fabric was trimmed, the braid turned to the inside and using the upper thread running through the horsehair to shorten that edge, I hand stitched it down, being careful to catch only the silk organza underlining.


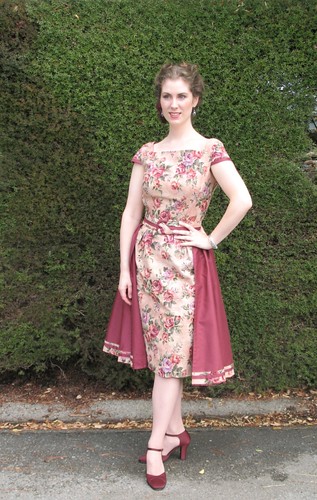
About a week before the gala, I remembered I was going to need a belt for my dress.  I like to finish all of the “extras” required for a dress ahead of time because they always take a lot longer to finish than I expect them to.  I had a funky old plastic circular buckle that was originally one of those awful t-shirt buckles from the 1990s, and a few rectangular Maxant buckle kits on hand.  


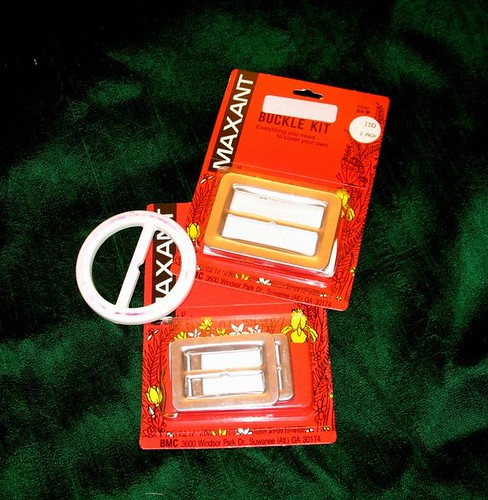
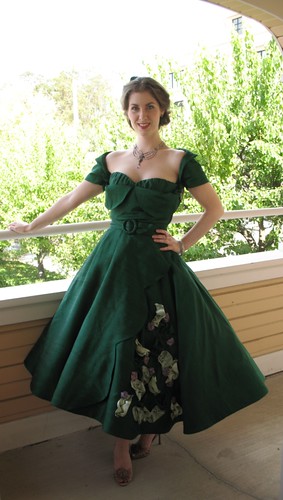
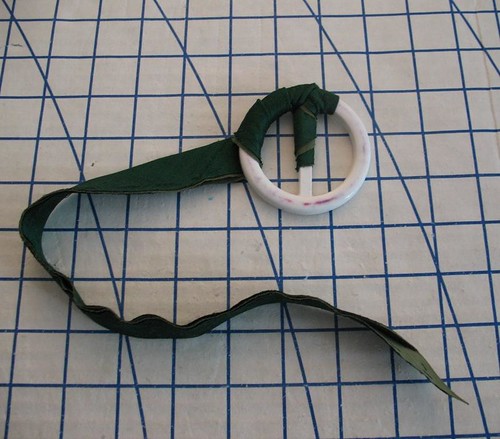
Because of the round scallop motif, I though a circular shape would work better.  To cover the plastic, I wrapped folded bias strips of my silk, underlined with cotton for stability, around the buckle.  
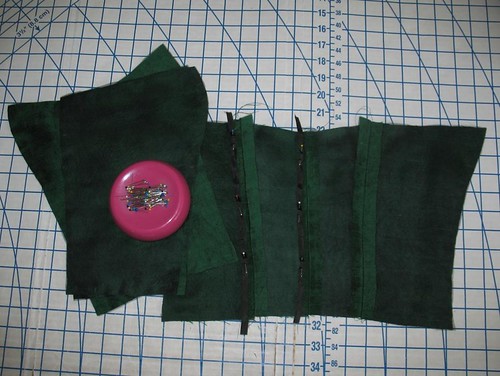
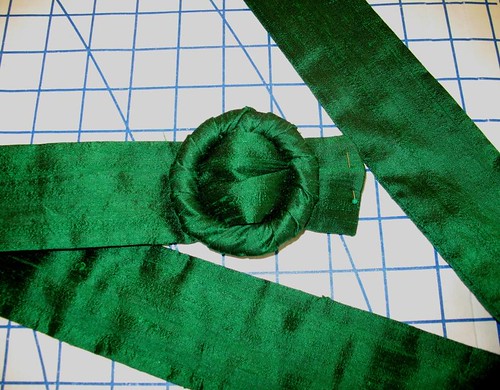

The belt itself was made of a simple rectangular cut of silk underlined with heavy cotton.  Because the dress had a boned under-corselette, I did not feel that the belt needed to be super stiff.


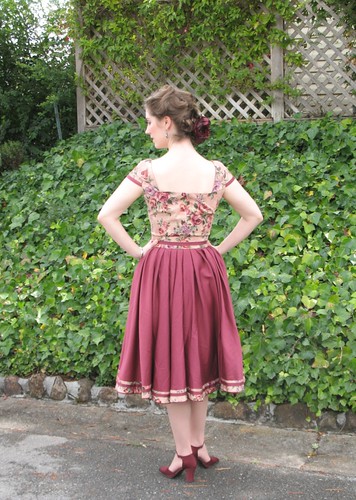
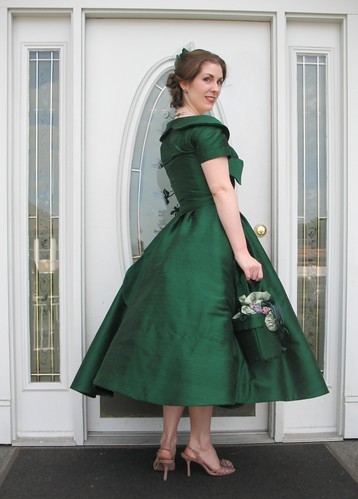
I used a Threads Magazine tutorial to add ribbon hangers to the dress.  Because all of the weight is in the bodice, and I do not want the sleeves and upper-back to stretch out, I used the strapless version of the tutorial.  The little thread bars at the back and front bodice really work to keep the dress from hanging open.  I will definitely be using the technique again.


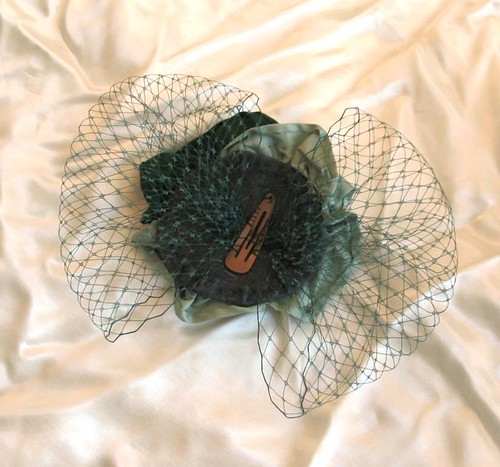
This is what I came up with as a last minute hair ornament.  The original idea was to make more of a 1950s styled cocktail hat.  I found a buckram form hat at a local antique shop that was dingy enough that I would not have felt bad about re-covering with my emerald silk, but, in the end, it was not quite what I was looking for, and it would have taken too much time.


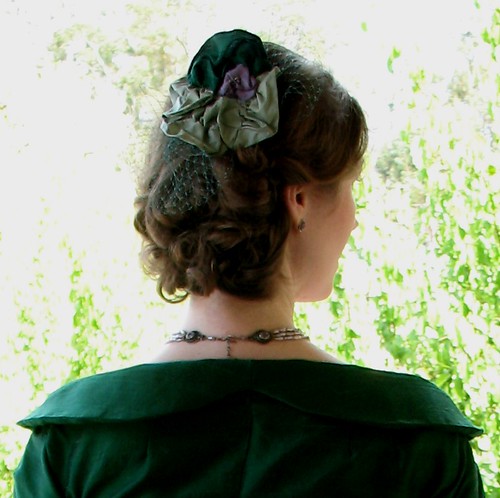
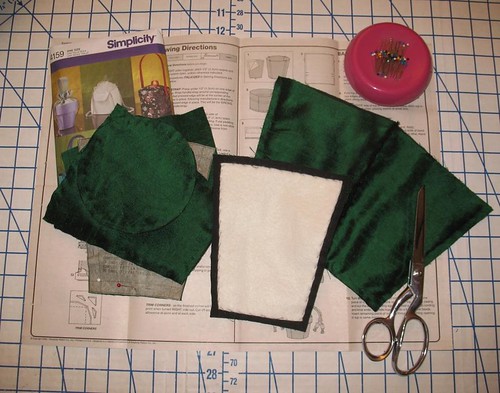
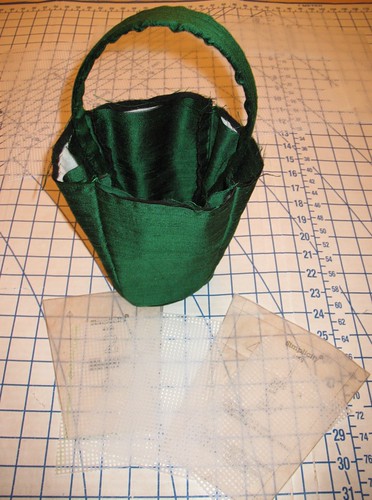
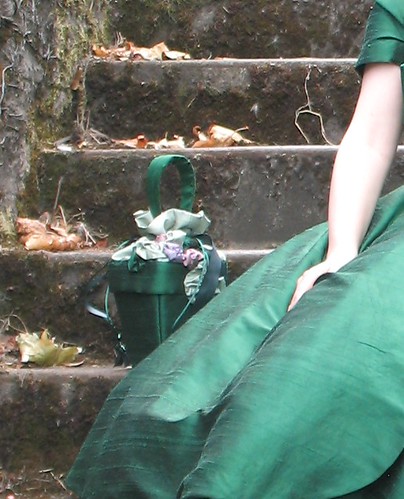
To make a base for the leaves and flower (the same embellishment used on my purse and dress) I used a circle of wool felt that was in the stash, cut a length of jewelry wire, taped the ends together in the shape of a circle, and hand sewed the felt around the wire circle.  Luckily, I had a bit of green millinery veiling from Britex stashed away to add a bit of whimsy to the finished product.  I secured the veiling to the back of the wool felt in a figure eight pattern.  To secure the ornament to my hair, I hand sewed a barrette to the back of the felt.


And there you have it.  The dress is now safely tucked away in the closet and my sewing room has just about recovered from the project (although I do keep finding small pieces of silk here and there).


Fabric & Notions Used
*Emerald Silk Dupioni from fabric.com
*Lavendar Silk Dupioni from Britex
*Mauve Silk Dupioni from Joann Fabrics
*Mint Silk Dupioni from Discount Fabrics in Berkeley, CA
*Silk Organza from Dharma Trading Company
*Cotton muslin used as a non-fusible interfacing
*6” wide horsehair braid from Vogue Fabrics
*Gutterman silk thread for hand basting
*RIT dye (used on cotton ticking and organza)
*Hug Snug rayon seam binding from fabric.com
*Beads for flower embellishments

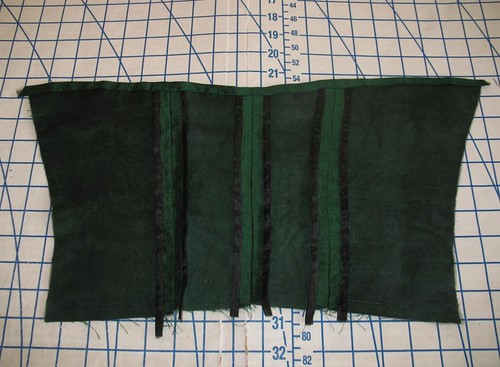
*Spiral Steel Boning from lacis.com
*Cotton down proof ticking (coutil substitute) from Vogue Fabrics
*Needled Cotton Batting from JoAnn Fabrics
*Grosgrain ribbon for waist stay

*Plastic canvas
*Fleece (substituted for fusible interfacing)
*Rattail for drawstring closure

Hair Ornament:
*Wool felt
*Jewelry wire from JoAnn Fabrics
*Hair barrette


Friday, October 7, 2011

Tchaikovsky Times Two!

Because I was volunteering at the Gala on Sunday, I was unable to hear the second half of the concert, so I went back for the final performance on Tuesday.  Now, there was no way that I could compete with my Ceil Chapman gown, however, I was not going to show up in any old thing, either!


The weather has turned wet and cold in Marin County, and in an effort to wear all of my cotton garments one more time before putting them away for the season, I pulled out this dress, which has been feeling neglected.

The pattern I used is Butterick 5032, a vintage reproduction dated 1952.  I previously used the capelet pattern as an accessory for this dress.


My original thought was to accessorize the dress with the cummerbund from the pattern, however, when I lined the fabric (because the reverse side of the cotton did not look great), it made knotting the waist extremely bulky and awkward looking. 


Because I was not thrilled with the fit of the skirt back at the upper hip, I wanted something to cover it.  At that point, I had cut into the majority of my floral cotton, and did not have enough to make the overskirt.  My solution was to use a wine colored cotton sateen as a contrasting fabric.  Because the cotton was not sheer, I decided to leave the skirt front open so the straight skirt was not completely hidden.  With my leftover floral cotton I made a belt and added a bit of bias trim the skirt hem. 


To keep the open skirt front pulled down, I tucked a fabric wrapped nickel into the hem on both sides which works perfectly as a dress weight.  I also added little cap sleeves to make the dress more wearable, and edged them in the wine sateen to use the contrast fabric a bit more.


The weather will probably not let me wear this garment until next year, but I hope to get a lot more wear out of it then.


By the way, the symphony was absolutely fantastic!


Shoes:  Hillard & Hanson “Elisa”
Earrings:  Shadows
Floral Hairpiece:  Made by me.
Fishnets:  Kohl's; Simply Vera, Vera Wang Fishnets

Wednesday, October 5, 2011

A Potted Purse


I have been waiting for an opportunity to make up Simplicity 4159, and my green silk gown was the perfect backdrop.  I love the flowerpot idea, but thought the idea could be improved by the addition of some foliage.


Because the dupioni is rather lightweight, I used some black cotton in my stash to underline it.  Then I used fleece (also in the stash) in place of the suggested “double sided stiff fusible interfacing” and hand basted it in place.  I am not even sure where I would look for something like that. 


The pattern consists of four trapezoidal pieces.  The padding is sandwiched between two pieces of the self fabric, sewn together, and then attached to a circular bottom.  For added stability, I inserted pieces of plastic canvas between the two layers.  I was concerned that the piece would end up very floppy.  I wanted the finished purse to have enough body to look solid and a few pieces of plastic needlepoint canvas did the trick.


I really did not use the directions very much.  With the addition of my plastic canvas, it was necessary to rework the order of construction.  

I also added a lining to the interior of the bag.  That would be my biggest problem with the pattern – the inside of the bag is completely unlined as drafted and leaves raw edges everywhere!  And the last thing I want in a purse is to reach in to pull something out and get a handful of fabric from shredded edges.


Because I just could not deal with the mess inside, I created my own lining.  To let the handle (which is sewn to the bottom of the purse) come through, I cut two pieces of the circular bottom from my lining fabric, drew a circle in the center (thank you spool of thread), stitched that circle, cut the center out, and flipped right side out so I had a finished hole.


The top of the purse with the drawstring was underlined in silk organza for ease in attaching the flowers and leaves.  


I used the tutorial over at Eva Dress to make my leaves – the only difference was that I used my silk dupioni and therefore had to finish the raw edges, which I did with a simple hand-rolled hem.  


The flowers are small squares of silk that I basted in a circular shape and gathered to create a little pillow which I secured on the finished bag.  I added beads to the prick-stitches that help shape the flower.


The fun part was adding the flora to the flower pot.
  

Yes, it is definitely matchy-matchy with my dress, but it was too much fun to pass up.  Actually, I was working on the bag prior to finishing the dress and was highly influenced by how the flowers and leaves worked in the silk dupioni and decided to go for the same look with the dress.


Tuesday, October 4, 2011

Ceil Chapman Cocktail Dress Unveiling


Well, here she is!  I was adding silk petals and flowers and beads right up until the end – a ticking clock is a great motivator.  And while I wish I had had more time with the embellishments (the fun part!), and it was not exactly my original vision, it works!  In truth, I am thrilled with the finished product.


I felt like the belle of the ball!  Everyone was extremely complimentary about the dress.  Many people told me how much they loved the dress, and their eyes widened at the notion that I made the garment myself. 


I have a love/hate relationship with people approaching me and immediately asking if I made my dress – does that mean it looks like something from a home economics class!?  So it is extremely gratifying to have people amazed and a bit skeptical that the gown is home made!


I like to christen all of my extra special creations.  And because of the green and purple color palette, I keep thinking of A Midsummer Night’s Dream.  So I am going with “Titania.”  If the queen of the faeries partnered with Dior to create a gown, I imagine this would be the end result.

My homage to Dovima!

My Persian lamb wrap (don't worry, it's synthetic!) was a gift several years ago from a lovely lady, and it was the perfect addition to my outfit.  As the temperature dropped, I was glad to have a little extra warmth!


I have a lot more construction specifics, but for now, I could not wait to share the finished product.  More pictures may be found over on my flickr account.


Necklace:  Shadows (high school graduation gift from mom)
Earrings, Ring, & Bracelet:  Macy's
Hairpiece:  My own creation; Russian veiling from Britex.
Shoes:  Colin Stuart for Victoria’s Secret
Purse:  Simplicity 4159 (I will share more of the specifics later)
Wrap:  Vintage (courtesy of Sandy)


Monday, October 3, 2011

Ceil Chapman Cocktail Dress, Sneak Peek


The Marin Symphony Opening Gala Celebration was fantastic.  The music of Tchaikovsky was absolutely glorious - and if you happen to be in the Bay Area this week, the program will be repeated this Tuesday, October 4, 2011.  I would highly recommend the experience.

I am exhausted, but had to share a sneak peek of the dress that I finished just hours before I had to leave the house - those finishing touches always take longer than expected!

There will be many more pictures to come, but for the moment, I will leave you with this little hint  . . .


Saturday, October 1, 2011

Ceil Chapman Cocktail Dress, Part 7


Working with silk just makes me happy.  Don’t get me wrong, it can be a bit challenging, but the finished product is well with any extra aggravation.


Because I am a finishing freak, I am binding all my edges with Hug Snug rayon seam binding.  I just love the vintage feel it gives to my sewing.  And if I bind off seams as I work, I do not have to worry about massive amounts of fraying (which the dupioni and organza has a tendency to do).  I also ended up finishing off all of the facing edges.


I have spent a lot of time hand basting with this project, and I have come to the conclusion that couturiers really know what they are doing – I have so much more control over fabrics (especially when basting two different textures together) if I avoid the sewing machine.  Also, silk thread really does make a difference and is worth the extra money.


I am curious as to the original fabric suggestions.  It is hard to tell from the sketch, but the dress is, for all intents and purposes, a strapless garment – the shoulders really do not hold anything up.  Boy am I glad I made that corselette!  My dupioni, even when underlined with organza, would not have been sturdy enough to stay up without boning of some kind (which the instructions do not suggest). 


There is an under-bodice (the pattern calls this bodice front/side front and bodice back, etc.).  The under-bodice front is constructed separate from the back, and the bodice (called waist front and back) is laid on top and then basted together before the side seams are sewn up.


The “wings” on the back bodice pieces actually pull forward when attached to the sleeve and open out while the upper back folds down with the help of the upper back darts.  I also decided that the facings needed a bit more body, and underlined them with some cotton.


I am very surprised that the instructions do not suggest reinforcing corners before clipping them to set in the sleeves.  Was this just understood, or did a seamstress in the 1950s not concern herself with that sort of technique?  What would keep the clipping from continuing to tear into the garment?


Those sleeves gave me quite a bit of attitude, but they are now set in.

Because my corselette is only going to be attached to the front bodice, I finished the back upper edge with my emerald silk.  It obviously will not show, but I like the way it looks. 


I have more work to do, but the end is in sight.  I cannot wait for the Gala on Sunday!

Friday, September 30, 2011

New Vintage Vogue Patterns!

This morning I received an email announcing Vogue's new Winter/Holiday 2011 Collection.  Lo and behold, they did not let me down – there are two “new” Vintage Vogue lovelies to tempt me! 

Vogue 8768


Vogue 8767


I love, love, love both of these!  And that jacket is perfection!
As the new Butterick and Vogue pattern catalogues come out, the first thing I look for are the Retro and Vintage lines (big surprise, right!).  If there are none, I am a bit peeved.  To be fair, most seamstresses are probably annoyed that two of the patterns are vintage inspired and taking up space in the catalogue.  But not me – so thank you Vogue! 
I will have to take a closer look at the line drawings of the other patterns to see if any interest me, but for now, it is back to the sewing room, where another vintage reproduction requires my immediate attention!  No more distractions for me . . .