

After testing the pattern, making the stencil, and dying the fabric, it was time to get started with the fun part . . . lots and lots of
hand stitching!
There are many different ways to stencil fabric, but I knew I did not want to use fabric paint. For one, it is something else to
purchase. Also, I do not like the idea
of working with a fabric that has been painted.
It seems to me it would get stiff and difficult to hand sew. So I went the lazy route . . . a Sharpie
pen.
I started with a green felt tip. There was some drag across the fabric, but
nothing terrible. However, I did not
like the way the color looked on the blue jersey. (My plan is to remove the inked portion, but there are probably going to be sections that remain after everything is trimmed away.)
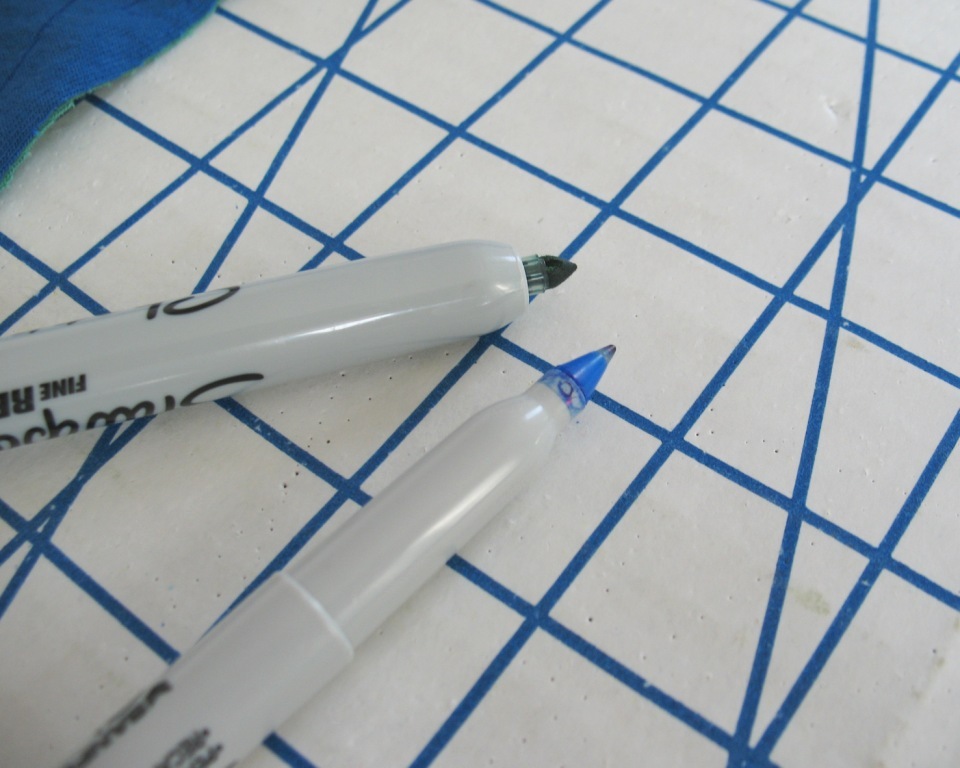
After digging around in a desk drawer, I came
up with a blue fine tipped pen.
I was concerned that it would not show up well on the fabric, but it is
clearly visible, even without the benefit of daylight. And it glides across the fabric more easily than the thicker tipped Sharpie.
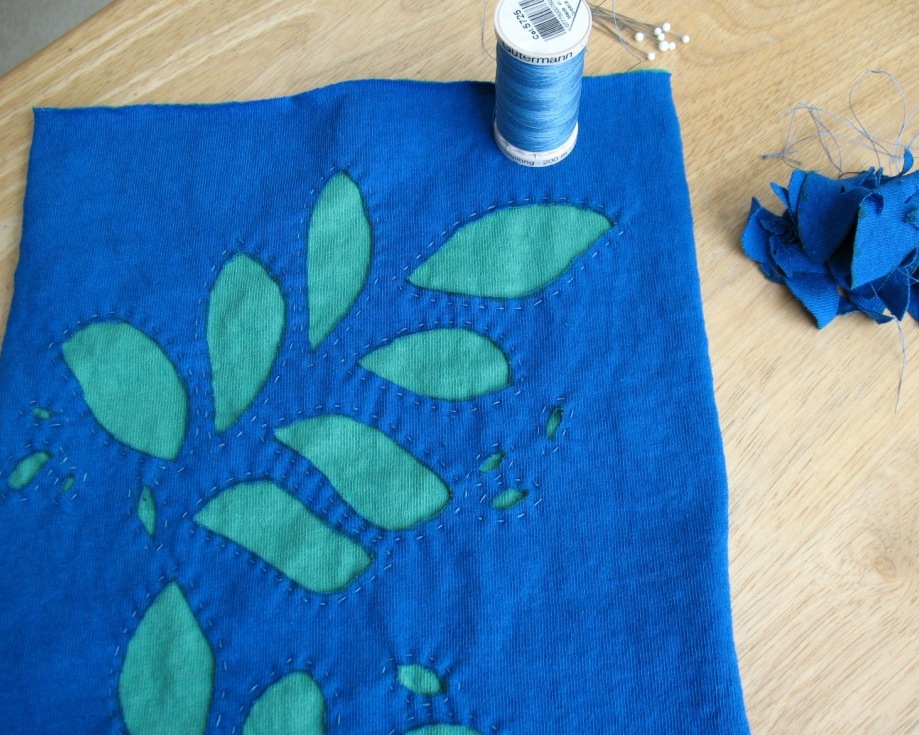
I started my swatch with two small pieces of the dyed cotton jersey. I have quite a few spools of hand quilting
cotton thread and found a blue I thought would look nice with my fabric. After looking at my sample in the daylight, I decided I did not like the color of the thread - it looked too gray on the bright blue fabric.
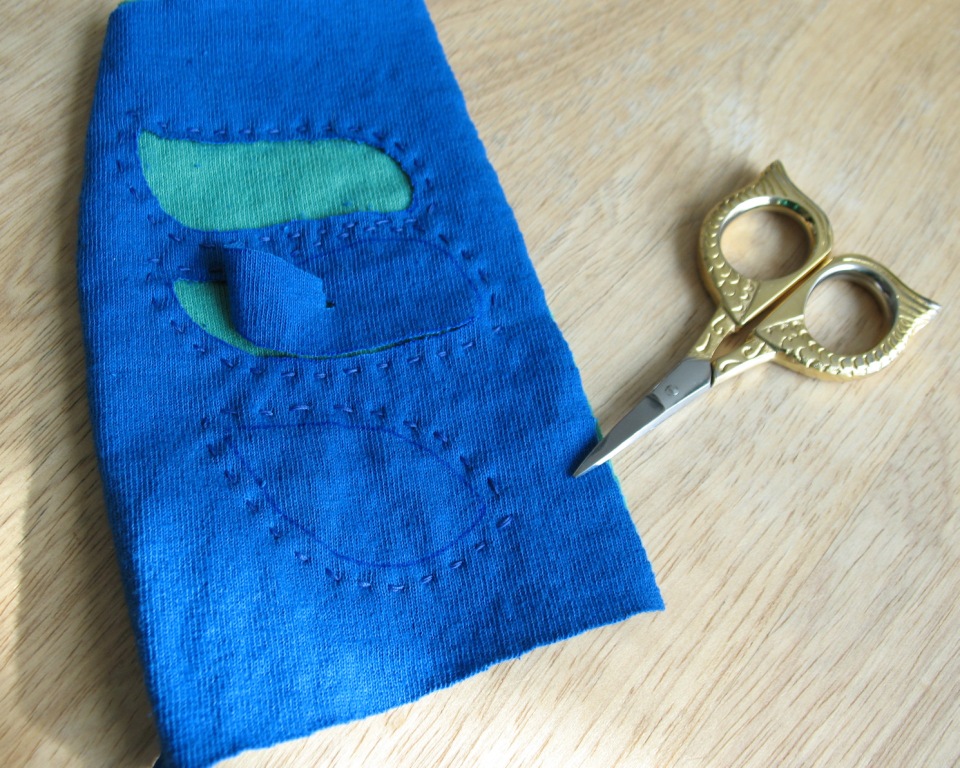
And I am making a note: I am going to have to find different scissors to trim off
the top layer. For my samples, I used a
small pair of embroidery scissors, but my fingers started to cramp after a few minutes. My other small scissors are not up to this task.

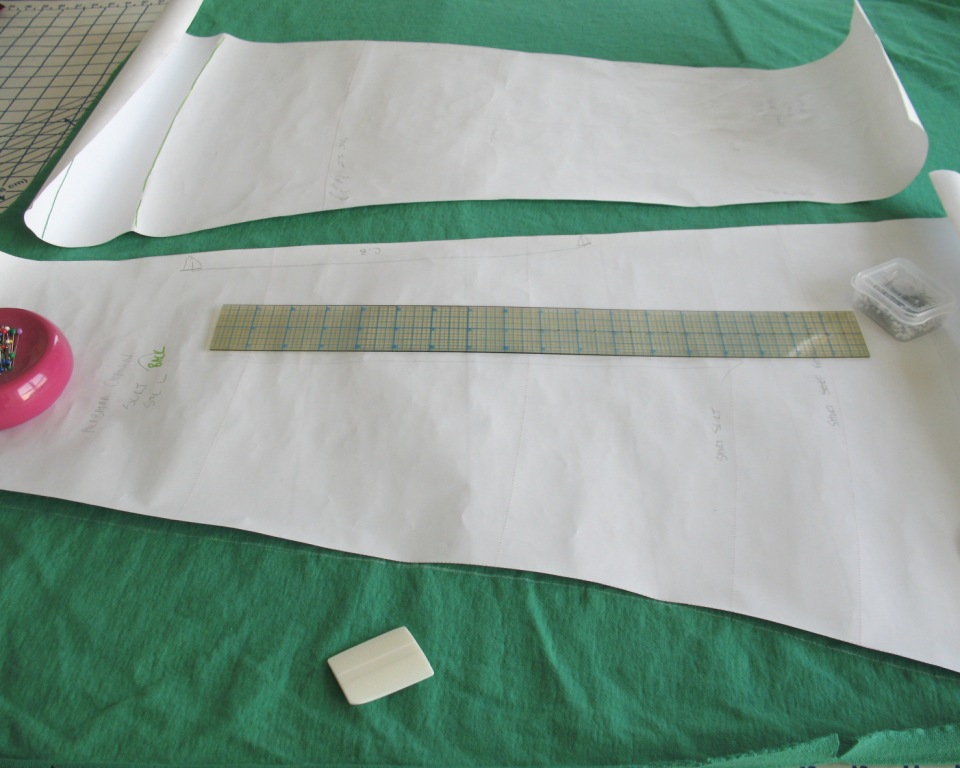
Time to cut out my skirt pieces!
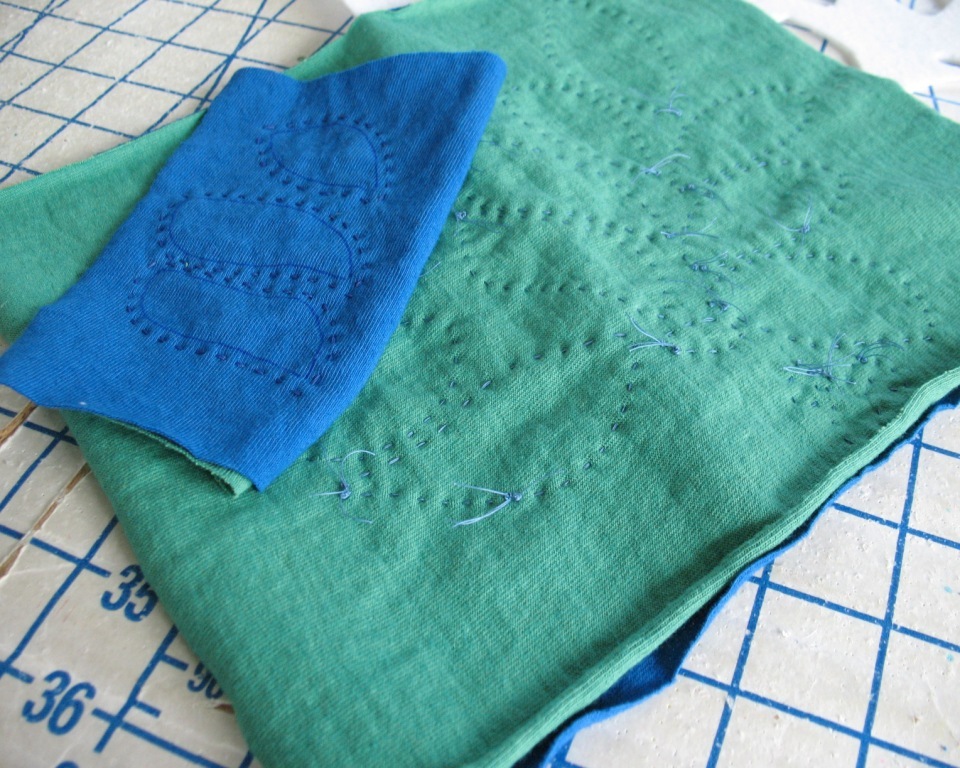
Once each piece was cut, the next step was to apply the
stencil. The stencil was placed over the
fabric and held in place with magnetic pin holders.
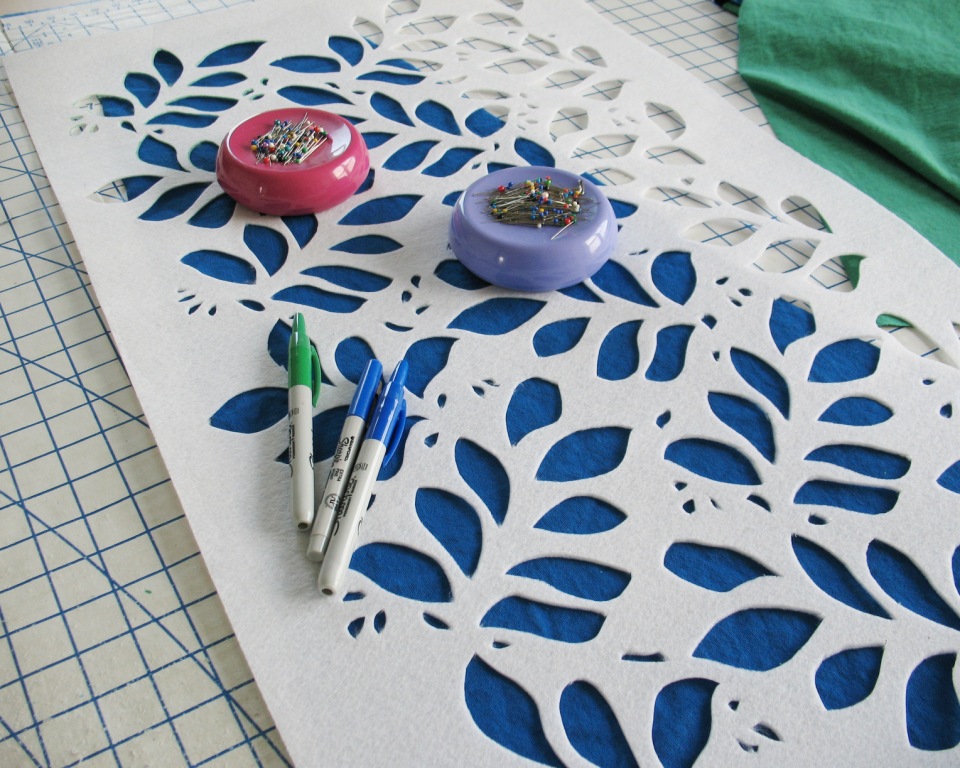
I decided to orient the pattern along the
grainline of the fabric. Starting at one
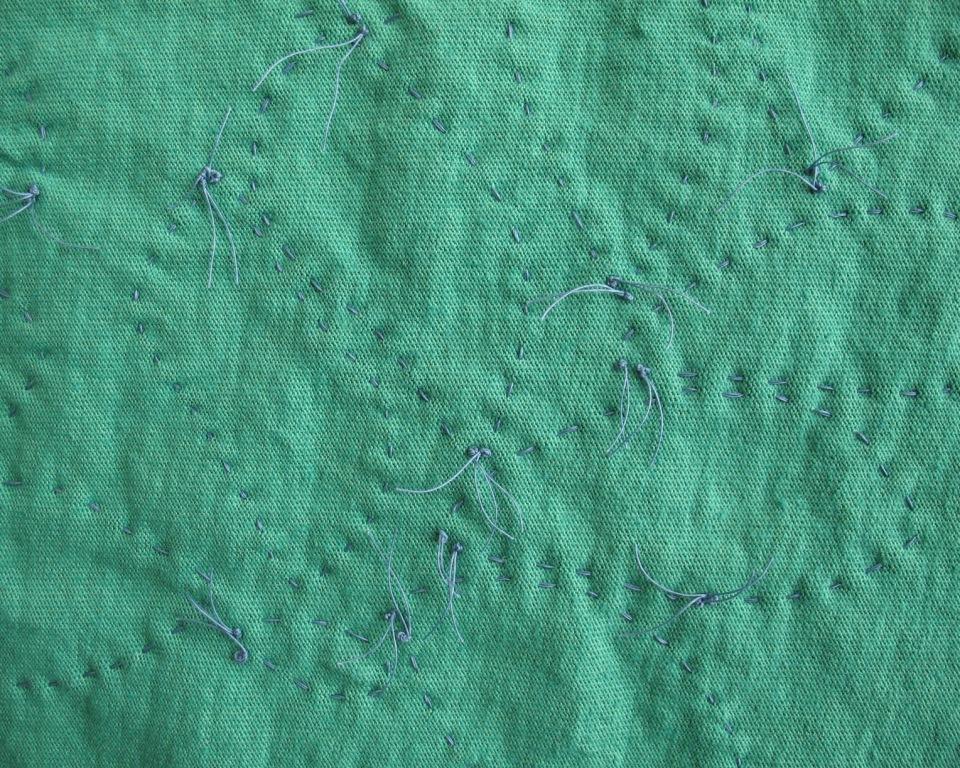
end, I traced each cutout with my Sharpie pen. This went very quickly. The Pellon is thick enough to keep the pen on
track and makes for easy tracing.

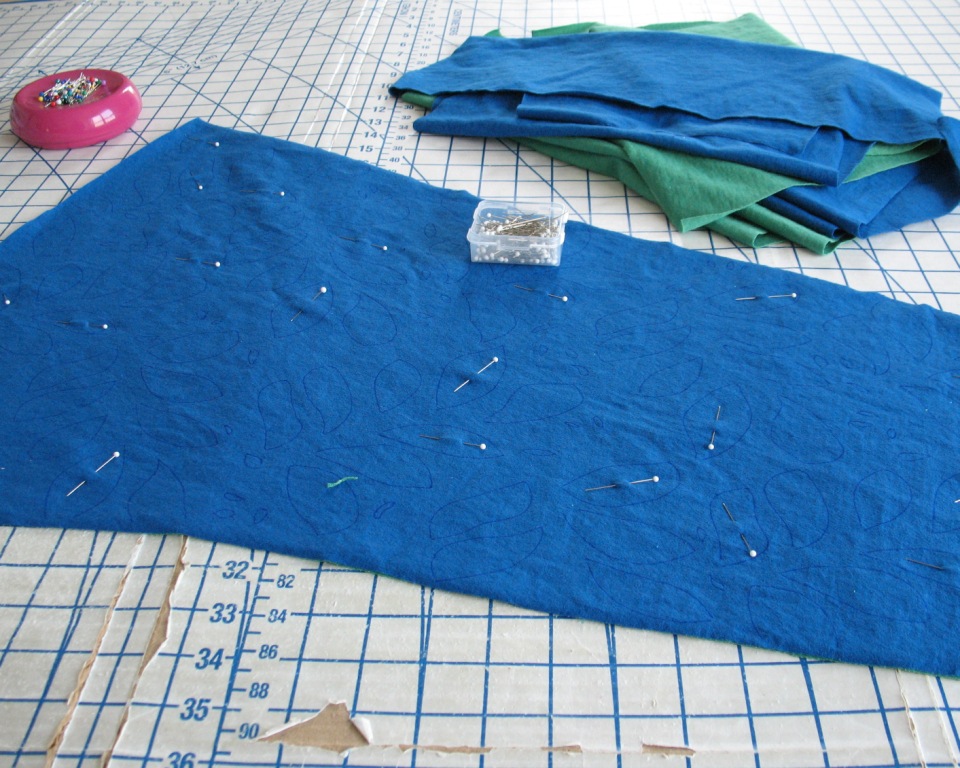
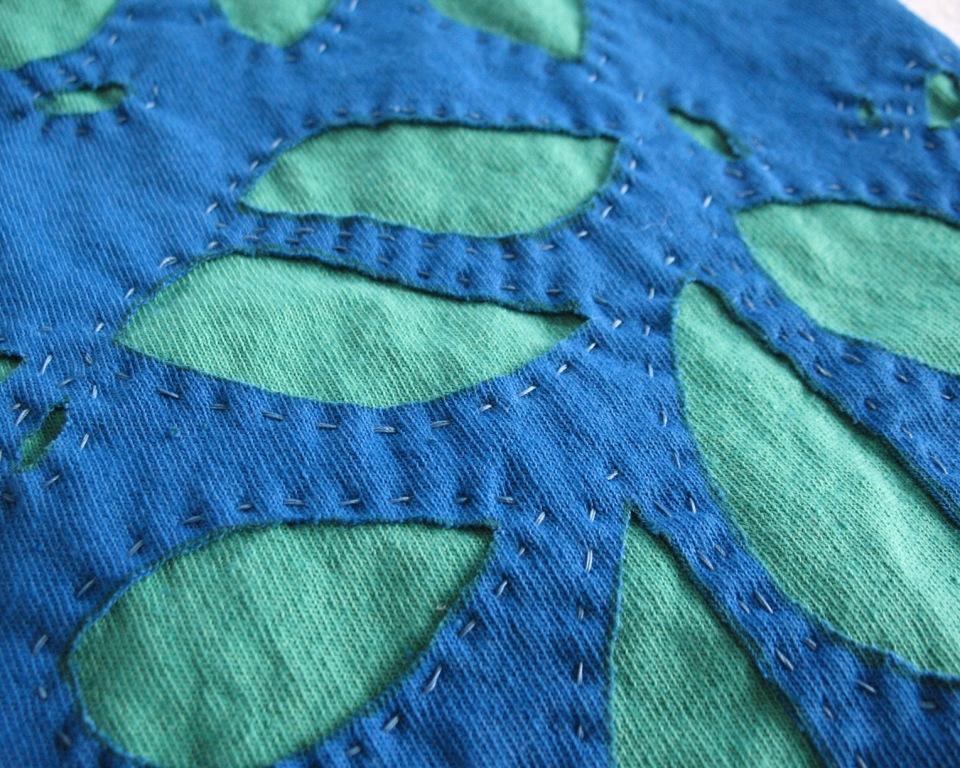
Next, the stenciled fabric was matched back to its plain
jersey counterpart and pinned together.
Thankfully, this fabric like to stick to itself, so I went easy with the
pins.
And now I can look forward to many hours of hand sewing! I am very excited!!
I'm following your journey with great interest. I've just ordered a book myself and am looking forward to lots of lovely hand sewing as well.
ReplyDeleteI've made a couple of these skirts and if you are sensible (let's say you hate tags) I recommend hiding the knots, they are annoying (at least for me). I also used sharpies, not only to mark, but to give color on the outside. Have fun!
ReplyDeleteI've been wanting to try this style for a long time. I'm anxious to see how long the hand sewing takes you. Though I don't hate hand sewing, I don't love it as much as you do. :-)
ReplyDeleteLove your color combinations!
ReplyDeleteThis is looking great so far -- can't wait till see it finished!
ReplyDeleteLaura - I am having such a blast watching what you're working on. I signed up for the Alabama Chanin Craftsy class a while back and purchased a kit. I certainly wasn't brave enough to dye my own fabric, I haven't even had time to start sewing. So, I longingly look at the kit on my peg board and I live vicariously though you. You're doing a fabulous job!
ReplyDeleteYou should definitely play with that kit! Once you get things cut out, the hand sewing is a great project to have one hand when you get a few minutes set aside for creativity. It is a bit like knitting in that way for me.
DeleteIt's looking so great!! I love the handstitching that these projects entail, so relaxing and slow. I've been using handstitching for other knit and woven garments now too.
ReplyDeleteIt's looking so beautiful! And thank you for going through each step separately...I recently bought the books but have been nervous to start and gather all the separate components. This is helping motivate me :)
ReplyDeleteOh good! Hooray for hand sewing!
DeleteThe duck billed applique scissors work really well for this; I confess they are my at-hand snips now (I know, should use the cheaper cuticle ones for thread snipping....).
ReplyDeleteI have had some spectacular fails with this technique in the washing (after wear) phase (enormously ugly unraveling at cut edges). I am thinking the next time I am going to test wash a swatch before I invest the time in the larger project.
I have wanted a pair of applique scissors for some time, so I may just have to invest.
DeleteDid you hand or machine wash the garments? I know that Alabama Chanin says machine washable, but I never like to put my hand made garments in the wash . . . especially something special!
Looks very pretty so far, and I love color combo. I've become a convert to Kai shears, which are super sharp. They make several sizes of small trimmers.
ReplyDeleteI keep hearing the name Kai when scissors come up lately . . . I will have to check them out. Thanks for the suggestion!
DeleteLaura this is a lovely, interesting and inspirational project. Thanks for sharing the process.
ReplyDeleteIndeed, thank you for sharing all your projects and nudging me into refreshing some of my rusty slow sewing skills.
Fine markers - Have you tried Frixion pens? They are marvelous for precise and accurate marking.. Apply some heat from an iron (with or without steam) or hairdrier or laying on a warm radiator and the marks disappear. Once washed the marks usually disappear permanently. Even so, as with anything it's always wise to test before applying to the real thing. If a mark is accidently erased by pressing, it's usually possible to restore it by placing the fabric in the freezer.
These pens are great for magic writing fun with young children. What's not to like?
Morgan
I have heard of Frixion pens, but have never tried them. I will definitely keep my eyes open next time I am in the writing utensil section of the craft store!
DeleteLooking good so far. Laura, my husband donated some scissors to me for this very purpose - they are for making flies for coarse fishing and they are absolutely perfect. Made for a man's hand but with very delicate and sharp points. http://www.drslick.com/catalog/scissors/tungsten-carbide
ReplyDeleteI have the 3.5" size. Just more things to buy!!
Thank you for the suggestion, Ruth! (This hobby of ours is certainly a money pit, isn't it!)
Delete