

This vintage reproduction pattern was released last year, but I just got my hands on it - and I knew the exact fabric that I would pair with the design. The design is a big fabric hog, requiring over six yards of 45" wide fabric, but I found this fabulously over the top cotton at an estate sale a few years ago, and I had a feeling that I had enough! Which it turns out, I did. So I jumped right in!

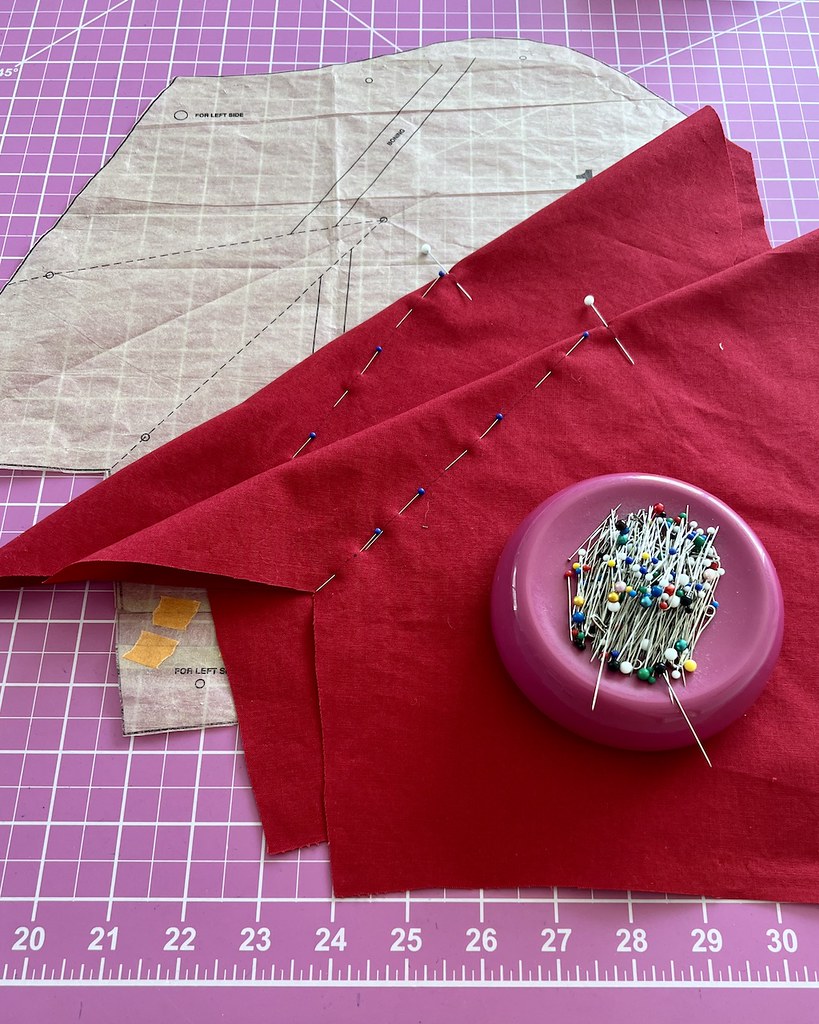
I was slightly concerned about the bust measurement on my standard size, so I cut out one size up, knowing that I would have to decrease the waist sizing . . . but I would deal with that later. Because the skirt is made of nothing but gathered rectangles, there was nothing to worry about with the skirt sizing. And since I was going with a larger bodice size, I only added 1/2" to the torso length. Because of the dart placement, I wanted to make sure that alteration wasn't going to affect the dart.

Turns out, there were minimal changes necessary. Because this dart has a particularly large takeup, it ends up getting trimmed at a later point in construction, so the additional fabric at the point was probably unnecessary. But it's always good to check! You can always trim away, but you can't ever add back.

As is probably clear from the pattern illustration, this dress has a whole lot of fabric to be gathered.

Not only that, it's a whole lot of boring rectangles to be gathered. Those markings are especially important since it's a challenge to keep track of which seamline is supposed to match up with what point on another rectangular ruffle, and I am terrible at transferring markings. I always think that I won't need them later on, and then I have to pull out the pattern pieces over and over to reference. You would think I would learn to just mark from the beginning, but I still try to cut that corner.

As predicted, the gathering was extremely tedious, and used a whole lot of thread. But I was willing to get through it because the skirt was going to be fabulous!
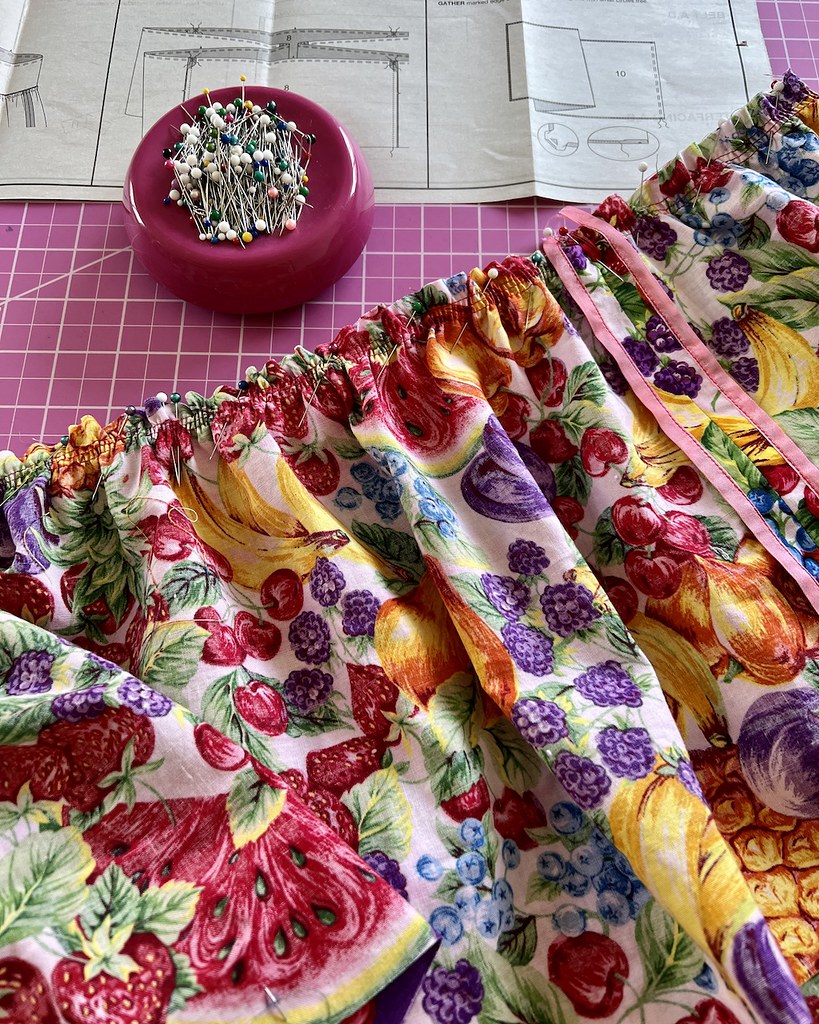
I debated whether to use seam binding or French seams for the raw edges of the ruffle. The cotton is very lightweight and thin; I had originally assumed that this was a quilting cotton, but the substrate is more like a voile than what I am used to coming across with quilting cottons. The weight of the fabric would have made a nice French seam, but I decided that avoiding bulk of any kind with all that gathering was preferable to taking a chance with the finish, so I went with the seam binding.

I am happy with my choice, and I love the way the contrasting solid rayon ribbon looks with the extremely busy print. Sure, no one else is going to see it, but I know it's there (and now you do, too!).

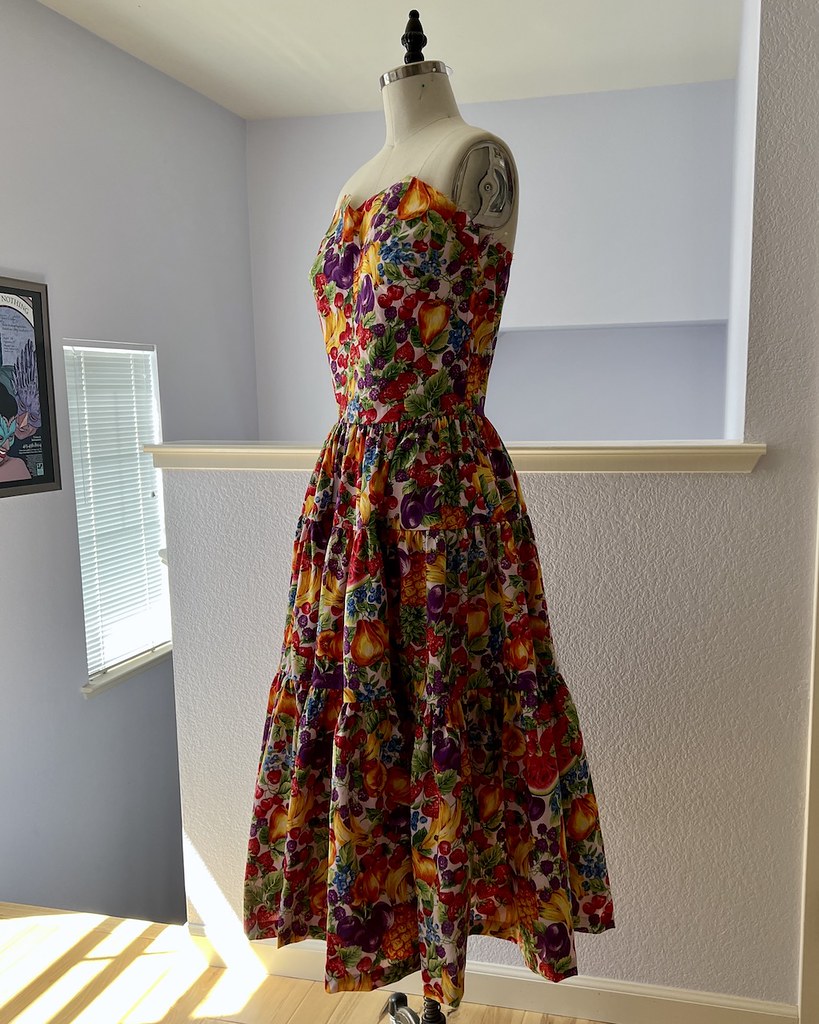
One eternity later . . .

and the skirt looked something like this. Carmen Miranda would be proud, I think!

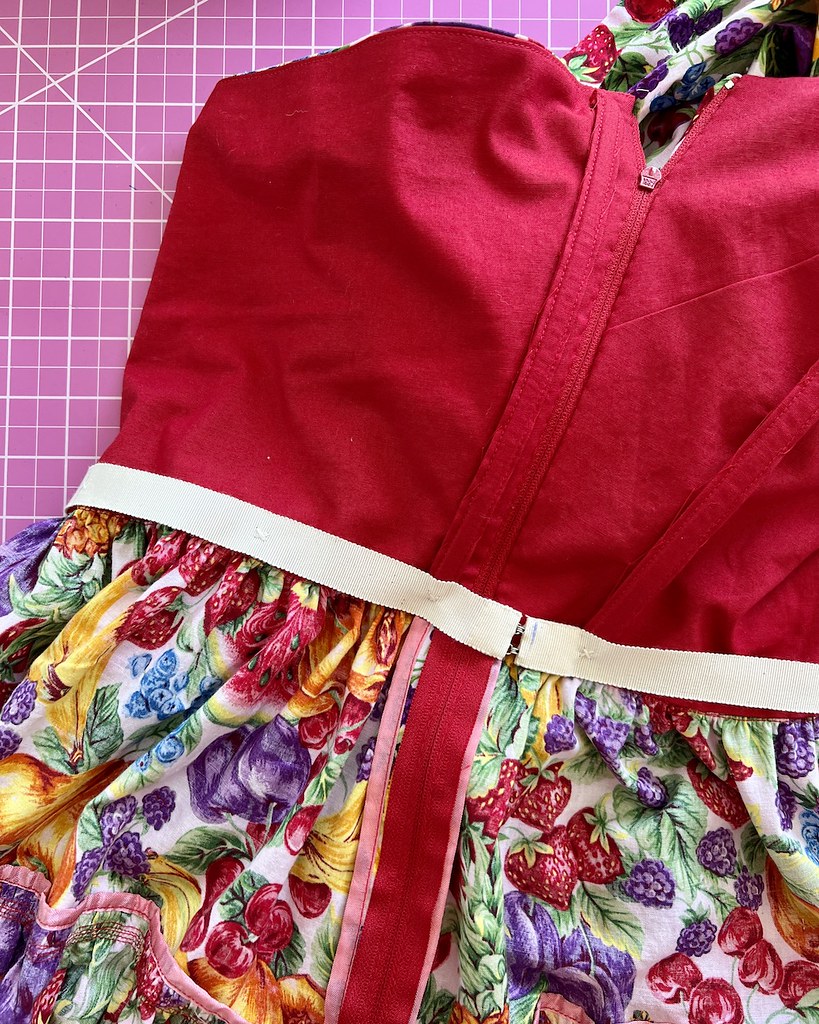
Per usual, I hand inserted my zipper.

This pattern suggests closing the upper edge of the left side bodice for about one inch, but I would rather have the option of stepping into a dress than having to shimmy it over my head, so the side seam is open from hip to the top of the bodice.

So far, so good.
Although, the lightweight cotton was making me slightly nervous about that bodice staying put.

But my Kona cotton lining was up to the task of stabilizing the dress bodice.
After getting nervous that I had made a mistake cutting out the larger bodice, I ended up removing fabric from both sides of the bodice back, from top to bottom, plus narrowing through the lower portion of the bodice to the waistline on all seams. Now that the dress is finished, I know that I should probably have used my standard size . . . but it all turned out okay in the end.

The hem of the skirt was just folded under twice, and hand stitched into place.

And here is where those rectangles actually come in handy . . . it's so nice not to have to mess with a curved hemline when it comes to the actual hemming.

One of the fun parts about this design is the two straps/scarves that can be worn in a variety of ways on the body. The instructions suggest edge stitching with a machine, but since there was no other top stitching visible on the rest of the garment, I decided to hand hem those edges. And I am quite sure that no one who has been around these parts for any period of time is surprised about that! When in doubt . . . hand stitch everything!!

Whether it was my choice of a large size, or whether the fabric stretched slightly at the bust line, I can't say for sure, but I ran a line of gathering stitches just inside the seam allowance at that edge. This allows me to make that part of the garment curve inward slightly by pulling up on the bobbin threads.

As with a couple of my more recent vintage themed projects, this pattern has the boning applied to the outside of the lining. I liked the way that it worked for this dress, so instead of applying the standard channels to the inside of the lining, I catch-stitched covered pieces of boning once the bodice was finished.

This meant that the boning channels would be visible, so I pulled off the white cotton/poly channels that the plastic boning comes in, and made matching channels from the lining fabric. I would have used the fashion fabric for a fun contrast, but I thought that the fabric was a little too thin/delicate for the job.

The final addition was a waist stay.

I have a roll of off-white petersham ribbon, and boy, has it has come in handy! I wish that I had a better match for the fabric, but color aside, it still does an excellent job.
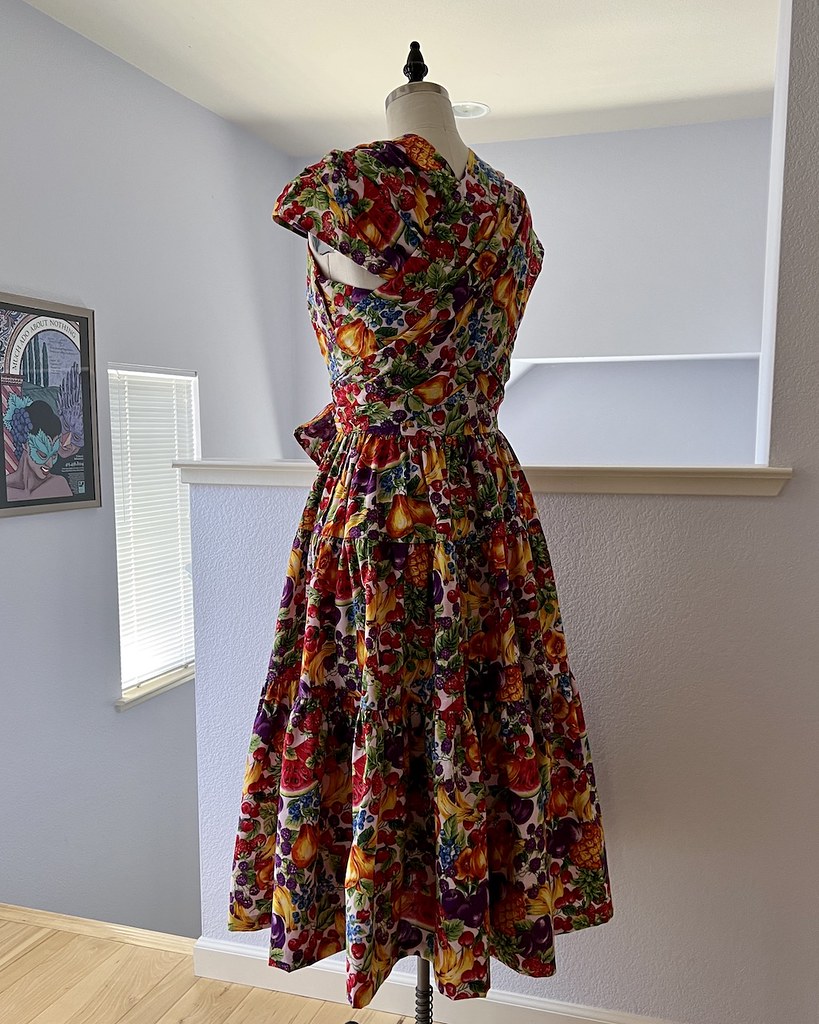
I was asked which way I plan on wearing the dress after posting images of this dress on Instagram. The answer is, with the drapes placed over the shoulders and crossed at the back.

I may play around with one strapless shoulder at some point, but this is my favorite look, I think.

The dress is definitely drafted as a strapless garment between the sizing and the added boning, so the "straps" are not intended to keep the bodice from collapsing. But I really like the effect created by the criss-crossed fabric!
It's definitely a lot of look, but I am so pleased that I finally found the perfect project for this incredible print.

Wow another amazing dress. I love the way you finish all your garments, they are always as perfect on the inside as the outside.
ReplyDeleteIt's beautiful. Looking forward to seeing you in it!
ReplyDeleteWhat a stunning dress! Yes, it’s a lot of look, and you will clearly be the belle of the ball when you wear it!
ReplyDelete