

This is a more recent vintage reproduction from Butterick. It is one of those 1980s designs that clearly draws inspiration from a 1940s silhouette and what immediately caught my attention, especially View D.

I purchased this rayon challis a couple of years ago, and it gives me vibes that channel both the 1940s and 1980s, so it seemed like the perfect choice for the pattern.

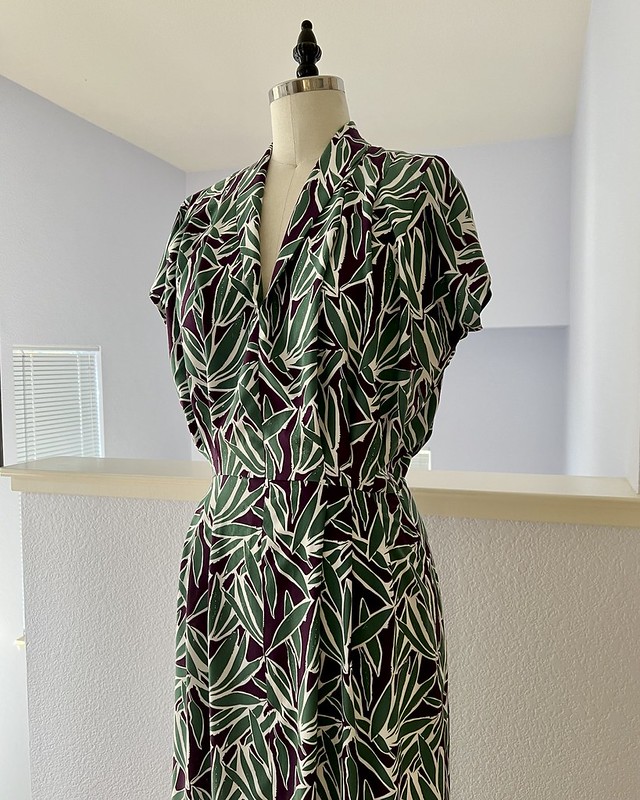
It's a fairly simple design that uses pleats at the waistline and the shoulders to shape the bodice.

But I will say that this pattern did make me stop in my tracks when I first pulled out the pattern tissue.

Taking inspiration from vintage patterns that were often single sized, this reproduction pattern has a printed zipper pull and teeth notated right on the pattern tissue as I have seen on quite a few 1970s and 80s patterns. But to my surprise, the zipper was printed on the center front of the skirt piece. My immediate thought was "that can't be right."

Most people would probably have noticed that the pattern includes a jumpsuit version. To my credit, I did notice the jumpsuit - it is just not something that I was planning to make, so my brain wasn't focused on where the zipper opening for that particular version would have to be placed. And obviously, the most common way to get in and out of a pair of pants is a front fly . . . and there you have the front zipper opening.

Once I had made that discovery, I also realized that the front bodice was left open (another detail that had escaped me on my initial inspection of the pattern illustrations). So you have a short zipper from waist down a few inches into the skirt/pants, and that's as far as the closure takes you. To be fair to the pattern, there is plenty of ease created with the numerous pleats drafted into the bodice, so the garment would definitely be wearable as-is, but since I was planning to insert a side zipper into my dress, I thought closing up that center front bodice seam for at least a few inches would make the garment much more wearable.

I used a bunch of different seam finishes on this dress. For the side zipper seam, shoulder seams, and the front skirt seam that opens into a shaped hemline, I used a standard seam that was pressed open, and finished the raw edges with seam binding. And I used French seams anywhere I could get away with them. The enclosed seams are fantastic on a lightweight fabric like this challis.

The front facings were finished with seam binding and constructed as shown in the instructions.

I did want to close up that front bodice slightly, and I contemplated using a snap as a closure, but in the end, just hand stitched the finished facing with a ladder stitch after trying the dress on and figuring out how far I wanted that center seam closed.

The hemline and armholes were finished with a narrow hem and stitched into place by hand.

The left side seam was reinforced with a strip of interfacing before inserting a zipper with a hand pick-stitch.

Side openings are not my favorite technique, but this dress has plenty of ease so getting in and out isn't nearly as painful as other side zippers can be.

And I opted out of adding shoulder pads because I didn't feel like the dress needed them.

The sleeve length slightly extended, and obviously, I went for the longer skirt length. I had enough yardage for the full length version of the dress, and it seemed silly not to use it and be left with an unusable amount of leftover yardage.
The finishing touch is a self-fabric belt.

The belt really finishes this silhouette nicely.

And I really do think that this dress and fabric combination was mean to be full length now that it's finished. I just love when I find the perfect fabric to pair with a pattern, even if I had no idea of the combination when the fabric and pattern were initially purchased!

lovely dress, the fabric is perfect
ReplyDeleteI have been eyeing the pattern and wondered how it would sew up. I love your version and think the fabric really suits the pattern. Thank you for the detailed construction shots—always useful and interesting. Great dress!
ReplyDeleteAbbeysews