

This is one of those patterns that I knew that I wanted to make up as soon as it was released. Of course, it's a fabric hog, so that limits the amount of stashed yardage that I can use. And so the pattern was put away, waiting for the right fabric to show up.

While trying to figure out my next project a couple of months back, I came across some cotton that was still on the bolt, just as it had been since I purchased it at the closing sale at my local JoAnn Fabrics. I assumed that I had about 3 yards.

When I went to unfurl the yardage to measure what was left and to take care of pre-washing it, I realized there was significantly more fabric than I had expected. I wish that happened more often!

In fact, I had enough to lengthen the skirt so that it is more of a tea length look than the original below the knee styling. I definitely prefer a slightly longer length, so it was good news all around.

The pattern calls for bias tape to create the neckline elastic casing, but I prefer to use self-fabric when possible.

For one, it matches, and also, the most commonly produced bias tape is a poly/cotton blend, which I try to avoid whenever possible!

This particular quilting cotton is fairly lightweight and has a really nice hand, and the self-made bias tape worked perfectly.

I will say that the instructions are interesting. This is not the way that I would have chosen to construct this, but I decided to follow the given directions to see how it went. The main downside to the given instructions is that it is impossible to tell how the bodice is going to fit until it is completely put together.

The wide neckline means a standard bra will not work, so I went ahead and added bust pads. The pads that I had on hand were slightly too large for the design, so I just trimmed them down. They get hand stitched into place along available seamlines. It can be a little fussy to make sure they are in the right position and to have them sit between the bodice and lining layers, but it is definitely worth the extra effort.

So far, so good.

The pattern calls for different width elastic in the neckline and around the arm.

This seemed like an odd choice, and seeing as the only neckline elastic that I had on hand was 1/4" instead of the suggested 3/8" (and I really didn't want to purchase more elastic) I decided to change things up slightly while still maintaining the difference in width between the neckline and arm. I am still not entirely sure why that choice was made by the designer.

The tiered skirt went together fairly painlessly. The cotton did want to fray, but not terribly.

And once the seam was stitched, I finished it with some seam binding.

Since I was dealing with a bunch of rectangles, the hemline was a piece of cake to finish.

A circle skirt is wonderful, but those curved hemlines can be a bit of a bear to deal with.

The sleeves are not lined, but the remainder of the bodice is so those raw edges were nicely contained.

And then there was a bit of hand sewing to accomplish.

It was around this time that I realized that I had made a mistake by sizing up with this pattern.

So instead of adding a waist stay for the purpose of stabilizing a form fitting waist seam, I used it to slightly take that waist in.

When that didn't feel quite secure enough, I added a length of elastic just under the bust line.
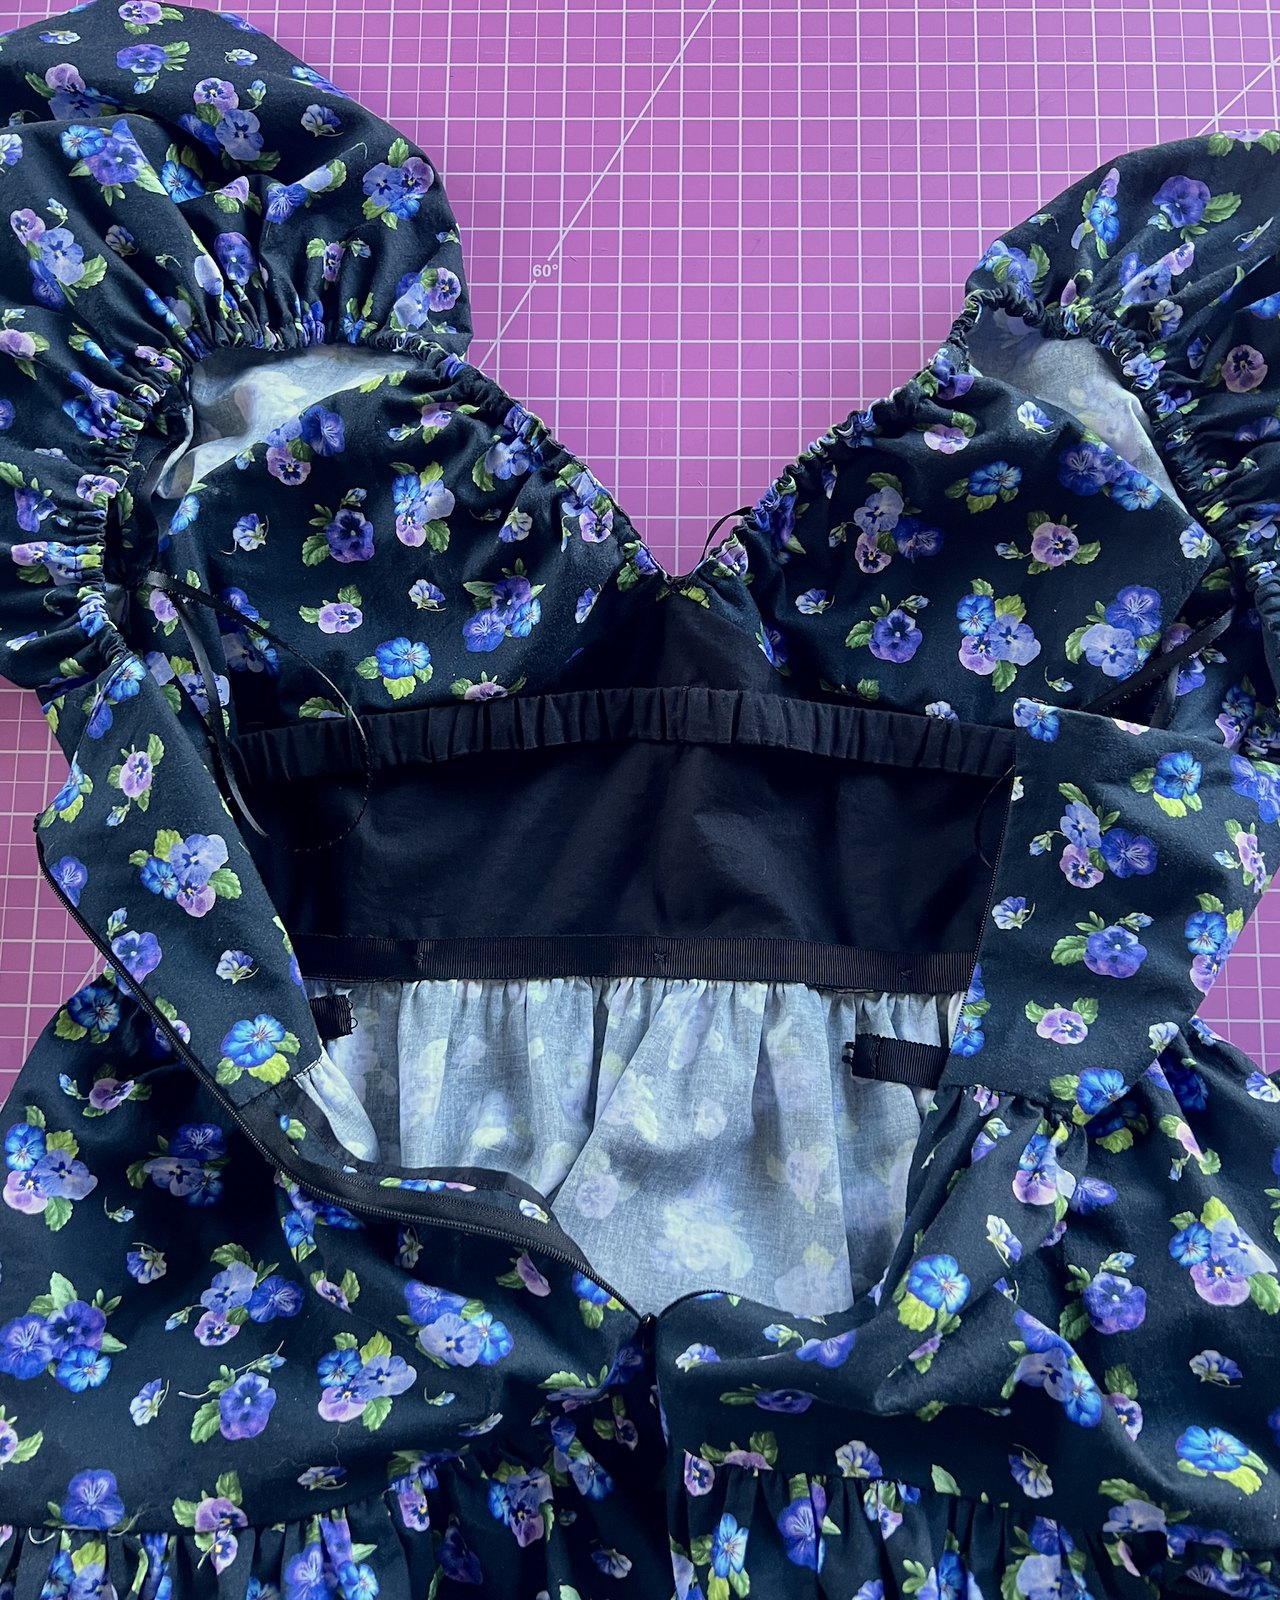
This dress is essentially held up by the elastic in the shoulders of the dress and it does not have any added boning or something to maintain the structural integrity of the garment. If those sleeves slip down, the whole bodice is going with them.

The addition of the waist stay and the under bust elastic worked pretty well.

I was hoping that this would be a pattern that I would return to again and again. I'm not sure that I want to deal with modifying the construction of the bodice, and I don't know that I love the dress enough to deal with all of that gathering!

But only time will tell.


It looks beautiful - I love the combination of the fabric and all that gathering!
ReplyDelete