Wednesday, September 21, 2011

Ceil Chapman Cocktail Dress, Part 2

I did not want to waste much time searching for the coutil and silk organza needed for my project.  I was already ordering horsehair braid from Vogue Fabrics, and a search for coutil turned up cotton down-proof ticking with a notation that it is an “excellent substitute for coutil.”  It does not come in black, but since the price was right, I figured I could dye it. 
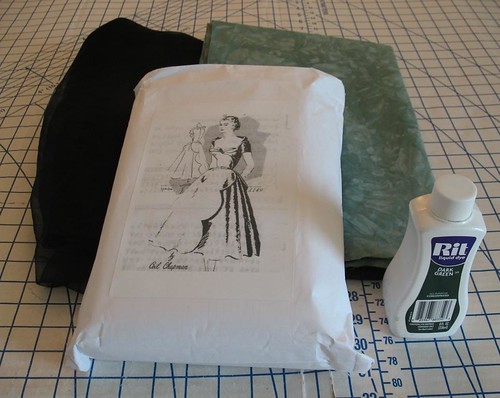

I know next to nothing about dying textiles.  I have used Kool-Aid to dye some super wash merino wool and know that it drinks up dye like there is no tomorrow.  And I have used RIT on a couple of cotton dresses and tops that needed a pick me up.  While using RIT, I have discovered that I prefer liquid dye to powder.  In one instance, the green powder dye left yellow and blue spots on the fabric (yellow and blue do make green, but this was not the look I was going for!) – I suppose I did not do a good enough job dissolving the powder, but I have never had this issue with the liquid version. 

Luckily, I had a bit of dark green liquid RIT dye left over from another project.  It does not match the emerald green silk, but I figured that it would do the job.

I remembered that Dharma Trading Company sells silk at a great price.   However, their silk organza only comes in white – another fabric length to dye! 

The silk took the dye quite well, although there are a few inconsistencies – but since it is going to be used as an underlining, it will work perfectly. 

The cotton ticking is a different story, although to be fair, it is probably user error.  Because I did not want to stand over the sink and agitate the dye water for 30 minutes, I immersed the fabric and used a couple of plates to make sure the fabric stayed under the water.  The white fabric turned a lighter green than I expected and was very splotchy.
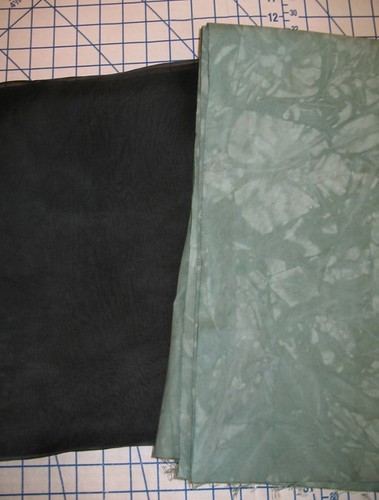

I decided the fabric was too light for the dress (even though no one will see it but me!) so I over dyed with the only two colors of RIT dye left in my cupboard: purple and navy blue.  The fabric came out quite a bit more even because I stood at the sink and kept agitating the fabric.  There must have been a leak in my rubber glove because my thumbnail is now colored a purple blue color.  Lovely, right?  Thankfully, my event is over a week away, and I am sure my nail will have returned to a normal shade by then!

In the future, textile dying is something that I would love to explore a bit more in depth. 

Next up will be a bit of work on the skirt, and I think I should get going on my corselette so I can fit my bodice muslin.

With less than two weeks to go, I believe I am on track!

Sunday, September 18, 2011

Knitted Lace and Crocheted Roses


About this time of year I begin to crave nubbly sweaters and scarves.   Of course, the weather is not exactly cooperating.  After wearing my sweater this past Thursday, the weather decided to turn hot.  Still, I am starting to feel drawn to sweaters and cannot wait until it is cool enough to pull out wool skirts and dresses.  This means my knitting needles will start to get more of a workout, and I will hopefully complete a few of the projects that have been stashed away on needles for quite some time.   


There is something very relaxing about the repetitive nature of knitting.  Add a warm cup of tea and a little Chihuahua snuggled up next to me, and I have the perfect tranquil evening at home.

If you love vintage looks, you will love A Stitch in Time.  


This book is filled with knitting projects from the 1920s through the 1940s.  Copies of the original patterns are included along with updated versions with extended sizes.


I am absolutely in love with every project in Volume 1 of Susan Crawford’s reprinting of the original book, and I am sure that Volume 2 (out any day now) will be just as beautiful.  And if you are looking for a little vintage inspiration, the photography is stunning.

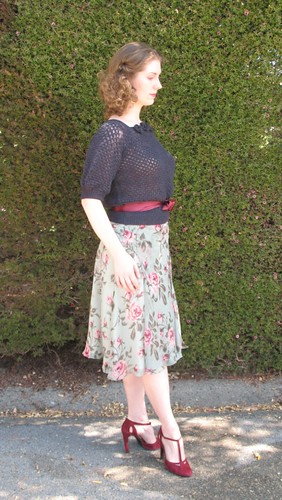
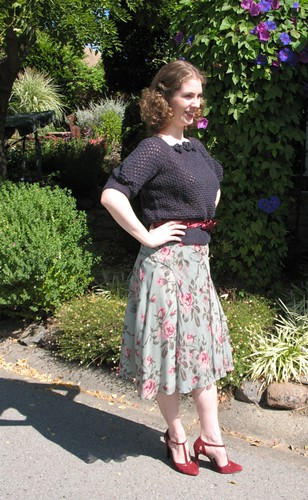
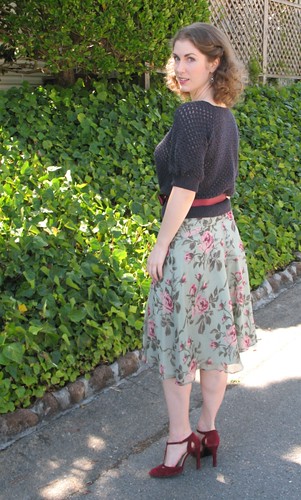
I finished this sweater back in January, but never got around to wearing it - mostly because I could not find a skirt to wear with it.  Then the weather got too warm, and it was tucked away.  I had an urge to wear the sweater last week, and after doing a quick closet search, I rediscovered this silk skirt hiding in the back, so my Rose Jumper makes her debut.


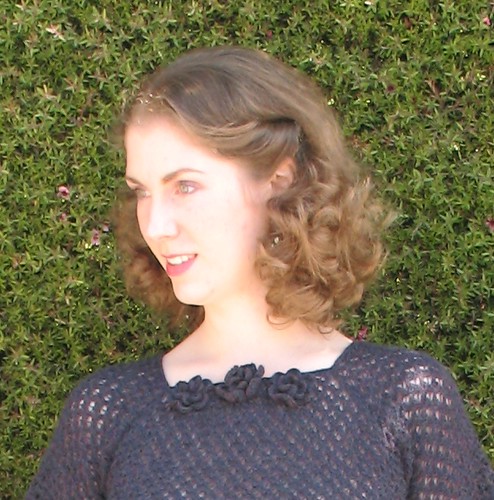
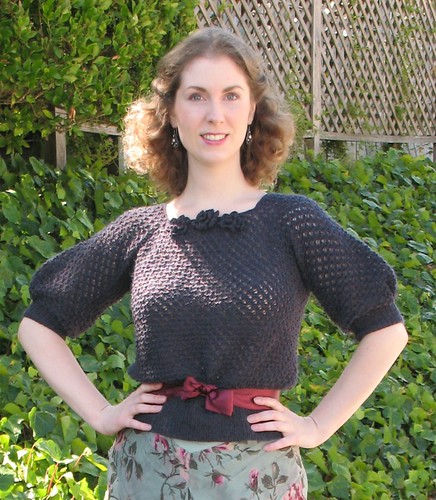
The stitch pattern is very easy to remember, which makes for a quick knit.  I especially love the addition of the crocheted roses.


The sleeves are not exactly what I expected, but I am very pleased with the finished result.  They are knitted from neck to wrist.  Before ribbing the lower portion of the sleeve, some of the center stitches are cast off.  This creates a little hole that loops out to create the nice little lower sleeve puff.  I thought that it looked a bit strange when left open, so I ended up gathering that portion and tacking it down to the upper edge of the ribbing.  


When I look back at the line diagrams in the pattern, this detail is noted, it was just not clear to me when I chose the pattern.

This is one of the reasons I love vintage – there are so many interesting details.


Sweater:  Rose Jumper from A Stitch in Time, Volume 1
Skirt:  Banana Republic
Shoes:  Colin Stuart for Victoria’s Secret
Earrings:  Shadows  

Saturday, September 17, 2011

Ceil Chapman Cocktail Dress, Part 1


I thought I would document the progress I am making with my cocktail dress.  Forgive my rambling – this is mostly for my own benefit, but I thought it might be interesting or helpful to someone else, so here it goes . . .

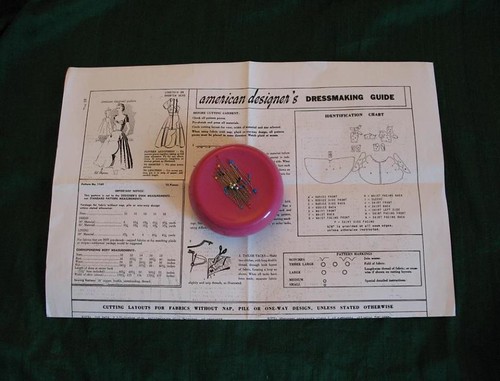
The pattern is a multi-size reproduction that I purchased from The Vintage Fashion Library.  It has been copied onto white paper and includes 9 separate sizes ranging from a 32” bust all the way up to a 48” bust by 2” increments.  From the dark line that indicates a 34” bust, I would assume that this was the original pattern size.  However, it is interesting to note that the original instruction sheet is marked a size 12 with a bust measurement of 35.5” a waist of 25" hips at 36" and a notation that reads “this pattern is cut to the designer’s own measurements . . . not standard pattern measurements.”  Unfortunately, there is no differentiation between sizes (other than the one bold line out of 9) which makes following the lines a bit tricky in some spots.  To make sure I was following the correct line, I used colored pencil to make my chosen size stand out on the paper.

The envelope includes two pages of instruction sheets and three huge pieces of paper with the printed pattern pieces.  


Quite a few of the individual pattern pieces are separated between the three different papers - it would have been helpful to add marks for matching them together properly.   It took my entire living room floor to unfold and layout the pattern and figure out which piece lays next to the other, and then tape and cut them apart! 
Not all the vintage pattern marks are included.  And instead of the notches and different sized circles on the original, a small line is used to identify notches and darts are drawn in as with modern patterns.  I would expect that the darts will need to be adjusted as you move up in size – it does not seem to me that a size 34 bust should use the same size dart as someone with a  48” bust.  

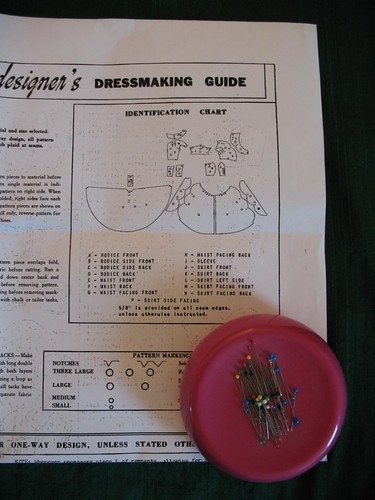
There are a couple of pattern pieces that are printed up-side-down or look a bit different than the identification chart. 


1.  The bodice front (A) is drafted as a full piece, but the original was to be cut on the fold (this confused me for a second – I thought I was missing a piece).
2.  The Waist Facing Back (H) is printed up-side-down.
3.  The Waist Facing Front (G) is printed up-side-down and the grainline is misdrawn.
4.  The Waist Front (E) grainline is misdrawn.

I always like to iron the paper on a low heat setting in order to get the major wrinkles out, and this also tends to make the paper a little less stiff.  However, I made the mistake of ironing one of the pattern pieces  with the printed side up.  The printing came up and stuck to the faceplate of my new iron – aargh!  I did manage to get it off without any damage to the iron, but that is a mistake I will never make again.

The pattern pieces are labeled with the company’s name and their pattern identification as well as the letter and description of the piece.  The writing, however, has nothing to do with the directionality of the pattern piece according to the identification chart.  I kept thinking that I did not have all the pieces because the shapes were facing in the wrong direction or up-side-down!  Note to self: do not try to match up funny shapes when tired.

Using a tracing wheel and some tracing paper, I have transferred all of the pieces to muslin along with their markings.  It feels positively wicked to write on fabric - but now there is no need to deal with stiff paper pieces!


 And now I must get back to the sewing room!

Wednesday, September 14, 2011

Make Every Day an Affair to Remember


The majority of the clothing I have made would qualify as “special occasion” attire.  These are the patterns I am drawn to – I simply cannot resist a fabulous dress.  If it was acceptable to flounce around in a hoop skirt all day, I would!  And most days, I am what the average person would consider overdressed.  


Then again, overdressed these days is basically anything other than a pair of jeans and a t-shirt, and by that definition, I do not mind if my habiliment is considered a bit extravagant.


I have recently come to the conclusion that saving these special garments for a special occasion is silly.  If wearing a great dress will improve my mood, why not wear one every day?


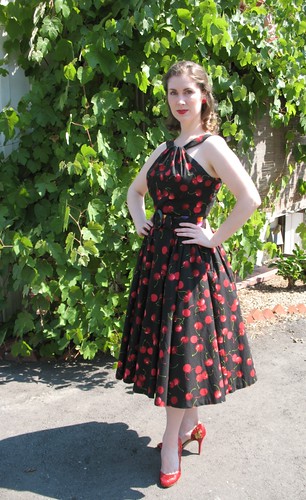
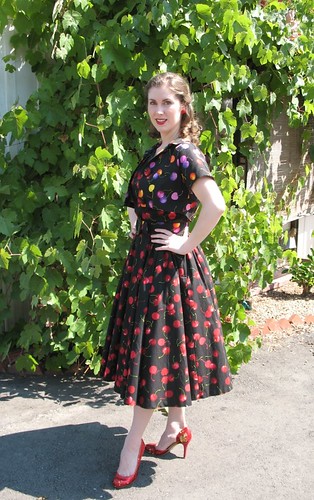
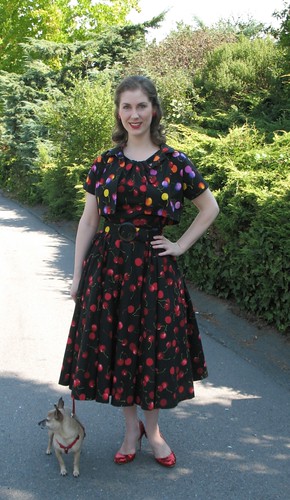
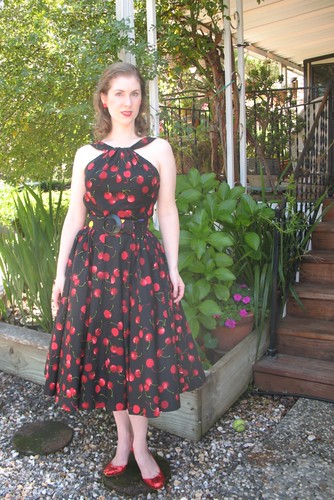
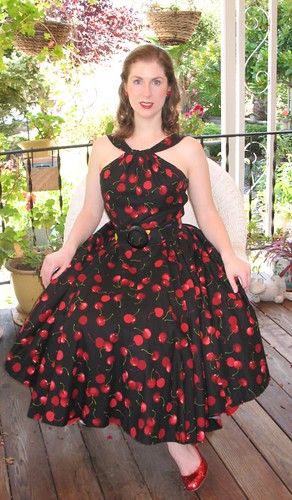
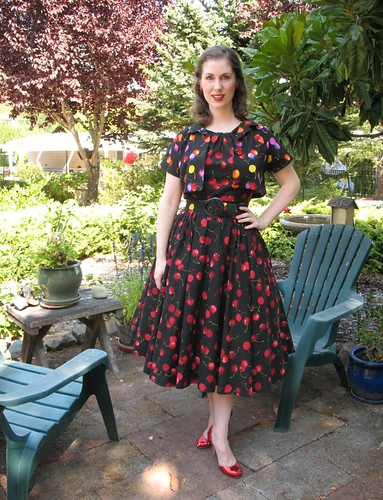
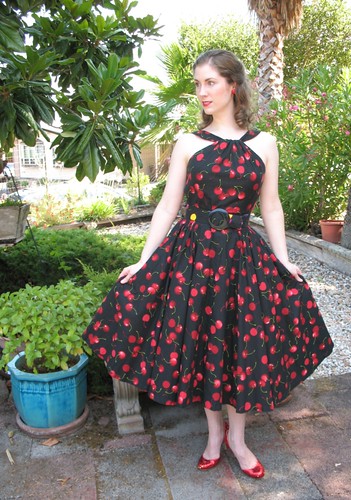
Case in point - until yesterday, this dress had only been worn twice since I completed it in September of 2007.  It was worn to a wedding, and for the opening night party of Idiots Delight in which I was cast as Mrs. Cherry. 

I simply could not resist this cherry printed cotton that I found at Joann Fabrics – I have never met a cherry print that I did not like, and Mrs. Cherry was not going to leave the store without it.  I could not decide between the red or multi-color, so I purchased both, and used the multi for the jacket and belt to add a bit of contrast to the outfit. 

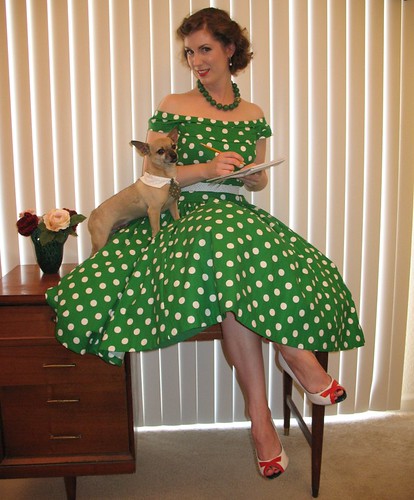
For the past year, my cherry confection has been decorating a wall in my sewing room, along with my green polka dot frock.


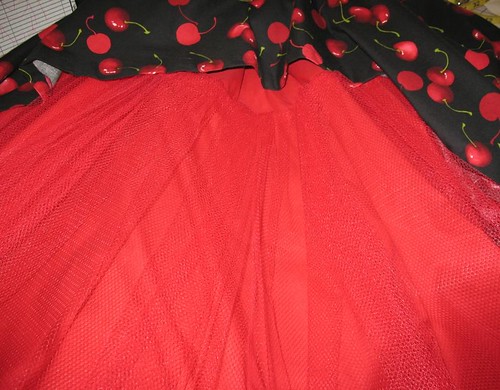
This dress has its own petticoat ruffle attached to the skirt lining.


I love the idea, but after using this technique on these two dresses, my closet was threatening to go on strike. 

Realizing that the netted crinoline construction used in this pattern (fabulous though it may be) was creating serious space issues, I used the skirt pattern to make myself a separate petticoat which I now use under my other full-skirted dresses. 

What makes this skirt so special, you may ask.  Instead of gathering all the way around the waist, the gathers are pushed to the sides, leaving the center front and back flat, which creates a more flattering line.  


The gathered netting gets sewn below the hip to accommodate the zipper making the poof start at the hip-line.

I decided to make the belt wider than suggested because I felt like a skinny one would get lost in the large pattern.  Because I could not find any belting as wide as I wanted, I used two layers of thick interfacing and sewed vertical pieces of plastic boning at the back and side waist of the belt to keep it from rolling.


I had to fuss a bit with the front neckline.  The construction went together beautifully, but the upper bodice would not stay centered or gathered as shown in the illustration.  


To remedy this, I simply tacked the underside of the casing to the straps invisibly where I wanted it to sit.  This is an extremely easy fix and something that makes the dress much easier to wear because it eliminates the need to keep adjusting the neckline.


My only real complaint, if I had to come up with one, is that the matching jacket is unlined, and the finishing technique leave something to be desired.  There are many ways to fix this, and it is labeled "easy," so I suppose Butterick did not want to add difficulty to the pattern.  However, because the dress is fully lined and finished off beautifully, the jacket construction just seems like too much of an afterthought.


I decided to forego the buttonholes because I knew I wanted to wear the jacket open and I wanted to use over-sized buttons.  I thought that large buttonholes would detract from the overall look.


Ribbon hangers were added to the dress so the weight of the skirt does not stretch the straps – not only does she take up quite a bit of space, those nine yards of fabric are quite heavy! 

This dress is quite easy to put together, but the pattern lines create a very memorable dress with a great neckline.  Do be aware that a special bra may be required because of that lovely neckline and the low back - a regular strapless may not work in this case.


So, no more excuses, go pull one of your neglected frocks out of the closet and take her for a jaunt – you will not believe how it will improve your mood, not to mention all the compliments you will get!


Dress & Jacket:  Butterick 4792
Earrings:  Vintage
Shoes:  Nine West “Vishnu” in Red

Polka Dot Dress:  Vogue 1094
Necklace:  Banana Republic
Shoes:  Seychelles "Babydoll"

Sunday, September 11, 2011

Couture Inspiration


I recently found out that I will be attending this year’s Marin Symphony Gala at the beginning of next month.  Of course, this means that I need to get going on my gown!  Sure, I have numerous things in the closet which would certainly be appropriate.  However, having made two special dresses for this event the past two years, and not wishing to be outdone by myself, I think something new is in order.


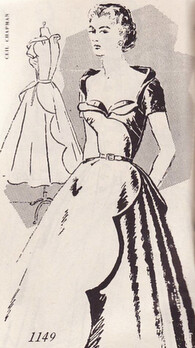
I purchased this reproduction of a Ceil Chapman design from The Vintage Fashion Library and later found the perfect fabric - a silk dupioni, cross dyed emerald and black.  I have perfected an image of my ultimate version of this dress ever since I laid eyes on the pattern.  I cannot be sure that the final product will be everything I hoped for, but I am going to do my very best!

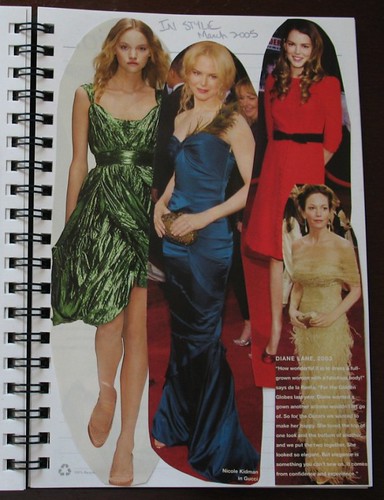
Due to space limitations, I have been going through old fashion magazines and pulling the few pages I really want out before recycling the rest. 


I make little collages out of the tear sheets and note the month, year, and magazine the images came from. 


And then, because I am obsessed with style.com, I head over to the website to see the entire collection.  It is inspiration central!  

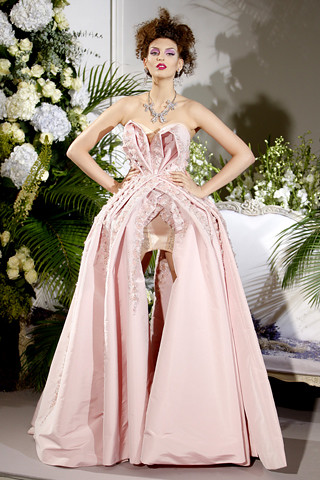
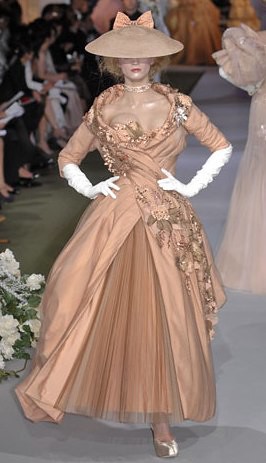
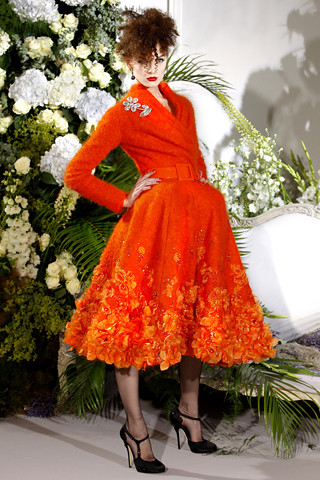
Although it may not be politically correct these days to venerate Mr. Galliano’s artistic genius, I have to say that Dior couture is currently my favorite, perhaps because of the reoccurring use of the New Look silhouette.

Dior Couture, Fall 2009
from style.com

Dior Couture, Spring 2010
from style.com

Dior Couture, Fall 2007
from style.com

With less than a month to go, I have traced the pattern onto muslin (the pattern came on bond paper, which just does not like to lay flat, especially with the massively sized pieces involved).  I have decided that instead of trying to find a foundation garment that works at the last minute, I am going to make my own attached corselette to help with the added weight of the beading I plan on adding to the bodice.  And, of course, I will have to make some sort of headdress (probably a simple 1950s cocktail hat with millinery veiling).  I also hope to have enough time to bead or embellish the underskirt a bit.  Perhaps something like this . . .

Dior Couture, Fall 2009
from style.com

Just to make sure the darn pattern fits correctly, I am going to mock-up the bodice portion in muslin before cutting into my silk.  Turns out, I only have scraps of muslin left in my stash. How on earth did that happen?  I remember when I first got on the JoAnn Fabrics mailing list and they sent a 50% off coupon, I decided to purchase a 50 yard bolt of 45” wide muslin.  I figured that sucker would last forever.  Well, I was wrong.

I have a lot of work ahead of me, but I think I can do it.  Deadlines have a way of motivating me.  And masses of inspiring images of couture are just a click away!

Tuesday, September 6, 2011

Presenting Mr. Valentino


My little guy has been a bit miffed that he has not had the opportunity to make your acquaintance, and he is right, an introduction is long overdue.  

"Hello, my name is Valentino.  Pleased to meet you."

Valentino came into my life just over four years ago, and I cannot imagine it without him.  


After a few trips to the Marin County Humane Society looking for a canine companion, there he was, looking at me with those big brown eyes through the glass. 

He is most happy resting in a patch of sunlight while having his tummy rubbed. 


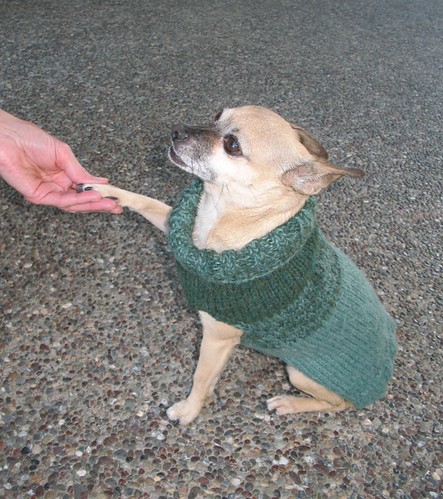
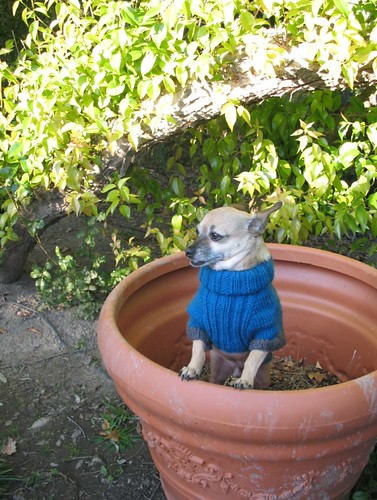
For those days when the sun is hiding behind a cloud or the weather turns a bit chilly, he slips into one of his favorite sweaters and prances proudly down the avenue.


And while I am the first to admit that I have quite a few clothes, you should see Tino’s wardrobe.  


He has sweaters to keep him warm on cold evenings, polo shirts for a slight chill, raincoats to keep him dry, and costumes to keep him cute.

Valentino as Happy the Dwarf, Halloween 2008

One of my favorite creative pastimes is knitting with my little dude snuggled up next to me.  However, it can take quite a bit of time to complete an adult sized sweater and I sometimes get impatient with the process, yet it takes no time at all to make the pupster a sweater.  And since making his acquaintance, I have made my Tino quite a few doggie sweaters.


Some of those sweaters are currently entered in the Pet Challenge over at instructables.com.  (Voting ends tomorrow at midnight!)  If you are not already familiar with the site, you should stop on by.  There is truly something for everyone, from cuisine to crafting.  

And remember we can always learn from our canine friends - it is extremely important to take some time out to relax and enjoy the good life!


Say goodnight, Tino


Saturday, September 3, 2011

Purple Passion Flower

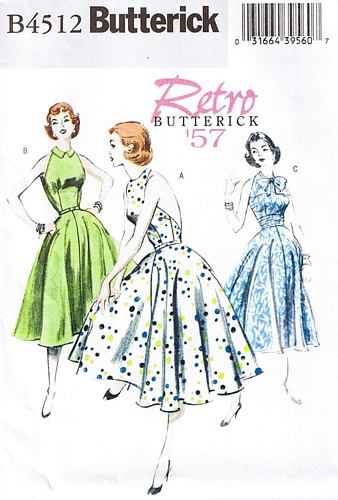
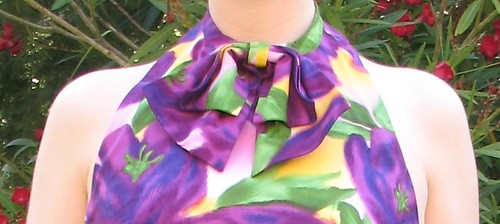
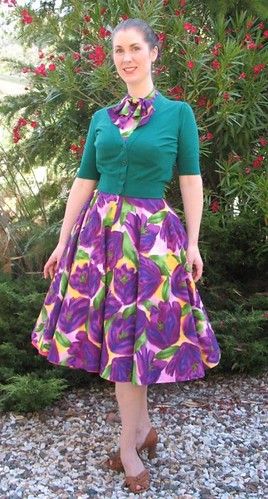
The only problem with having a closet packed full of clothes is that you can easily forget about wonderful dresses hiding back in the far corners – sometimes for years at a time!  Today I rediscovered this dress I finished back in 2008 using Butterick 4512 (one of their vintage reproduction patterns).


This is not the first vintage reproduction from the McCall pattern company that I have made, and it will surely not be the last.  Try as I might, I cannot resist the adorable vintage pattern sketches on each envelope, no matter how simple the silhouette. 


It is actually a brilliant marketing ploy – everything looks better on an elongated fashion sketch with an impossibly small waistline!  I wish I had become aware of these sooner - through internet searches, I have come across quite a few that I wish were still in print.  Not only is the envelope artwork fun to look at, the patterns generally have wonderful details that many contemporary ones seem to lack.


The fabric print is not something I would normally wear, however, it called out to me from the bolt as I walked by the quilting section at JoAnn Fabrics one day, and I could not resist.  If only it came in a silk satin – can you imagine?! 

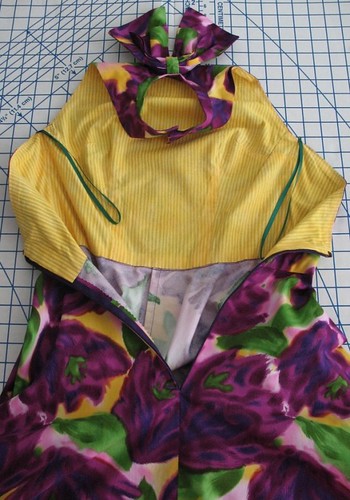
Because I have had issues with halter-topped reproduction patterns in the past, I was a good girl, and mocked-up a quick muslin of the bodice.  Sure enough, there was some serious gaping from the upper bust area to the neck.  I thought I had fixed my problem using the muslin, but after putting the dress together, the neckline was still not laying flat.  To fix the problem, I added another dart.  Unfortunately, the dress was already lined, so it is not the prettiest fix in the world, but it does make the dress wearable.


I knew I wanted to use a contrasting fabric to break up the busy print.  My first inclination was yellow, even though I usually avoid the color.  However, I found a fun striped quilting cotton that I liked and purchased enough to use it for the cummerbund and bodice lining.


If I ever make this up again, I would add a bit of boning at the center back bodice. 


The back has a tendency to pull downward over the day.  It is not a huge problem, just something that could be improved on.

Boy am I glad I caught site of this fun frock hiding in my closet before the weather precludes me from wearing it!  I even got quite a few compliments from strangers.


Dress:  Butterick 4512, Made by Me!
Cardigan: Banana Republic
Shoes: Franco Sarto Foe Brandy Capra Botalato