
I often get impatient when working on a muslin - the actual garment is so much more interesting to stitch together, so I tend to plow right through the practice round. But in this case, I did not have my fabric in hand because it was being printed! So in order to perfect my design, and to make sure things were headed in the right direction, I decided to make a second muslin in a slightly crisper cotton.
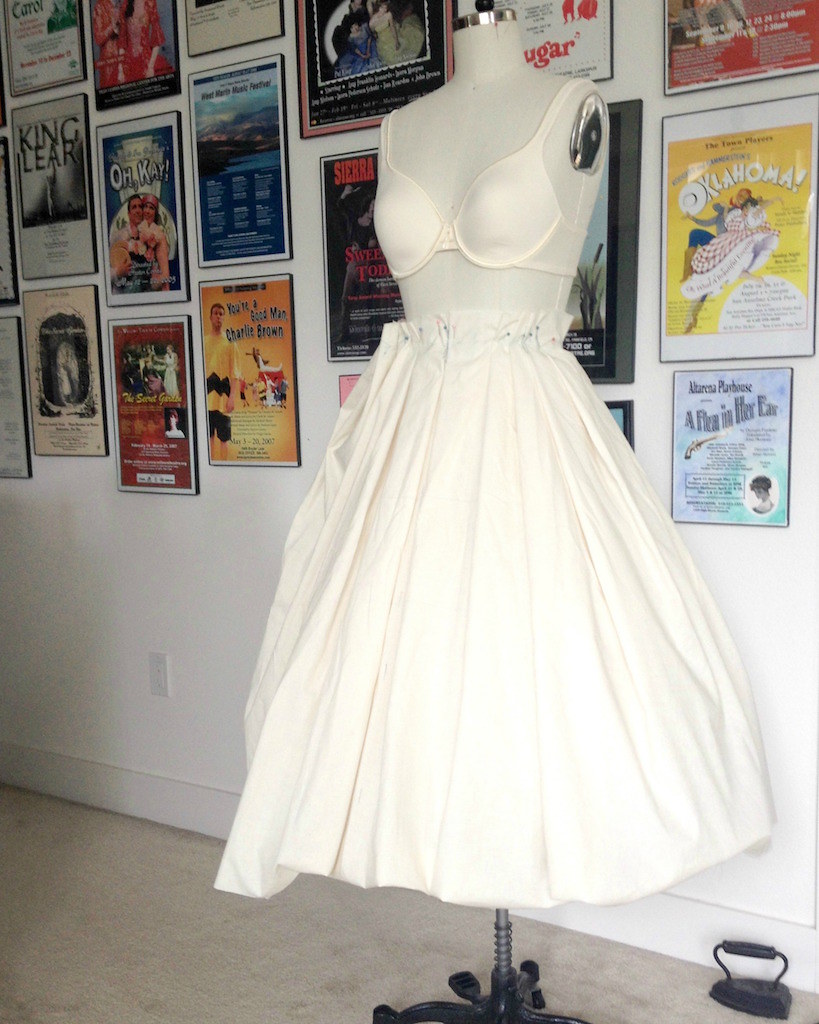
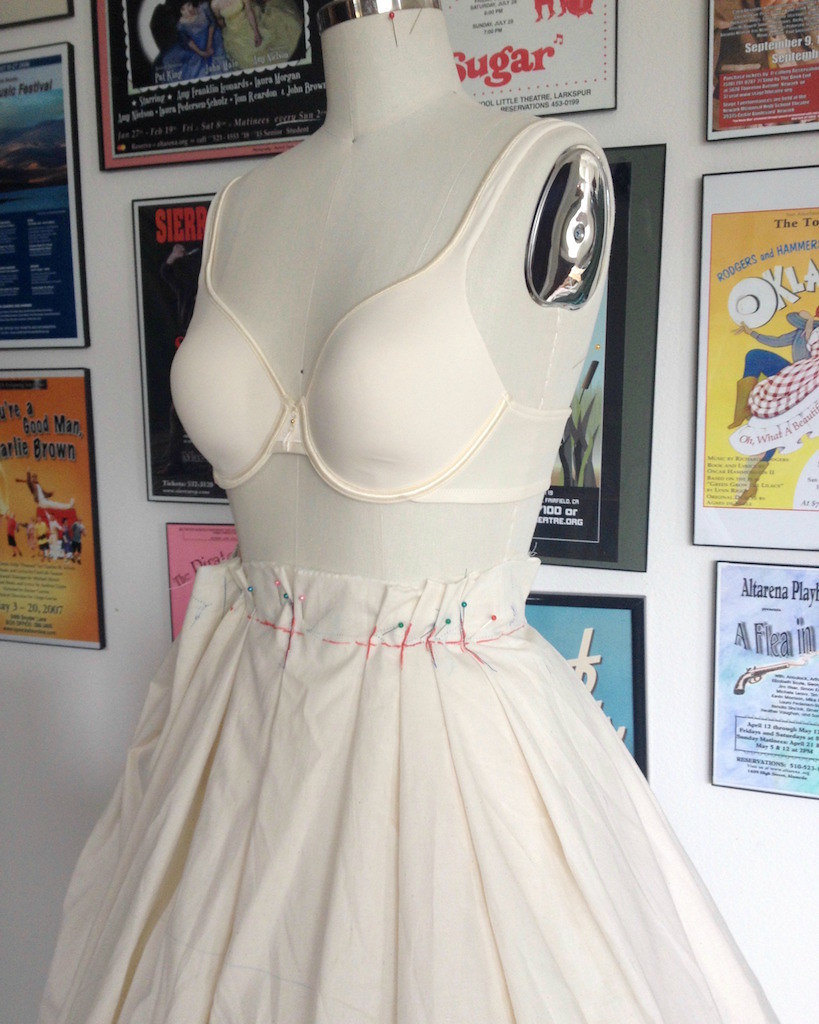
After playing around with pleats for way too long, I finally settled on the skirt.
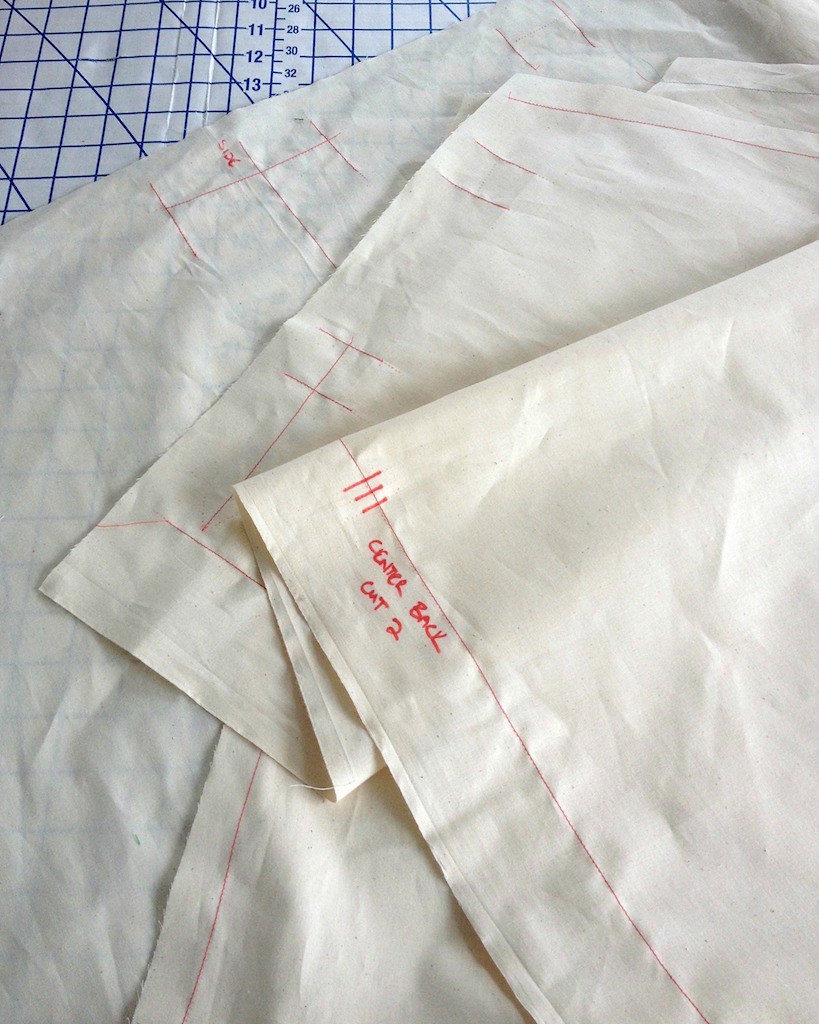
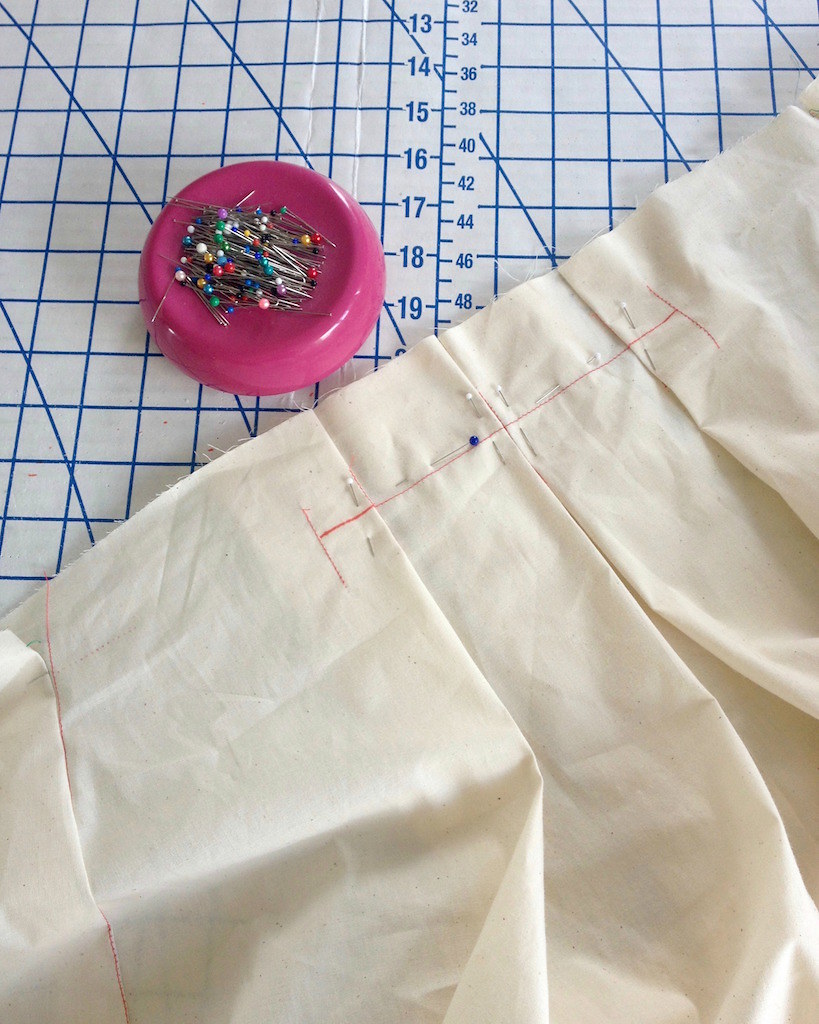
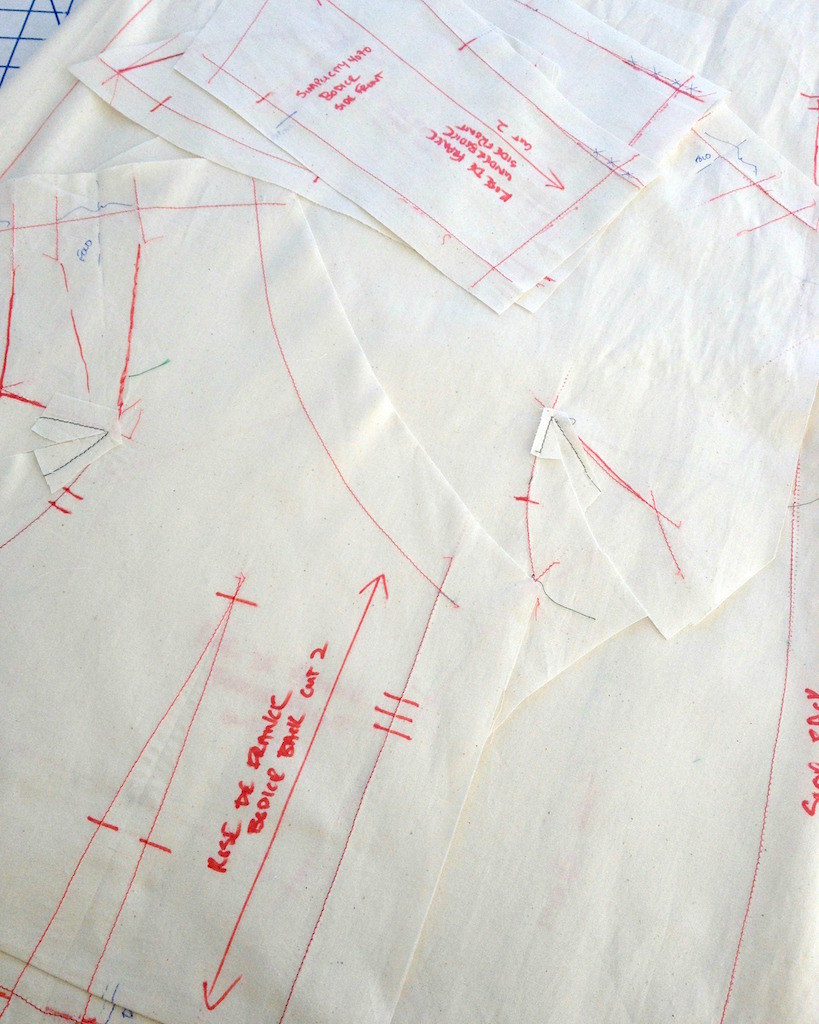
Once everything was marked, I cut out a brand new version, this time with one set of clear markings.
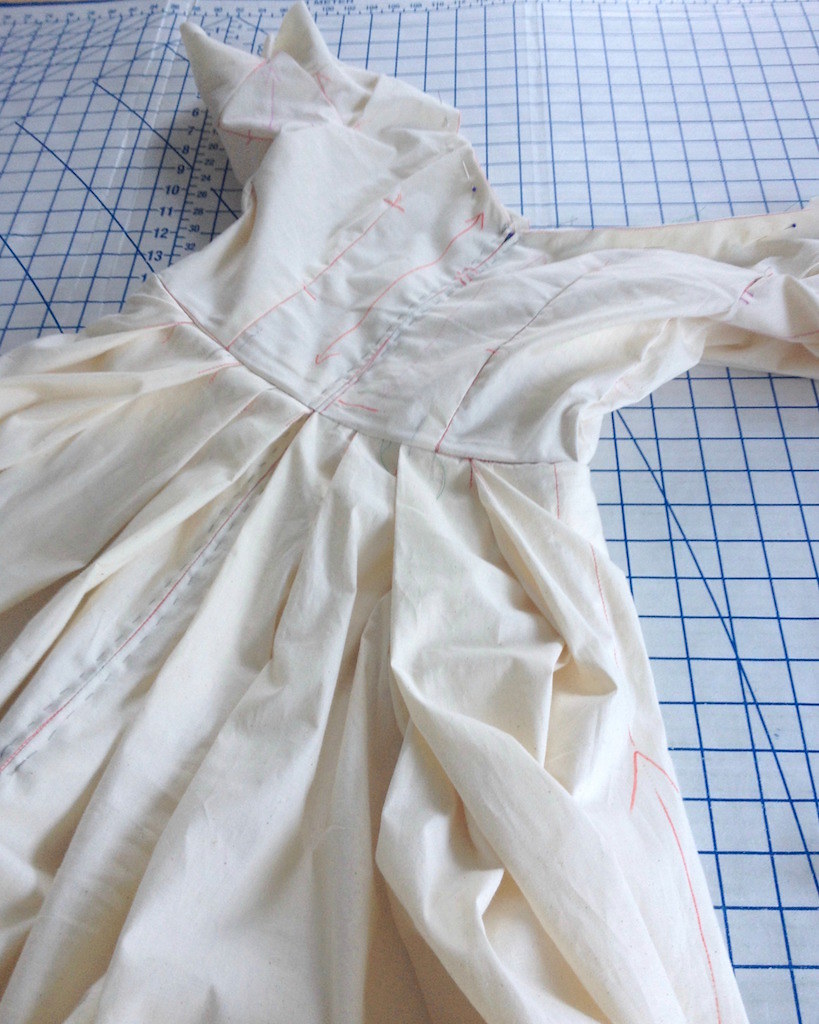
That went together fairly easily.
And soon enough, I had my skirt.
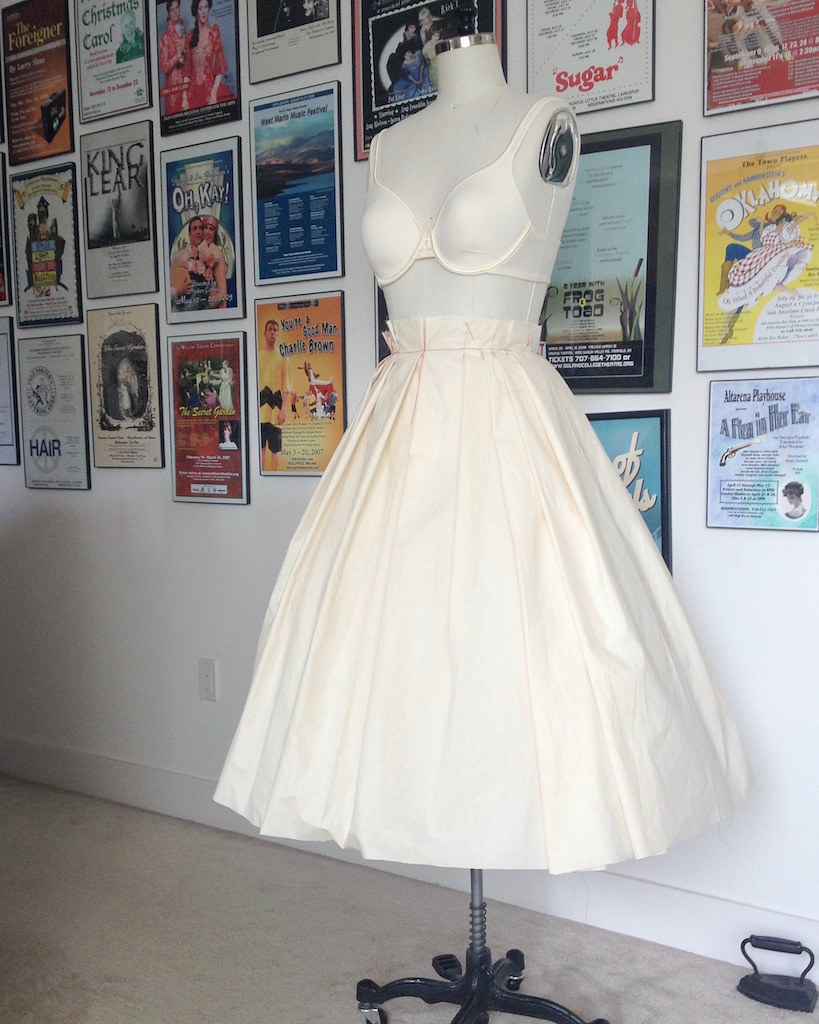
It was a relief to see that things were looking good!
A second bodice was also basted together. The sleeves were slightly wide, so I narrowed the gusset pieces which fixed that issue.
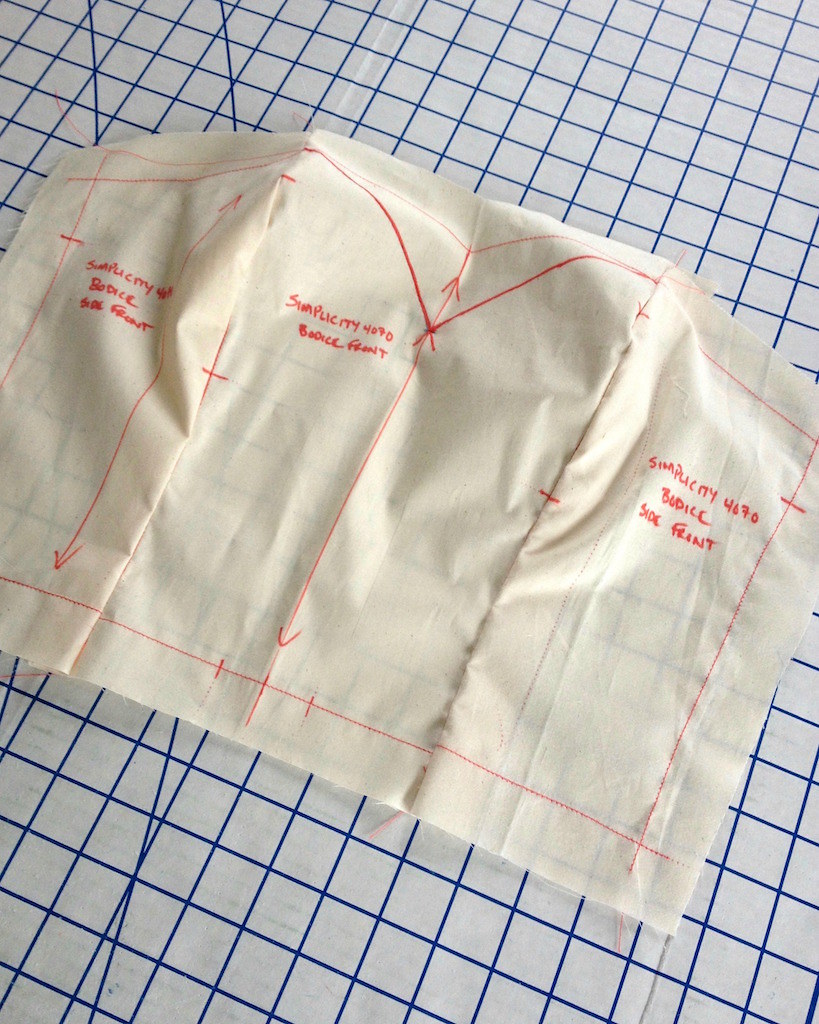
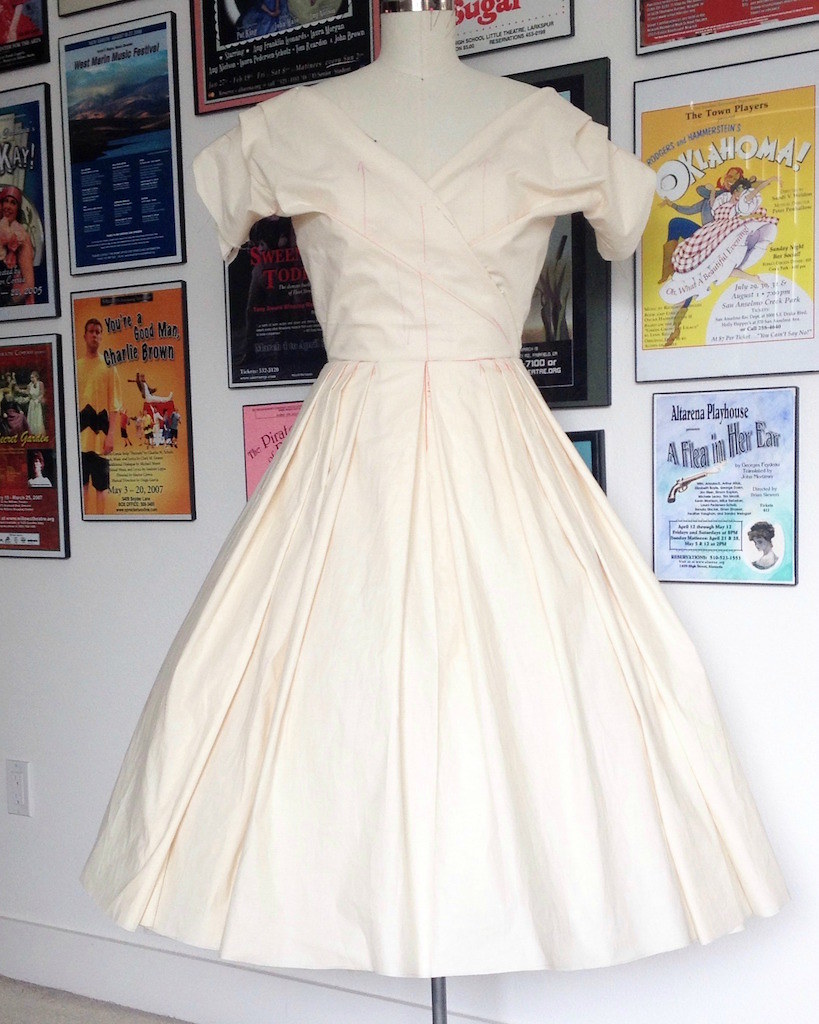
As a foundation for the bodice, I pulled out Simplicity 4070. If I need to tack the bodice fronts in place, I will have that option. This layer will also have one or two sets of boning channels stitched in for added stability since the neckline is going to sit very wide on the shoulders.
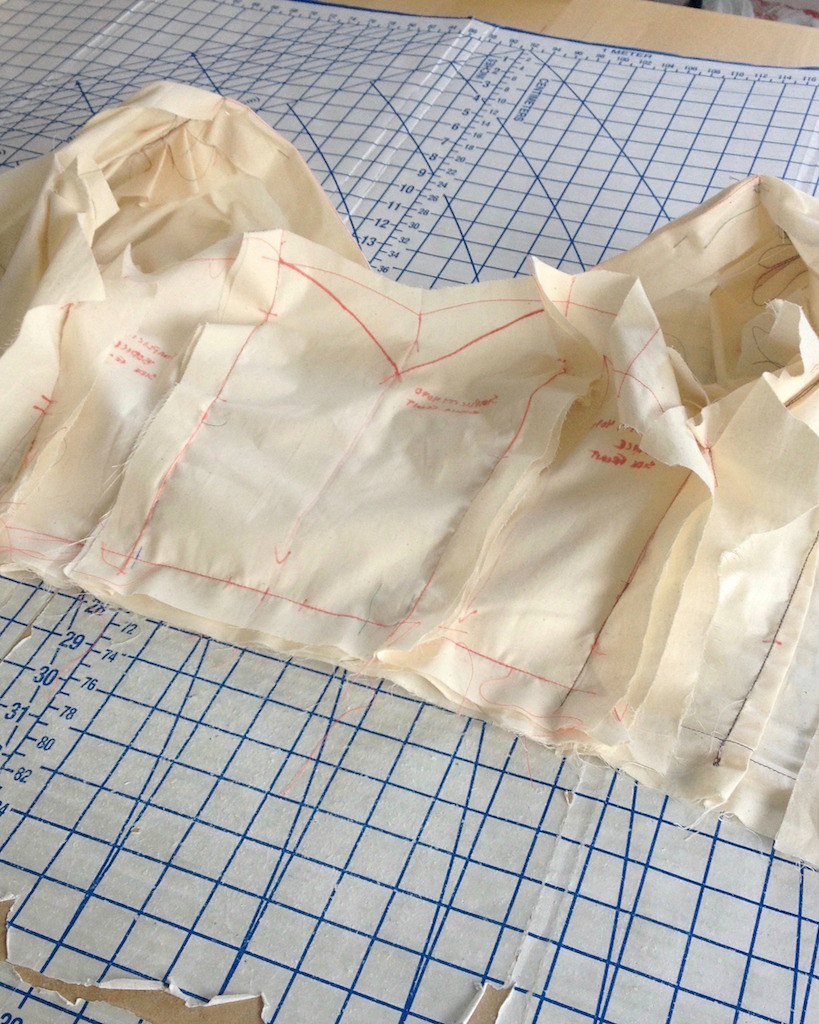
The sweetheart neckline of this layer required a bit of reshaping to keep it from showing, and the princess seams were taken in at the waist, but other than that, everything matched up nicely.
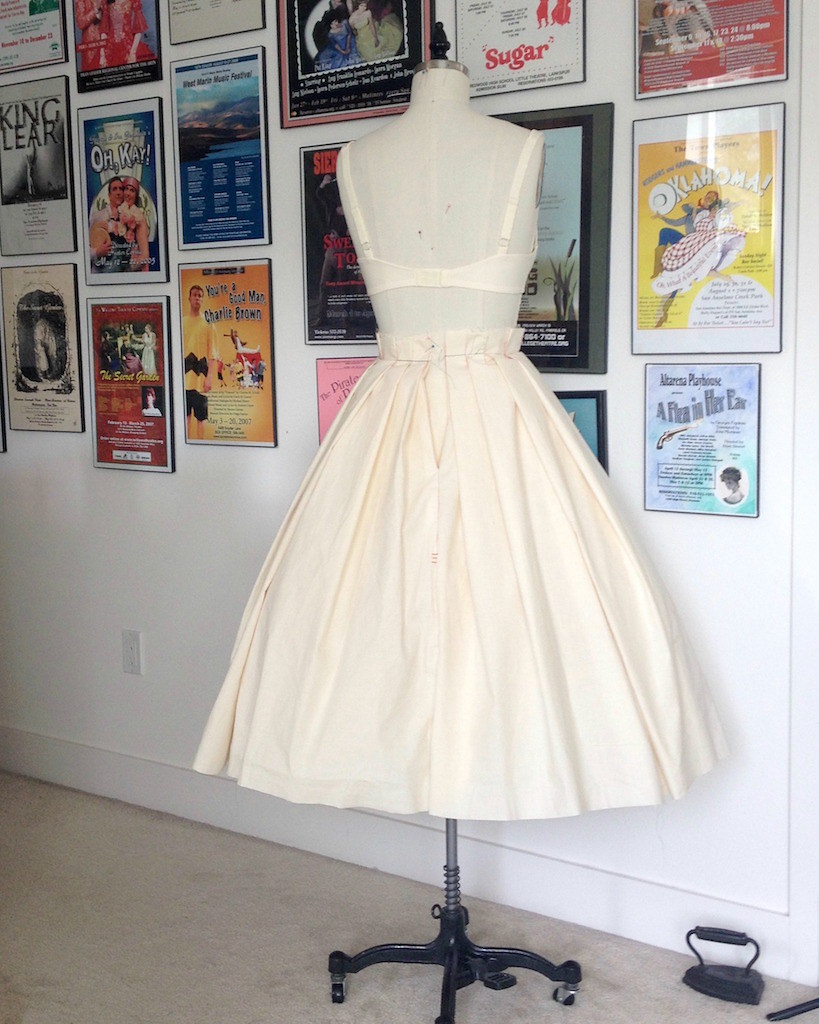
Then I put the two parts together, basted a zipper in, and tried the darn thing on! For my first self-drafted garment, I am very pleased.
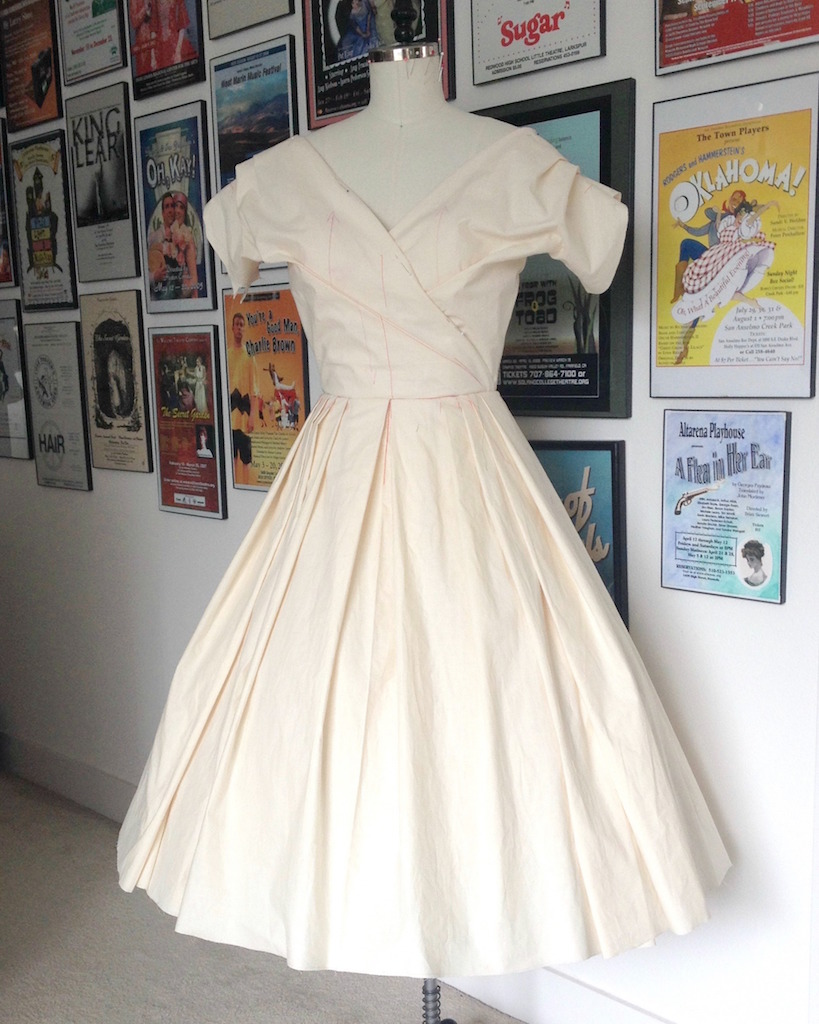
There is some bulk at the waistline seam, but with my fabric choice, I think everything should work okay.
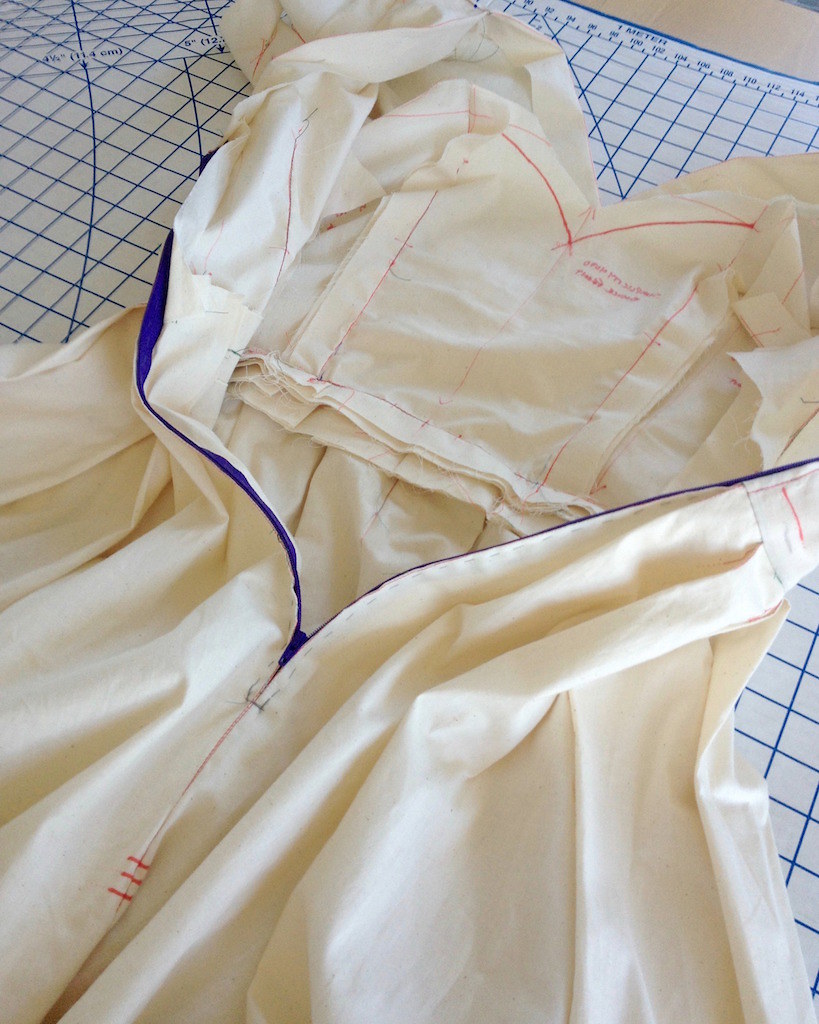
After some minor alterations (the back dart did not match up with the skirt pleats, for instance), it was time to rip the whole thing apart.
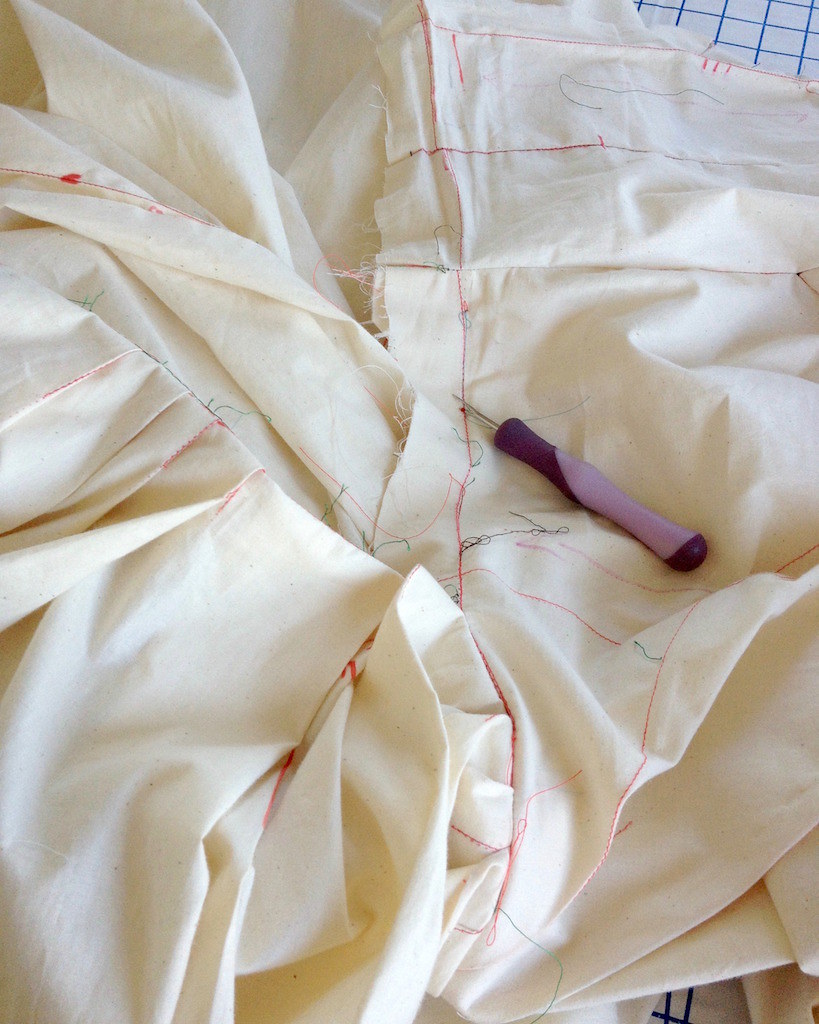
Which looked something like this.
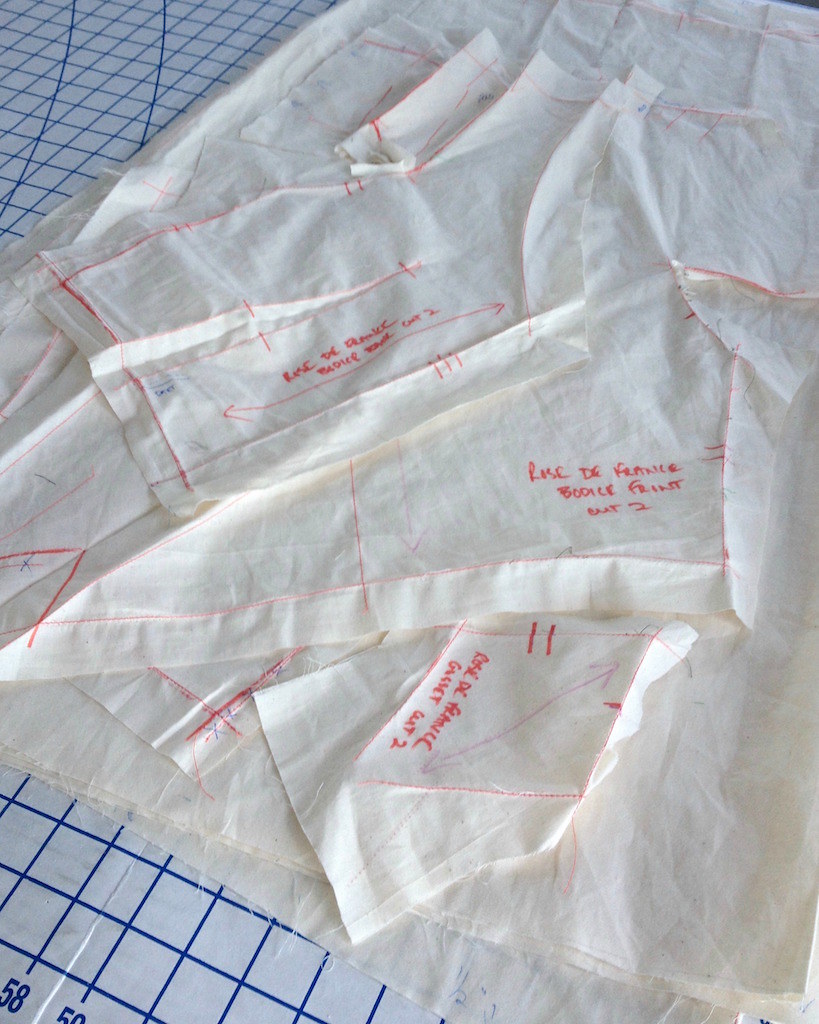
And after a quick press, I had my pattern pieces ready to go for when my fabric arrived.
Overheard conversation #25:
ReplyDelete"Now we're in pieces."
"Mmm hmmm; it's not Mother Nature up to her old tricks."
"She doesn't even sulk about bulk."
"You do realize once clad in the final product all that boning will give her the waist of a prom queen."
"Bod-zilla!"
"Top that with dignified decolletage, and whatever she gets from Hair and Make-up, and 110 years later they'll be in for another quake."
"She won't even have to shim and shake."
"Before she constructs a story to go around, it's good to have the real low down."
"Put the blame on Laura Mae, oy!"
"Put the blame on THAT Laura Mae!"
Your muslin looks awesome. I would just dye it and wear it as is, but I am weird that way. You are a very talented seamstress, can't wait to see the final dress. Cheers, Michele
ReplyDeleteI've seen the final dress in bits and pieces on Instagram, but this is the version that makes my heart sing. Something about red tracing wheel lines on creamy muslin just looks like the professional dressmaker stopped in for a short lecture demonstration and left a miracle on a dress form.
ReplyDeleteWow this looks amazing! Can't wait to see the final dress. One day I'm going to make something like this! Make a muslin and sew it with the right techniques. For now I just go with fast and easy projects.
ReplyDeleteYour second muslin is to die for. Definitely worth the effort for such a special dress.
ReplyDelete