
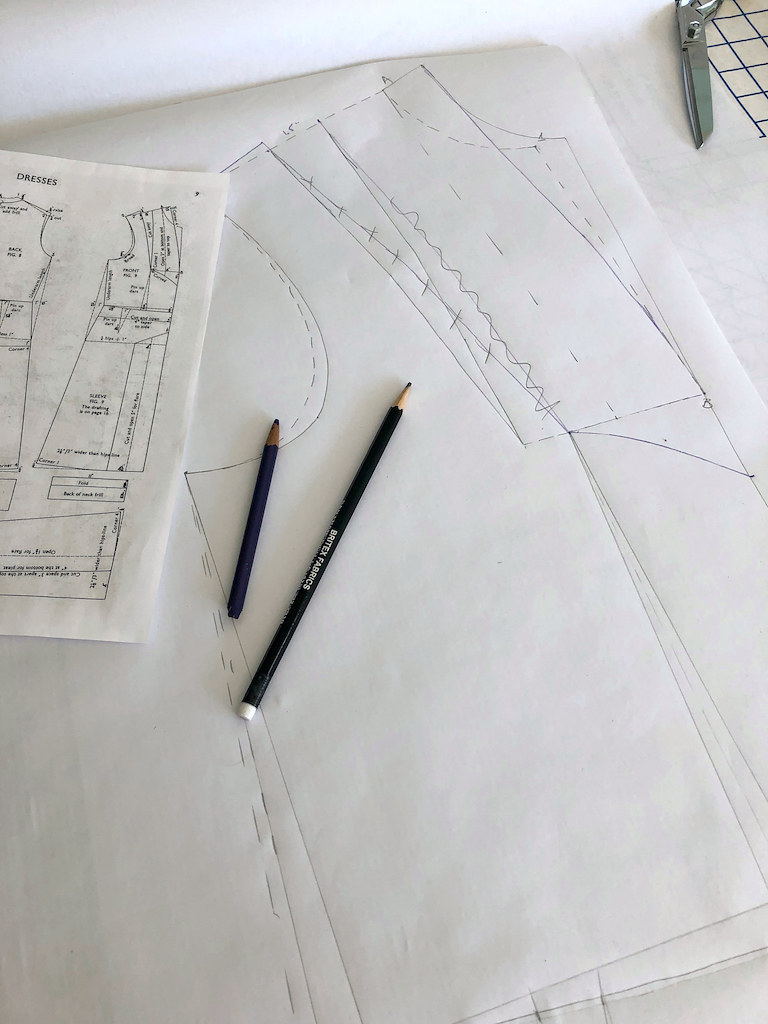
So the trick is now to turn these diagrams into . . .

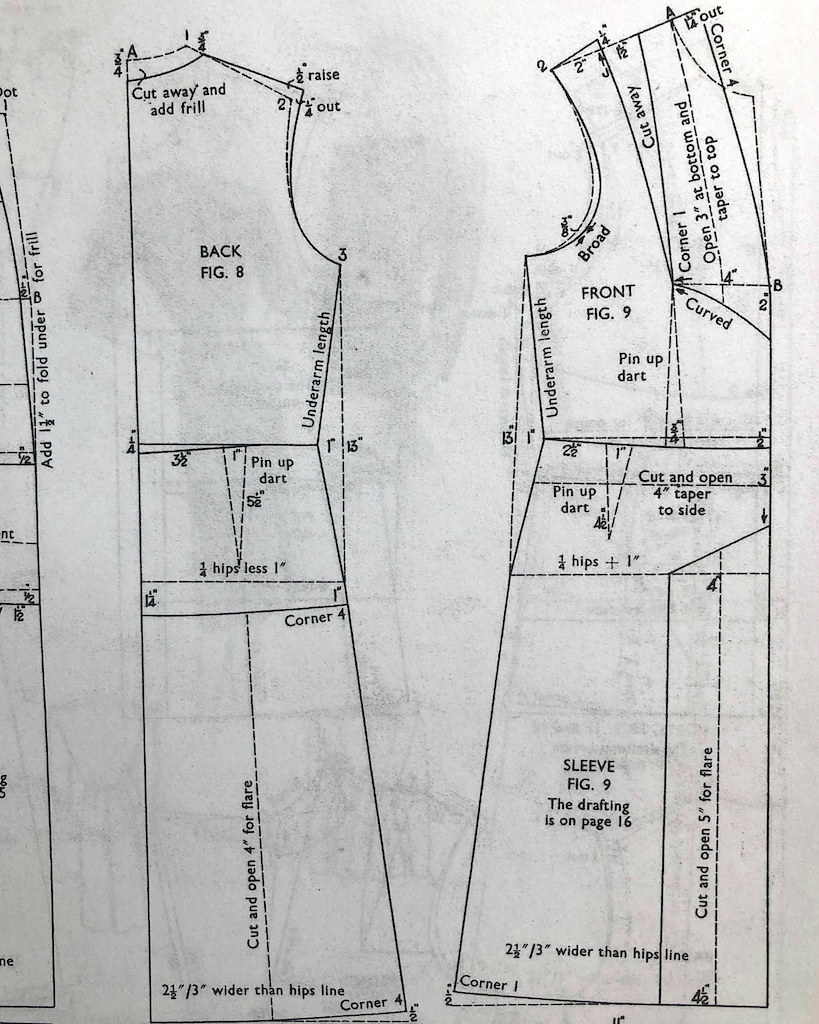
pattern pieces that will make a dress that looks like the illustration. The Book of Draftings tells me that I am working with Figure 9, and that my draftings are to be found on pages 9 and 16. Great! The only other "Helpful hints for the making of garments given in this book" regarding Figure 9 is this:
The vest portion of this dress is gauged along the bottom and inserted. The front panel of the skirt is fixed in position and machined. Gauge the centre part above the panel into 3-in. space and draw to the figure. The drapery is slotted through and attached.

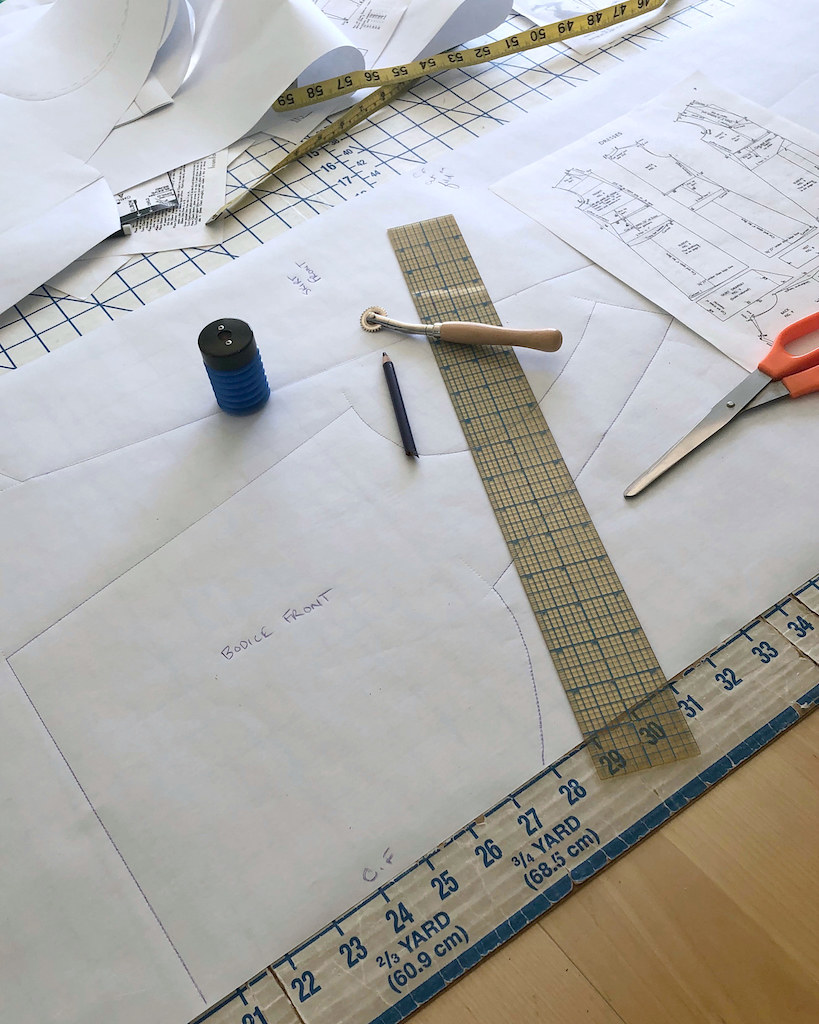
What I previously created is a basic block sketched in pencil on paper that should fit my body fairly well since is has been made using my specific measurements. What I now have to do is slice, dice, and manipulate the block into my Figure 9 diagrams to create a paper pattern for the dress.

I start with the back since there seems to be less to do there.
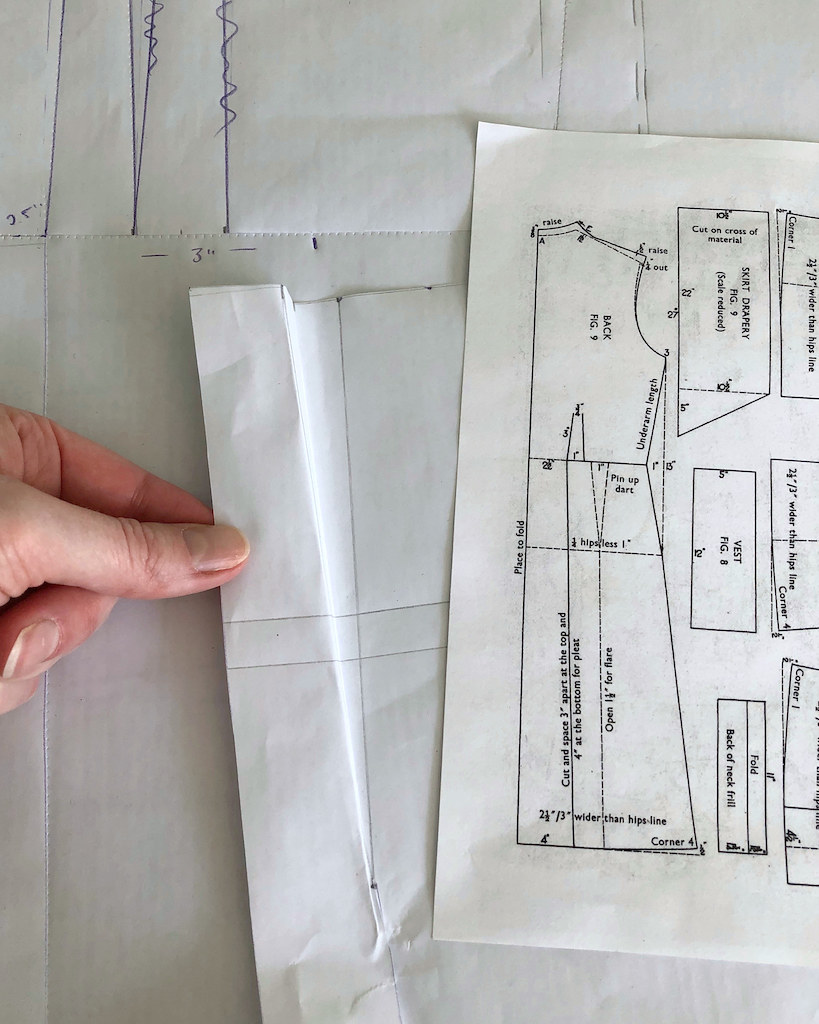
"Pin up dart" seems fairly straightforward, and to counteract that fold, I "open for flare" by slicing from the hem up to the point of the dart. That newly sliced and folded shape is then traced onto another piece of paper to give me my pattern piece. (In theory, at least!)

I decided to make a waist seam at front and back, although the illustration suggests that the back bodice and center portion of the skirt is one piece. But hey, I'm the one putting this thing together, so I am going to simplify where I can since this is my first attempt to make something using this new-to-me system.
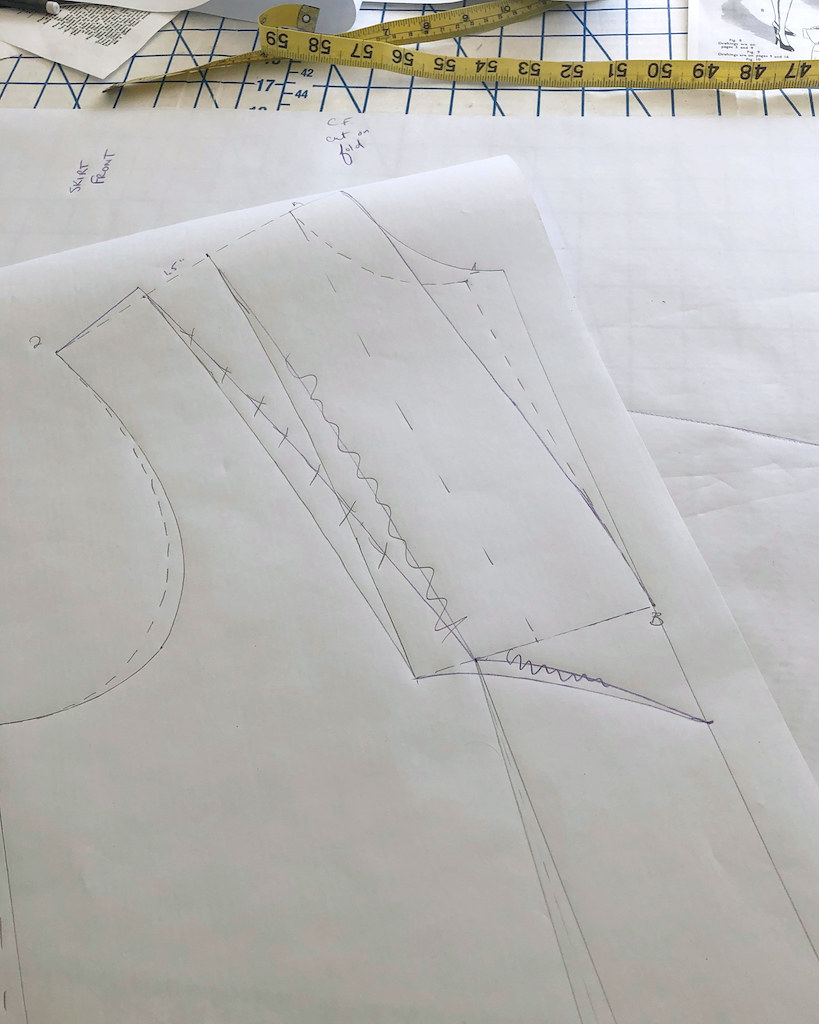
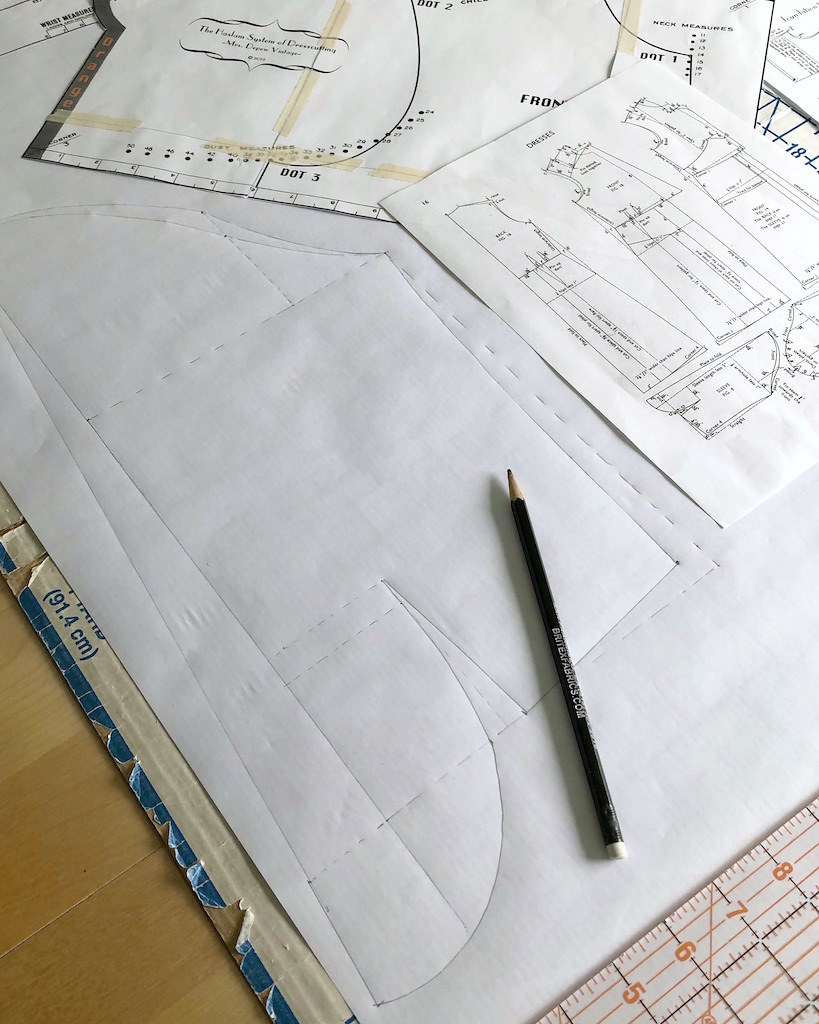
Now that I am a little more comfortable with the process, I decide to tackle the front. The first thing I do is cut out the center front inset for the skirt. The paper gets sliced from the hem to the angled section, and as suggested, is flared 5" at the hem, tapering to nothing at the top of the piece.

The skirt front is similarly sliced and flared to correspond to the diagram. This portion of the skirt is expanded, which will then be "gauged" at center front to created the gathered look of the illustration.

Moving on to the bodice front, you can see I made a few drafting errors. Thankfully, I caught my mistakes before moving on.
Remember, I am working without seam allowances of any kind. Those will be added in after all of the slicing and dicing is finished. This makes everything so much easier - especially when is comes to making sure corresponding pieces will fit together properly.

And eventually, I have my pattern pieces sketched out on paper.
Since the sleeve is a one-piece sleeve and bears no resemblance to the two piece drafted sleeve in the foundation draftings, I really think that you are expected to draft this from scratch.
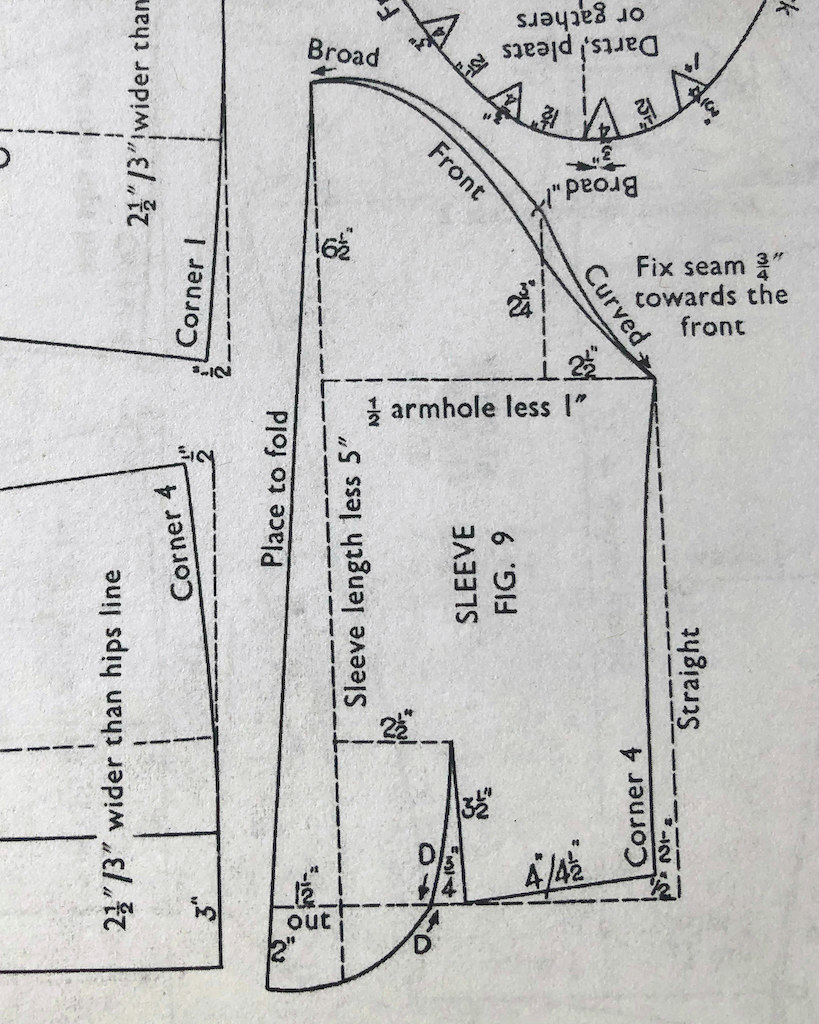
I am slightly confused how the measurements on such a diagram can be used for a system that allows for such a huge size variation. One assumes that a 24" busted individual's arm is going to be a whole lot different than an arm belonging to someone with a 50" bust. This also applies to the flared portions of the skirt and bodice pieces. If you want something to look gathered across a front portion of a chest that measures 12", adding 3" is significant, where that same 3" is going to do very little to gather fabric across 25".
I would be curious to know what size the original drafted illustrations were made for. There are specific designs made for children and some of the illustrations seem to suggest a more mature figure as they are drawn, so perhaps those issues are taken into account in some cases. But I think gathering and pleating suggestions might have to be tweaked if you want your garment to look exactly proportionate to the illustrated figures. But we will have to see how that goes . . .
You are amazing, lady. I’ve been putting off making my desired Haslam dress for three years now in favor of easier projects. You’re inspiring me to give it a go after all!
ReplyDeleteVery informative, and kudos to you for navigating all of this successfully.
ReplyDeleteMeanwhile (SFX: tapping of foot), your "educational excursion diversion" translates into more time in the Lilacs & Lace waiting room.
Now you're just tipping you head back at a slight angle and smirking - [finger pointing at screen] I KNOW YOU!!!
"If you want something to look gathered across a front portion of a chest that measures 12", adding 3" is significant, where that same 3" is going to do very little to gather fabric across 25"." nails it.
ReplyDeleteThose numbers need to be proportional to the specific size, and would clutter up what is supposed to be a straightforward drafting procedure.
It reminds me of the endless charts for the 'draft your own sweater' instructions, with spreadsheets for incremental changes and a "fill in the blanks" Mad libs like instruction set.