Showing posts with label Haslam System of Dresscutting. Show all posts

Thursday, January 9, 2020

A Brocade Gown


Although I didn't manage to post the finished photos of my Haslam System of Dresscutting project in 2019, I am going to pretend that I did, and add it to my finished projects for the year!


This was, by far, my most involved sewing project of 2019.  From studying the drafting system itself, to drafting a made to measure pattern, sewing up a muslin, and finally, making the dress, it was a lot of work!


I will always have fond memories of the fabric since it reminds me of my trip to New York, and visiting Elliott Berman Textiles with Peter.


And I do love the Ellen Tracey brocade, but I have also come to the conclusion that any fabric made with a fair amount of polyester (this is a wool/poly blend) is never going to be my favorite textile, to work with, or to wear.


In this instance, the partially polyester blend doesn't have the weight that it would if it was made with rayon or silk, nor does it drape as beautifully.


But despite the fabric content, I really do like the way this turned out.


The system itself was a nice challenge, and while I do think there are a few issues to contend with, for the most part, it works quite well.


In other words, I could definitely see myself making another design using The Haslam System in the future.  And it's always a good idea to try something new every once in a while!


I think any drafting system is always going to require some tweaking and at least one muslin, so for the moment, I have other patterns and projects that are taking my time and attention.  But someday, I am going to have to go through and look for another dress to tackle and draft from scratch.


And I have not completely decided against making another version of this design, probably knee length, and with a couple of design alterations - this time in a rayon to see how that turns out.  I also have a need for more of this style sleeve in my life, so I definitely want to use that pattern piece again.


I mean, after all that work, I might as well get a second dress out of it, right!?


Dress:  Made by me, self-drafted with The Haslam System of Dresscutting
Shoes:  Remix "Miranda"
Purse:  Vintage
Hair Braid:  Made by me
Earrings:  Vintage
Bracelet:  necklace from Banana Republic

Thursday, July 25, 2019

Finishing the Haslam Project


This is the last of these in progress posts, I promise!  Then, there is the issue of getting through the pictures of me wearing the dress, which I am afraid will take far longer than I want.  But I will get there in the end!


I always underestimate the amount of time required to finish one of these involved projects.  Of course, it helps to get some of the moving parts finished before they are actually needed.  Case in point . . . shoulder pads.


I didn't want too much bulk through the shoulder, so I only used a few layers of cotton batting.  And then all I needed to do was cover the batting with pieces of my fashion fabric.


Even though I thought I had added at least three extra inches to the skirt length, I only turned up 1 3/8" for the hem.


But once I put the dress on with my heels, I decided I wanted the dress to be slightly longer.  I really wish that the hem was deeper, but it works.


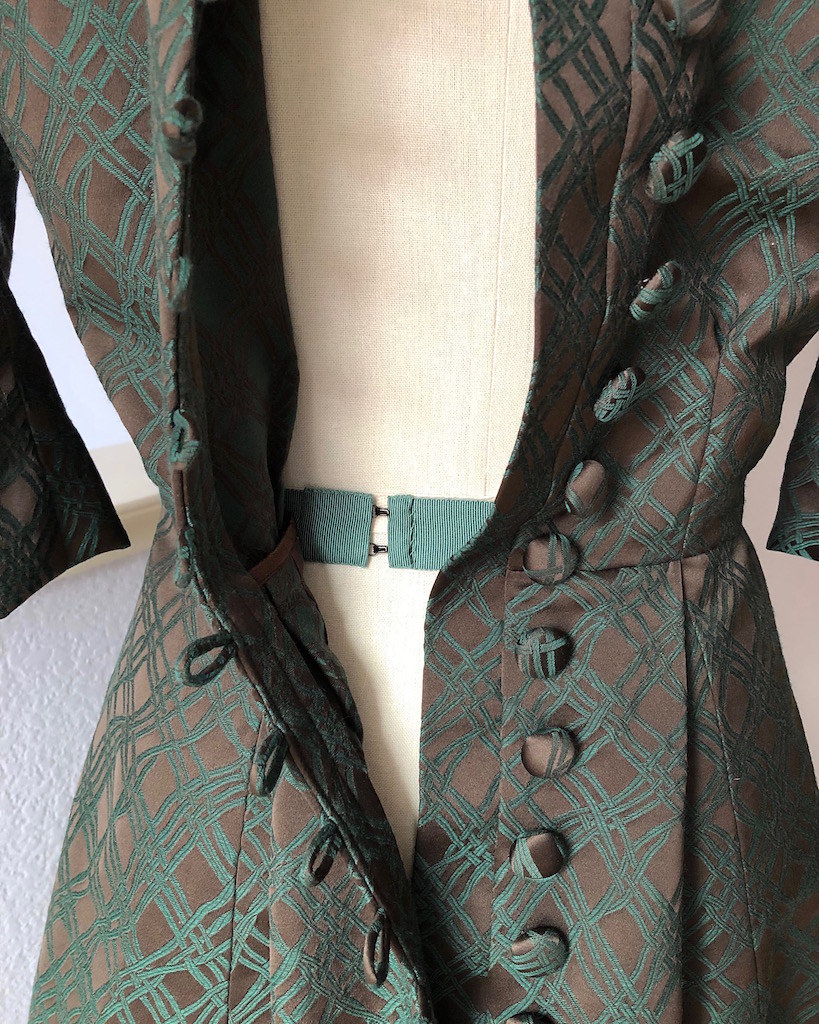
The final thing to do was add a waist stay.  I even had a length of petersham ribbon that matched my fabric perfectly!


The stay makes it impossible for any pulling at the waistline since it is slightly smaller than the circumference of the dress waistline.  Since my closure is a row of buttons, this is especially important.


Here you can see how the stay works within the garment.


And then all those bits of basting thread need to be removed (at least, the visible ones).  I will admit that I don't often remove any basting so long as it is within the seam allowances and will not be seen by anyone other than myself.


And that means the garment is complete!


It's been a fun journey.  Does it make me want to start drafting sewing patterns from scratch?  No!  But it was a good test of my sewing knowledge, and I am pleased with the finished results, so overall, I am calling this a successful experiment.


Thursday, July 11, 2019

Those Crazy Haslam Sleeves


Now for the hard part - the sleeves.  This is where I had the most questions.  The armscye gave me a bit of trouble, but that was an easy fix.  


My most pressing issue was the fact that the only image of the garment is not entirely clear on how those sleeves are put together.  There is the illustration and the line drawing of the back view.  Now, is the gathered portion a part of the lower hemmed edge, or is it inserted into a seam and completely drawn up?  I couldn't come up with a definitive answer, so I just went with what felt right.


For most of the dress, I cut my pieces using a 5/8" seam allowance.  However, for the sleeve, I gave myself a little extra room to play with where I could.  I also needed to contend with narrow seam allowances in a fabric that likes to fray.  For the almost dart like parts, I used this technique with the help of a couple of squares of silk organza.  I can't tell you how often this comes in handy, even in places you might not expect.


Once that corner was reinforced and clipped, the center portion of the sleeve was gathered up to fit the legs of the matching seamline.


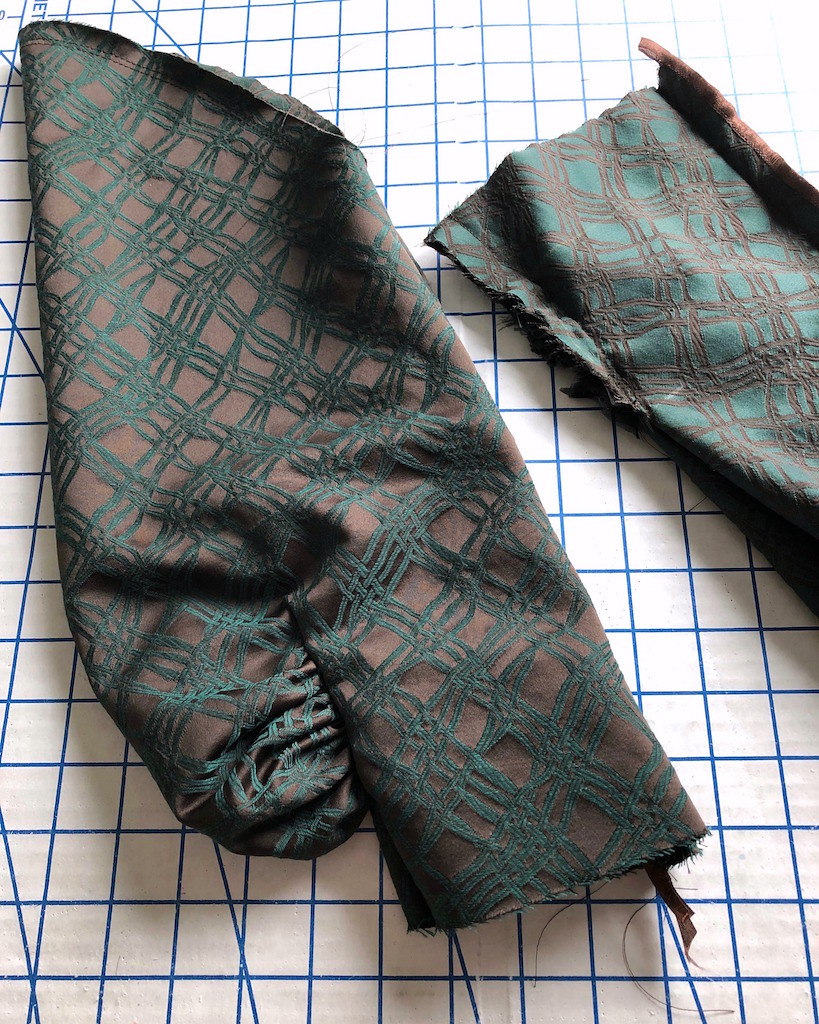
That gives a lovely fullness at the lower sleeve.  I decided to draw up the fullness completely, and not incorporate any of the gathering into the actual hem.


That gives a very puffy look to the outside portion of the sleeve.


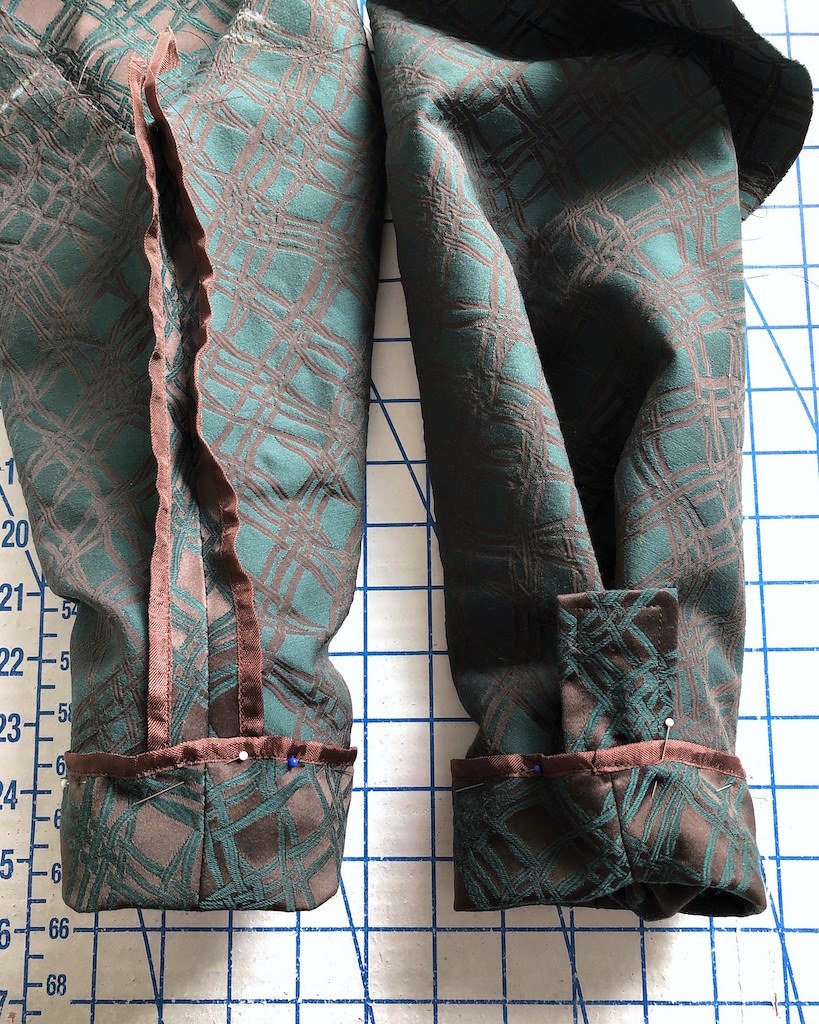
The insides, of course, are not as pretty.


The hem allowance would cover and protect a portion of the raw edges, but not the whole thing. 


My solution was to hand stitch a small rectangle with finished edges to the top of the raw edges.


And, of course, the other seams were finished with rayon seam binding.


And then for the most exciting part . . . seeing what they look like on the actual dress!


So far, I like it!


Thursday, July 4, 2019

Buttons, Buttons, and more Buttons


About those buttons . . .


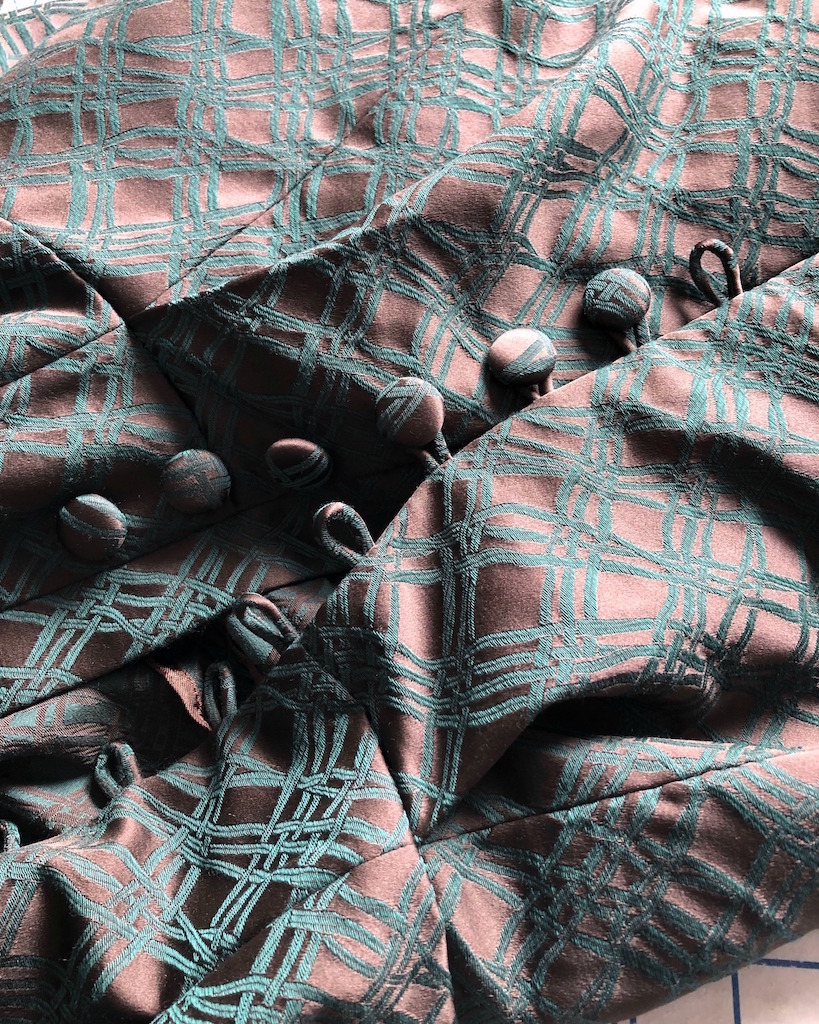
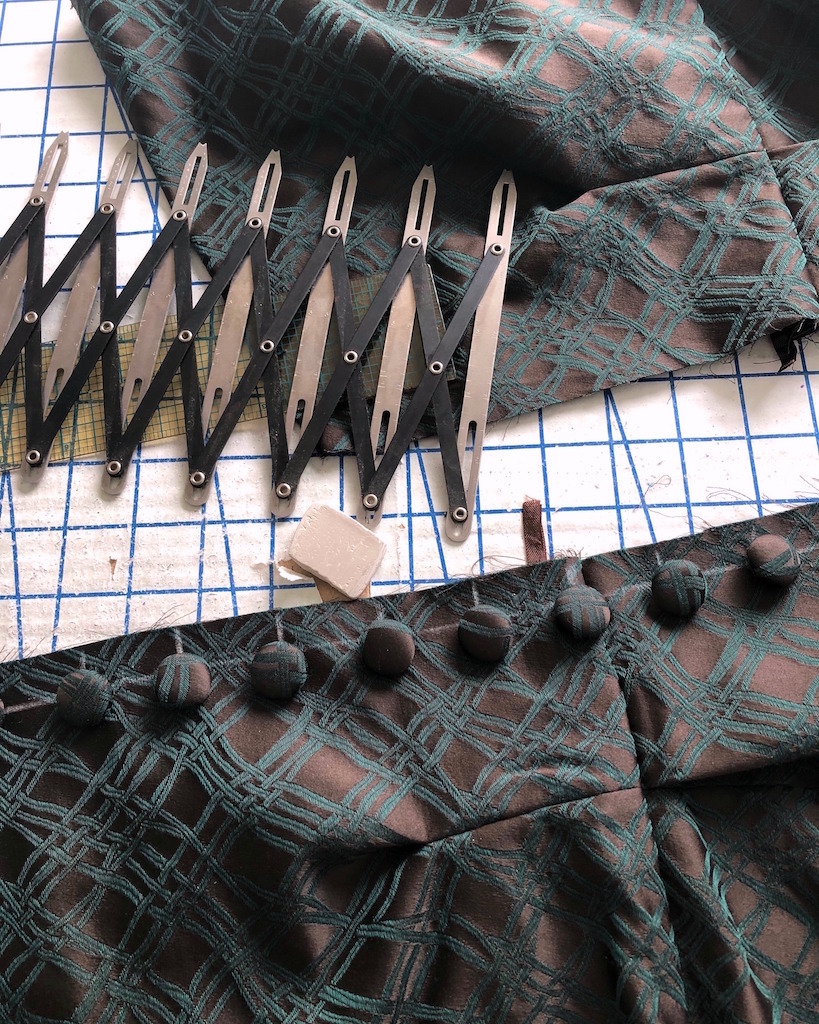
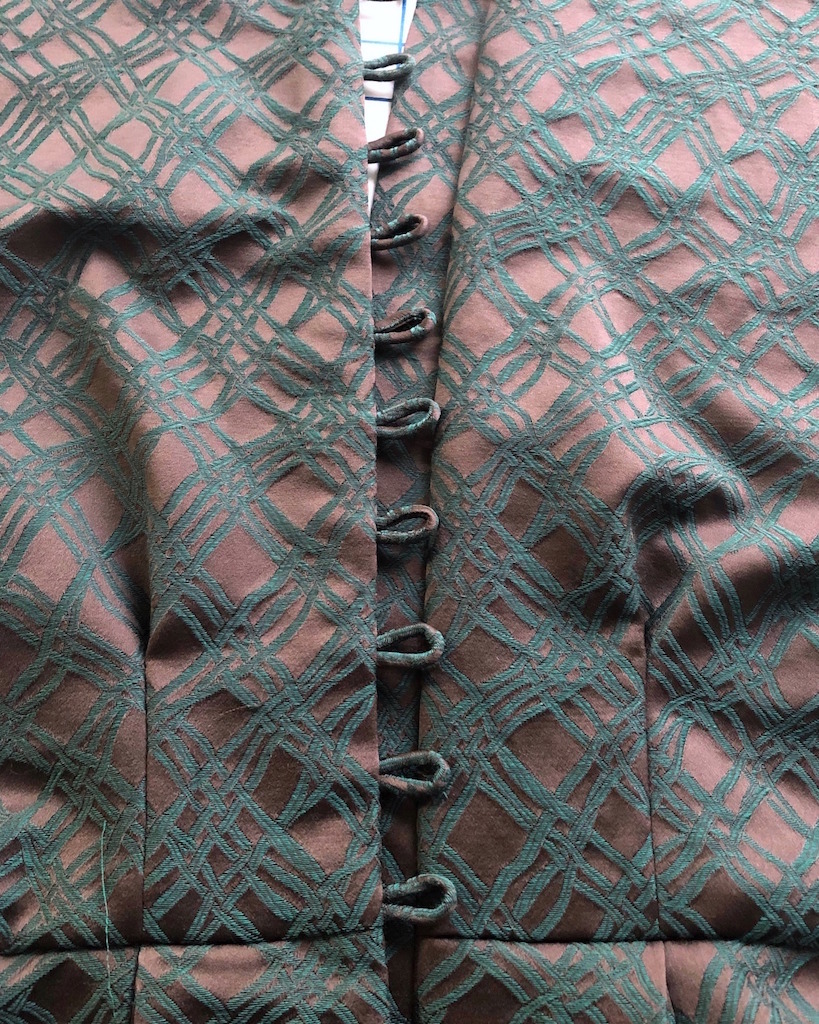
Buttonholes just didn't seem right for this project.  So not only did I need to cover a whole lot of buttons, I also needed rouleau loops.  This gave me a chance to use up some of the oddly shaped scraps leftover from cutting out my dress.


And Shams bobby pin turning method is the only one that doesn't make me want to tear my hair out!


Once that was accomplished, I needed to cover my buttons.


My preferred covered button kit is one that has teeth on the upper portion of the mold that grabs the fabric and a bottom portion that snaps into place.  I have never had an issue with that type of covered button kit.  But the only option available in the size I wanted was the other kind where the back gets pressed into place.  I have had numerous buttons pop off, often as I am putting a garment on.  Granted, they are usually the smaller sized buttons, but I don't like the thought of my button top falling off, never to be found again.  Also, to add insult to injury, I have been scratched by the remaining piece that is stitched into place since the inside of that piece has rough edged metal were the shank is inserted.


What I have discovered is that the real trick to making these covered button forms work is glue!  I know, I hate using glue on fabric and avoid it at all costs, but in this case, it really is necessary.  Wrap the upper portion of the button in your fabric, place it in the mold, push the excess fabric toward the center and drop a bit of glue in the center.  Then put the back piece into the mold and push it into place using the stopper (I like to use an old thread spool to help keep enough pressure to get that back piece all the way into the button form).  Pop the covered button out of the mold and let it sit for a bit until the glue dries.


Now that I had my buttons, I used my new-to-me simflex sewing gauge to evenly space my button and rouleau loops.


You can apply the bias loops to the garment in a long serpentine manner, which I often see done.


I choose to apply individual piece for a couple of reasons.  Number one, I hate turning the bias strips right side out, and the smaller the length, the easier that step tends to be.  Second, it saves fabric if I can use small little scraps for individual loops instead of worrying about finding a bias piece of fabric long enough for my entire opening.  Third, I think this makes it easier to make sure they are all uniform in size.


And then I needed to figure out some kind of placket.  Again, no instructions included with the Haslam System of Dresscutting; this usually doesn't present much of a problem, but it does make me put on my thinking cap.  And when I want to be sure something is going to work, I pull out some fabric scraps and try it out.  Better to mess up with scraps than have to pick something apart in my good fabric!


For the back shield piece, I cut straight of grain pieces of fabric.


Those pieces were applied to the center back opening edges.


The raw edges were encased and then turned under.


I also edge stitched like any other facing.  This keeps the facing from peeking out, but also secures those loops with an extra line of stitching.


Which gives me a finished opening.  For the button side of the opening, that facing was cut wider and it extends past the seamline to create a shield.


And now all that is left for the center back opening is to stitch a whole lot of buttons into place!