
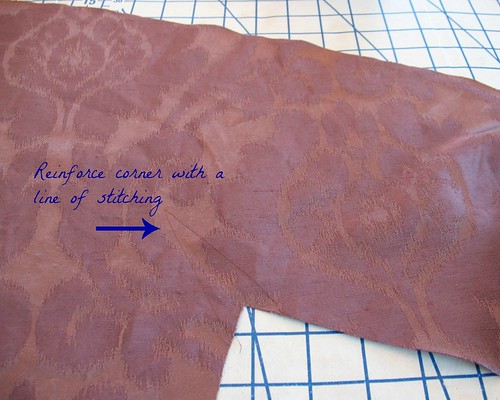
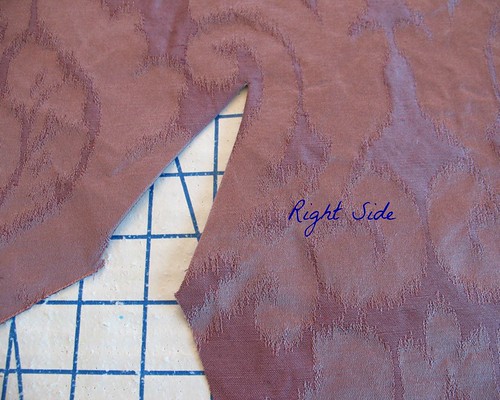
Interior corners can be tricky on areas that will be under
stress such as an armhole, which is going to see quite a bit of movement
throughout the day. Clipping extremely
close to the seamline is necessary, but the pivot points often show signs of
wear long before the rest of the garment.
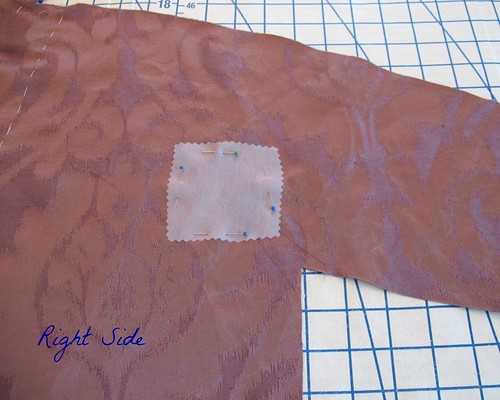
Reinforcing the stitching with an extra scrap of silk organza can make
all the difference. (I know you must be sick and tired of hearing about my obsession with silk organza, but it is extremely useful to have on hand for so many reasons.)
The first step is always to stay-stitch the inner corner,
whether or not you choose to reinforce the area with extra fabric. A small stitch-length will prevent a cut from
migrating past the seam allowance, but
sometimes a bit more than a simple line of stitching is needed.
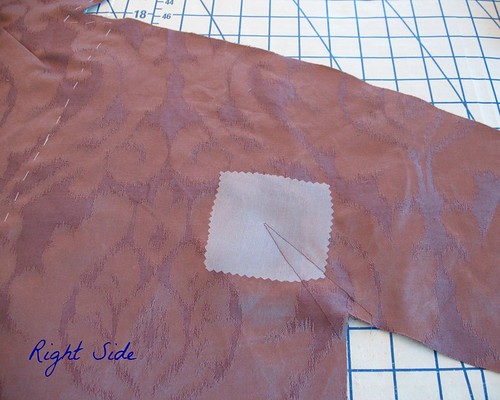
Pin a small square of organza in place on the RIGHT side of
the fabric. The center of the square
should be placed at the point of the stitching line.
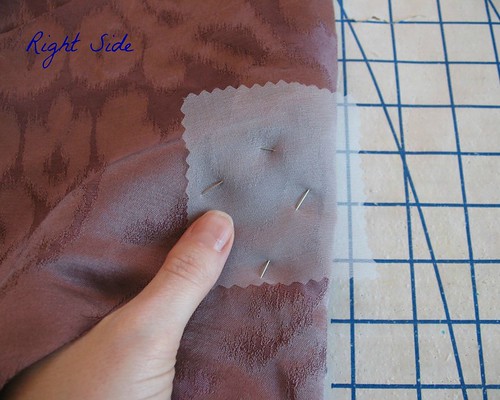
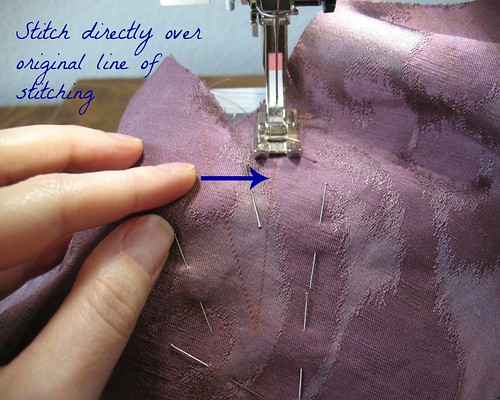
I find it easier to see the original line of stitching while
it is not covered with another piece of fabric, so I flip the piece over, and
pin from the wrong side.
After removing the pins from the right side of the fabric, stitch
directly over the original line of stitching.
This should secure the square to your fabric.
At this point, it looks a little ridiculous with that scrap
marring the front of the bodice, but we aren’t done yet!
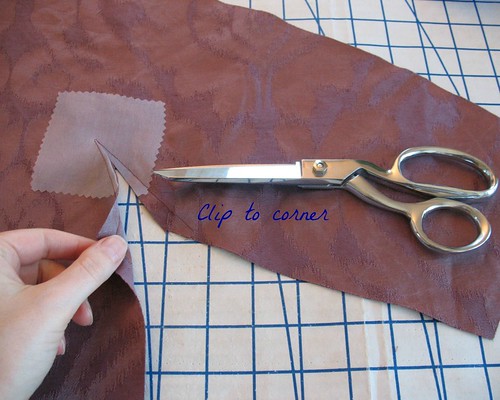
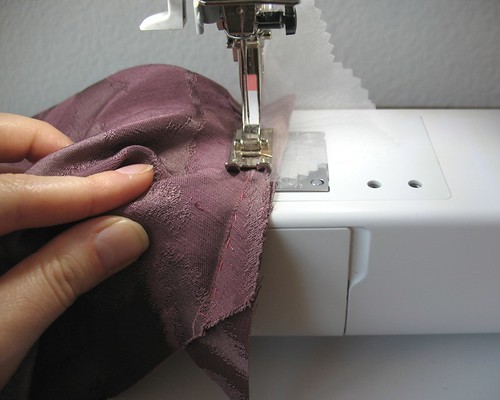
Clip all the way to the stitched point, being careful not to
cut through the line of stitching.
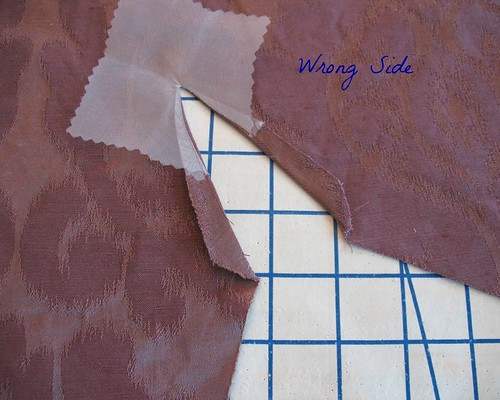
Press each side of the organza towards the center, and push
it through to the wrong side of the fabric.

Pull the organza taught, making sure it is not visible from
the right side of the fabric and press in place, bringing the seam allowance
along with it.
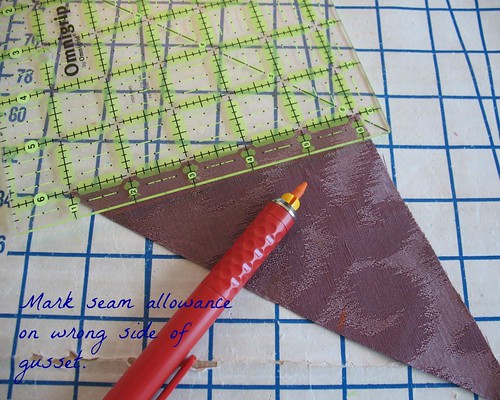
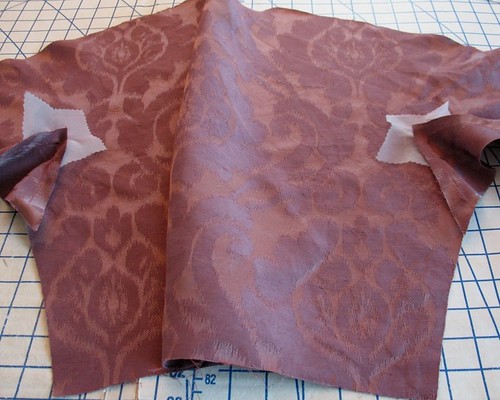
Mark seam allowances in chalk or pen on the wrong side of
the gusset.
Pin the gusset in place.
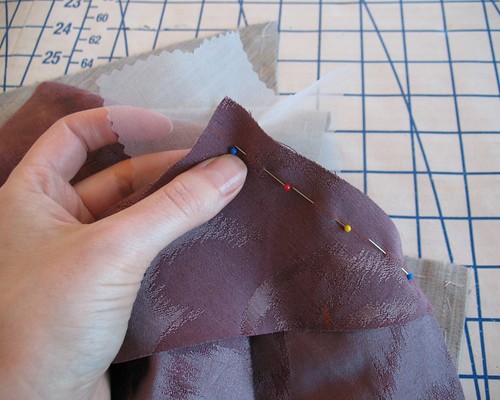
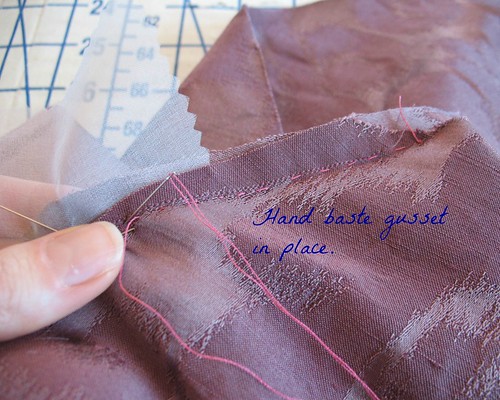
I like to hand baste at this point to have more control at
the interior point. The edges will not
match, especially towards the interior corner – the important thing is to match
the reinforced stitching to the seamline marked in chalk on the gusset.

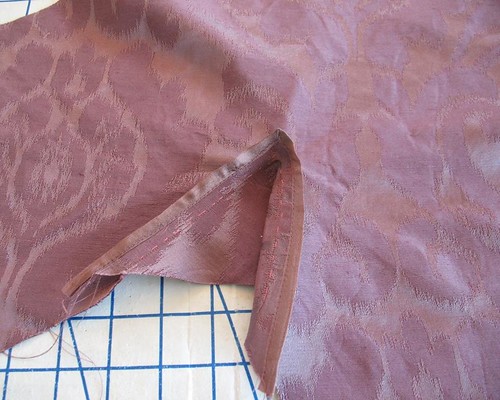
On your machine, stitch from fabric edge to point, plunge
the needle, turn, and stitch to the opposite edge.
Trim the excess organza from the edges.

Now is the time to finish the gusset edges however you wish (of
course, I prefer to use rayon seam binding!).
Voila! Your finished
gusset!

[Britex has generously provided the fabric and sewing
supplies for a dress I will be wearing to a formal event in October. I will be
sharing some of the steps and construction techniques with you as I work on
this project over the next couple of months.]
Strength, elegance, and longevity.
ReplyDeleteNice to see a pit that won't quit.
Thanks very much for that. I have a neckline with a sharp corner like that that I was hoping to get to tonight. I think that will be just the treatment.
ReplyDeleteGreat tute! wonderful clear photography.
ReplyDeleteExcellent tutorial, thank you! Very timely for me too, since I can use those techniques on a sharp corner that's on my agenda :)
ReplyDeleteWOW. Thanx for this excellent tip, and so well written too. Even I can understand it! ;-))
ReplyDeleteThanx again.