

After a year or more of use, my knitted kitchen rugs started to look a little worse for wear. They were also very lightweight and didn't like to stay put. I cannot recall when I first came across a #jellyrollrug, but once I saw one, my mind wouldn't let go of the idea of replacing one with the other.

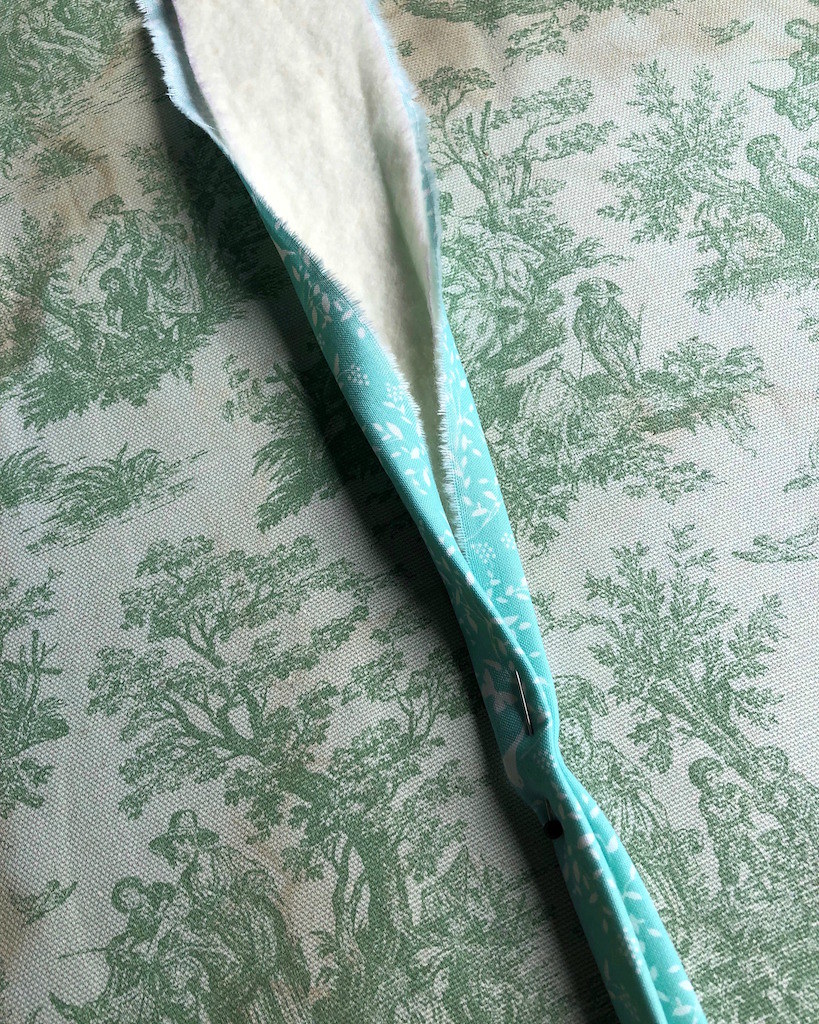
I started small, with the idea to replace the dog bowl rug. An actual Jelly Roll was not used. Instead, I gathered scraps of fabric that I thought would look nice together, purchased a few small cuts of quilting cotton, and ripped my 2.5" wide strips along the cross grain. Cotton batting was cut into 2.25" wide strips.

I started at the ironing board and wrapped the batting in my cotton strips. Eventually, this got old, and I decided that the ironing step was unnecessary. I would just fold the layers together at the sewing machine.
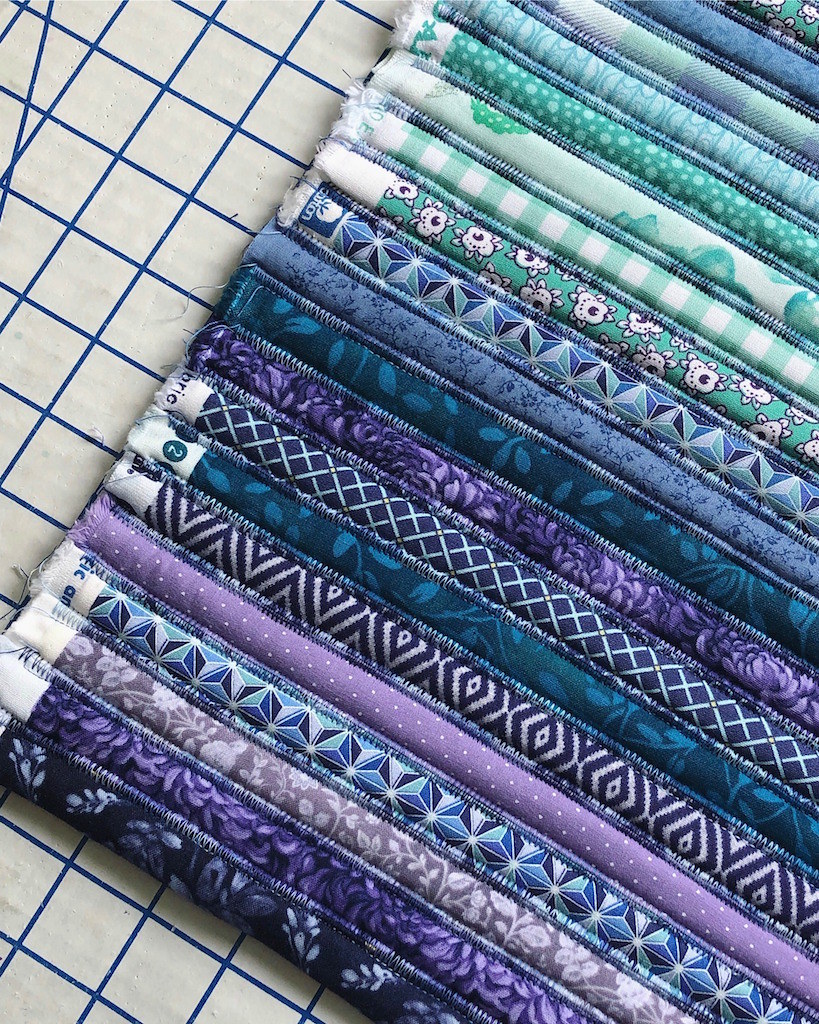
For the first rug, I used my 42" wide strips laid side to side in an order that I found pleasing.
There was no need to join the ends of the fabric/batting tubes since the 42" minus the trimmed selvedge ends was going to be wide enough for my rug. To finish the sides, I just used another strip of fabric and bound the edges. It's not perfectly rectangular, but it certainly works, and I think it looks rather pretty!

Of course, once I made the first one, I wanted a larger version to replace the boring gray rug in the living room. That was definitely going to need more than the 42" strips, so I needed to join at least some of the ends.

Once I came up with a color/print order, I joined the seams along the bias, trimming the excess off after I had a long chain of 2.5" wide fabric.

The next step was to wrap the fabric around more cotton batting until I had a big ball of fabric rope.

The idea for this rug was to make it into a half circle shape, or something similar; large enough to fit the coffee table, but rounded at one end to save on fabric.

Well, my sewing machine table is set against a wall, and once the rug began to grow, it was a struggle to manage. There is a rippled portion, the rows are definitely not straight, and I had to trim more of the edges than I wanted to, making this much too small for the living room. The only good thing was that it could replace the other knitted rug in the kitchen.
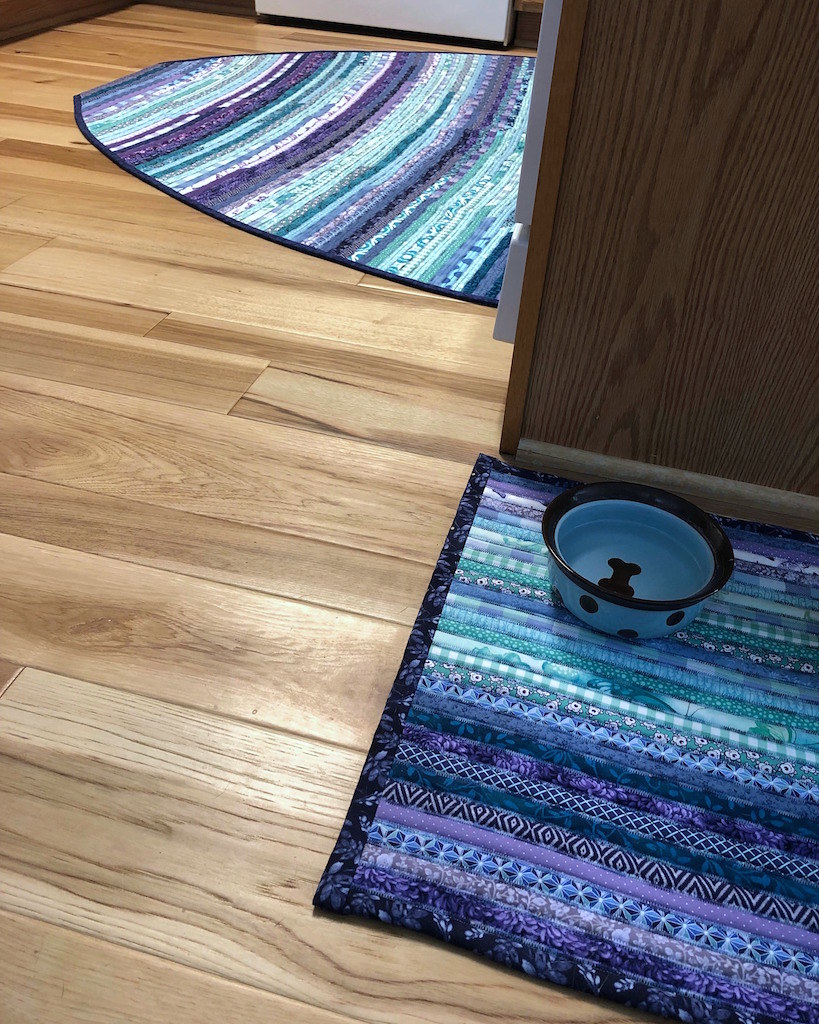
So, not an entirely successful project, but I think it has charm, and it does work in the space.

But I wasn't over the fact that I wanted a pretty rug to replace the boring gray one. So a couple of weeks later, I was back at it, making a very large fabric rope ball for my next Jelly Roll Rug.

This time around, I decided to go for the original oblong shape. And that's where things went really wrong. I love my colors, and I love the idea, but fighting with an ever growing rug in a small space, with a wall to contend with, and the weigh of the rug dropping off the side of the table every chance it gots was not an easy thing. I was determined to get through.
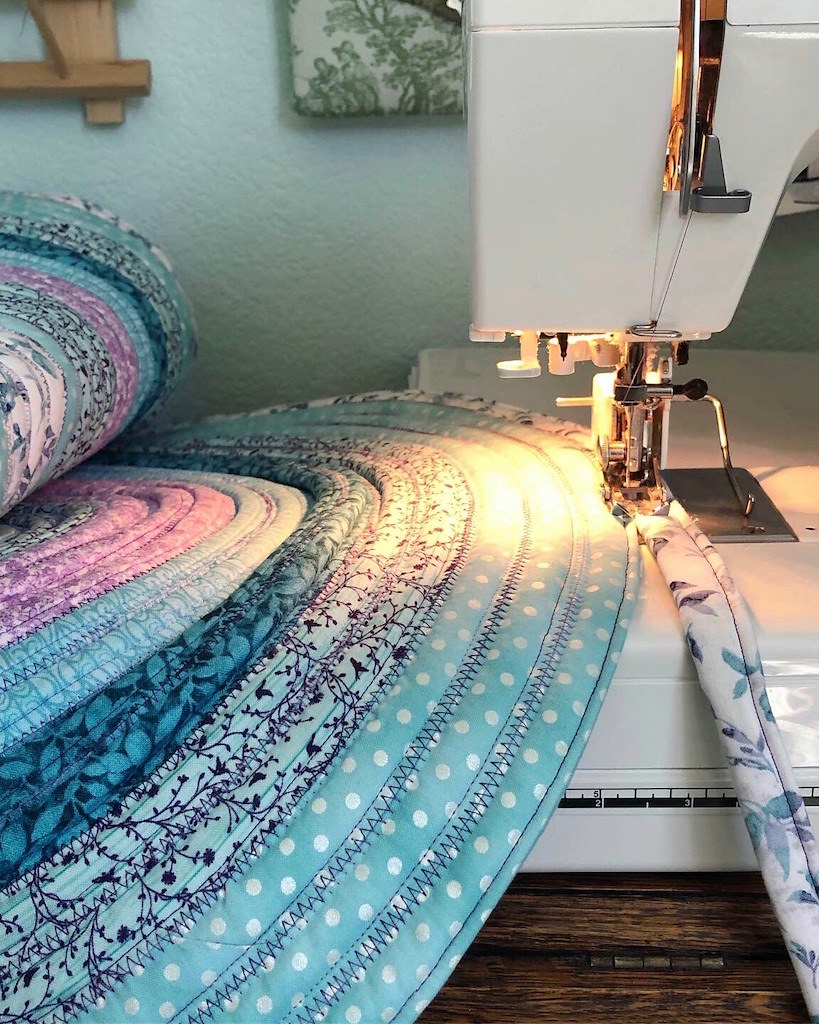
I was ironing everything flat at each turn, and checking that it was laying flat for the first bunch of rows, until the floor space in the sewing room could no longer accommodate the growing rug, nor could my standard ironing board. I stuck it out, hoping that I could iron the thing into submission once I was finished. But once I brought it downstairs to iron on the floor with some old towels laid down, I saw what a huge problem I had. No amount of steam or starch or a combination of both was going to get this thing to lay flat. So I had a hissy fit and ripped the whole thing apart. And then I put the fabric ball away.
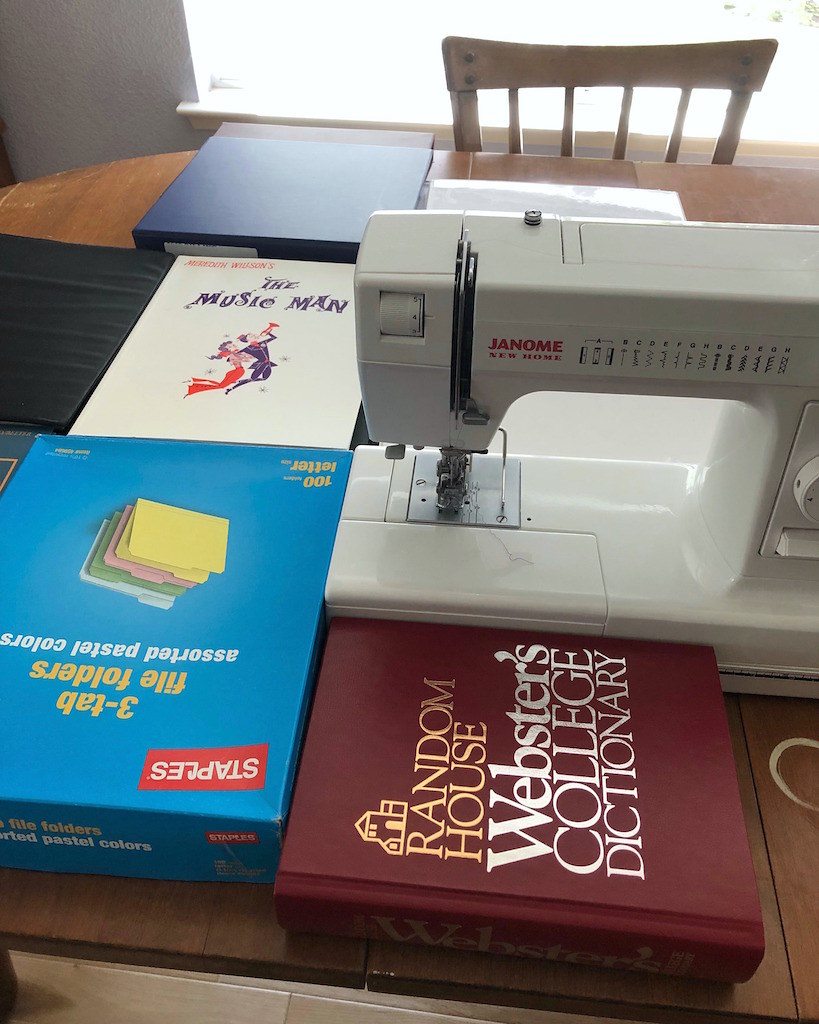
A few days ago I was still glaring at the discarded rope when a thought crossed my mind. People without an extra sewing room use the dining room table as a temporary sewing table all the time; in fact, I used to do the same thing. I am so very grateful to have a dedicated space, but in this case, I though the extra room just might save this project. So I cleared everything off, brought the sewing machine down, and pulled out a bunch of books to give myself a semi flat working space. Best of all, no wall to fight directly behind the machine!
I also put a towel down and brought the iron downstairs to check my progress. The corners were cupping slightly, but I was able to iron them flat along the way.

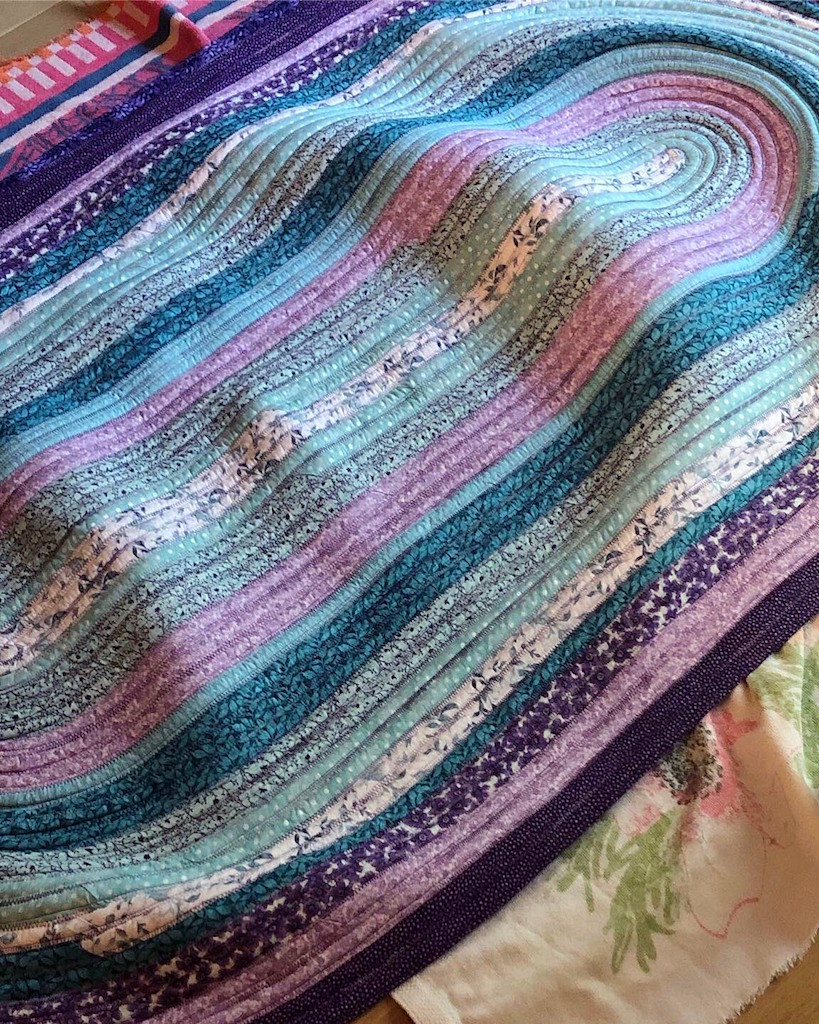
That is not to say it wasn't a lot of working fighting this monster as she grew larger and larger. The finished measurements are 67" x 40". I am not sure how many 42" strips are in this rug, but I think there are considerably more than 40 of them (the standard Jelly Roll number, I believe).

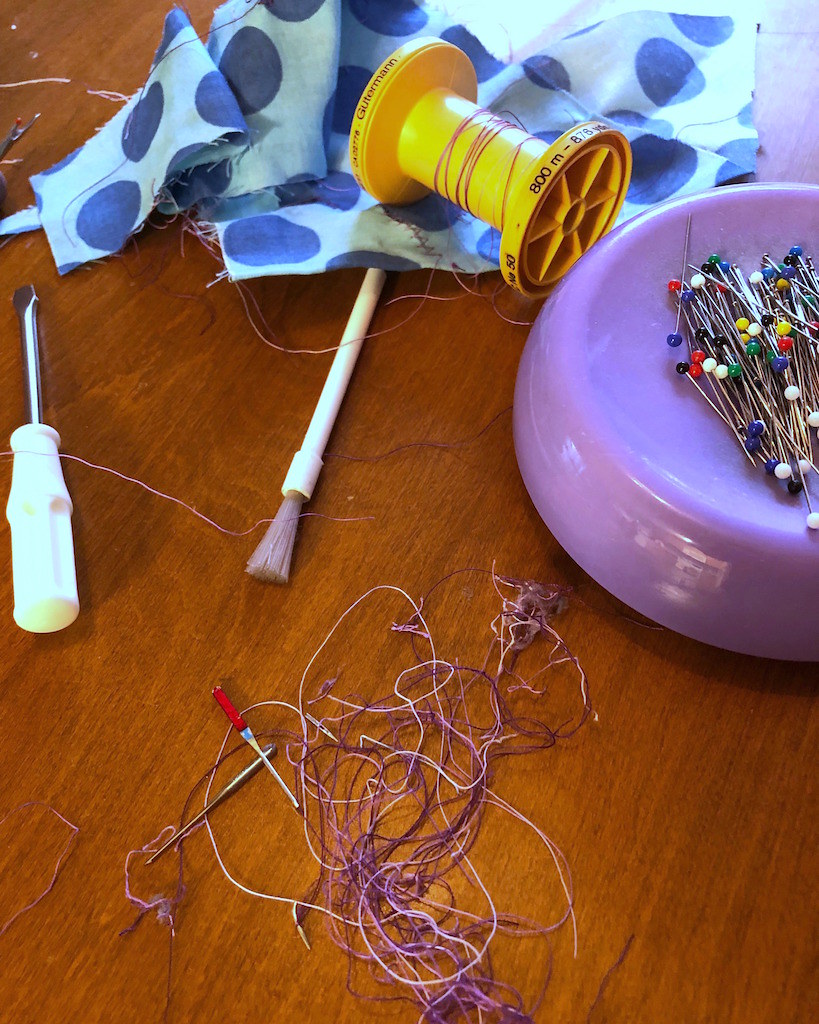
Everything was going fairly well until the last few yards of fabric rope. Then the machine started acting up. Grrrrr. I suspect that my needle had enough and perhaps bent slightly. Well, I got myself a new one and started again, only to have it break as I was pushing the end under. I suppose I may have been stitching too fast for the added thickness. Well, a third needle was employed to get through the last few inches of the project.
I gave her a final press, pulled the towel out, and weighted her down with books for a few hours.

Miraculously, I have a usable rug! There is a little bit of waviness at the center, but overall, I am calling this a win.

And, most importantly, the gray rug is gone! You can also see a bit of the hand braided and hand sewn rag rug I made a year ago in the background. I am still convinced that hand sewing on a flat surface is the only real way to keep a larger sized rug completely flat, but I am very happy that this project turned out as well as it did in the end!

Turned out awesome!
ReplyDeleteMary in Thailand
I love your rugs!!
ReplyDeleteI love the array of books and boxes around your machine to level out the work surfaces. I have a set of 5 Encylopedia of Philosophy books I use for the same thing! I also have a staples box like yours which might be a bit thicker for me to try... :) (Nice rugs too!)
ReplyDeleteWavy or not, it really looks great!
ReplyDeleteSo pretty! I love the colors you chose.
ReplyDeletethe colors are gorgeous
ReplyDeleteLove the colours. And if you want to make another large one, or anything else that doesn't work in your usual sewing space - put the sewing machine on the floor! That's how I did the quilting on the V1277 Koos coat - and made a crinoline for a '50s dress. (I have a similar issue with my sewing set up for things like this, but an antique dining table that I don't want to risk marring).
ReplyDeleteI was about to suggest putting the machine on the floor. The trouble is to work the foot peddle is almost impossible. I am envious of your willingness to keep going until you won. Great Job!!!😁
DeleteHaving done several of these, I found your adventure quite true!!
ReplyDeleteLove your soft colors Very pretty
Those are all incredibly pretty rugs!
ReplyDeleteSo pretty! And a LOT of work!
ReplyDeleteThey all look amazing! Beautiful color choices for the two rugs.
ReplyDeleteIt’s beautiful
ReplyDeleteThis comment has been removed by the author.
ReplyDeleteUtterly charming - all of them. Your vision and determination are epic.
ReplyDeleteI still think you ought to tasked with orchestrating world peace.
Wow, I was wondering how you got it to lay flat! Sometimes ripping and redoing is the best :/ Was also wondering if you broke a needle but now I know! Looks good!
ReplyDeleteIt looks lovely. I am as far as having the big rolls of padded jelly roll pieces, but not attempted to join together into a rung yet, been busy on other projects. And this project is more difficult, and takes longer than I expected. Good to hear from someone who has actually made one :-)
ReplyDeleteThis is truly beautiful!
ReplyDeleteLove your colours. So pretty. I am not lucky enough to have a sewing space. I only use my dining table. Luckily mine extends from an 6 seater to an 8 seater so i have room to move.
ReplyDeleteI can't wait to get started n you've inspired me to start small with the dog dish mat God bless you. I love doing homemade interior decorating
ReplyDeleteVery pretty. The colors are stunning. I’m about to try my first one but I think I will do a square one.
ReplyDeleteI would like to do this, but cannot figure out how long the center should be? Yours turned out beautifully- must you iron it, every time you wash it? I’m sure it would give your washer quite a work out- thanks!
ReplyDeleteI love the colors of your rug! It’s beautiful! Are you a singer or a voice teacher? I have all the music you put on your rug to flatten it. I’m a singer and a voice instructor!
ReplyDeleteI was a vocal performance major in college and did a lot of musical theatre in another lifetime!
DeleteI did the same thing with the books! Makes for a larger flat surface.
DeleteBest press works well if you ever need to iron them. I love these and the colors
ReplyDelete