
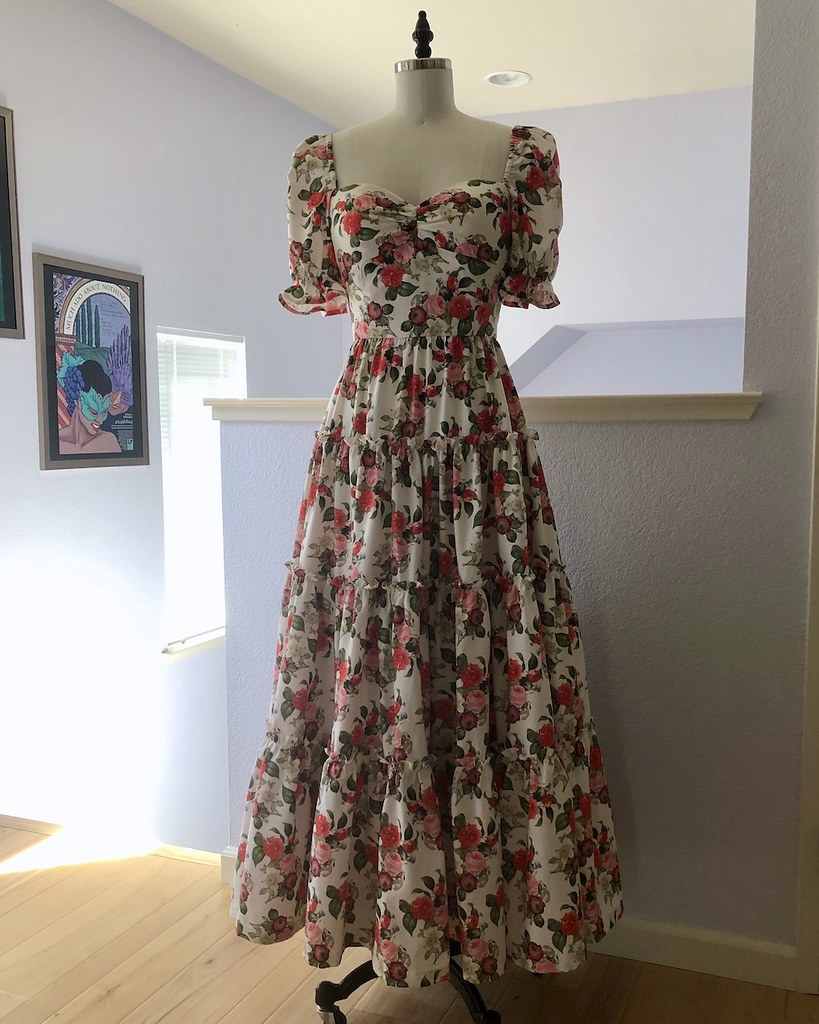
And this is the final installment of the saga of the rose printed dress, all nine yards of her. Well, it's close to nine yards, although there are a few narrow strips left over that I will be stashing away. I have quite a few red/pink/green prints that I know would make a lovely quilt at some point . . . if I ever manage to get around to it.

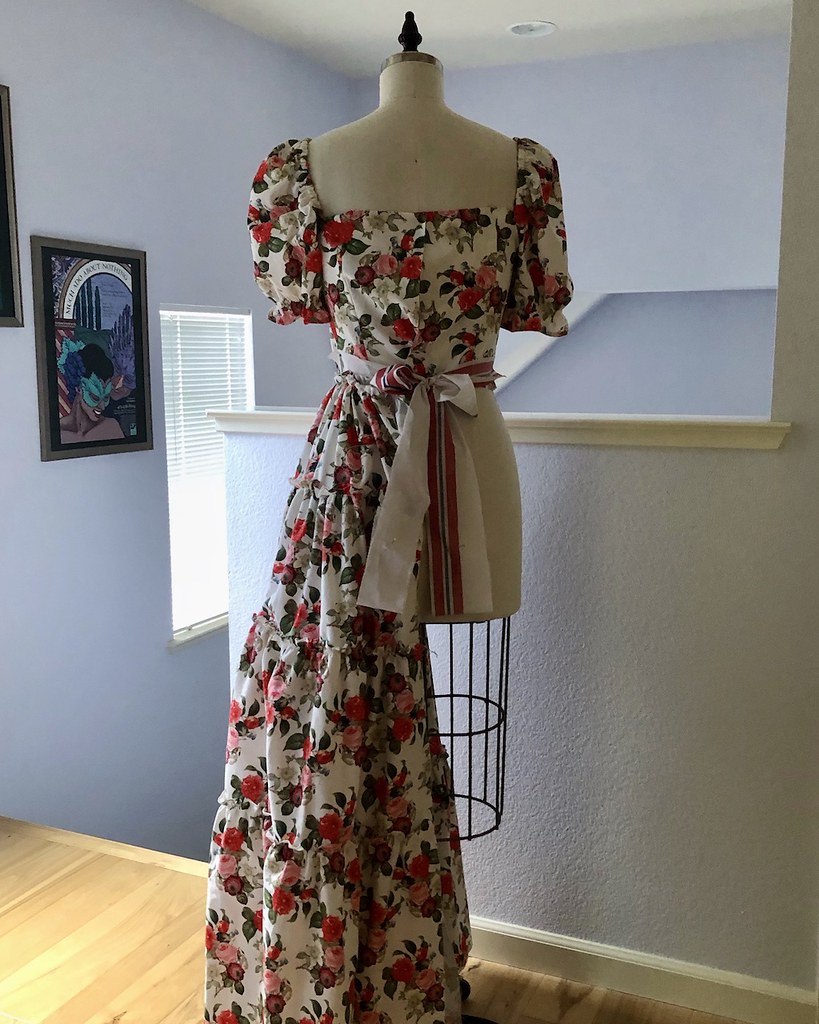
Although the idea for the dress came together rather quickly, the addition of waist ties came later on. I thought about it, decided it might be too much, and then decided that was the perfect reason to go ahead and do it. I wasn't quite sure about the length, so I pulled out some scraps to approximate what the finished ties would look like.
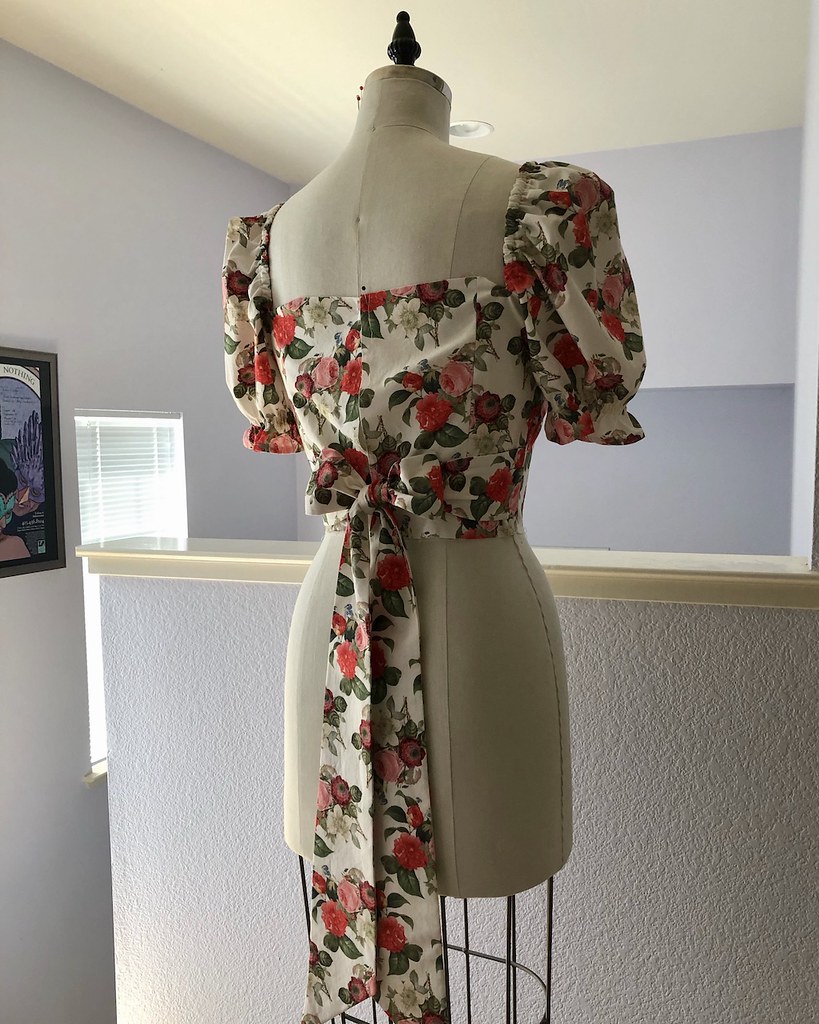
I also happened to remember this blouse that I have made on a few occasions. The necktie portion of the pattern has a curve that eliminates a bit of bulk where the ties wrap around each other. I was curious to see if the same sort of thing would work with a waist tie.

I figured out the midpoint at my back waist and placed the deepest part of the cutout at that spot, adding seam allowance. And since a graduated tie, in my opinion, always looks nicer than an even width throughout, I made the lower end 1" wider than it is at the side seam (excluding that cutout).

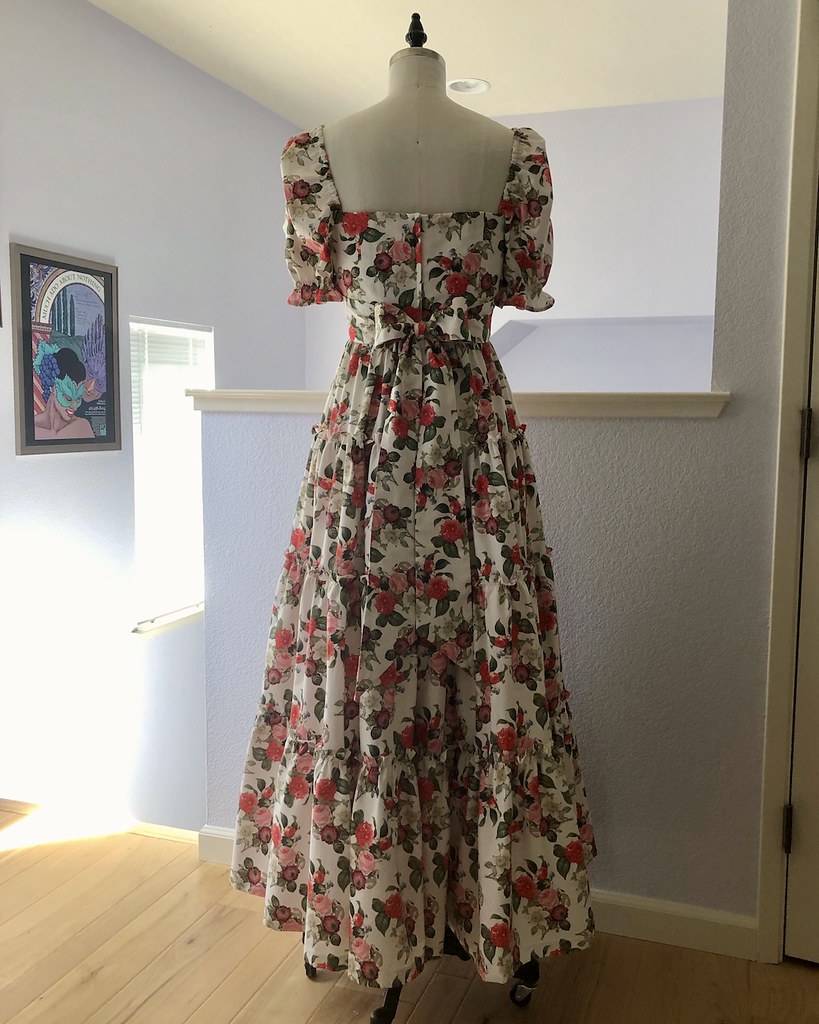
And here is the result of that.

I am definitely glad that I decided to add the waist ties. This dress is extremely girly, so why not go all out?!
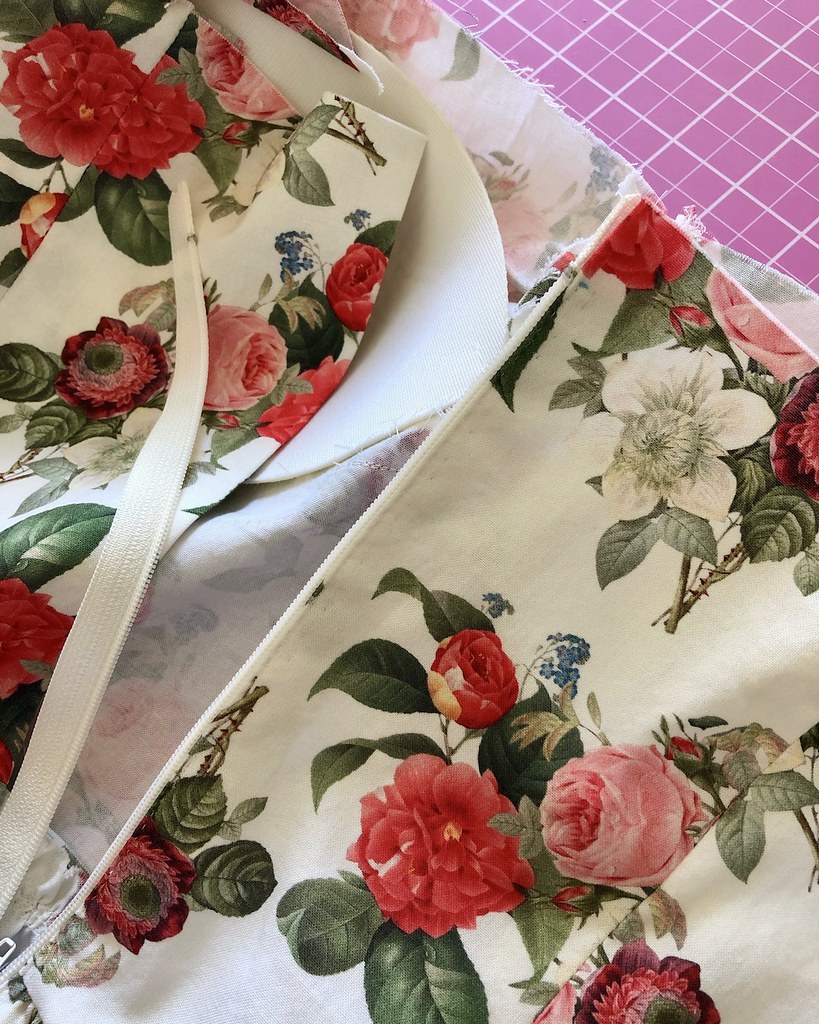
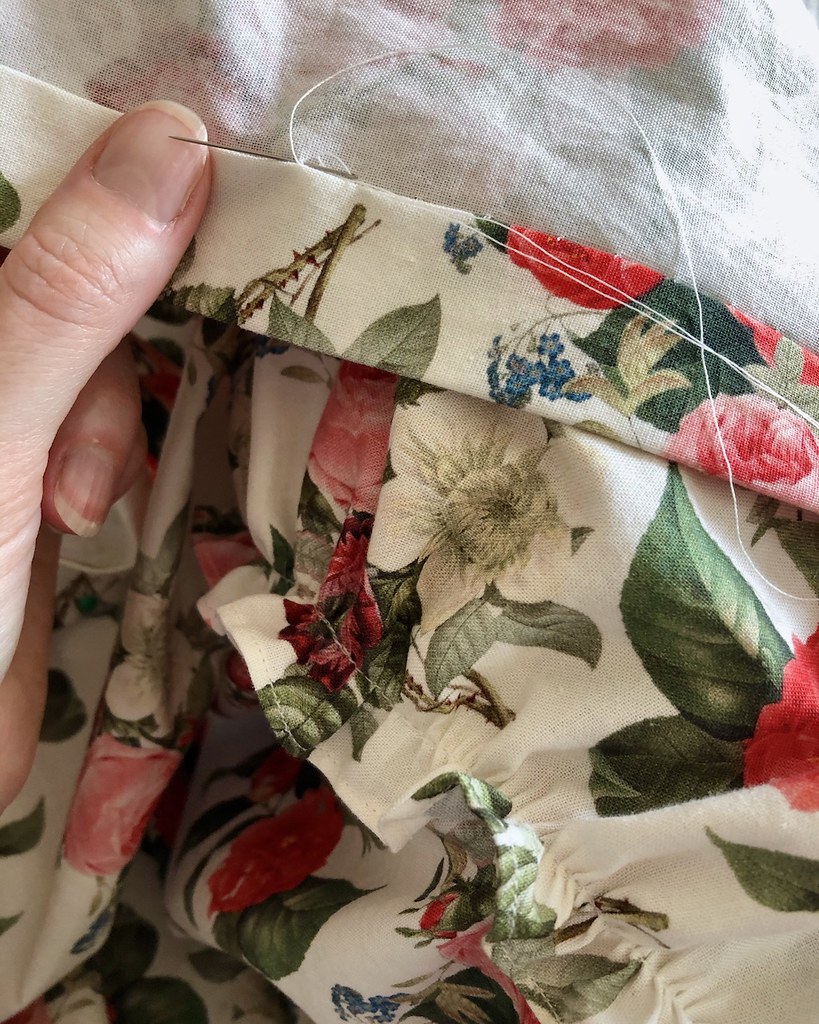
And for the first time ever, I tried something different for the gathered skirt. I used my vintage gathering foot for the majority of this project, but the waist seam still needed to be gathered down the old fashioned way (which is not my favorite part of the process!).

As you can see from the first photo, the two lines of stitching were giving me attitude. I know that many people like to use three lines of stitching, one that sits just outside of the actual seam. I have never liked the idea of having to remove the line of basting after the garment is complete. What if it pulls the fabric, or the needle holes don't steam out? Well, this is quilting cotton, so I thought it was safe to try with this textile. And I have to say, it's definitely easier to manage the bulk of the gathers with that added line of basting. Will this be my new go-to? I can't say for sure, although I am certain that fabric choice will have to be considered.

The zipper was lapped and applied by hand with pick stitches.

This is my favorite way to install a zipper. It gives me a lot of control, especially when I have yards and yards of fabric to manipulate.
I decided to line with self fabric. The skirt is, of course, unlined.

Because this fabric is somewhat lightweight, adding the boning to the bodice lining for this particular dress was absolutely necessary. I love the McCalls pattern for it's overall design, but there are some important construction steps missing, such as boning.

The lining was hand stitched into place.

I also added ribbon hangers at the waist. Because the shoulders are elasticized, hanging this dress from the sleeves will not work!

And next up is the hem.

And there is a whole lot of it! Instead of using the narrow hem foot here, I gave the dress a more substantial hem.

Of course, there isn't much I love more than hand sewing, so sitting with yards and yards of hand stitching to do is really a pleasure.
As with those ribbons that were added to support the weight of the dress while on a hanger, I also added a waist stay to support the dress while on my body.

As I mentioned in this post, I had to take off a significant amount of length in the torso (which NEVER happens to me). Except for this Cynthia Rowley design for Simplicity. I know that the weight of all of that yardage gathered into the skirt had a lot to do with it, so the skirt needed to be supported at the waist instead of relying on the sleeves.

I definitely prefer true petersham to grosgrain for this purpose. And I also like to use two or three smaller hook & eyes instead of one larger sized one. Covering the majority of the metal from the hook & eyes also makes the waist stay more comfortable.

I also like to offset the opening of the zipper and the waist stay, especially when they are at center back.

I tend to perch on the front of a chair rather than lean back, but if you can imagine leaning back on zipper teeth and hook & eyes right along the spine, it is not going to be the most comfortable thing.
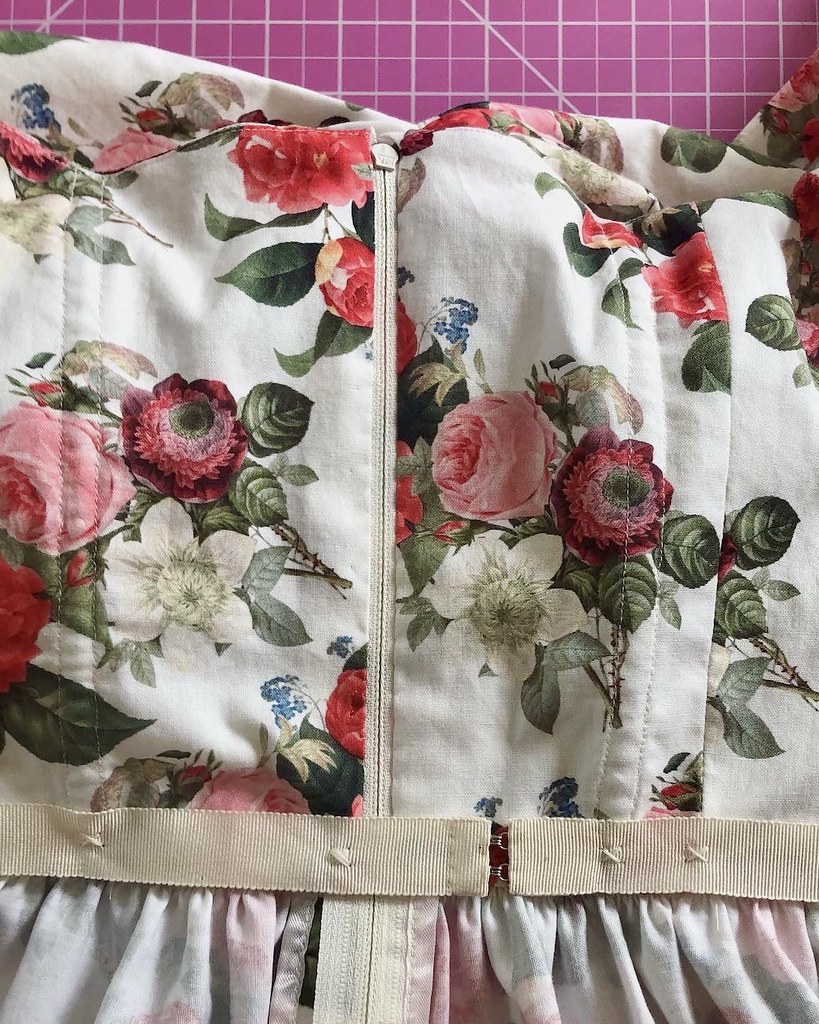
For some projects, I like to secure the petersham all along the waist with a catch-stitch. But in most cases, a few strong stitches at each seamline and/or dart is sufficient as you can see here.

Since I had almost an entire year to sketch out the idea for this dress, if only in my head, the actual process went quite smoothly and fairly quickly.

I tend to shy away from elastic and top-stitching, and this dress has both. So, I am not sure what possessed me, but the dress really did turn out almost exactly as I had envisioned it.

It's always good to try things that are a bit out of the comfort zone. I also knew that I loved the style of the bodice, so going in, I had a fairly strong chance of creating something that would work for me.

I have also decided that I need more maxi dresses in my life.

They may not be the easiest garments to wear (beware the rolling office chair when wearing anything tea length or longer!) but they almost make me feel like I could be six feet tall, which has always been a dream of mine. Unfortunately, I don't think I'm going to make it, seeing as I haven't grown any taller since the age of twelve. So it shall be maxi skirts and high heels for the time being.
That came out so well, and it's very you! I think walking around with 9 yards of that cotton would be kind of heavy, but that's fashion, right? Looking forward to seeing you wear it.
ReplyDeleteIt's not lightweight, but it weighs much less than some costumes I have worn in the past! I actually like weighty skirts, as long as the weather isn't too hot. And yes, fashion is not always comfy!!
DeleteBeautiful : )
ReplyDeleteGorgeous, both inside (loved thought/care/follow-thru that went into each decision) and out!
ReplyDeleteYou did good!
Pero qué preciosidad de vestido, es de ensueño. A mí también me gusta coser las cremalleras a mano, tradicionales, las invisibles no me convencen y terminar los dobladillos o los forros con pequeñas puntadas a mano es un verdadero placer. BESICOS.
ReplyDeleteIts so pretty. I love everything about it, the print, the length, the ruffles, the sleeves and just everything. You did a really nice job. its beautiful.
ReplyDeleteForge on, you are a giant.
ReplyDeleteA fan
P.S. Twirl, and watch me turn on you.
Can't wait to see it on you. I really love it.
ReplyDeleteLovely! Looking forward to the modeling shots.
ReplyDeleteHow beautiful! I also can’t wait to see it on you. It did come out perfect with all your changes. A hand picked zipper is my favorite method as well. I never liked sewing zippers until I learned that method.
ReplyDeleteAbsolutely gorgeous!
ReplyDeleteSo pretty!
ReplyDelete