

If I had to choose my favorite portion of this pattern, it is the scalloped edge. But I was unsure about the yoke. The scallops were not going to show very well if I used self-fabric for that portion of the pattern, and I didn't think that I could find a sheer fabric in a short period of time. But I have been wanting to attempt a lattice cage along the neckline of a dress for quite a few years, and now seemed like an excellent opportunity. First, I traced the yoke pattern on paper so that I could visualize how the spacing would work.

The next step was to test my theory. I found water soluble stabilizer and purchased a roll. This product is generally used for machine embroidery, and I have never used anything like it. I was somewhat skeptical that it would wash away, so I pulled out some scrap fabric.

Short answer is, the product works. I have found that it dissolves best in warm water, and I used some mild hand soap to make sure everything was washed away.

Proof of concept was a success! With that accomplished, I was ready to get started on the actual yoke.

First, I cut out a bunch of bias strips.

Those were stitched together with a narrow seam allowance.

And then comes the fun part . . .
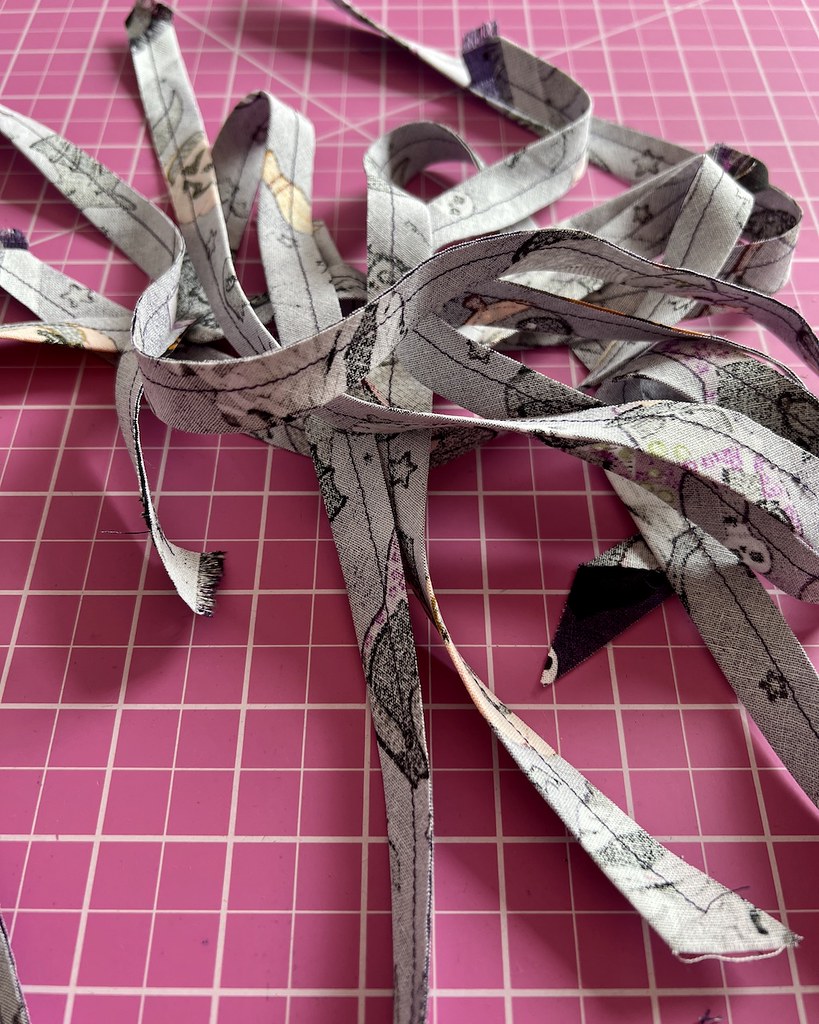
I know all of the tricks, but I still detest turning loops right side out. I hate it almost as much as mending, which is saying a lot! A quick bit of steam flattened them out nicely, and that bit of torture was over.

I knew that I would have to make more lattice than was needed for the yoke, but I wanted some idea of the shape. This was accomplished by tracing directly onto the stabilizer.

Next, I drew in the spacing lines for the lattice.

This particular stabilizer does not sit completely flat. I was able to stretch the edges slightly, but I was unable to keep it from puckering, especially with the pinned strips of bias.

I wasn't too concerned about the stabilizer itself (since it would be washed away) and since my fabric was bias, I was hoping it would turn out flat if I dried it on a flat surface.

So what started out as a simple two piece yoke turned into a rather time consuming activity.

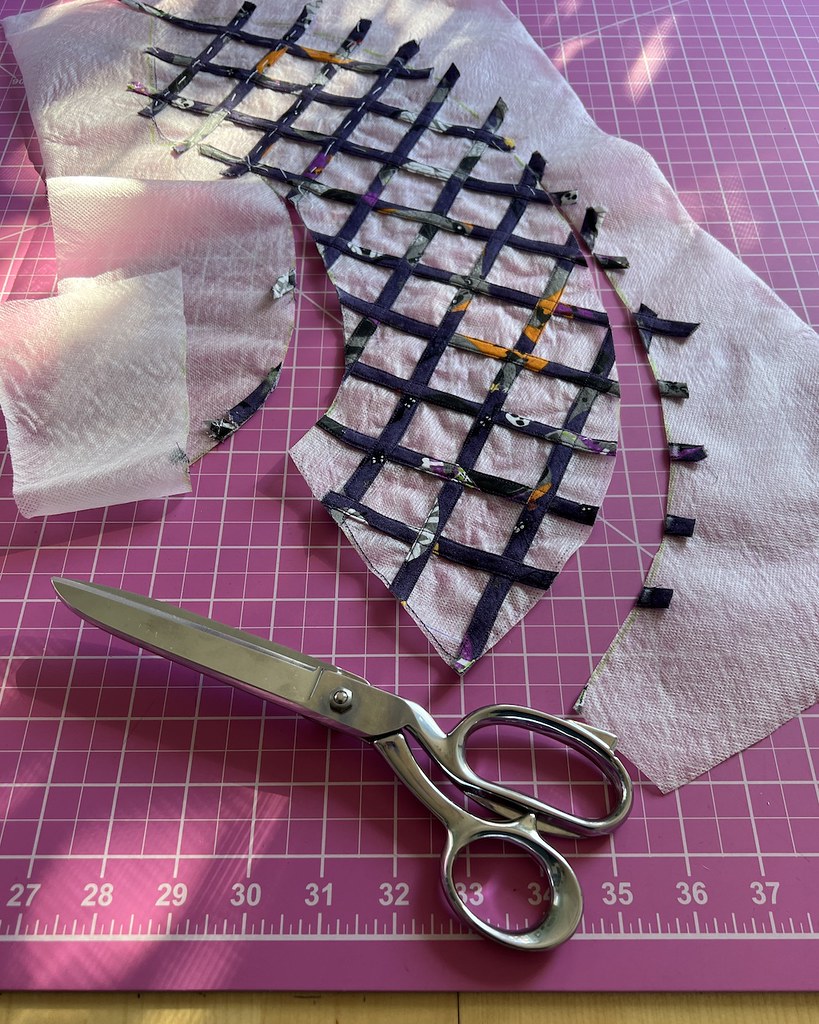
As I was laying everything out, I realized that I should probably weave them in and out of each other. This had completely slipped my mind as I was thinking through all of the steps. Thankfully, these yoke pieces are not too big, so making sure everything was properly woven under and over was not too much work. That being said, how do people manage this with pastry?!

With all of those pins, I knew that I would have a fit at the sewing machine, so it was obviously time to hand baste everything into place.

Once that was accomplished, it was just a matter of edge stitching all of the strips down.

I generally prefer hand sewing to machine sewing, but I got in a rhythm with this and it wasn't too bad.

I had, of course, traced the outline of the yoke directly on the stabilizer, but I wanted to make sure that stitching on a slightly puckered surface hadn't shrunk my yoke, so I made myself a paper template and retraced that shape.
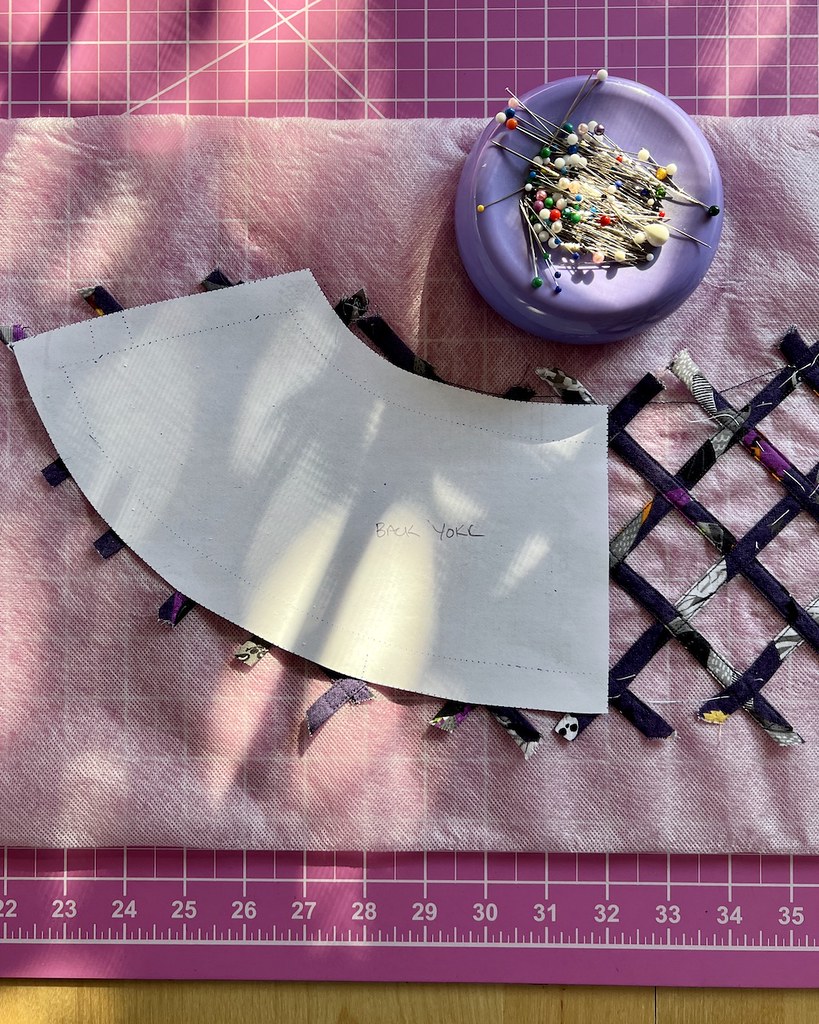
It was fairly accurate, even with the addition of all that machine stitching, but I am glad that I took the time to ensure that the pieces were the proper size.

And then I had to cut that shape out.
After joining both shoulder seams, it starts to look like part of the bodice.

And it was at this point that I realized that I would need to add two more strips of bias.

I wanted the cage to be centered, both front and back, but that meant that there were not many strips matching along the shoulder seams. Once that stabilizer was washed away, I don't think the pieces would have stayed connected without the additional bias strip. But better to figure that out now rather than later!

I also ran another line of stitching just inside of my seamline. This may not have been necessary, but I wanted to bind the neck edge, necessitating removal of the seam allowance, and I didn't want the lattice to stretch out.

The final step was to bind the neck edge with another strip of bias fabric. And so ends the saga of the cage yoke, and now it's time to get back to the actual construction of the dress!

Time consuming but what fun!
ReplyDeleteThank you for sharing the process! I love learning about these EXTRA details—-truly a work of art!!
ReplyDeleteThe description of your lattice yoke work had me on the edge of my seat just like my favorite murder mysteries! Because your writing is so detailed I am able to compare what you have done to what I might have done, and I always learn something new (which is wonderful after almost 50 years of sewing). Can’t wait to see the finished dress.
ReplyDelete