

I had hoped to get this dress posted by October 31st, but such is life. When I left off, I had finished making the yoke for McCalls 4587 (sent to me by Michelle of OldPatterns.com). But I need to go back a bit. The print of this fabric is fabulous, but the quality of the cotton is not great. It's a fairly loose weave, and a little bit sheer for a dark colored background.

I knew that I wanted to line the pencil skirt so that it would maintain its shape better, so I decided to go ahead and line the bodice as well.
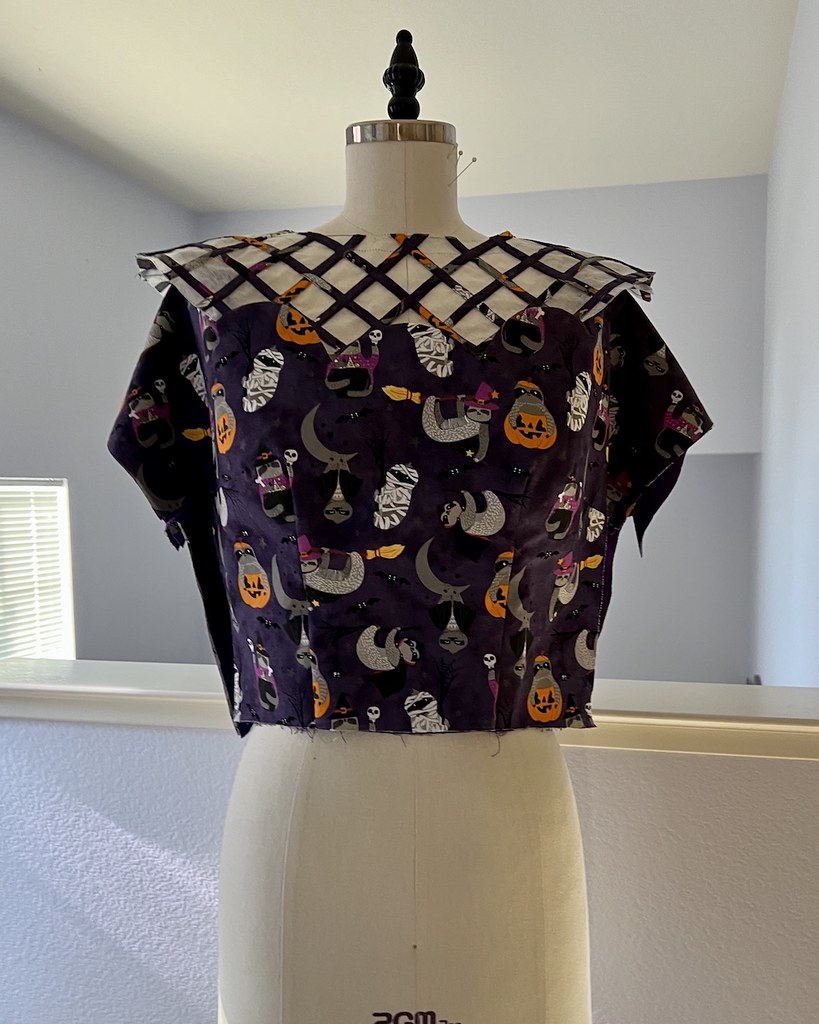
That was easily accomplished by cutting a duplicate of bodice front and back, stitching the shoulder seam on both the fashion fabric and the lining, placing them wrong sides together, and then treating them as one where the yoke meets the bodice. The scallop facing finished those raw edges.

The next step was to attach the yoke. The lower edge of the yoke matches the lower edge of the lower bodice facing (the scalloped piece). I thought about rinsing the stabilizer out before stitching the yoke to the bodice, but changed my mind. And I think that was the right decision. This made it much easier to attach the two pieces accurately.

Of course, that meant having to wash the entire bodice while there were still a bunch of raw edges.

I was as gentle as I could be, and placed the wet fabric on a flat surface to dry. The great news is that the water soluble stabilizer came out with no issues.

The line of stitching connecting the yoke to the bodice is covered with a bias piece of fabric.

I could have gone with the printed fabric, but I thought it would break up the print too much, so I found a contrasting cotton.

This was probably the most fiddly bit of the dress construction. Trying to get everything to line up properly and maneuver the bias bits versus the straight of grain under the machine gave me a bit of grief. But it all worked out in the end.

The skirt went together easily.

I wish that I had enough of the fabric to do a better print match, but I didn't, so I am going to have to get over the center back and side seams. Thankfully, the front of the dress doesn't have any strange duplications of the motifs.

The side zipper was hand stitched into place.

I found a very good thread match, so those stitches just about disappear.

As the days are getting significantly shorter, and I was running out of time to complete the dress by Halloween, I did some of my hand stitching after the sun had gone down. Boy does it make a difference working with dark colors in crummy lighting. Still, hand sewing is one of my favorite things to do, and I wasn't about to let a lack of light stop me.

The pattern faces the sleeve hems, which I find works best for a cut-in-one sleeve.

The facing was finished with seam binding, under stitched (a step which was omitted from the directions, but I did it anyway), and hand stitched in place.

And all of those raw edges are tucked away nicely.

The bodice and skirt lining were hand stitched to the zipper tapes.

Next up was a belt to tie in the contrasting bias of the yoke.

With all of the machine edge stitching on the yoke, I decided top-stitching would be a nice finish for the belt as well. And I just happened to have an appropriate buckle stashed away.

And that's about it on the construction end of things.

I had a specific idea that came to mind as soon as I had this vintage pattern in my hands, and the alteration of the fabric yoke to a cage/lattice made of fabric strips worked as well as I could have hoped.

I am confident that I will use the same technique in the future.

And as for the pattern? This fun novelty print was an excellent opportunity to test how well I like the fit of this design, and I definitely plan to make another version. Now I wonder where I can find fabric to make an illusion neckline . . .

I love the lattice neckline -- really pretty and fun dress!
ReplyDeleteShould read "Peter"
DeleteThis is stunning. Adorable fabric, but the quality of work you do is the real prize here! (You give me inspiration and hope for my own sewing journey…)
ReplyDeletePixierita
I’m impressed about 15 kinds of ways with this dress! I do hope you use the pattern again.
ReplyDelete