Bias binding is a wonderful way to finish raw edges - before
I discovered
rayon seam binding, it was my favorite way to finish a seam
allowance. It can also be used as a decorative or contrasting edging on a neckline, sleeve, or hemline.
When I discovered
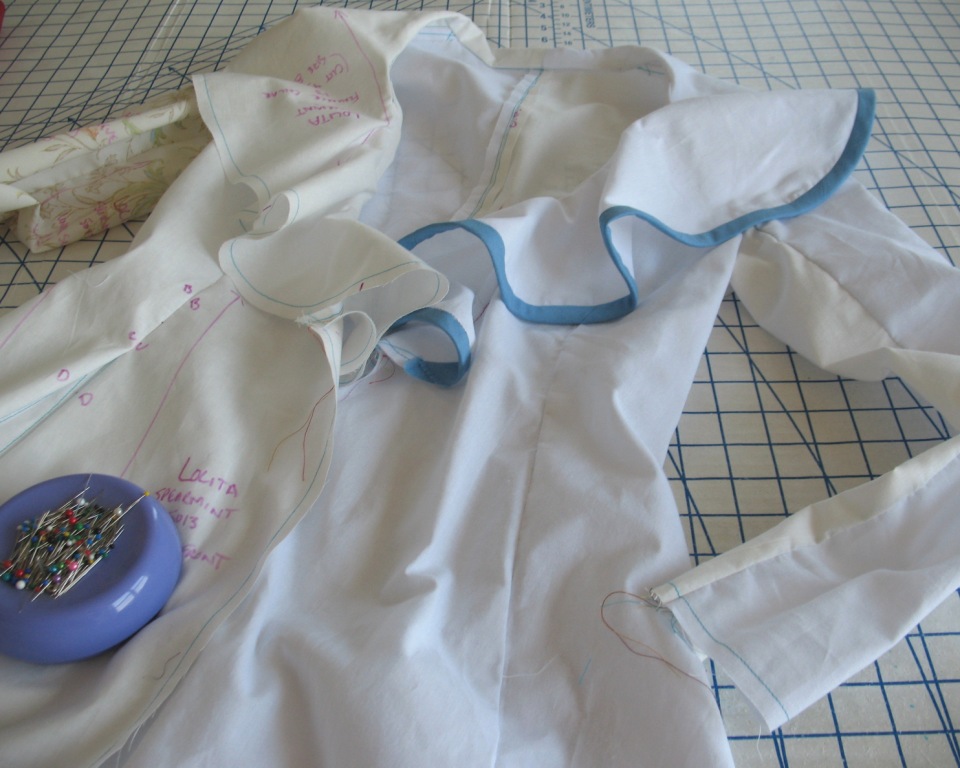
Lolita’s Spearmint Coat, I fell in love
with the flounced collar. I immediately started
daydreaming all sorts of fabric possibilities.
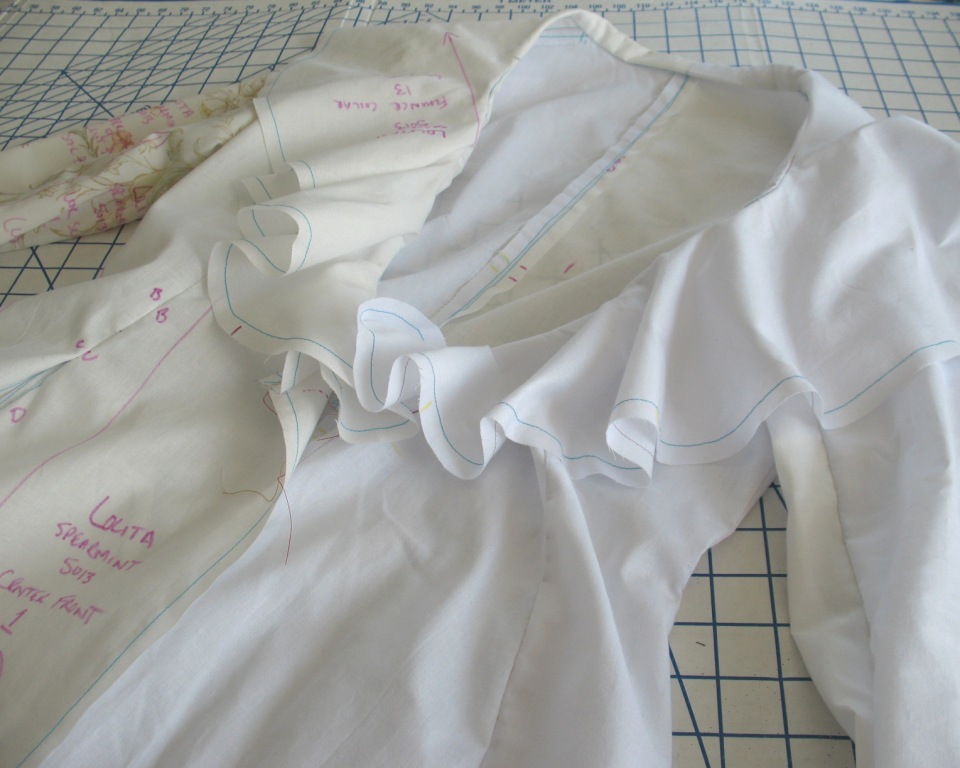
As drafted, the collar is made up of two layers of fashion fabric as
well as a layer of hair canvas/interfacing.
This makes heavy weight fabric choices a bit challenging.
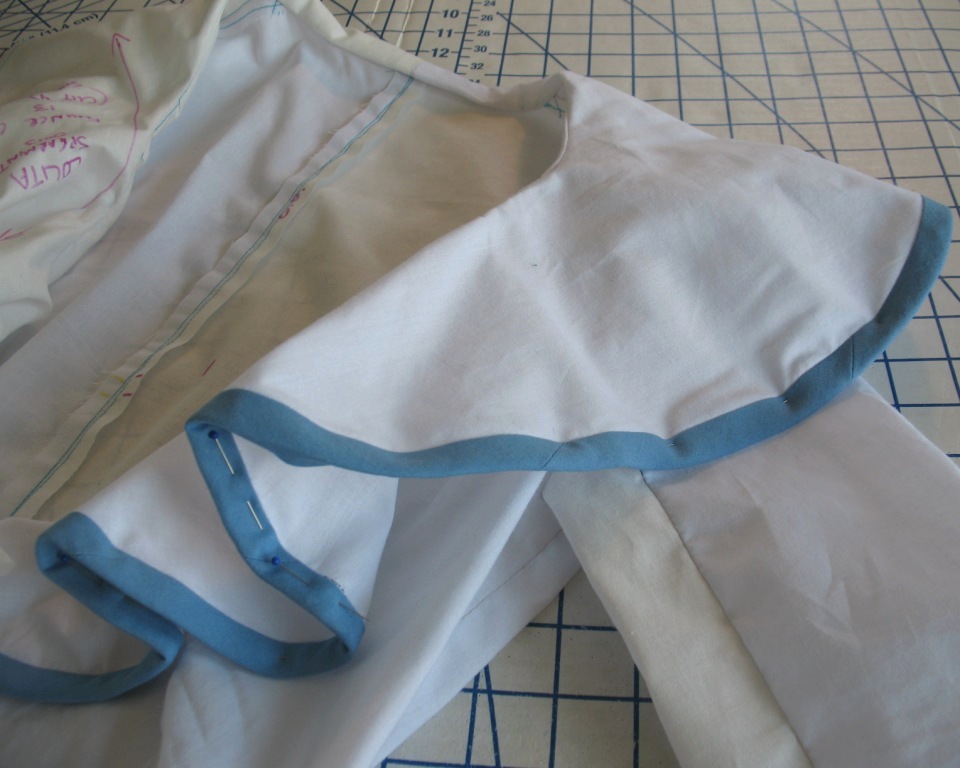
Binding the edge of the flounce is another option. If you use a heavyweight fabric, you could cut one collar layer and use a lightweight fabric as binding. If your mid to heavy weight fabric is double-sided and you want to show it off, cut a single layer and add a binding - the second side will peek through at the front of the flounced collar. Or, for fun, you could add a bit of contrast to the edge – the possibilities are endless! All you will need is a raw edge to apply the binding; if you are using multiple collar layers, edgestitch them together prior to binding them.
[I will be making my Spearmint up in this
gorgeous linen from Britex Fabrics. I plan on using two layers of linen to make up the collar, and have not yet decided if I will add an interfacing layer to the mix.]
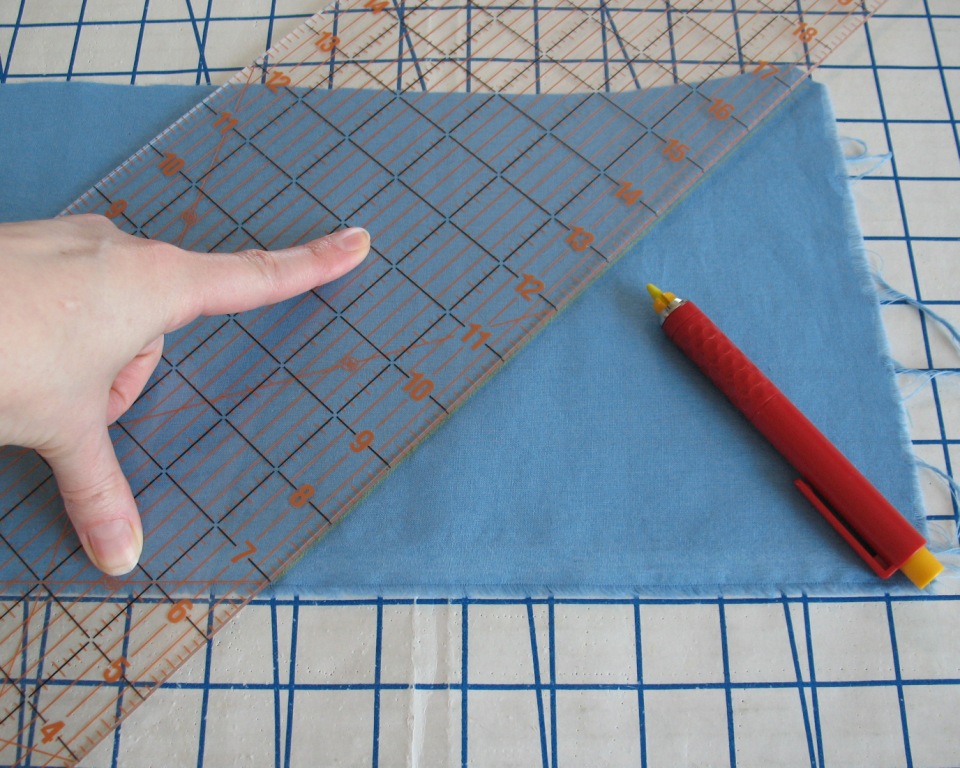
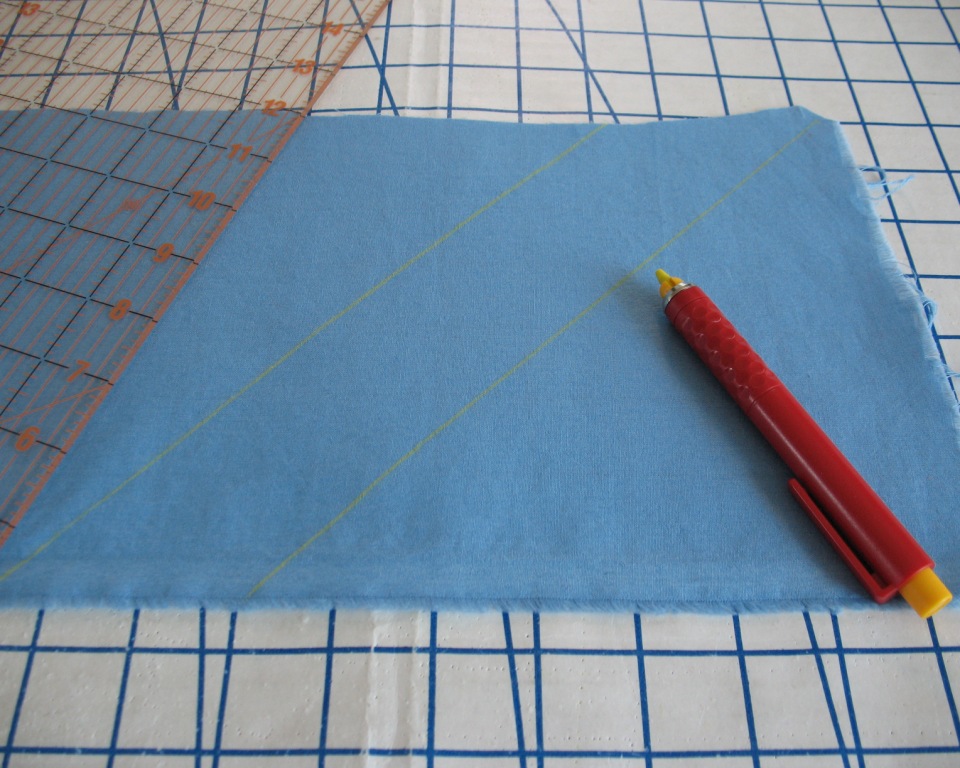
The first step is to cut your bias strips. You can make them as narrow as you like, although I would not recommend the finished width to be more than 3/4" wide on a curved edge to keep the bias from distorting. To make things easy to see, I pulled out a blue cotton remnant to make my bias strips of fabric, and also so you can see how the contrast will look.
If you are using a slippery material, you will want to
choose a marking utensil that has very little drag and will not pull your fabric
off grain.
You will need four times the width of your seam allowance,
plus a bit extra for turn of cloth – if you use a thicker fabric, you will need
to add more than just a bit! It is always a
good idea to play around with the technique using your choice of fabric and bias binding to make
sure you are happy with the outcome. (If your bias is to be applied to a curved edge, make sure to test on one!)
I am using scraps, but it is best to use longer pieces of bias whenever possible to avoid too many joins. You can create a continuous bias strip (
this is an excellent tutorial for that), but I like to save fabric, and often end up using the random lengths of bias left from cutting out my pattern pieces.
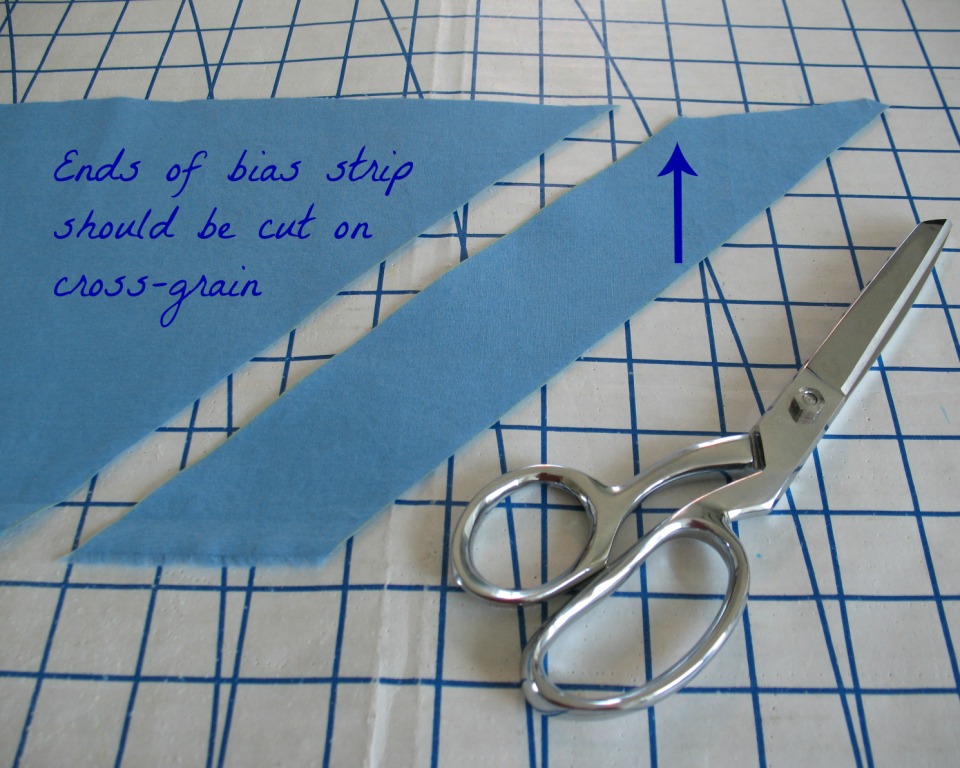
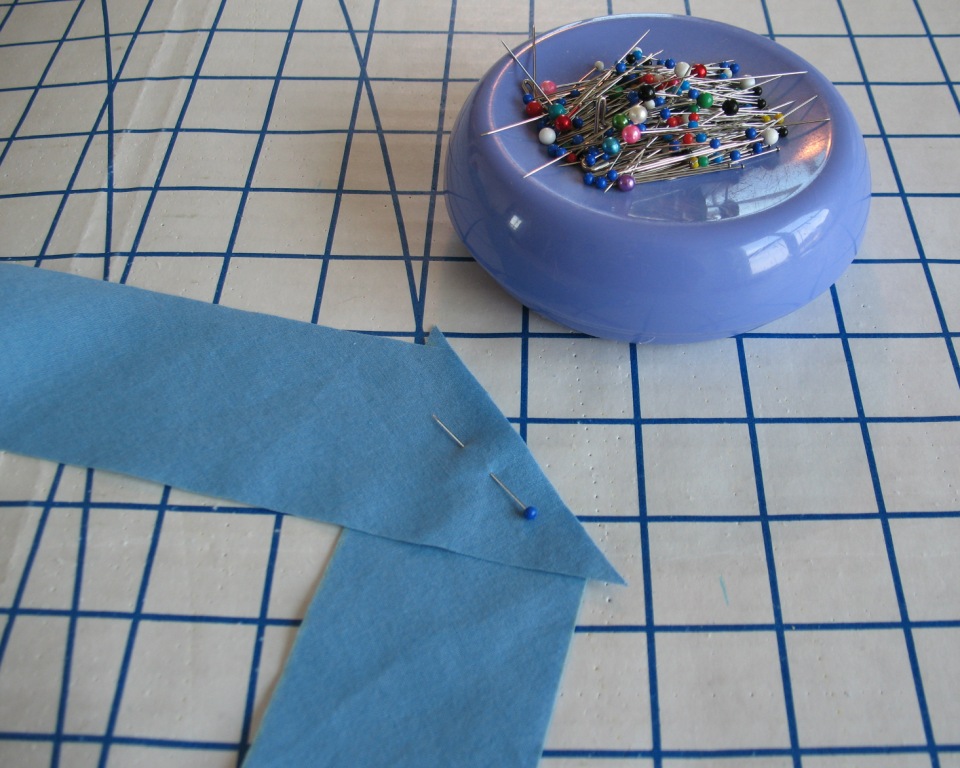
To do this, mark your bias, cut, and repeat until you have all of your pieces. To stitch them together, you will need to cut all of the edges along the cross grain.
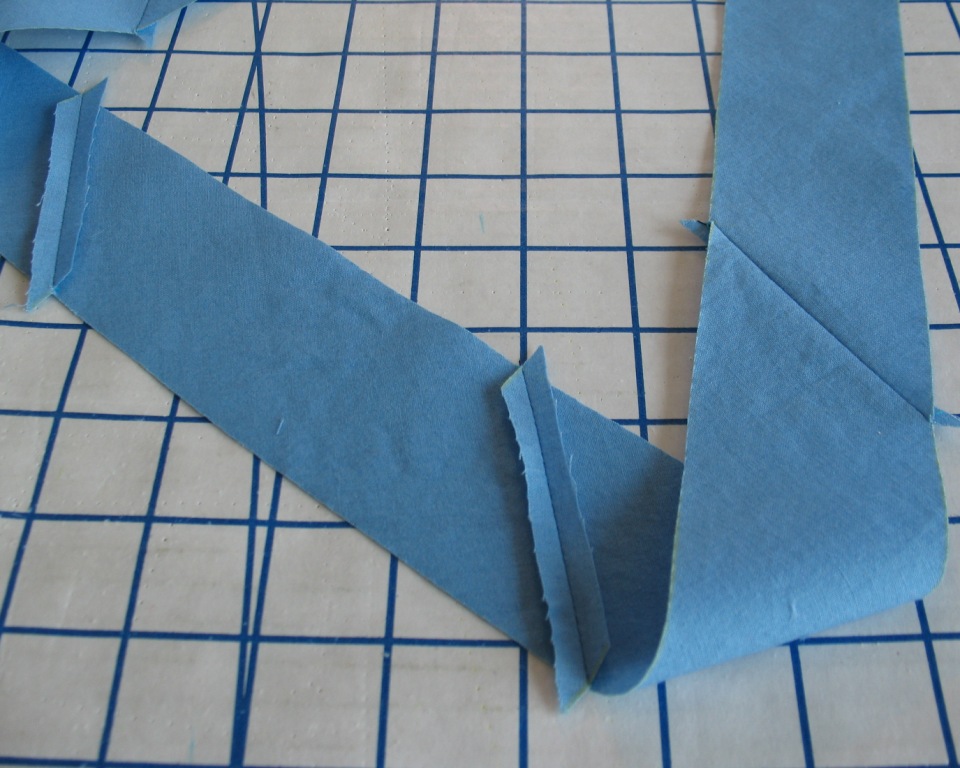
Do yourself a favor, and join them on the cross grain – little triangular tabs will protrude from both sides of the tape if you have matched things up correctly. Press those joins open. Making a blunt perpendicular cut might seem easier, but will create unnecessary bulk and will look clunky when everything is turned and stitched in place.
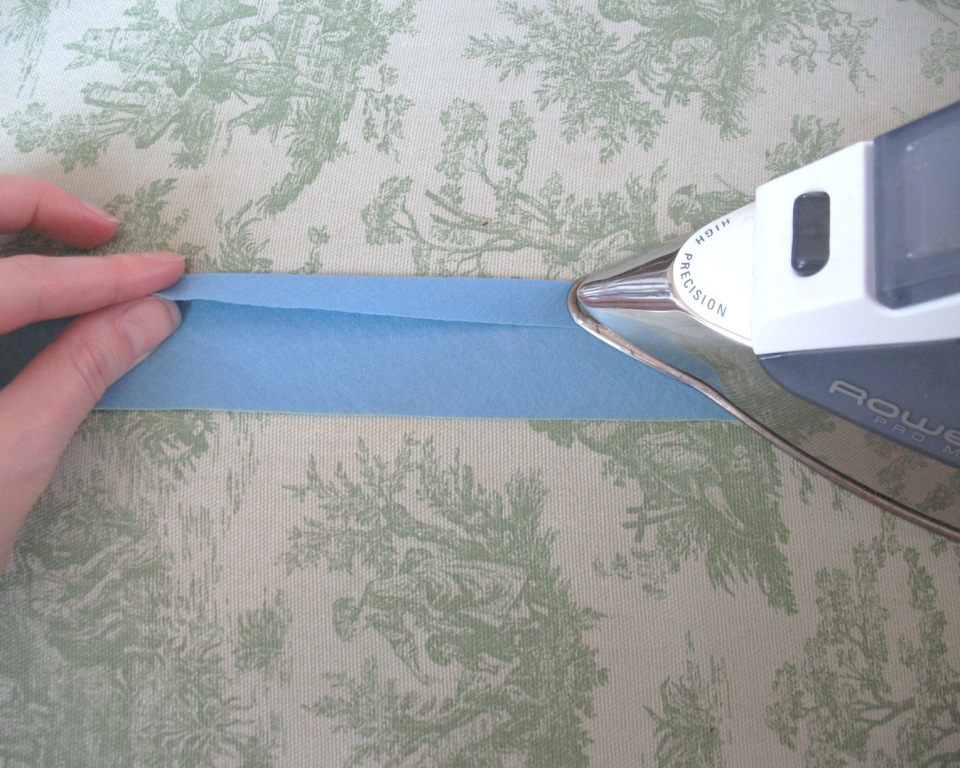
It is always easier to press your bias strip before applying it to your garment. These strips will have a tendency to stretch, especially if you have a large garment hanging off the edge of your ironing board, pulling at them while you try to press an even allowance. Press under one-quarter of the total width of the binding - if your strips end up a little too narrow, you can cheat some of that width back in by pressing less fabric under.
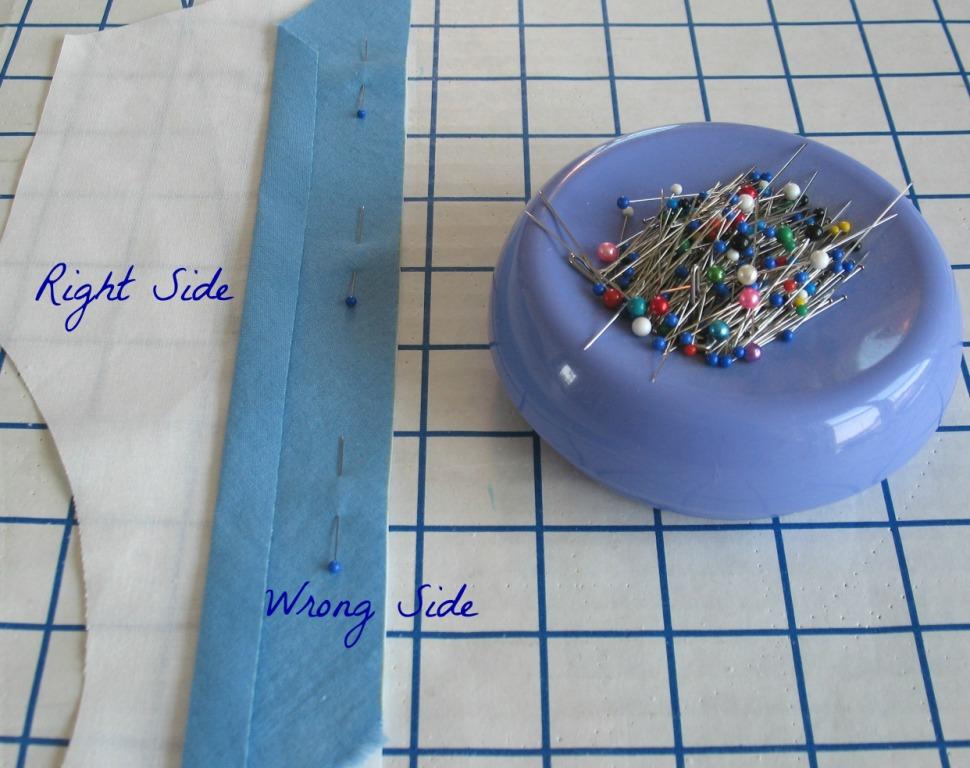
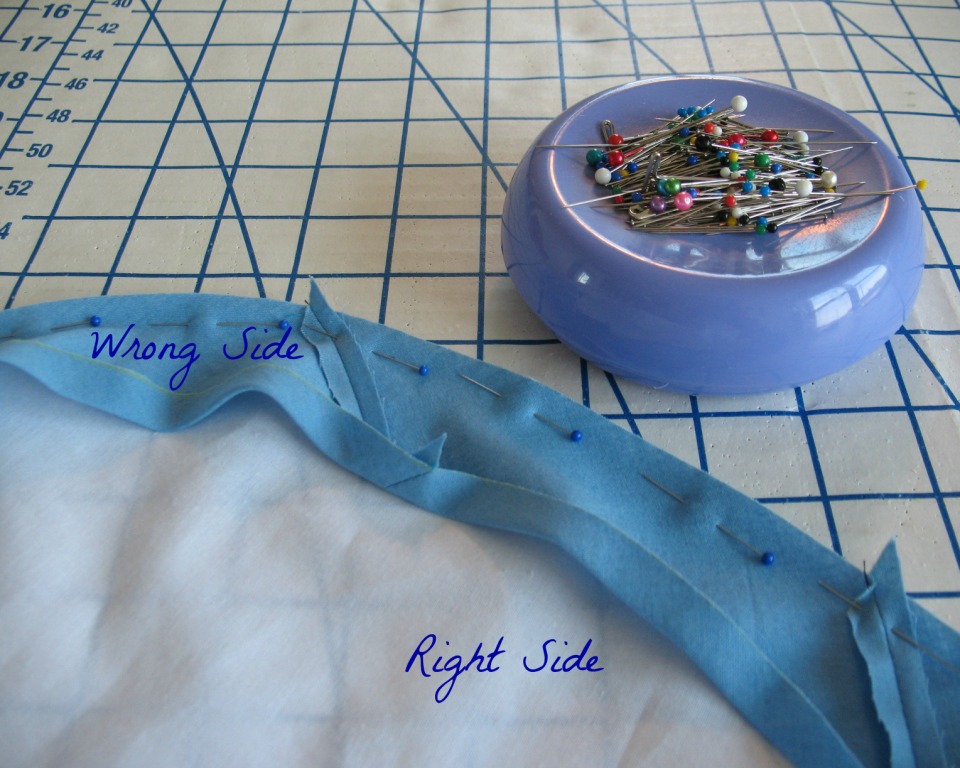
Pin the strips to the fabric edge, right sides together. Your seam allowance will be equal to the finished width of your bias binding.
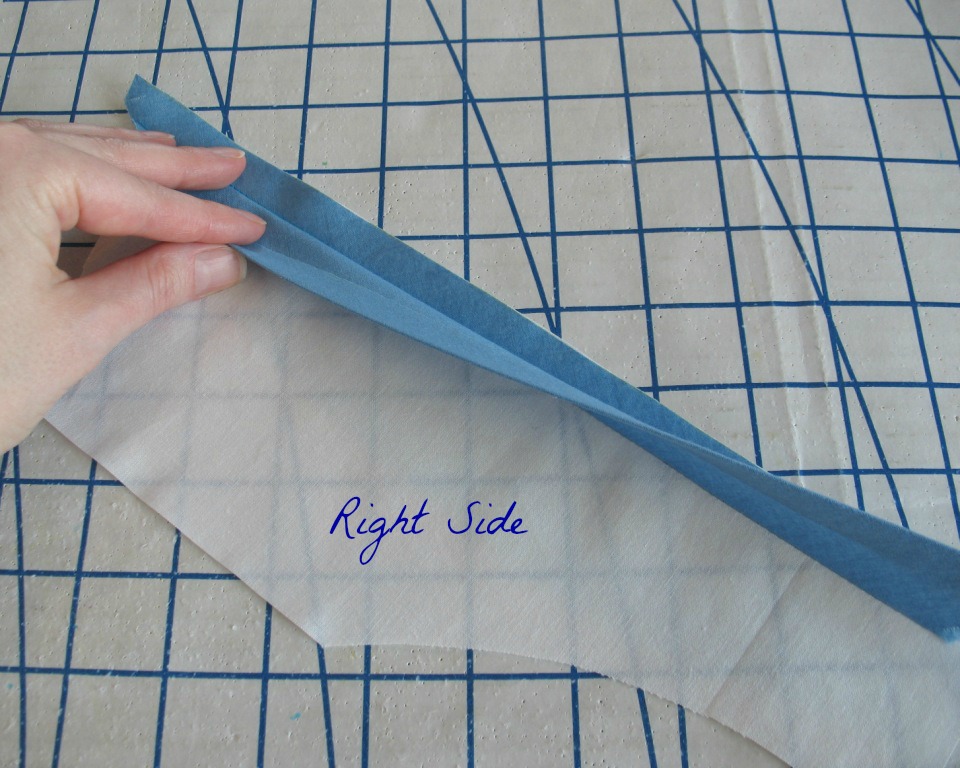
Press the binding towards the raw edge.
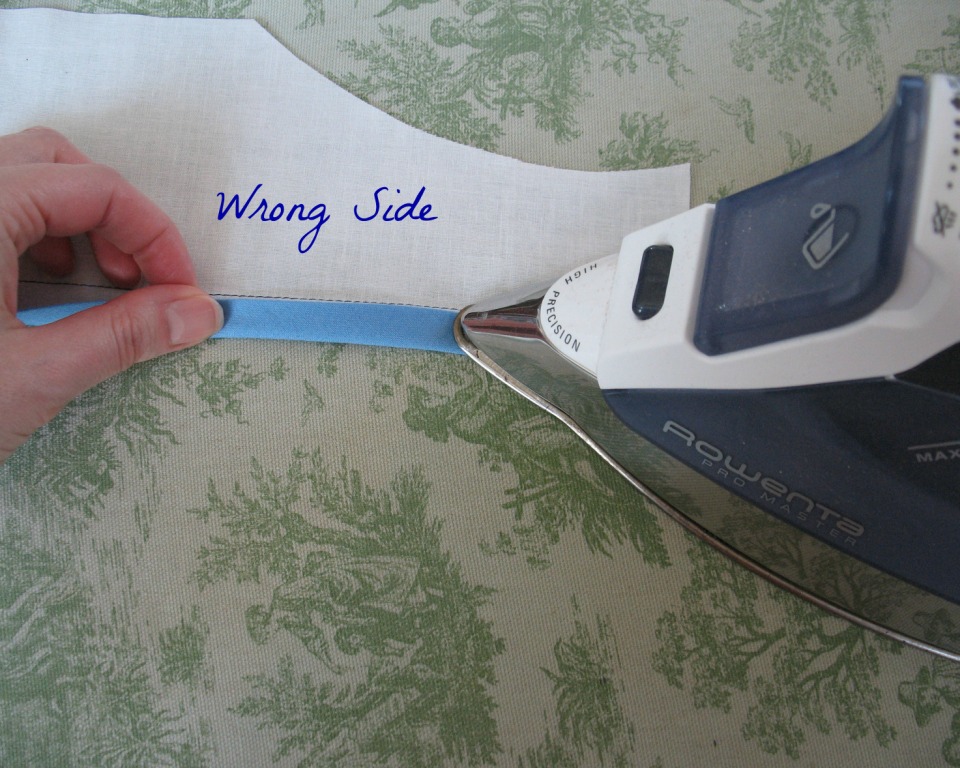
Fold the remaining half of the binding over the raw edge and press into place.
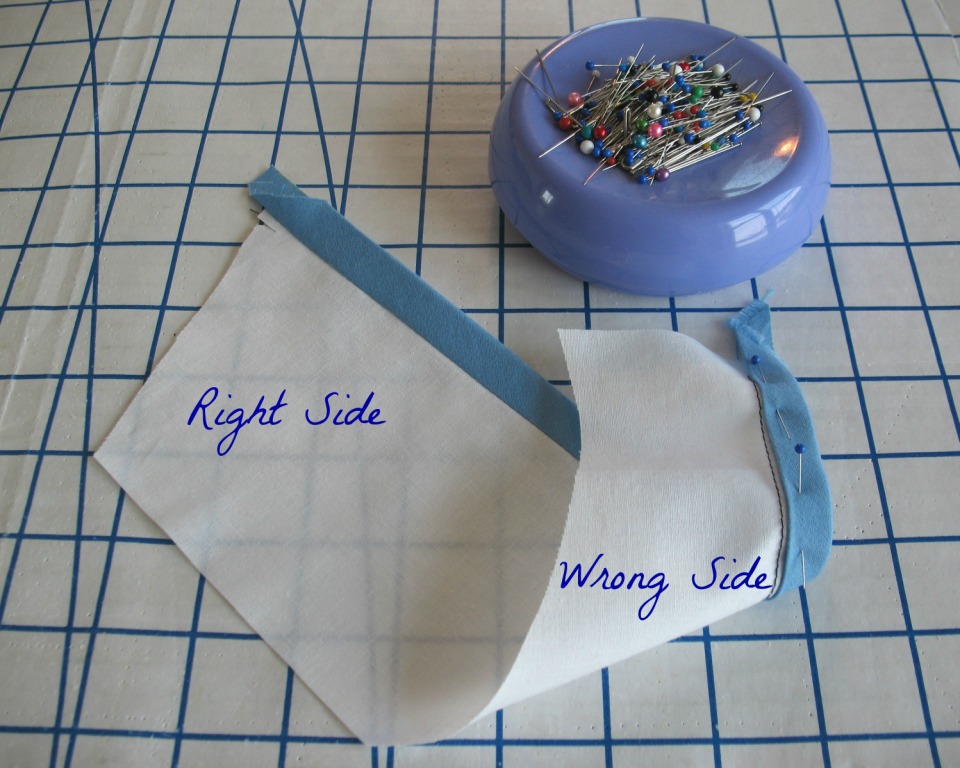
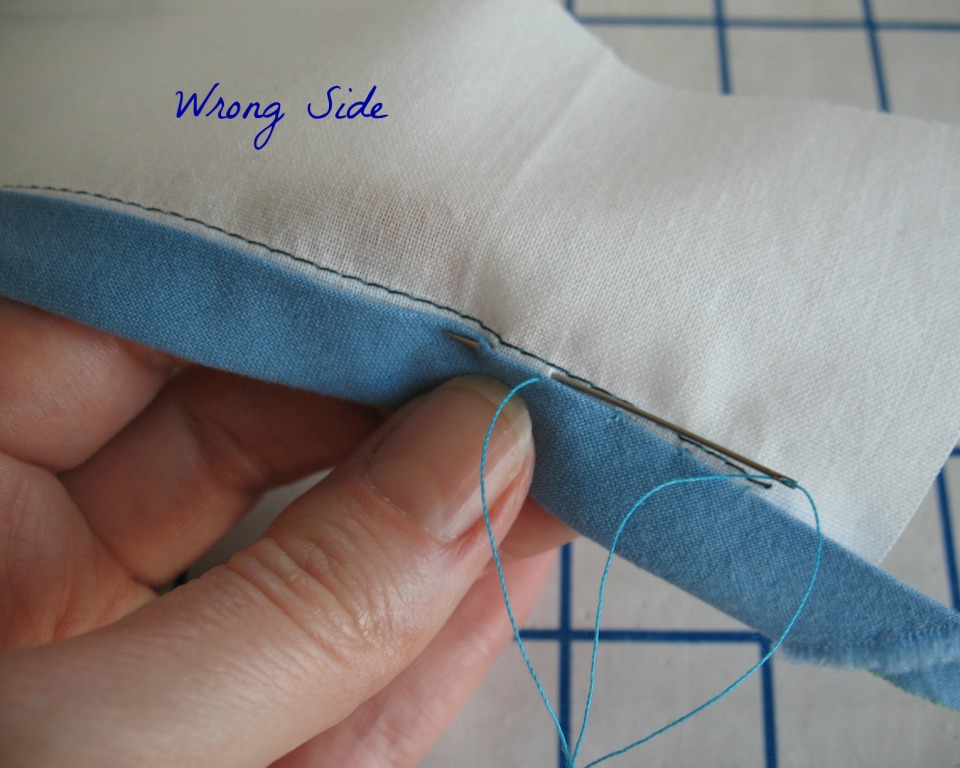
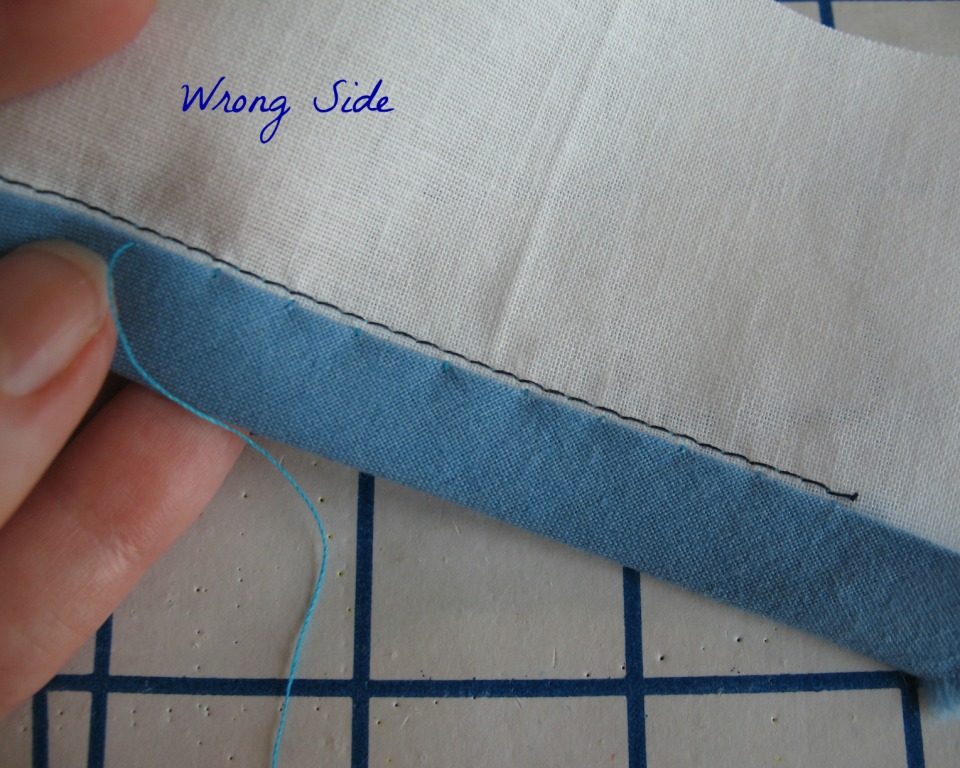
I prefer my finishing to be invisible, so I will be hand stitching the free edge of the binding just inside the machine stitched line. If you prefer, you can use a top-stitch to catch both sides of the binding – just make sure to extend your wrapped bias piece beyond the initial stitching line so your line of top-stitches will catch both sides of the binding.
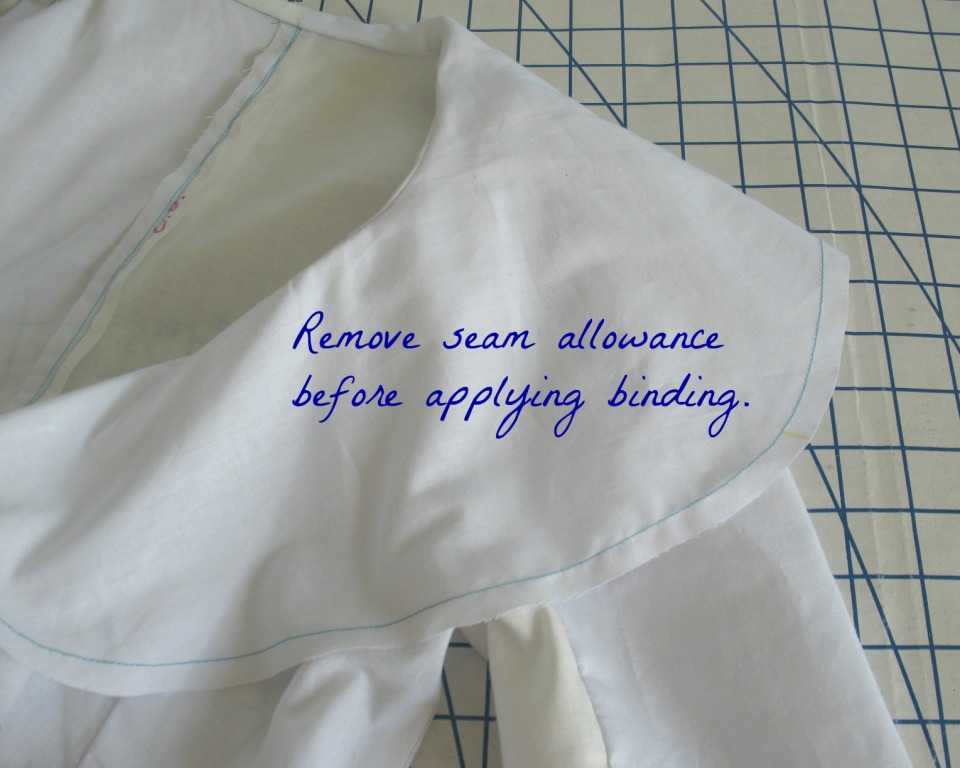
Because this technique will bind the edge of the collar instead of turning it under, we will need to
remove the seam allowance prior to stitching the binding. The same thing would apply to a neckline, sleeve, or hem - remove the seam allowance or you will end up altering the original design.
Make sure to gently stretch the binding around curved edges
to get a nice finish.
For this pattern application, both sides of the collar will be visible in places, so make
sure to be careful with your stitching and thread choices.
Using a bias binding is a slight change, but really opens up the design possibilities!
And if you made it through all of that, you deserve a
reward!
Amity has generously offered to
send one lucky winner a copy of
this wonderful pattern! Simply leave a comment on this post - if you like, you can tell me what your fabric choice would be for this design. The contest will end Friday evening, 11:59 p.m. PDT.