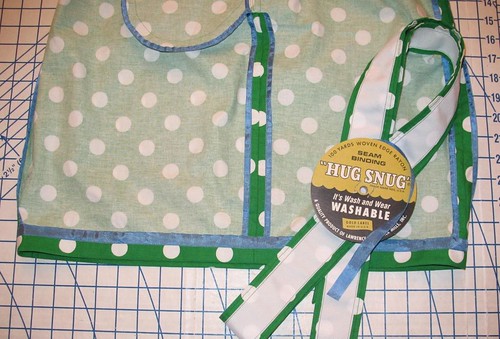
I often get questions about the rayon seam binding finish
that I love to use. So when Jeanette
suggested a tutorial, I figured the timing was perfect!
First, you will need to make sure you have the right
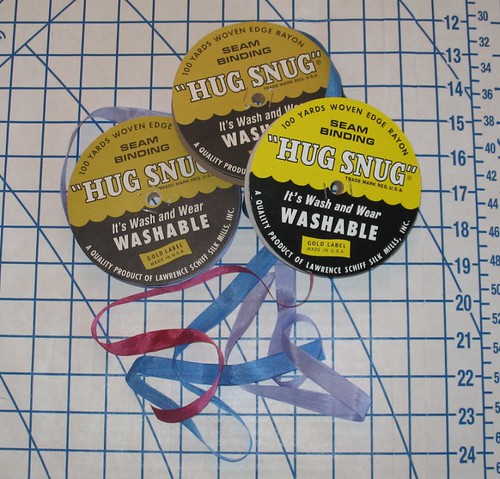
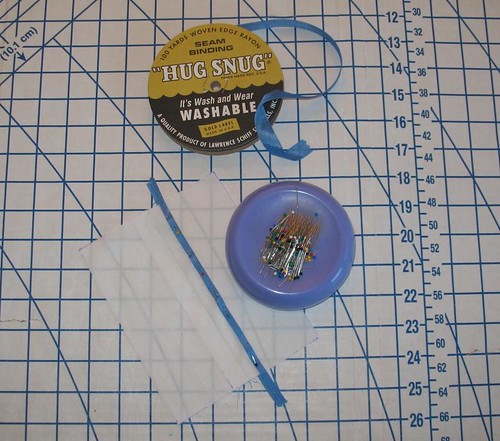
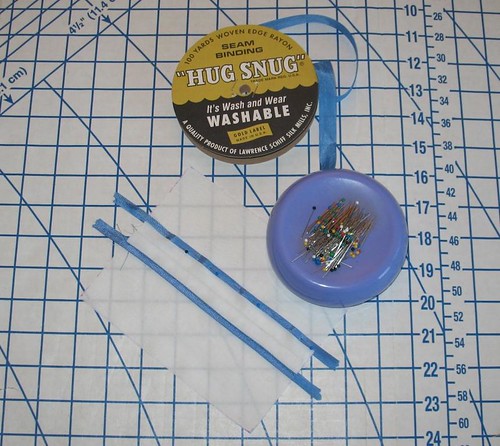
materials. I use Hug Snug Rayon Seam
Binding, but any rayon binding will do. This is not twill tape,
polyester hem tape, or single/double fold bias tape. I highly recommend getting your hands on some
rayon binding - it makes a real difference.
Whenever possible, I like to sew my seams before applying the
hem tape to the raw edges of my fabric.
This way, if any stretch occurs, your piecing will not be affected.
There are a few different techniques I have used to apply
the seam binding, and I am sure there are more that I am not aware of, but I
will start with my favorite.
*Double-Seamed Method*
1. Pin and sew your
seam as you normally would.
2. Iron your seam
flat.
3. Go back to your
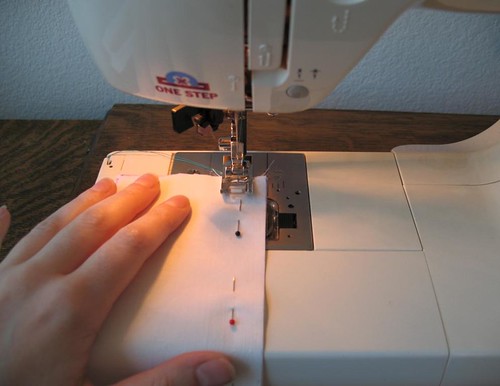
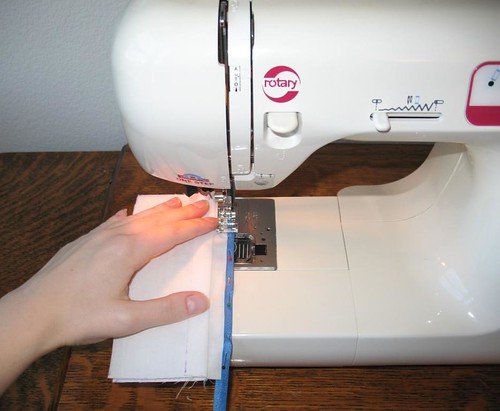
sewing machine. Push all of the fabric
to the left of the needle except for one raw edge (you should have the wrong
side of your fabric facing you). I like
to keep a spool of seam binding at my feet and unwind it as needed.
For my first seam, I do not use pins, but you certainly could. The
seam binding is a bit sheer and very delicate, so you should be able to
see/feel where the edge of your material is.
I like to place the binding so a bit more than half of the binding hangs
over the edge (if your fabric if thick, you may want to have even more hang
over the edge to accommodate the thickness).
Stitch this is place and continue unwinding from the spool at your feet
until you reach the end of the fabric.
4. Cut the binding
about an inch from the edge of your fabric just in case it unravels at the cut
end before you finish your garment.
5. Back at the
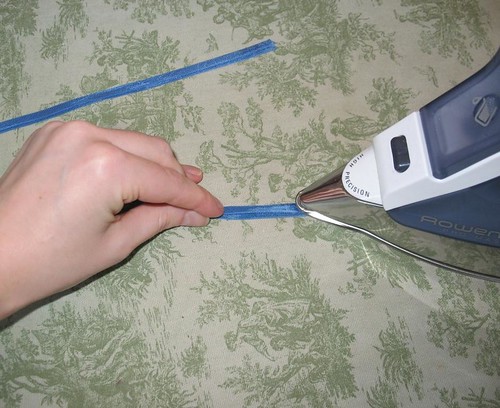
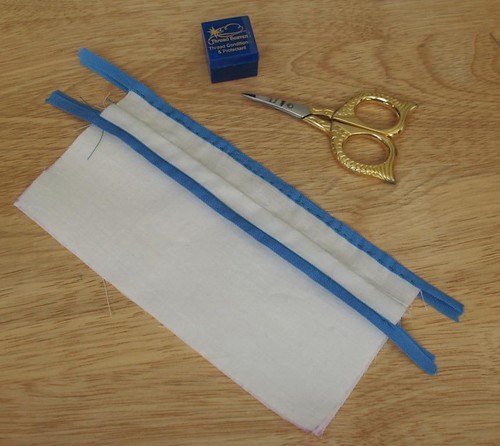
ironing board, fold the remaining half of the binding so that it encases the raw edge. At this point, depending on the length of the
seam, you may want to use a few pins to hold the folded over edge in
place. You may not need to, however, because this stuff irons beautifully!
6. Now you need to go
back to the sewing machine and stitch that seam in place. I usually complete these first steps on all of
my lengthwise seams at once before heading to the ironing board, iron a bunch
of them down, and then head back to the machine to be more efficient.
This method obviously uses up a lot of thread, but I
find that I get the best results. I do
not have to struggle with a narrow folded piece of drapey rayon and I do not
have to pre-cut lengths of binding, so in the end, I feel like it saves time
and frustration.
But that’s just me!
*Pre-Fold Method*
For this method, lengths of seam binding are cut to the
length of each raw edge that needs to be covered. If I go this route, I like to use pinking
shears to cut the binding. (While the
edges are woven and will never ravel, the cut ends have a tendency to fray.)
1. Pin and sew your
seam as you normally would.
2. Iron your seam
flat.
3. Cut your pieces of
seam binding a bit longer than your seam (to account for any measurement mistakes
– you will not want to unpick your stitches once you have completed a long seam,
and it is always better to have a little too much than not enough, right?).
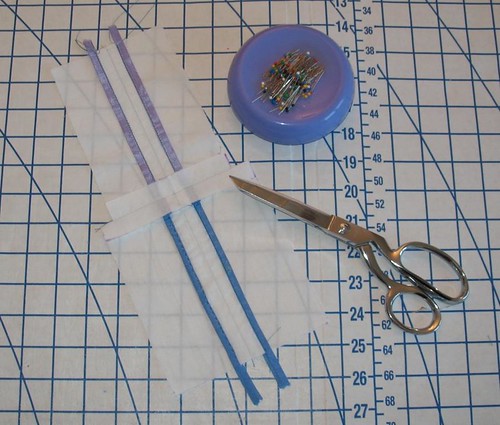
4. Go to the ironing
board and fold the lengths of seam binding so that the edges are not quite even. This will ensure
that your single line of stitching catches both the front and back sides of the
binding.
5. Here comes the
irritating part (at least for me). Forget
I said that – it may end up being you favorite part and I would not want to
influence you! This time you should work with the right side of the fabric facing you. Encase the raw edge of
your fabric with the thinner edge on the top and pin in place.
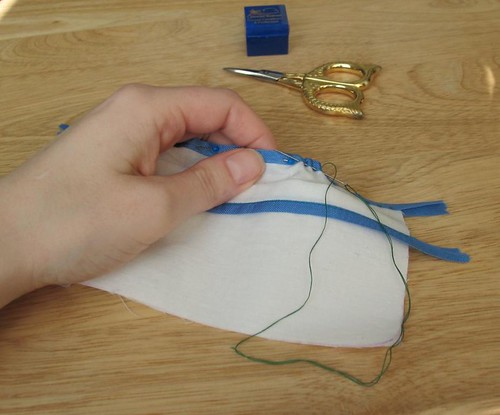
6. Go back to the sewing machine and stitch as
close to the edge as possible. When you
turn your seam to the wrong side, you should have easily caught the back side
of the binding because it is wider than the front fold.
If your stitches look a bit wavy or the binding looks
ruffled, go back to the ironing board and press your seam flat with a bit of
steam. Presto, you have a beautifully
finished seam edge!
*Pre-Fold Hand Stitched Method*
This method is the same as the pre-fold method except that
you will be hand stitching the seam binding.
I have found that with a piled fabric like velvet or some
thicker wools, the folded rayon does not like to stay in place with the
Pre-fold method and then you have to fight your machine, the stitching line is
no longer straight, and frustration ensues.
I should also confess that I find hand sewing to be incredibly relaxing
(unless you are on a deadline!) and easier to keep things from shifting. I use a combination of a running stitch with
a few backstitches every few inches to make sure that the running stitch does
not gather my seam.
A quick steam press, and you have a lovely finished seam – nothing is ever going
to unravel!
*A few more things to keep in mind*
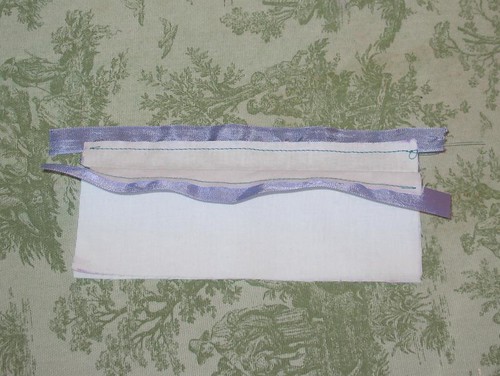
This is obviously a rather time consuming technique to
finish raw edges, but I believe the end result is worth the extra trouble. The light weight rayon will not add bulk to
your seams, it gives a very vintage feel to the insides of your garments, and it really is pretty!
If you have perpendicular seams, make sure to finish all of the seams traveling in the same direction before sewing up any cross seams. For instance, each lengthwise skirt seam
should be bound before the skirt gets stitched to the bodice along the waist
seam.
This will catch all of the ends of
the seam binding in that waist seam, which, eventually, gets finished with the
binding.
And look, you now have another completed seam that needs to be finished! Time to get to work!
I have never pre-washed the rayon binding, and have never
had an issue with shrinkage. That being
said, I normally drip dry all of my hand made clothing, so I am not sure what
too much dryer time might do to the binding.
I would imagine that if your fabric is pre-shrunk there should not be any
issue.
Rayon seam binding also works great as hem tape!
*Suppliers*
If you don’t think you will have a use for 100 yards of this
stuff, I would suggest
Mattiecakes’ etsy shop.
She sells very reasonably priced lengths in stunning colors.
If your local sewing shops do not
carry rayon seam binding, I would suggest trying some Hug Snug from
fabric.com. The mass retailers like JoAnn Fabrics
do not carry the rayon binding, and I would suggest avoiding the polyester hem
tape that looks similar at all costs – it is stiff (even though it calls itself “soft &
easy”) and will not iron nearly as well – I would imagine it would melt if your
iron gets too hot!
And I promise you will
get a lot of use out of this stuff – it is fabulous!
Contrasting colors can look very pretty, so don’t worry
if you cannot find an exact match to your fabric.
If you have any other suggestions for places to purchase
rayon seam binding, please let everyone know!
Sorry for the length of this entry and the poor picture
quality – the sun was not very bright in the sewing room today! I have a new found respect for all of the
bloggers out there that are always doing new tutorials – it is really
challenging and time consuming not to mention difficult to take pictures with one hand! So please let me know if I was unclear or need to fill in any missing steps.
Thanks for reading!