Saturday, October 8, 2022

A Sequined Bolero

So what is the perfect match for a sarong dress?  A bolero, of course!

I made a Dorothy Bolero not too long ago in cotton pique, and it worked as a wonderful coverup for my checkered sundress.

I was really hoping that I would have enough of this fabulous novelty print to make myself a matching coverup for McCalls 4425, and it turns out, I did!  Not only that, I managed to do a pretty good job matching those oversized motifs to the actual dress, which will be more obvious when I get the post of the dress construction finished.
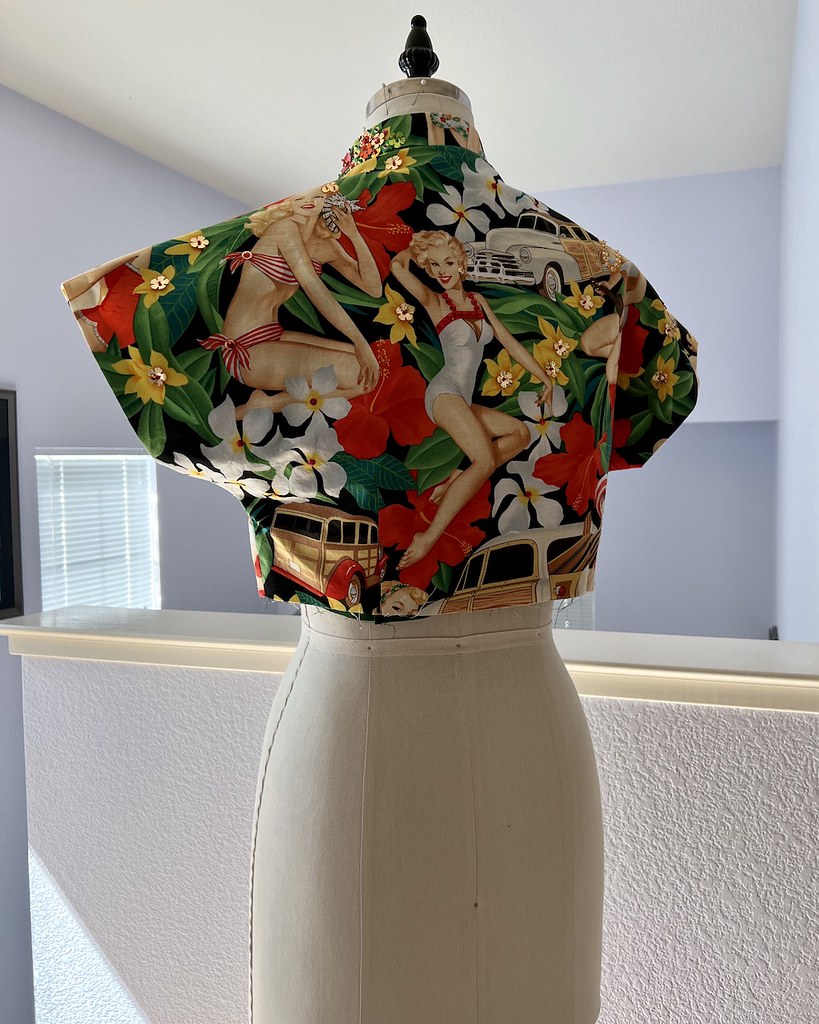
I knew that I wanted to add sequins to this piece to match the embellished dress, and initially, I planned to stitch the embellishments on the collar prior to construction.  But as I was thinking things through, I realized that it was not an ideal solution with such a narrow collar.  I ended up applying the sequins to the already constructed and lined collar.  Some of the threads show through on the back side, but it really was the only way to go, so I will just have to get over the visible stitching.

There are a few sequins on the front and back pieces as well, but those stitches were easily hidden since there were multiple openings through the sleeves and the lower center back lining.

I love the look of layered sequins, and although I am going to put the bling away for the time being, it has been a lot of fun playing with shiny things this year in my sewing adventures.

The actual construction of the bolero is fairly simple, and everything went together smoothly.

The only issue was how to iron the garment once the sequins were attached (the cotton does wrinkle, and it's impossible not to scrunch things up a bit while stitching the embellishments in place).  

But I did remember a silly little iron from the quilting section of the fabric store that I picked up many years ago.  It never got much use for quilting as I didn't see the point, but that tiny little iron was just the thing to get into the small spaces between the sequins.

This is what makes it so challenging to get rid of any of my sewing stuff - it always ends up coming in handy years later.

And it now appears that I will be hoarding sequins of all shapes and sizes for some future project that I feel needs to be encrusted with sparkly bits and beads, so that has to be added to the extensive list of sewing accoutrements stashed away in my home.


Wednesday, October 5, 2022

Testing a Theory

And so begins the saga of McCalls 4425.

I found this pattern at an estate sale not too long ago.  I had seen images of the design online for years, and was thrilled to come across a copy, and not only that, it was in my size!  Strangely enough, this was the only sewing pattern in the entire household that I could find in a small hallway closet with some other sewing notions.  These days, I generally find 1990s patterns, and maybe a few 1980s thrown in for good measure, so to find this design was pretty special.  This project also utilizes other finds from this very estate sale, but I will get to that later.

It has been some time since I did a full muslin for a project, and I though it would be a good idea to do that with this pattern since the skirt is somewhat fitted.  

At this stage in my sewing game, I feel fairly confident about doing a couple of quick measurements and determining if a bodice on a pattern is going to fit.  I tend to choose full skirts, so the lower portion of a garment isn't too important when it comes to fit, so long as the waist measurement works.

This pattern was going to be a bit tight through the hips.  I added a bit of length through the torso and left myself some extra room to play with along the side seams.

I left off the front drape on my muslin since it wasn't going to alter the sizing at the hipline and I didn't have very much spare yardage of plain muslin, so the mock up looks a little askew.  But it did its job with regard to fit.  I get nervous about designs without a waistline because the fit gets complicated for me at the back of the garment, but this one worked out better than expected.

My little guy snuck into a couple of these photos.  Tino likes to be included in everything these days, and does not enjoy being left downstairs alone anymore since his hearing is not so great and he likes to keep me within view.

As you can see, he is very helpful!

After adding some width to the hips and making a slight swayback adjustment, I was pretty happy with the fit.  This fabric repeat is rather large, and I didn't want any unfortunate placement of the motifs, and the overlapping pieces needed to be somewhat matched, so cutting everything out was a process!  I did purchase slightly more fabric than I thought I would need for this very purpose, and thankfully, it all worked out.

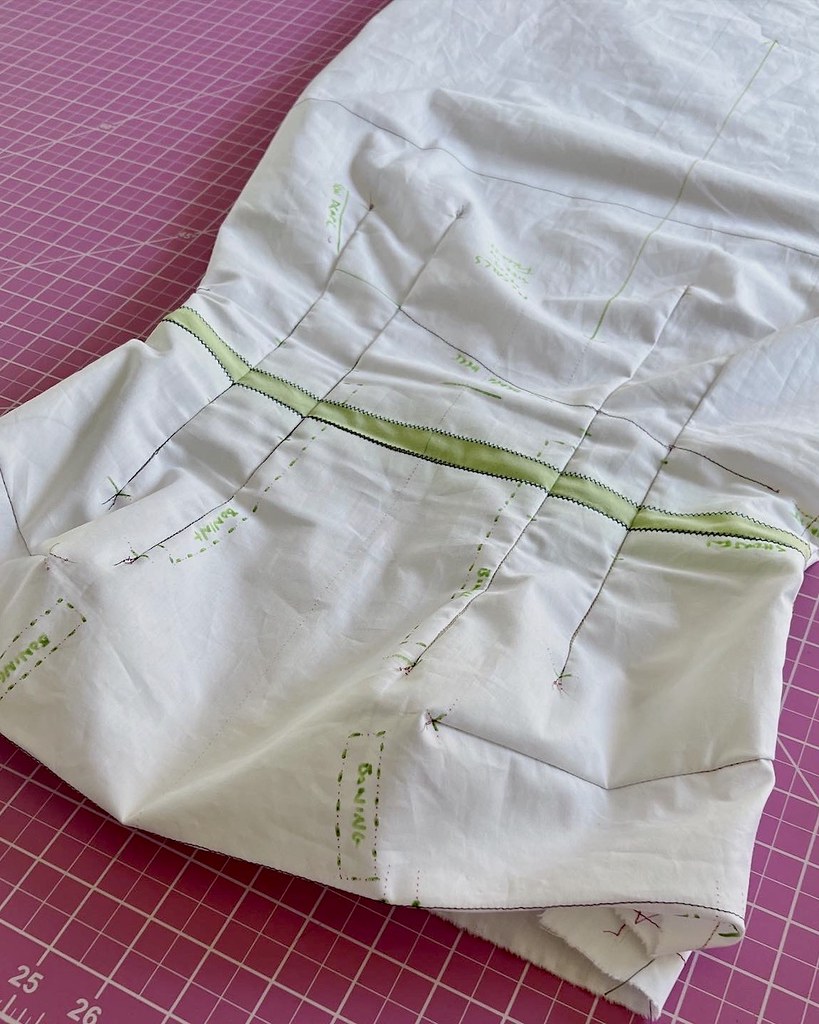
Once that was accomplished, I cut out my underlining and transferred the pattern markings to that layer.

I generally prefer lining to underling, but in a case like this, it sure makes things easier.  I was able to trace the lines of the darts directly on my underlining, which always feels slightly naughty.  Basting stitches that are within seam allowances are also left in place on most of my projects which feels rather lazy, but since they aren't seen on the outside of a garment, I let them be.

Next, the fabric and underlining were joined together just inside the dart stitching lines.

I also thread traced the placement line for the drape, which definitely came in handy later on.

Because I was using a muslin as my pattern and I had marked both my cutting and stitching lines, I decided to leave extra fabric at the top of the bodice.  While trying on the muslin, it seemed like the neckline was rather low and I wasn't able to determine if it would be necessary to add more coverage until after the bodice boning was in place.  Also, I figured that this would make it impossible for that edge to stretch out since it had not been cut.

I used a scrap of organza to reinforce the clipped edge where the drape is attached to the front of the dress.

This is one of my favorite things to do when corners need to be clipped.  I no longer trust a simple line of stitching - I figure wrapping those edges with a tightly woven piece of fabric will do a much better job in the long run!

And that completes most of the work on the front and back of the dress.  But this over the top print needed something extra, in my mind, and so next up is the fun part  . . . the embellishments!


Sunday, September 25, 2022

Picnic Ready

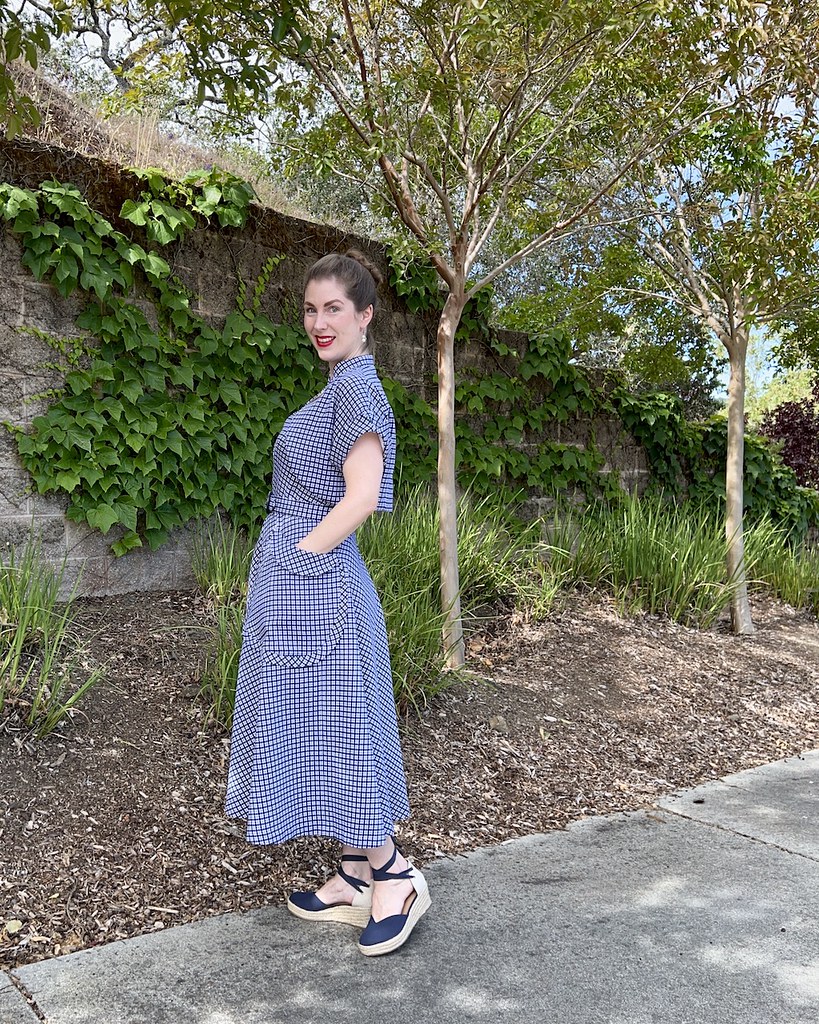
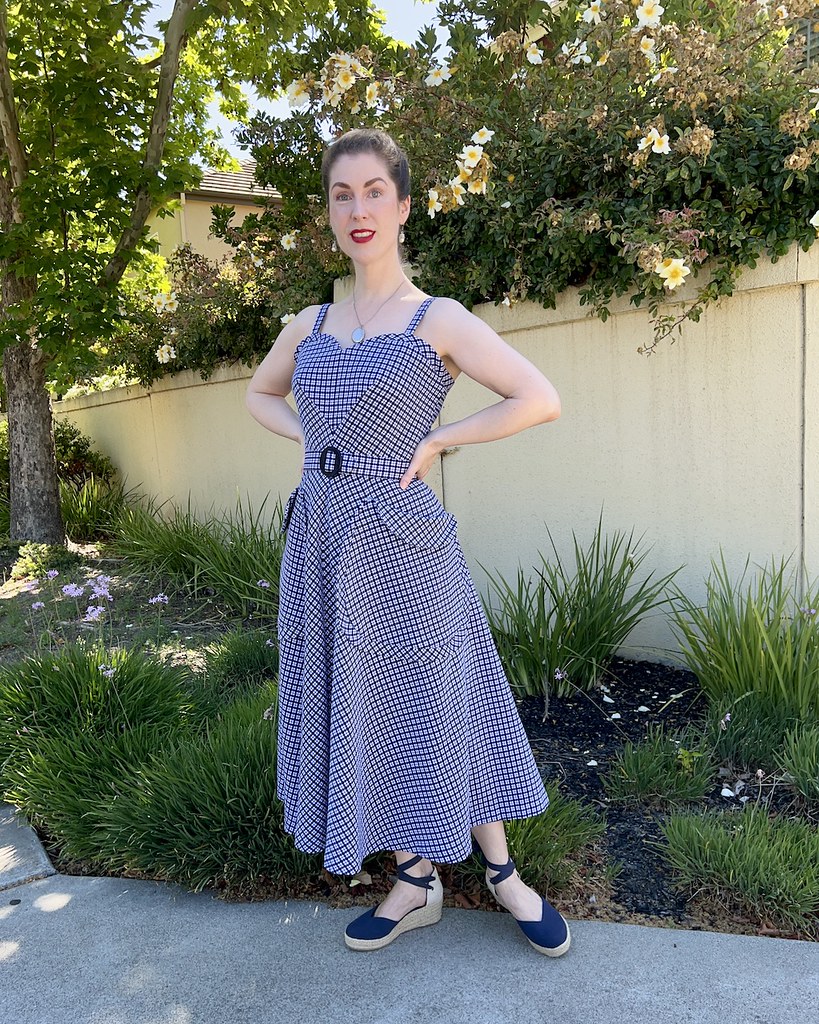
This was one of my favorite projects of the Summer.

The fabric and pattern combination was a happy coincidence which led me to work with a recently released pattern instead of letting it languish in the stash and eventually be forgotten (I have to remember to work with new to me patterns more expeditiously in the future).

And while there was a bit of frustration with the bulk of my chosen fabric and the corners of those fabulous pockets, overall, this project came together without too much frustration.

And I managed to sneak in a second project with my leftover fabric, which is one of my favorite things to do.  It makes me feel as though I am getting away with something.  

I used to wear bolero sweaters/jackets all of the time, and I cannot recall why I stopped.  I feel more cropped jackets and sweaters being added to the project queue sometime soon.

The fact that I had the perfect vintage buckle already on hand was just frosting on the cake.

I did have plans to make another version of this dress in a more novelty themed fabric, and I may get to that next year, but I am glad that this dress had her moment to shine during the warmer months.  

It has also confirmed my love of textured fabrics.  It's difficult to tell in these photos, but this is a checkered print that was applied to a cotton piqué. 

I may have purchased a few other piqué prints from Mood Fabrics when I picked this up, and I am quite certain that they will be put to good use in the near future.

Why is it so difficult to find textured fabrics, by the way?  Where are they hiding?

The urge to knit hasn't kicked in just yet, and I am temped to start another lightweight frock, but I feel like my next sewing project should be Fall appropriate.  And I am determined to complete a coat or jacket of some kind this year (or maybe I will give myself until February to complete that task!).  But it's hard to beat a cotton sundress and bolero jacket combo, and it won't be long before I am making another.

Dress & Belt: Made by me, Simplicity 9536
Bolero:  Made by me, "Dorothy" Bolero

Monday, September 19, 2022

A Matching Bolero

After I finished this dress, I decided that it needed a matching bolero.  There was a small amount of yardage left after cutting out the dress, and I hoped that it would be possible to squeeze a Dorothy Bolero out of the remnants.  The pattern itself comes with its own bolero, but the front lapped pieces are quite oversized and there was no way to cut the pattern out of my remaining fabric.  I contemplated purchasing an extra yard, but soon decided that was just ridiculous.

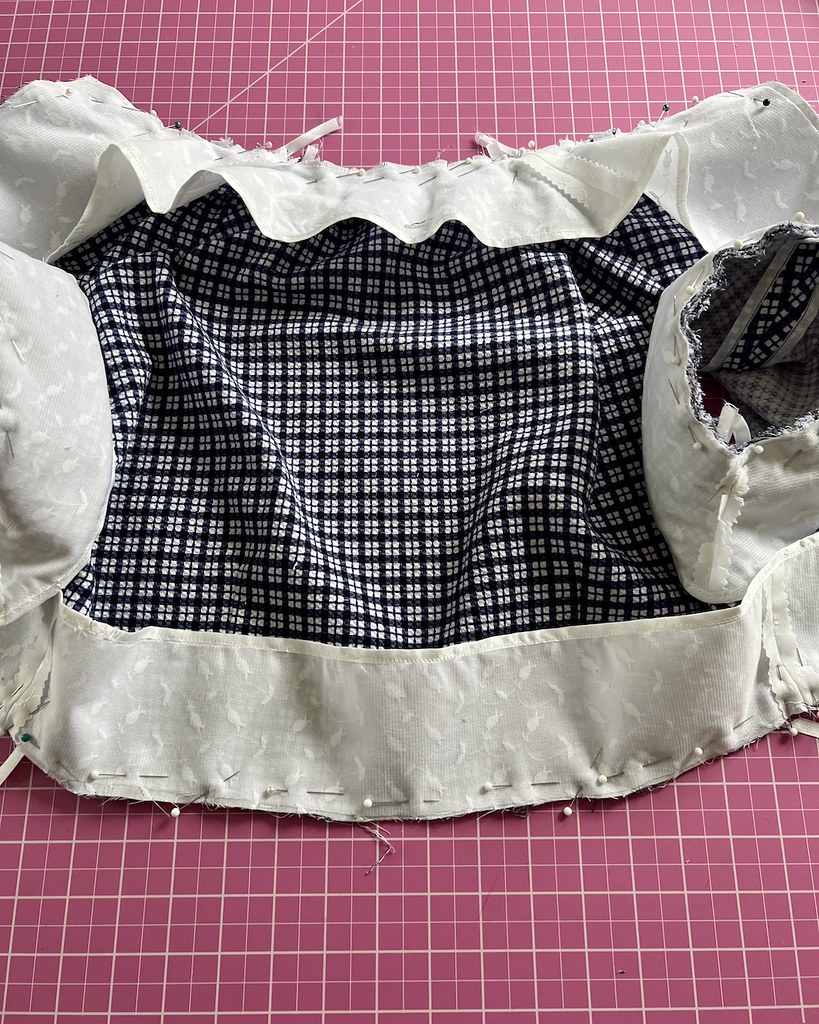
Turns out, I didn't have enough to cut everything out, even with the smaller pattern pieces from the Dorothy Bolero, but I still wasn't going to give up.  The turned back wing collared version of the pattern was my preferred silhouette, but there was no way to make that work.  I dug around in my stash and found scraps of eyelet from a very old project.  Using that eyelet for the facing pieces, I could just manage to cut out the band collar view of the pattern.

But I thought that the squared off edges might look strange paired with all of the curved edges of the pockets and neckline of the dress.

My solution was to curve those squared off edges, both on the cuffs and the center front collar.

It was a simple change and I think that it really helps bring both of the designs together.

I was slightly concerned that the contrasting facing would be noticeable and look cobbled together.

In the end, it ended up a being happy coincidence and looks much better than I had imagined it would.

I did interface the facing pieces because the eyelet fabric was somewhat flimsy compared with the piqué.

The contrast serves to break up all of those checks when it is worn with the dress.  The fabric is a cotton/poly blend, and while it isn't my favorite textile to work with, in this case, the finished product almost makes me forget that I hate working with and/or wearing polyester.

There was also a question as to which size I should choose with this pattern.  I went with the larger of the two, which definitely works, but I would also be curious to see how a slightly smaller silhouette would look.

But I am sure there will be opportunities in the future to test that theory.  And with this dress, I think that the bigger sizing works quite nicely.

Overall, I am extremely pleased with this outfit.

Both the dress and the bolero turned out even better than I had hoped, which is always a wonderful outcome.