
Just a note: the diagrams for the front bodice boning seem to be incorrect. The picture indicates that the boning channel should extend beyond the dart, but that would smoosh the boobage. The instructions are correct, but I like to just scan the diagrams and can be very lazy about reading every word of the directions - and I assume I am not the only one out there!
Also, my pattern tissue indicated a "placement line for lining," however, I believe that line should be used to place the boning pieces. The lining will be placed along the seam line once the seam allowance is pressed under.
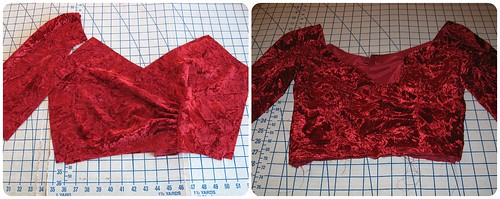
And then there were those added sleeves to contend with.
The bodice construction leaves the lower half of
an armscye available for sleeve stitching with the upper half completed by a finished sleeve cap.
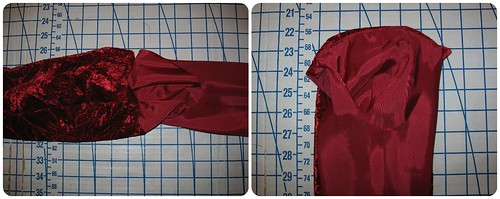
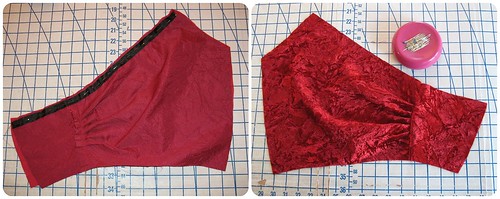
Once the front and back sleeve pieces were stitched together, I sewed the upper portion of the sleeve and lining, fabric right sides together, leaving 5/8” seam allowance free at either end. The velvet portion of the sleeve underarm was then sewn to the bodice.
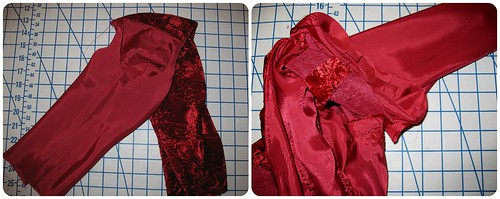
The lining underarm was stay-stitched and clipped so that the raw edges could be turned under and hand-stitched in place for a clean finish.


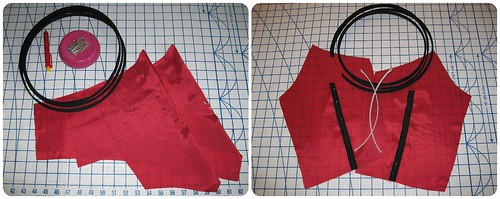
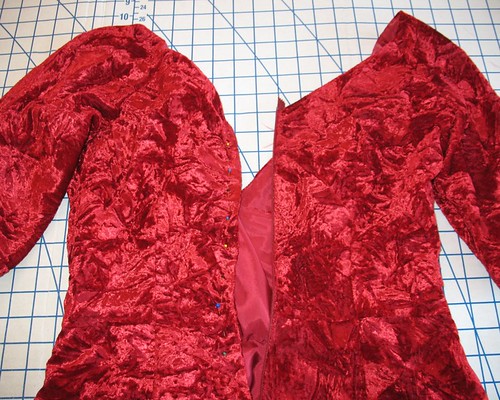
And then there was the waist seam – I really did not want to have it visible, even from the inside. With my addition of tulle and the multiple layers of velvet where the drape was attached, there was absolutely no way to make it look pretty.
It was a bit convoluted, but I managed to treat the bodice
bemberg as half underlining, half lining.
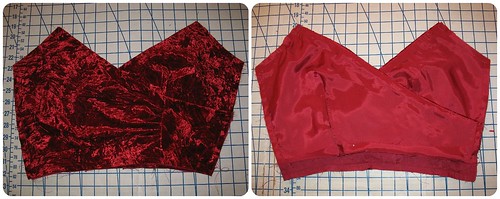
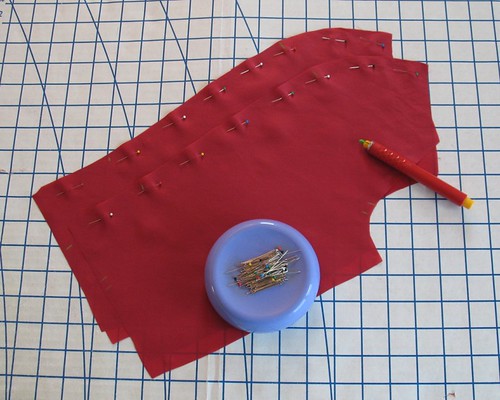
The two front bodice pieces are supposed to be basted together along the side and bottom edges and treated as one. But I wanted to keep the bottom portion of the lining free until after the skirt was attached. As a fix, I left the bottom bit free until the side seams were completed. This required the side seams to be sewn from armhole to just over an inch from the edge with the lining and fabric as one piece. Then I flipped up that portion of lining and pinned it out of the way while the remaining lower bit of side seam was sewn.
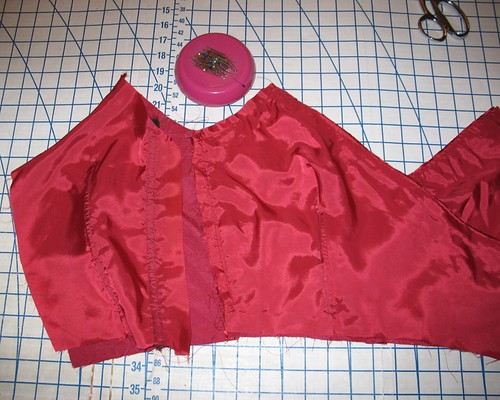
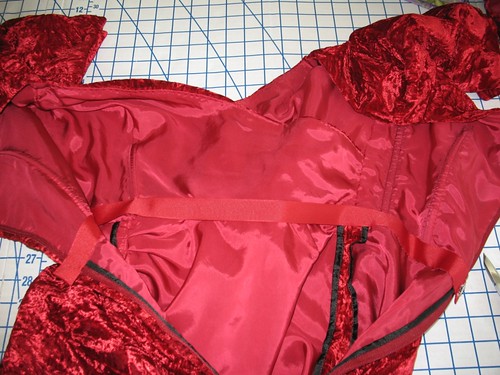
Some people may not like the amount of hand stitching involved with the lapped lining pieces, but it suits me just fine. After the skirt was attached, that front bodice lining was sewn into place, at which point the back lining could cover that side seam raw edge. The puzzle pieces just needed to get placed in the proper order for everything to fit together.

And with my hacks, the inside looks just as pretty as can
be.


What I really do not like about the instructions is that the back opening zipper does not utilize the lining to cover the zipper. Instead, it has the raw edges sewn together along the entire back opening before the zipper is inserted. This leaves a funky bit of folded fabric that cannot be hidden very well at the neck edge. I have come across similar instructions on Vogue patterns before, and know to avoid them, even if I have to rethink my methods of construction. That is not to say the method is incorrect - I just personally do my best to avoid it!

I used a lapped zipper application and hand picked the
seam. I could have easily used an
invisible zipper (and actually had the proper color on hand) but I really am beginning to prefer the old-fashioned look - big surprise, I know!

The final touch was to add a grosgrain ribbon waist
stay.
A walking foot sure would have been helpful - there was a fair amount of swearing at my fabric. But I did have an easier time with this velvet than I did with this project!
Wow - thats coming along really well! I have this pattern too but haven't had the need to make it as yet... although I do need to make something for new years eve...hmmmmm
ReplyDeleteI can't get over your mad sewing skill! French seams!? My goodness!!
ReplyDeletexoxo
-Janey
This dress looks absolutely fabulous on you!! As you drafted the sleeves yourself, could you either suggest which books or websites show you how to do this, or even show us a tutorial?? Please? Thanks.
ReplyDeleteI cheated with the sleeves, and used an old pattern I had on hand, Simplicity 9025. Every time I try to get rid of old patterns, I am paranoid that I will need them in the future – and instances like this do not help my pattern hoarding! My muslin of the dress convinced me that the borrowed sleeves would work perfectly with the dress. **Always make sure to mock up a muslin when working with two different patterns to ensure compatibility!!**
DeleteI am no master drafter, and I know that Gertie is going to be doing a sleeve tutorial on this very dress, so I am going to leave that to the professionals!
If you want a peek at what my sleeve pieces looked like, they can be found here: http://www.flickr.com/photos/45801735@N03/8262706247/in/photostream/
The back and front sleeve pieces are cut on the bias, and the lower edges were basted together and finished with a facing.
Hope that gives you a place to start!