Friday, November 30, 2012

Tips and Tricks: How to Protect an Extra Special Dress


Katrina recently asked how I store my gowns, and I thought some of you might also be interested.

First off, there has to be a way to hang the gown that is not going to mar the dress.  For instance, using skirt hanger clips to hang a strapless dress may leave permanent marks.  Some beaded gowns need to be laid flat and stored that way because the delicate fabric cannot take the weight of the beads. 


Threads has an excellent tutorial on how to hang special garments.


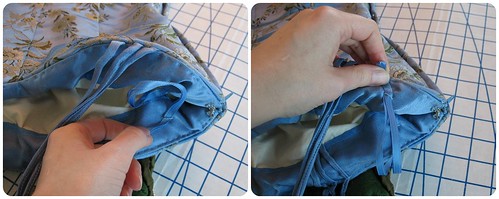
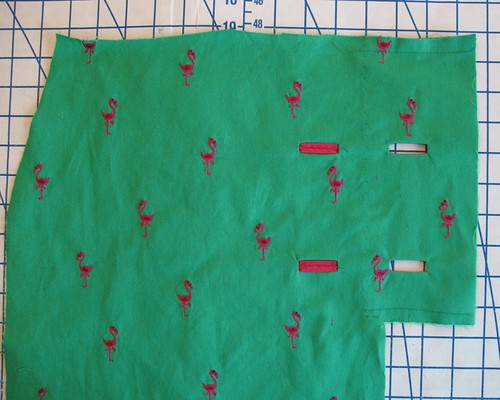
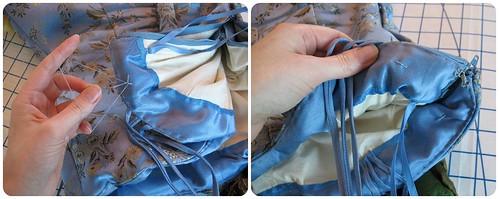
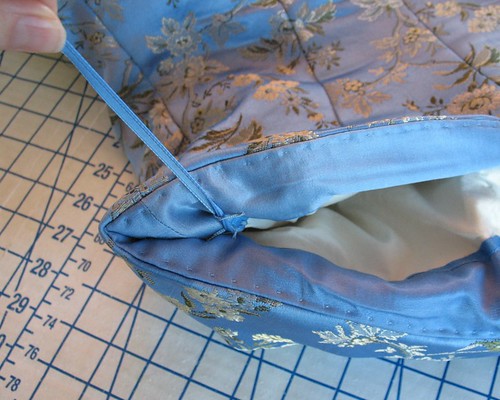
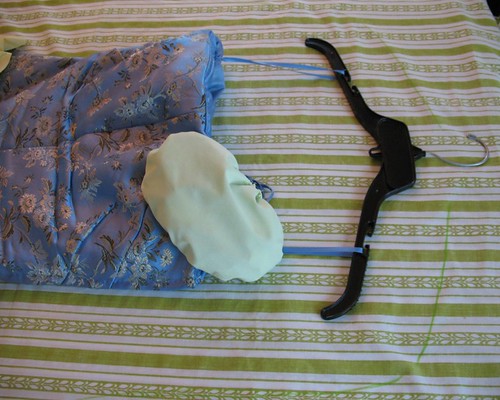
For this gown, I applied ribbon hangers that are attached to the corselette.  The cotton ticking is sturdy and will not stretch or distort.


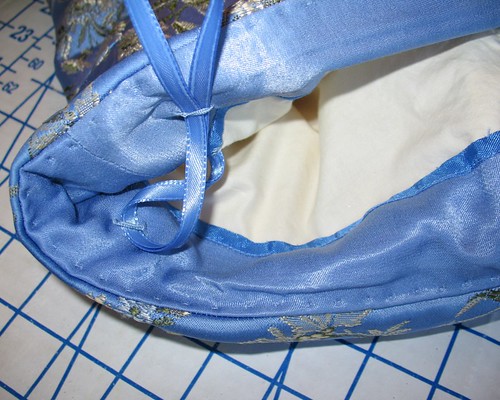
I made four thread tacks.  The ribbon hangers are threaded through one front and back tack so that the bodice does not fall forward.


I am incredibly lucky to have two closets to store my rather large collection of clothing.  Unfortunately, they both have two to three feet of space that is basically inaccessible because the doors/opening stops short of the actual space (it probably has something to do with bearing walls, etc).  Silly structural issues.  Someday I will have a walk in closet . . . pretty, pretty please!

This difficult to access space is the perfect place for storing clothing that is rarely worn, like a formal gown.  But satins and brocades are easily marred.  A simple lump of drywall on the interior wall of a closet can catch a thread and easily ruin a dress while being taken in or out.

My solution is easy – cover them up!  But not with those clear plastic garment bags that are available for purchase.

Plastic is a TERRIBLE way to store clothing.  Just because dry cleaners use plastic bags, does not mean they are suitable for long term storage.  If any moisture exists, mildew is inevitable.  And the static may actually attract dirt and dust. 

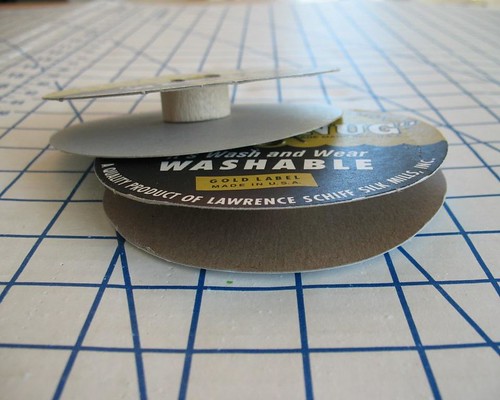
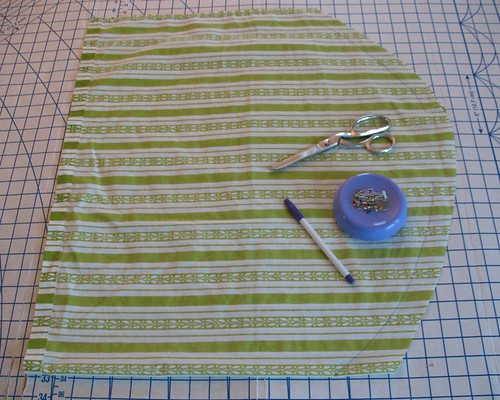
An old sheet is a great alternative, and you probably have an extra lying around, or can find one at a thrift store for a few dollars.  A quick run through the wash, and you have a large amount of fabric to work with.  [A pillowcase may work nicely for smaller items - just cut a small hole to allow for a hanger to slip through.]


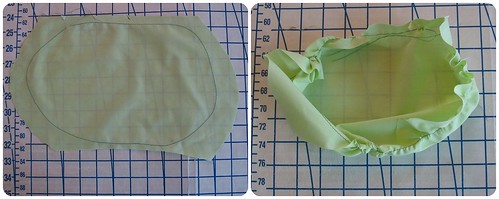
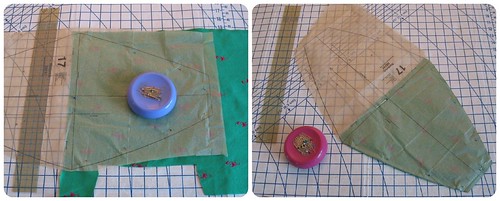
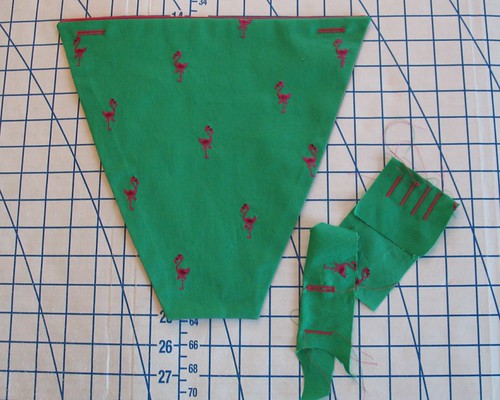
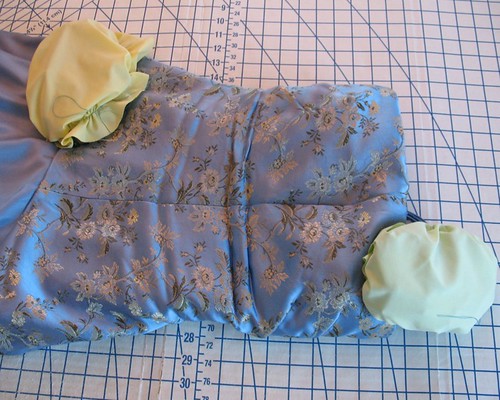
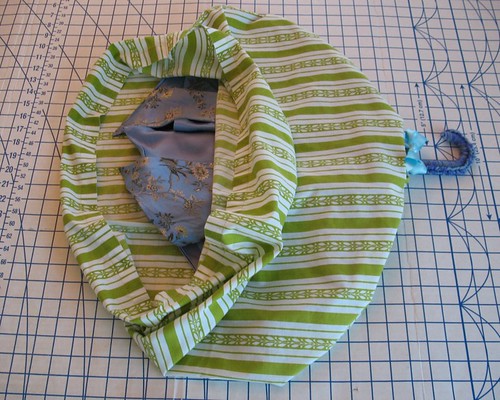
But before starting on the garment bag for this dress, I made mini-covers for the two beaded corsages with leftover sheet from my self-made garment bag that covers last year's gala gown.  Hopefully this will keep the flowers in place so no wires get bent out of shape.  


To make the covers, I placed the cotton over the corsage and traced around the outside edges with a fabric pen.  I then ran a line of basting just outside the drawn line.  Once the threads are pulled up, each corsage has a mini mop cap.


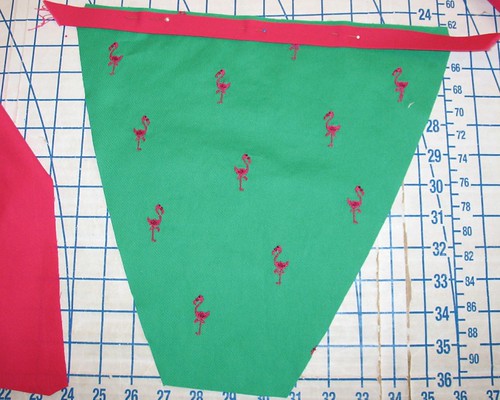
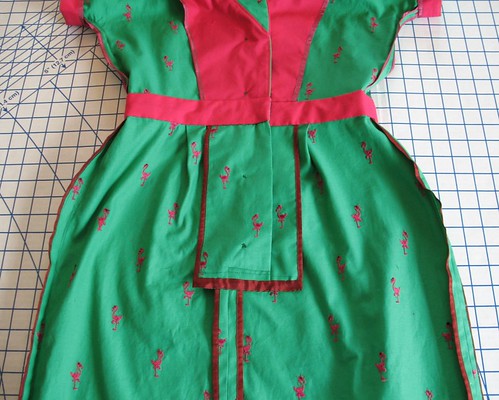
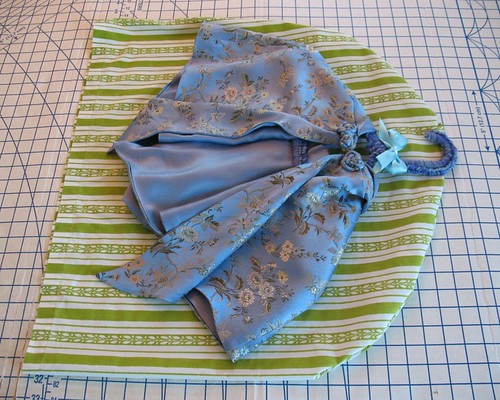
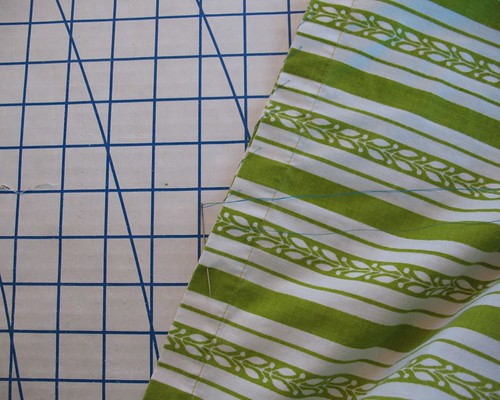
There is no need to be scientific about measurements.  With your garment on a hanger, lay it on top of the folded sheet with right sides together.  


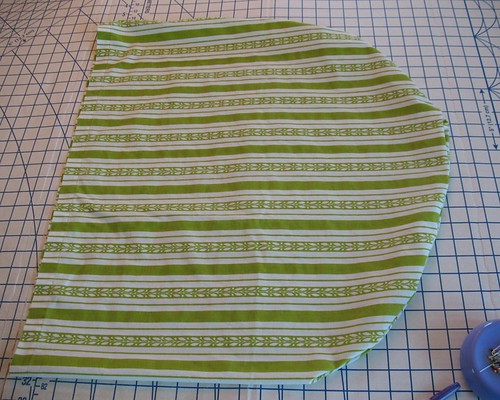
With a line of pins, or a fabric pen, mark the outline of the dress, taking into account the extra length required by the hanger.


Make sure not to squish any full skirts.  Give them plenty of room to drape naturally on the hanger.


Leave an opening so that the hanger fits through.


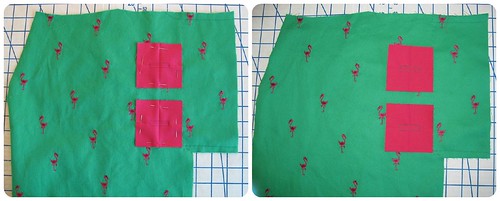
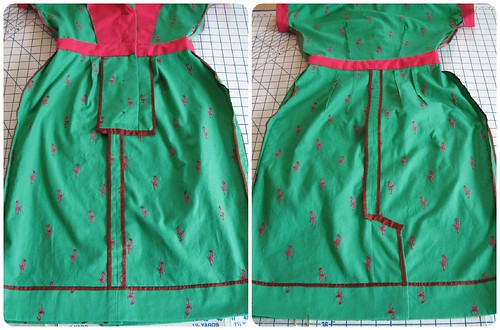
Put the dress aside and stitch along the outline you have created.


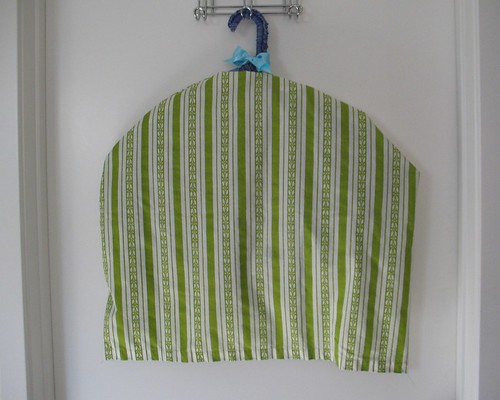
Turn the cover right side out.


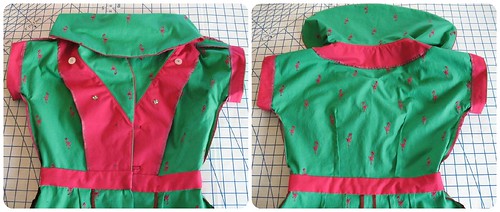
Pull the new garment bag over your dress.


I whipstitch the bottom edge.  This could be sewn with a machine, but hand stitches will be much easier to take out when the time comes to uncover the garment.


This may not be the most beautiful way to store your garments, but it will do a great job protecting them.


Any leftover sheet can be used for your next project muslin!  In this case, I used the leftovers to make my capelet a matching garment bag(let).


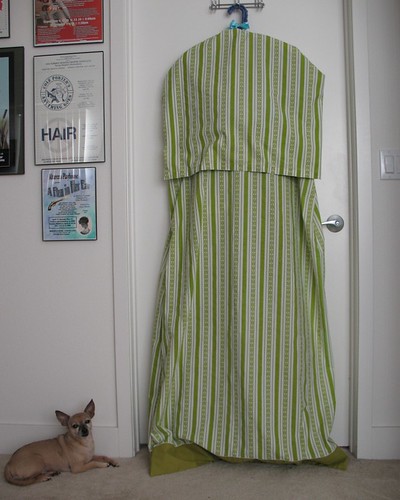
Is this necessary?  Probably not.  But after spending goodness knows how many hours creating the gown, I might as well spend an extra hour protecting her.  (The chihuahua sentinel is optional.)

Wednesday, November 28, 2012

Pink Flamingo


It is finally finished!


I had my doubts, and my frustrations, but it turns out I am very pleased with the finished dress.  Which probably has more to do with the fabric than anything else!


Flamingos are fabulous!  And I just love the green and pink color combo.


When I started, I absolutely believed that this pattern was going to be a one hit wonder.  I was curious enough about the style to give it a try, but also convinced that I would not want to make another.  After wearing it around for the day, I think that it would make a lovely wool frock (and much more suitable for Fall/Winter weather!).  So perhaps I will have to make another at some point.


The hat is something I found at a local store.  It does not have any label inside, and I cannot decide the proper way to wear it.  Some days I wear the buckle/bow to the front, and in this case, I decided that the embellishments should face the back.  Any thoughts on the “correct” way to wear the hat?


And it turns out that the dress works with or without the dickey.  A day to evening look, if you will.  And more proof  that the fabric really makes the dress!


Dress:  Butterick 5747
Hat:  Vintage
Earrings:  Vintage
Shoes:  INC

Sunday, November 25, 2012

Standing on One Leg


Thank you for all of your suggestions for coping with my frustrating machine buttonhole experience.  It is probably going to be some time before I pull out that particular foot again, but we shall see . . .  And it is further proof that they just don’t make things like they used to if all those owners of vintage Singer machines are to believed (and I do believe!!).


I have had this fabric for quite some time.  So long, in fact, that it was tucked away in a plastic storage bin that has been untouched for years.  But it was so memorable that I was continually making plans for it, if only in my mind.  My original idea was a pleated bodice with halter strap and full skirt.  I wanted to add some fuchsia contrast – perhaps a ruffled petticoat?

Over the years, the idea morphed as I came across suitable patterns.


And then came Butterick 5747.  I immediately thought of my pink flamingos.  


But how was the contrast color going to work?  (Because I really felt that the fabric needed a bit more pink to bring out those flamingos.)  

And, to be perfectly honest, I am not a fan of the yellow example of the pattern produced by Butterick, so I was concerned that the pattern might not be as fantastic as the illustration. 


Piping was the first idea that I came up with.


I did not bother adding cording or yarn or any fill to this particular piping because the contrast color was striking enough on its own (and is a bit easier to work with!).


Then came the question of where to place the piping.


Instead of waiting until the dress was constructed, I applied bound buttonholes at the beginning of the process. 


I happened to have a couple of packages of 1 1/8” covered button kits, so my buttons are a bit over-sized.  But the flamingos barely fit as it is!


The pattern places a button at the waistband which is rather ridiculous considering the belt that is included.  I decided that the fourth button should be moved up onto the bodice and a hook & eye would take care of closing the waist (and it does not interfere with the belt).


The insides look a bit crazy.  I ran out of rose colored seam binding, and ended up finishing the spool of wine as well.  


Two more spools of Hug Snug have bit the dust; which takes the total to well over 300 yards of the stuff used in the last couple of years – I am an admitted addict, and rehab is inevitable at this point.


Instead of using the embroidered fabric for a facing and dealing with ironing issues with the extra bumps, I used the pink cotton that was used for the piping.  So that is rose, fuchsia, and wine mixing it up on the inside of this crazy dress.


But flamingo fabric is quirky to begin with, so mismatched colors add to the fun factor (at least, I think they do!).

Saturday, November 24, 2012

Machine Buttonholes are Evil


I am extremely grouchy at the moment.  Baby Bernina has let me down.  When I picked her up, the dealer told me how much I was going to love the buttonhole feature.  Well, ha-ha joke was on her – I cannot remember the last time I used a machine to make a buttonhole.


However, the project I am currently working on has two interior buttonholes that will not show, and I thought this would be the perfect opportunity to use the fabulous buttonhole option on my lovely machine.

Trusty Bound Buttonholes

Turns out, the joke is on me, because my machine will NOT make an automatic buttonhole.  I have watched online tutorials and read the instructions, but no matter what I do, that silly little “A” does not appear on the screen after I stop and press the Quick Reverse Button -  the machine cannot seem get past the reverse straight stitch to make the second leg of the buttonhole. 

I turned it off and back on, hoping for the best.  It still will not work properly.

I am so frustrated that I just used the Quick Reverse Button each time I came to the end to complete the buttonholes.  It works, but so much for ease of use and consistency with the automatic buttonhole attachment.  I would scrap the whole foot, but no other option was included.


This is why I do not trust machine made buttonholes.

Has anyone else come across this issue?  I decided to step away from the machine before I do something that I will regret, like slap her silly.

I really do not enjoy when machines do not do what they are supposed to do.  Aargh!!


Have you ever had one of those weeks?  I would really like to finish the dress, but I am afraid to touch anything else at this point.

Tuesday, November 20, 2012

Skirts, Suits, and Separates


Here are a few more pages from Fashion: Fall – Winter 1950.


Perhaps one day I will come across one of the Sew Rite mail order patterns from this pamphlet!


I wonder what would happen if I sent a request to the listed address for a few (or all) of the patterns?  Could there be a magical warehouse that still stocks these fabulous old treasures?


Monday, November 19, 2012

It’s Smart To Sew This Fall


Life may suddenly have become very simple for New York and Paris designers.  They seem to have come to a tacit agreement on “the” silhouette of the season:  slim-as-a-knife.  But it’s small comfort for the more than three-fourths of us who bulge as no knife ever did, except maybe a Turkish scimitar.

Ready-to-wear clothes will be slim through the bust and beam – more so than we – or else too large through the waist.  Prices, they say, will be no lower.  For real fit, to give the optical illusion that we’re pounds lighter than we are, at a sensible price, the smarter gals will be plugging away at their little sewing machines.

Here are a few ways they’ll camouflage themselves as willowy:  they’ll adjust their patterns so that shoulders, waistline, side-seams are just precisely where they should be.  There will be no stretching of fabric tight over a bulge, sausage-like; rather the fit will be just shy of loose, so that you’ll get the benefit of the doubt on just how close their clothes do fit them.

Fall colors will be on your side, too, for your camouflage job.  The black-white combination of summer is carrying right over into winter because women have demanded a repeat on the flattery of the black for their figures and the white for their faces.


 . . .

Accents, in color or in fashion variation like checks and plaid, can draw eyes away from defects (hips, chubby legs, extra full thighs) to an asset (attractive hands, high bustline, firm chin) every time.  But such accents will generally be restricted to one splash.  They may line the wrap of a slim skirt to direct attention to a slim ankle, or they may form a bright one-sided pointed collar that juts off to the right of your chin.

Another fortunate fashion for the gals with girth this season is the stress on vertical lines.  Though the skirts will be up to 14 inches and higher, they will be so narrow at the hemline that many a slit will be necessary.  Some of these will be above the knee.  For those who oppose this, there are the wrap-skirt dresses, with a wide flap to permit ease of walking.


 . . .

Almost any fabric you choose for your suit, coat or dress will be right.  The variety shown in the Big City’s finest salons is endless.  Heading the list in a tie are velvet (and velveteen) and tweed.


It would seem that the more things change, the more they stay the same.  Will women ever stop trying to hide the “flaws”?!  

But I will take any of the above suits in velvet or tweed . . .

Friday, November 16, 2012

Crinoline-tastic


Thank you for all of your Pinterest suggestions – I am busy lusting after amazing vintage fashions and photos.  It really is hard to step away from the computer screen . . .    


There are easily twenty new ideas for projects floating around in my head, but I have not been in the sewing room for three days.  Time to get back to work - no more distractions! 


As I have previously mentioned, this skirt was my attempt to make a much more wearable piece of clothing from this pattern.


Unfortunately, this is only the second time I have worn the skirt – something I need to remedy.  And I believe part of the problem is that the print is extremely memorable.


Clearly, I have no problem wearing clothing that sticks out like a sore thumb, so that cannot be the issue.  


But for some reason, a skirt like this gets stuck in the closet.  The plain skirts in my wardrobe get a ton of wear, but the wild prints?  Not so much.  There really is no way to disguise this particular skirt - but that is okay!  I just need to find more tops that work back to the skirt.  Or I could always make more of my favorite article of clothing - the dress!


Sweater:  Banana Republic
Skirt:  Made by me, Spadea 1149 - Ceil Chapman Design
Shoes:  INC
Brooch:  Grandmother's