
Here are a few tips to help you tackle invisible zippers!
There seems to be an infinite variety of zippers out there –
the exposed zipper is getting a lot of attention these days on the fashion
front, but I generally prefer that the closure on a garment does not scream so
loud. An invisible zipper is an
inconspicuous option – it hides in the seam of the fabric so that all that
remains visible is the elegant pull tab.
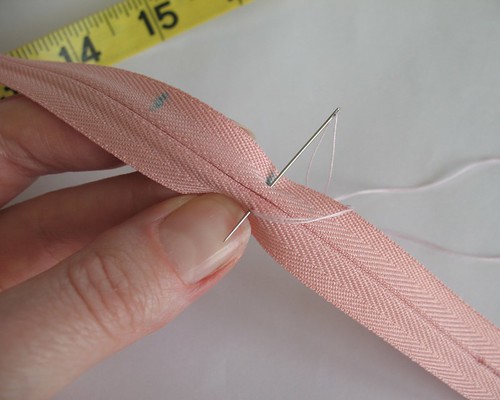
If you need to shorten your zipper, now is the time. [Something to keep in mind is that because
the invisible zipper turns inward, it is difficult to stitch in that fold the
closer you get to the zipping mechanism.
If I have an extra inch to work with and I am not fighting against the metal pull, I like to use it.]

To make it easier to access the zipper stitching line and keep the
folded invisible coils out of the way, you can iron the zipper open using a
low/synthetic setting on your iron with no steam. I usually take a quick pass at my invisible
zippers with an iron, but do not attempt to flatten them since it can affect
the integrity of the zipper. Also, too
much heat can melt the teeth together, ruining the zipper (please don't ask me how I know that!).
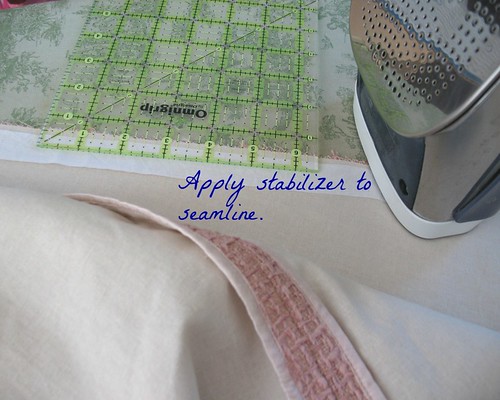
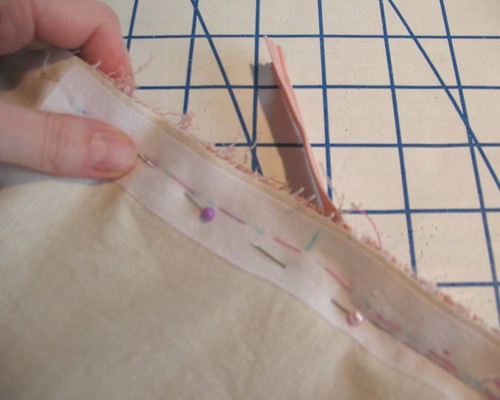
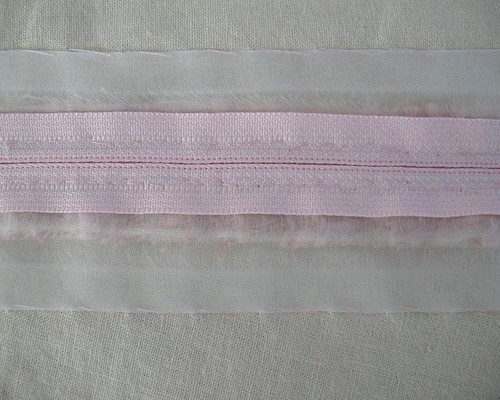
The trick I find most helpful for installing (any) zipper is
to reinforce the opening edges of the garment. Invisible zippers, especially, have a tendency to pooch out at odd angles in lighter weight fabrics that have not been stabilized.
A strip of silk organza is an excellent option, as is a strip of fusible
interfacing (make sure to choose an appropriate weight for your garment
fabric). The strip needs to be wide
enough to extend beyond either side of the seam fold so that the stitching line
will catch your chosen stabilizer. For
an invisible zipper, one inch is plenty.
Also make sure that the interfacing is longer than the zipper
opening. The point where the fabric seam
meets the zipper opening is likely to get a lot of stress and the interfacing
will help to reinforce that spot.
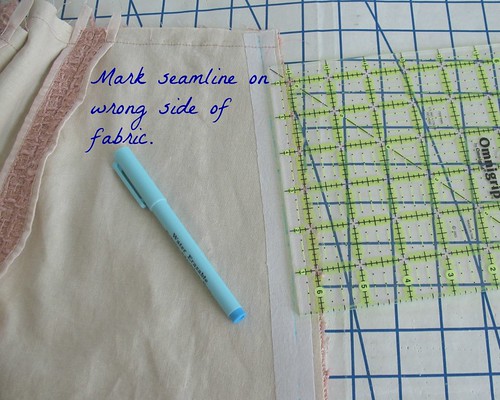
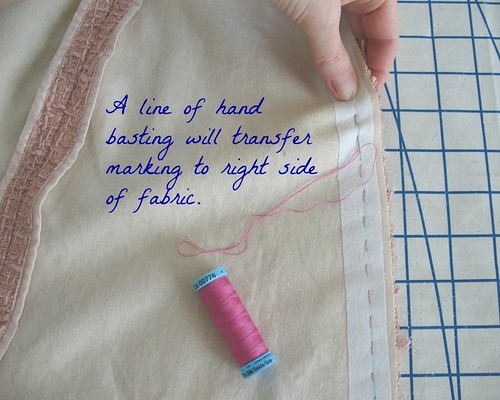
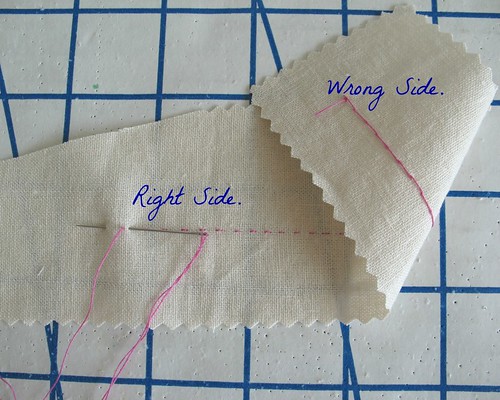
Mark just inside the seamline (depending on your fabric, a
fabric pen, chalk, or even a pencil will do the trick). For an invisible zipper, this line will need
to be visible on the right side of the fabric.

If there are horizontal seams that cross your zipper opening, trim your fabric layers, and baste those horizontal seams in place.

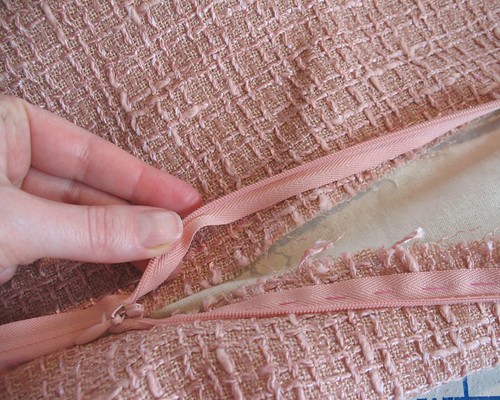
I find the easiest way to figure out which way to insert the
zipper itself is, with the right side facing and the zipper next to the opening
seam, right side up. When I begin to fold
the seam allowance away from me (to the wrong side where it belongs) the zipper
should disappear, leaving the pull tab visible.
In other words, the tape edge should be close to the raw edge of the
fabric, and the zipper coil should be just hanging over the marked seamline.

The second most important part of zipper installation is
basting, which saves a massive amount of time in the long run – so don’t skip
this step! I like to use a contrasting
silk thread so it is easy to remove later on.

Once one side of the zipper is basted in place, it is time
to stitch it down. Many machines come
with an invisible zipper foot. If you do
not have one, a regular zipper foot can do the trick, depending on how mobile
your needle is. The stitching line needs
to get as close as possible to the plastic teeth without grabbing them. I do not recommend the plastic invisible
zipper kits that only cost a few dollars – the plastic slide can move around
while you sew which is extremely frustrating.

Another option is hand stitching. I know the first time I heard of someone hand
stitching a zipper I thought they were crazy.
But a tiny backstitch/pick-stitch/prick-stitch is incredible sturdy and
works beautifully. It also gives you the
most control.
One thing that will help to ensure a beautiful application
is to stitch both sides of the zipper in the same direction. If you start from the top and work your way
down on the right hand side, work from the top down on the left side as well. This will help to keep your fabric from
shifting in opposite directions. If you
have trouble matching seamlines, this may solve your problem!

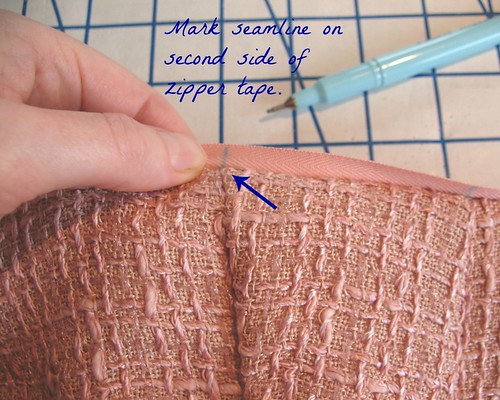
Speaking of seamlines . . . if you have any horizontal
seamlines to match, you will want to mark those after one side of the zipper is
stitched into place. Close the zipper,
and mark the seamline point on the zipper tape with a fabric pen or chalk (I
prefer a fine point pen – the thinner the mark, the more accurate the placement).
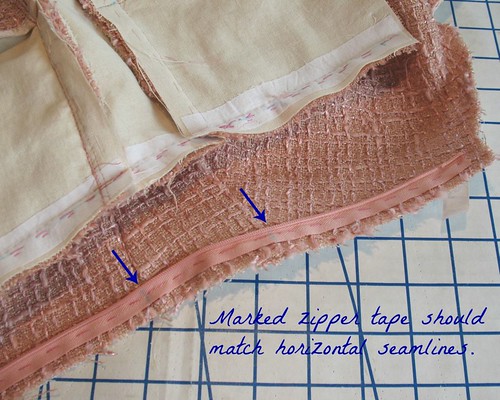
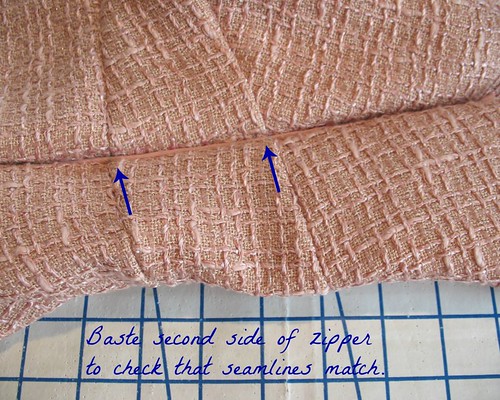
Matching any seamlines necessary, baste the second tape into
place.

Now make sure to zip everything
closed to check that those seamlines are matching up! If not, remove the basting and try again.
Once you are happy with the zipper placement,
stitch it into place, remembering to stitch this seam in the same direction as
the last.
Next you will need a standard zipper foot to close up the
seam below/above the zipper. Remove the
basting stitches, and push the end of the zipper out of the way.

Pin the seam closed below your newly installed
invisible zipper. The end of this seam
should overlap the zipper stitching slightly.
As a final note, I will say that I prefer to install
invisible zippers in an open seam. I
find it much easier than fighting with the twisting coil against a closed
seam. If possible, I will insert a
zipper before adding other pattern pieces to the mix. This is not always possible, but the less
fabric you have to flip around, the easier it will be!
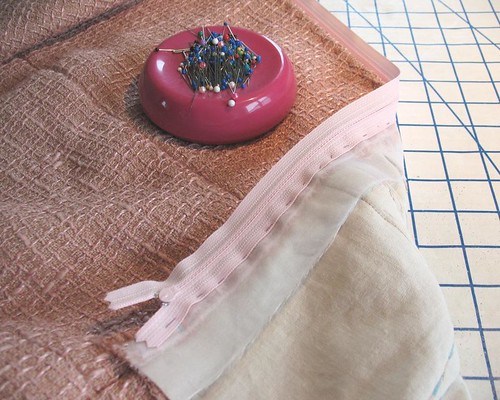
Things do not always go according to plan, as evidenced by
this project. As much as I love the look
of an invisible zipper, they are far from sturdy. I had a feeling that this fabric was too
bulky for an invisible zipper, but my stubborn streak thought I could make it
work – the dress had different ideas.
Instead of fighting to get it open and closed every time I wear the
dress, I decided a lapped zipper would be a much safer bet.

The problem was that the loose weave of the fabric was
coming apart and a lapped zipper needs plenty of seam allowance to work
properly. So out came the silk
organza. I ripped a two inch strip and
applied it to the raw edges. When turn
under, it covered the raw edges
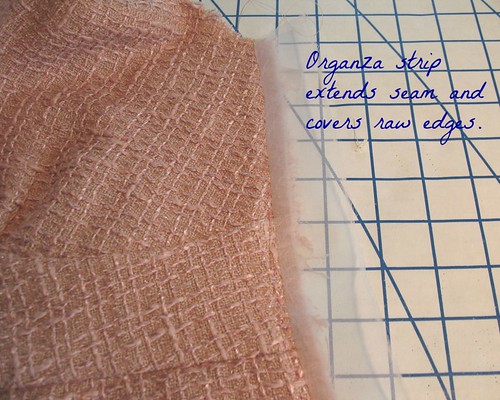
Crisis averted!

Invisible zippers are brilliant tools, when used with a
suitable project; when installed properly,
they are virtually undetectable. But they
are best used with light to mid weight fabrics.
Close fitting garments may require an extra pair of hands to zip them up
or the help of a hooked waist-stay. I
have a number of vintage invisible zippers with metal teeth which are a bit
stronger, but they still have to twist inward in order to close which is not
nearly as stable as a standard zipper.
And should your invisible zipper application go completely
awry, step away from the project for a chunk of time and then have at it with a
seam ripper. The invisible zipper is a
fickle mistress – worth the effort in certain circumstances, but she definitely
has a mind of her own!
Do you have any invisible zipper stories of your own?
[The fabric for this project was received in exchange for my
contributions as a Britex Guest Blogger.]
Thank you for this incredibly helpful tutorial with all of those pictures! It looks like this method gives you a lot of control, and I had no idea you could do a hand-picked version of an invisible zipper.
ReplyDeleteAnother wonderful tutorial!
ReplyDeleteZippers of any kind are my nemesis and invisible ones always seem to catch warp and break for me.
I will follow this next time, hopefully with better results!!
I totally felt the same way about hand-sewing zippers. Then I tried it when I only had an invisible zipper to go in a tricky side seam and it ended up being the best-looking zipper I've ever put in. I may do them all by hand from now on.
ReplyDeleteYou really do the most wonderful tutorials...I always put them on my 'to try' list! Thanks!
ReplyDeleteI haven't made that many zipped garments so far...but everytime I try to insert an invisible zipper it ends up as an epic fail! Most of the time I avoid them and prefer by far hand picked zippers, which, as you say, are the solution that offers most control!
ReplyDeleteGreat tutorial! I usually stay away from invisible zippers, but after using one recently for the first time in a while and having it work out nicely, I'm a little more inclined to start using them again. I didn't know you could sew one in by hand, though. I'll try this for my next one!
ReplyDeleteI find it hard to put an invisible zipper in a bias seam. not that it stops me from doing so but sometimes I have to do it more then once to get it in correctly.
ReplyDeletemy scariest event with an invisible zipper though occurred last year, when I had taken up the bodice of a prom dress. I had to reset the zipper and with all the beading and sequins it was so thick it refused to zip up on the girl. it went up and down just fine off of her. and of course I didn’t know there was a problem till the day of the prom. I fixed it though and she was only a few minutes late for her pictures. disaster averted but talk about being a bit stressed.
Aaahh . . . zipper nightmares! She is lucky she did not have to be sewn into the dress - it sounds like you work very well under pressure!
DeleteGreat tutorial and I've read a few over the last few weeks after making my first dress. I think I will go for hand picked in future as surely more satisfying and probably quicker for me. I am so devastated though as I zipped it up the other day the zipper pull itself came right off the top- I had to trim the top down as I had melted the teeth. How on earth do I get that zipper pull back on. The idea of trying again is awful. For now I'm taking your advice and stepping away. Any help out there?
ReplyDeleteI feel your frustration. Depending on the kind of zipper, you may not be able to get the pull back on track (and it certainly will not be possible once frustration sets in!).
ReplyDeleteI think the only way to ensure that the same thing will not happen again would be to start with a fresh zipper, complete with upper stoppers. That is probably not what you want to hear, but having had to remove two zippers in the last couple of months, it really is not as bad/time consuming as I expected.
Good luck!!