
I will jump right into a project with ten or twelve bound buttonholes, but ask me to use a machine to make a buttonhole and you are going to have to
drag me kicking and screaming all the way. In an attempt to get over this ridiculous paranoia, I decided to stretch my sewing skills and give my machine (and myself) a chance.
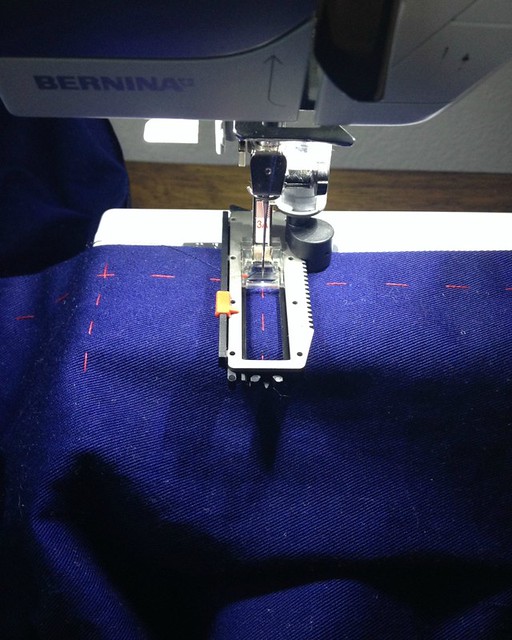
I tried using my Bernina machine to make
buttonholes for this project a few years ago, and it was a failure. Thank goodness they did not show . . . I managed to tear through one while ripping it open with the sharp tool that came with the machine and looks like a seam ripper, and the other never reversed itself while being stitched so I tried to use a manual setting and fix the mess with not much success. The buttonhole foot has been banished from the sewing room ever since.
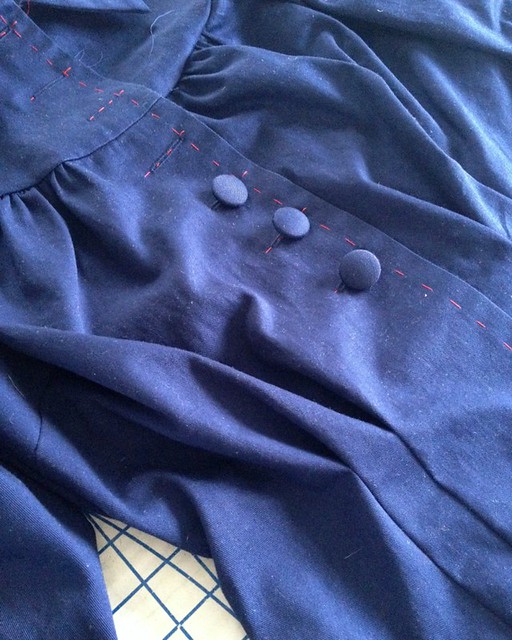
After a couple of practice runs this past weekend, I had a decent
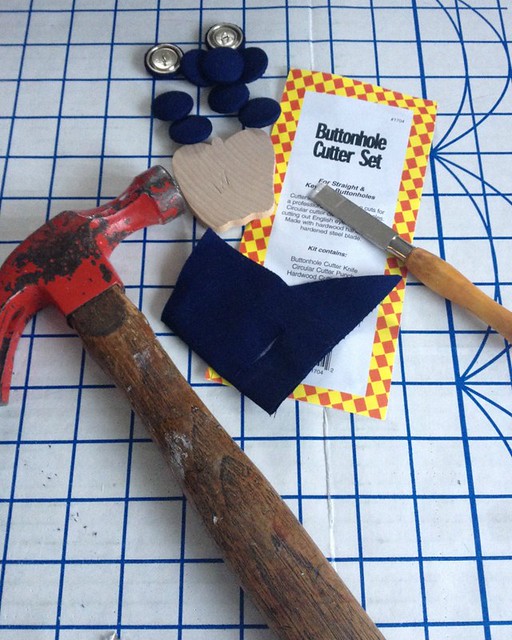
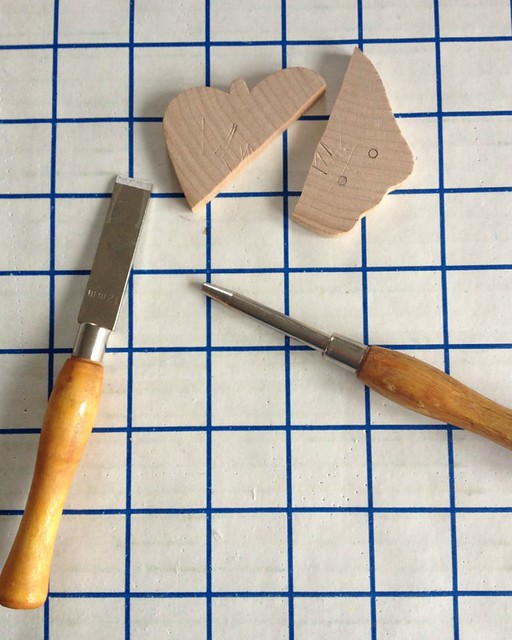
buttonhole that could be duplicated. Hooray! Time to try my new buttonhole cutter set! The brand new cutter is not
sharp, and attempting to cut through a mid-weight cotton did not work
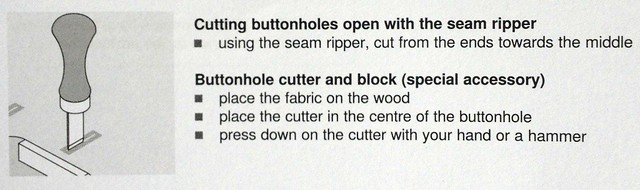
at all. The Bernina instruction guide
suggests using a hammer, so I tried that. The hammer created a slight tear so I used
some sharp scissors to complete the opening.
On the third try, this is what happened.

So much for my brand new buttonhole cutter kit. I posted some of these images on Instagram and had some very helpful suggestions which leads me to believe I got a dud.
Just for kicks, I tried out the eyelet punch that comes with the kit. And it works great. So I am going to blame this one on bad tools, not user error (which is generally my first assumption).
I know I have heard of using Fray Check to keep all of the
raw bits from shredding once the buttonhole is cut open. Does anyone do
that? Does it make the buttonhole too
stiff?
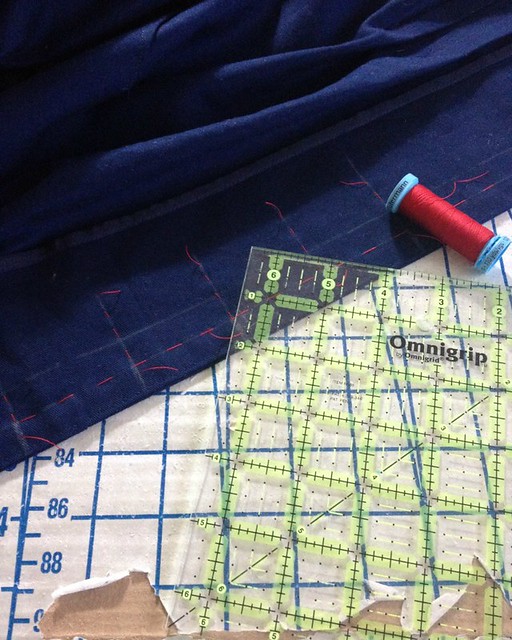
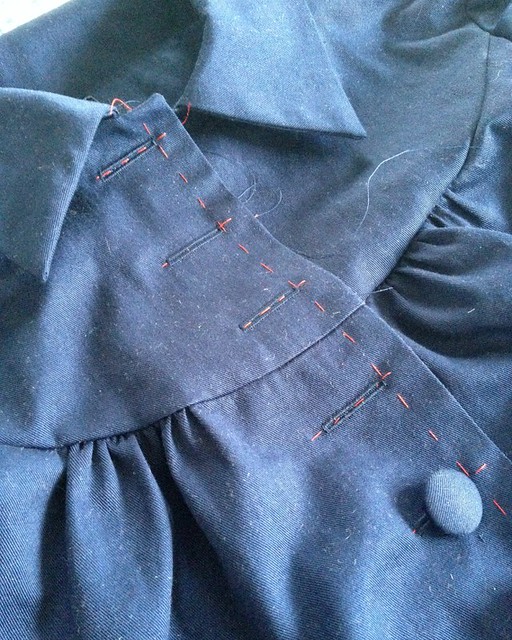
While doing some internet research, I came across a
suggestion to pin across the bar tack before cutting or ripping the buttonhole
open which seems like an excellent suggestion that I am going to try.
I would love to hear any other tips or tricks from any machine
buttonhole experts out there!
My grandma always told me to sew the buttonhole, then fold it in half (so the two ends touch) and use the very back, sharpest part of your scissors to start the cut in the middle. She would then use a sharp stitch ripper to cut the rest. It has worked well for me.
ReplyDeleteOh, and I have been contacted by Butterick to use one of my patterns for the fall vintage releases! I'm very excited, however it's not a "typical" vintage look so how the sewing blogosphere reacts will be interesting.
Yay! Non boring vintage release!
DeleteThe foldover works to clean out the corners as well (fold ends together, spread out sides almost as if you're turning it inside out).
What I can't figure here is how your wooden board snapped across the wood grain. That's not really possible (okay, I see that it did, but it does not make sense) - wood doesn't work that way.
Unless you were using Mjolnir. You Norse goddess you!
I think I am probably going to go with a sharp pair of scissors - thank you for the suggestion.
DeleteAnd I can't wait to see your pattern!! So it is not a full skirted 50s frock . . . maybe something 30s or 20s? Or is it one of those multi-sleeve patterns? Looking forward to the big reveal!!
This comment has been removed by the author.
DeleteAll I will say is that it's 40's and asymmetrical. :)
Delete1940s and asymmetrical sounds fantastic!
DeleteI bought this little set and have never had any problems with it. http://sewtrue.com/Store/Button-Hole-Cutter-Set-P894.html. I also run a bead of fray check inside the buttonhole, let it dry and then cut it open. Even so, there always seem to be loose threads that need to be trimmed.
ReplyDeleteFray Check before cutting - thanks for the tip (I was thinking of doing that after the cut!).
DeleteDepending on the garment and if it's possible at all, I start with the buttonholes (a blouse for example). That gives me the security of knowing that if I mess up, I have a better chance of fixing it. :)
ReplyDeleteI use embroidery scissors to cut the buttonholes, and ALWAYS start at one end and cut to the middle, then start from the other end and cut to the middle. Never had any accidents doing that.
I always use fray check on the back of the buttonhole and it's not stiff at all. I also use a very very sharp embroidery scissors to cut the fabric.
ReplyDeleteMy mother taught me to slide a pin across each end of the buttonhole and slice with scissors. Works, but I still don't like sewing them...
ReplyDeleteI use two needles on each end of a buttonhole, then, apply Fray Check. In my experience, Fray Check is gone after a garment is laundered.
ReplyDeleteI use a little pair of Kai scissors the size of nail clippers to cut open buttonholes. It gives more control.
ReplyDeleteI was taught by my home ec teacher (WAY back in the 1970s :-) )to insert a pin through the bar tack at one end of the buttonhole. Then insert the point of the seam ripper at the other end and VERY CAREFULLY rip across to the pin. The pin will stop you from ripping through the bar tack at the other end.
ReplyDeleteButtonhole chisels - I've tried a few and do not like the wooden blocks (they have to be hardwood)- after a while they cause the chisel edge to become bumpy.
ReplyDeleteRazor sharp chisel and a self healing mat work best.
This is the kit I use now
http://www.amazon.co.uk/Generic-Sewing-Buttonhole-Cutter-Set/dp/B00BZBOE5A
Re machine made buttonholes - I always use a piece of tearaway stabiliser underneath. Also, it's well worth getting the hang of making corded buttonholes on your machine. If you don't have the right shade of cord, ply a few lengths of your sewing thread in the correct shade and use that for the cord. It gives a nice loft to the top stitches.
Keep at it and enjoy
Morgan
Back to add a link to a youtube totorial for corded buttonholes on a Bernina.
Deletethe corded buttonhole demo is at the end of the tutorial.
https://www.youtube.com/watch?v=xv8SqOtUfag
I am definitely interested in learning more about corded buttonholes! Maybe on the next project . . .
DeleteI am nowhere in your league in sewing finesse, but I have done many buttonholes successfully. I cut the opening by folding the buttonhole in the middle, perpendicular to the stitching, and then carefully snipping the fabric with sharp scissors starting at the fold. Then unfold and snip each half to the end of the stitching.
ReplyDeleteTotally NOT an expert! :)
ReplyDeleteI sew the buttonholes, dab a bit of fraycheck on front and back and allow it to dry. It feels stiff initially but it softens up just fine. Sometimes I use my seam ripper (with end pinned) but that is a bit of a gamble. Other times I use my knife point Ginghers, cut in the center and cut to each end.
UUugh. I should have warned you not to use a hammer. The same thing happened to my buttonhole apple a few days before yours. I had been happily using mine for a few years (without hammer) up to that point. The awl and chisel are really helpful tools.
ReplyDeleteI always cut my buttonholes with a seam ripper. I've done this so often that I know exactly how much pressure to apply and I do it SLOWLY. I always apply a bit of Fray Check in the "well" of the buttonhole and let it dry. I do this before cutting the buttonhole. As SewCraftyChemist says, it can feel stiff but softens. (Fray Check is liquid nylon.) Fray Check can stain, so make sure you test it on your fabric before applying: you don't want a splotch if it oozes beyond the edge of the buttonhole. As you may know, I'm a big fan of Singer buttonholer attachments but naturally these won't work on a Bernina.
ReplyDeleteI am old school - or reckless. I use a razor blade or scissors and just cut. if you are able to trim delicate seam allowances then why not use the same technique to cut the buttonhole? also I like rounded buttonholes which my old Singer machine makes, they seem to last very well.
ReplyDeleteI was thinking an x-acto knife might work.
DeleteAnd I wish I had a keyhole buttonhole foot - I love those. Maybe someday I will come across an old featherweight with all those fabulous attachments to match my antique sewing desk!
Using a seam ripper starting from the bar tacks and working in has always worked for me.
ReplyDeleteThis is what I do too, always successfully. Start cutting from one end to about center, then cut from the other end until you reach the previous cut. Just be gentle, and be sure your seam ripper is sharp.
DeleteI finally figured out (after several years) that my beloved ancient straight stitch machine actually came with a buttonholer attachment, so I've made ... many ... buttonholes in the last couple of months (making up for lost time, y'know), and have settled on a very easy (and very unclassy) method: I use an exacto knife, with pins on either end of the buttonhole for safety, and position it over the space between my machine and its table- it slices through cleanly every time, and with a minimum of fuss.
ReplyDeleteI put a pin through each end of the buttonhole and use a seam ripper. I have never had a problem doing it this way.
ReplyDeleteI always use my smallest scissors to cut open the buttonhole. Like you, I avoid doing machine buttonholes if I can, but sometimes, bound buttonholes or slot seam buttonholes just won't do. One thing I do to make machine buttonholes look more finished is - I leave the thread long at the end of the buttonhole. I pull the under thread up to the top to join its mate, and I thread them together through a needle. Then I do a small buttonhole stitch (what else?) across the bar tack. This really makes a nice finish, particularly for the end of the hole that the button does not cover. I hope this makes sense.
ReplyDeleteI don't like fray check at all. I always use a seam ripper to open my buttonholes. I start at the end and go to the middle - then from the other end and to the middle again. Sew up many samples and then practice opening them. The old Singer buttonholers work beautifully - it is the only type I use to do nice buttonholes. I use the automatic one on my Kenmore for stuff like PJ bottoms that don't matter. It never looks as nice as the Singer ones, but it is faster.
ReplyDeleteThis is what I do - I take my project to the sewing class and sewing machine store and for $8 an hour I use their fancy automatic button hole program on their expensive machine. So worth it!!!!!
ReplyDeleteI have a buttonhole cutter and I LOVE it. It's Clover brand and so sharp that I can just push it by hand through the fabric (with self-healing mat underneath) with only a small amount of pressure. I always use fray check, even before testing if the button fits through the hole (that takes restraint for me!). Good for you for overcoming your machine buttonhole-making fears!
ReplyDeleteI just use a chopping board and hammer . I also dislike my buttonhole foot where you sit the button in the foot . I find these buttonholes are always too big . I prefer using my old Bernina and doing them manually . I also usually go over the buttonhole twice . Cutting them open and then going over the edges again . You get a really nice finish.
ReplyDeleteI love the idea of going over the cut buttonhole a second time - I suppose that would encase the raw edge with the zig zag . . . I may have to give that a try at some point. Thanks for the suggestion!
DeleteI always do my buttonholes twice. Well, mostly - when I do the ones on the Kenmore automatic buttonholer I just go around once. But when I do the nice ones on the Singer buttonhole attachment I always go around twice. I am sorry I did not think to say that as well.
DeleteGreat advice here; I love when everyone comes out to "say".
ReplyDeleteAs for that dress, my curiosity is piqued. Will this one warrant a base-of-the-bridge-on-the-beach backdrop?
Ferry just off shore with a languid look and a bouquet in a trash receptacle? Exuberant downtown dog walking? Purse and parcel outside a sewing purveyors emporium? Hmmmm???
This one is just a blouse. I'm not sure I am ready to sew machine buttonholes on a dress just yet!
DeleteI always fray check my buttonholes and it makes everything so much cleaner. I stitch the buttonhole by machine, put fray check on it and let that dry, then use a buttonhole cutter and whack the daylights out of it. After the hole is opened, I go back with snips to neaten up any frayed fabric - since it's stiffer from the fray check I find this step easier to do and it looks cleaner. Fear not the buttonholer! lol I don't know how you can do all those bound buttonholes all the time and not go crazy. They are lovely though :)
ReplyDeleteI have used a TINY bit of Fray Check, let it dry and then use a button hole cutter. You know they also make a scissor style button hole cutter?
ReplyDeleteAlso, Heirloom Creations has some excellent videos about using the Bernina Sewing Machine (just about any model) and there is an outstanding one about machine button holes. Check them out.
I start at one end and make a small incision with the seam ripper (facing away from the bar tack and pointing directly into the fabric, perpendicular), then take my smallest sharpest scissors to snip along to the second bar tack. I feel this gives me maximum control than either method on it's own. Wish I had a keyhole button function my machine. So interesting to read what everybody does!
ReplyDeleteI always put a pin across the bar tacks before ripping the buttonhole open with my seam ripper. Nothing is more annoying than to have a failure at the very end of a sewing project.....
ReplyDeleteI used to have the same problem of tearing through the stitches when trying to open machine made buttonholes. I bought a special tool like yours that looks like a little chisel. It was super sharp and definitely cut through, but sometimes the cut it made was too wide, and it would cut through the thread on the sides of the buttonhole. I finally invested in a pair of little sharp scissors, the kind with the gold handles. I tried it on a buttonhole that I was testing before I made them on the finished garment, and it worked so well. I had complete control over how much I cut, and it didn't cut through the thread on the sides! I now use it whenever I need to open a buttonhole. I do start the cut by using my seam ripper to make a tiny whole between the sides. This then gives the scissor blades enough space to fit into the area to be cut. If it's a large buttonhole, I fold the buttonhole back on itself and then make a tiny snip with the scissors to get it started. I still hold my breath, though!
ReplyDelete