
This was one of those projects that was started in 2020. I wanted something that would keep me busy . . . for a long time.
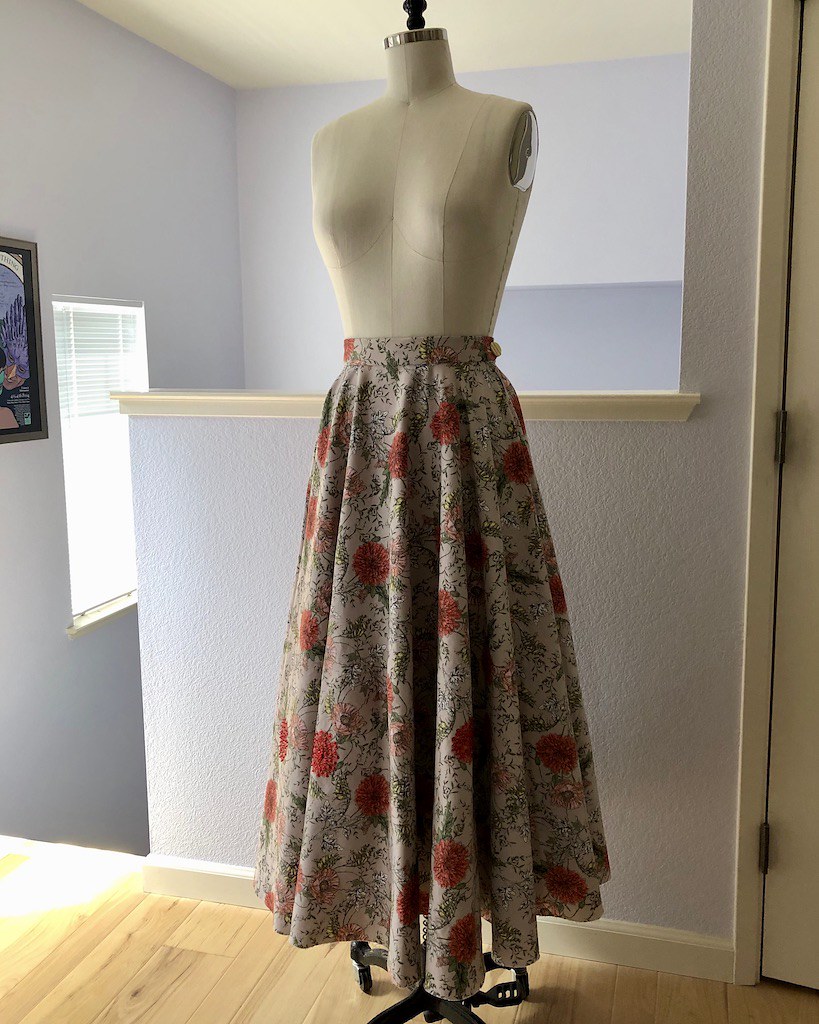
I have wanted to make a sequined circle skirt for YEARS, and this seemed like an excellent time to begin. Of course, choosing a motif to sequin was too much work for my brain. Instead, I decided to choose a print that I liked and embellish from there . . . so much easier!
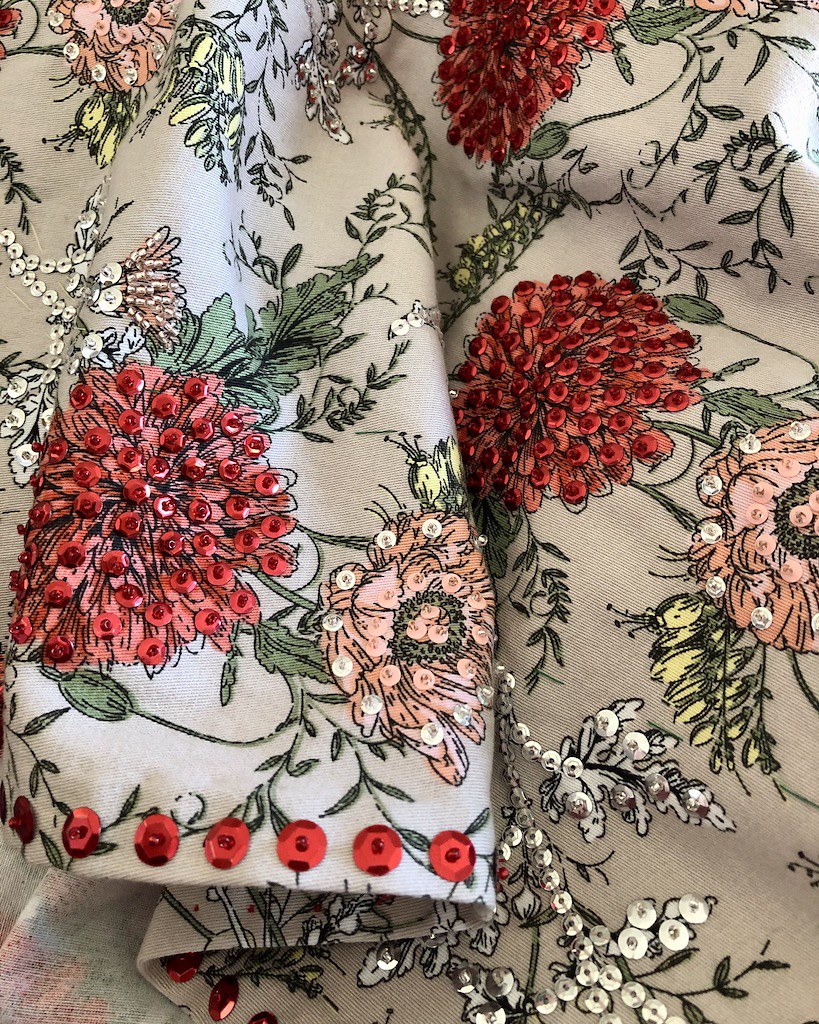
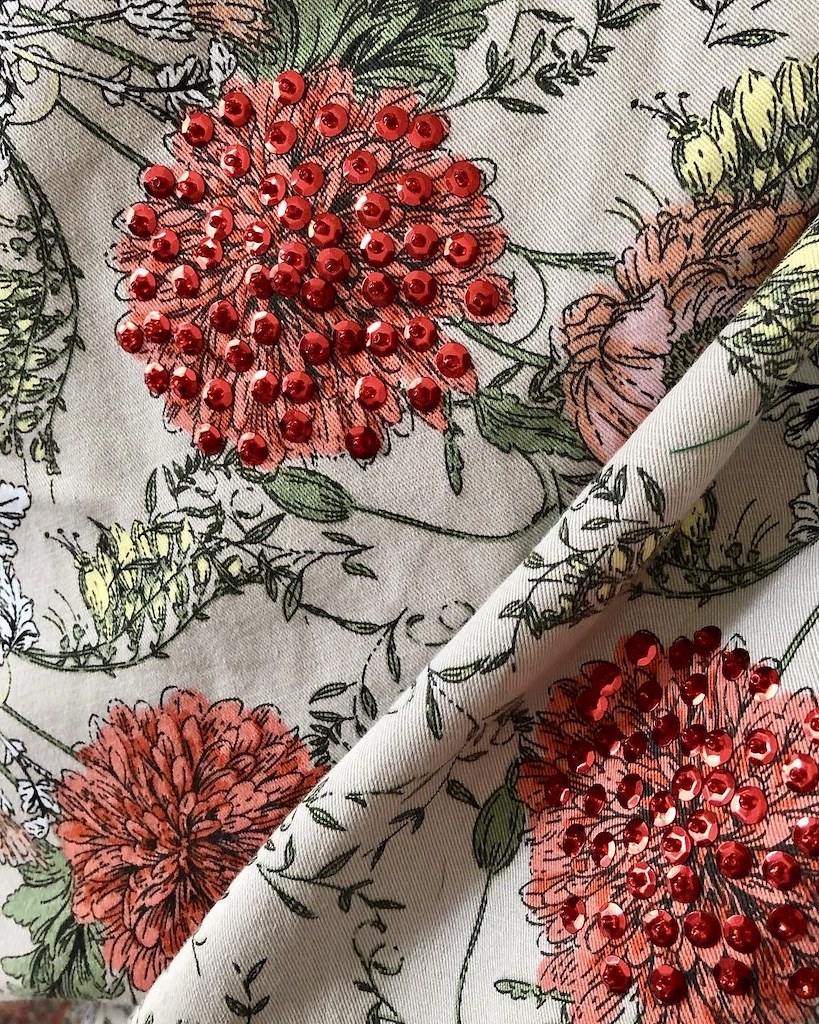
My first thought was to outline each flower plus an added smattering of sequins at the center. Then I added on a stem and a few beads for good measure. But the stem didn't look right with the large silver sequins, so I had to find something slightly smaller.

And as for placement of those sequins, they were originally meant to sit along the hemline, perhaps skipping every other floral motif. I interfaced that portion of the hem with some organdy that I had on hand to support the sequins and beads by hand basting it into place. This also made the hemline stand out, which was fine.

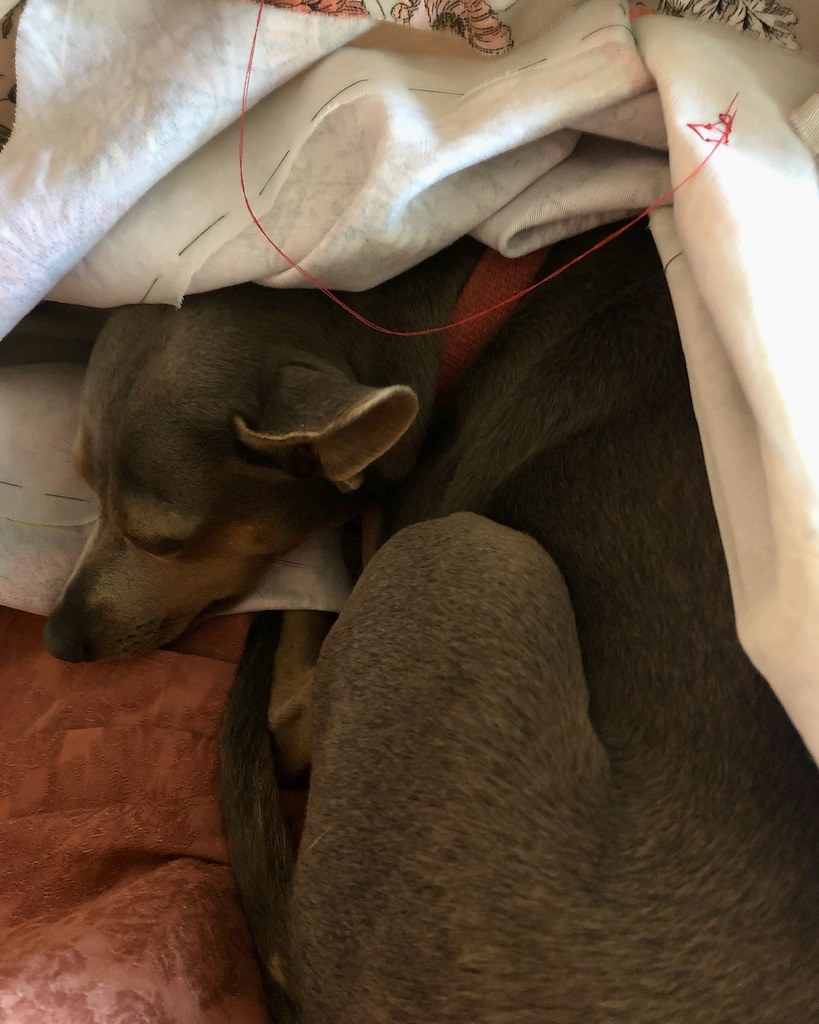
And look, it's my little "helper." Larry was visiting and decided to be a cuddle bug, which doesn't happen all that often, so I worked around him. Unlike Valentino, he is not put off by me reaching or moving slightly. If he has decided he wants a lap, there is little to dissuade him from remaining right where he is.
The placement of sequins also morphed into a full out explosion since I was having so much fun playing with sequins and beads.

Each cup sequin was applied with a bead to hold it in place and knotted off at the back. This will keep most of the embellished bits in place should one get snagged or pulled. I would love to learn more about tambour bead and give it a try, but the thought of being able to release an entire line of beads with a single pull is not very exciting.

From there, I just kept going . . .
When I wasn't having fun hand sewing sequins, I let the skirt live on my dress form so that the hem could drop. I also figured out that the flowers that I had chosen to embellish were getting lost in the folds of the circle skirt. Whoops . . . I guess I should have put the skirt on the form before getting started with the sequins.

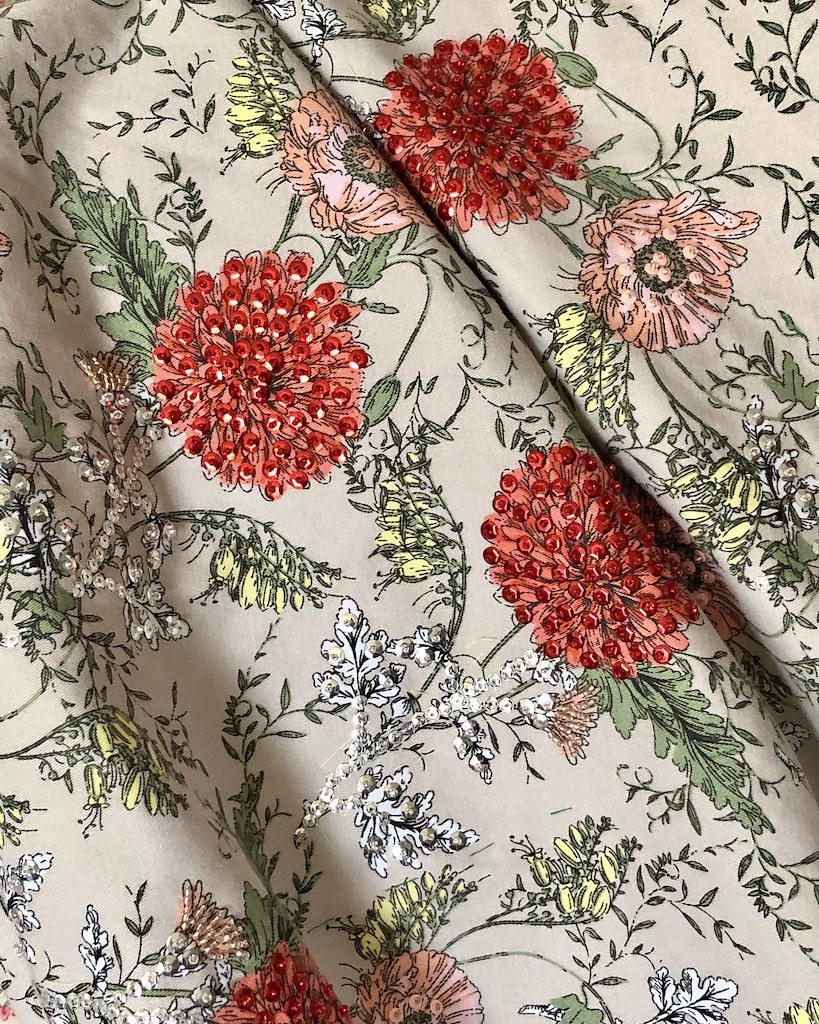
So the only logical thing to do was to put sequins on ALL of the flowers! And honestly, that was just fine. This process was rather addicting. I decided that the fabric was sturdy enough not to require any interfacing for the upper portions of the skirt, and I think that was the right decision. In the end, I cut around the motifs that had organdy underneath so that the drape of the skirt was not effected. Once all of the sequins and beads were in place, I thought that the organdy made the hemline area a little too stiff.

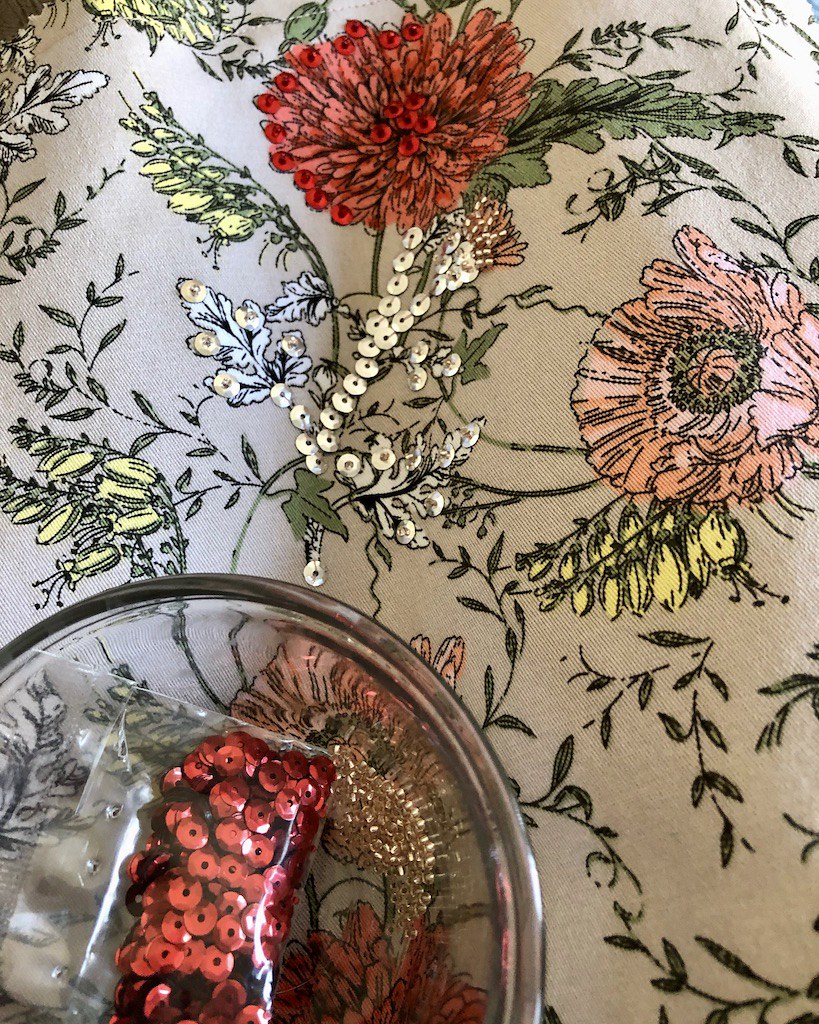
While searching online for smaller sequins for the stems, I found pink ones in the same size, so the little pink flowers were also adorned with sequins.

I thought about adding yellow beads, but didn't end up liking the way they looked.
And while the bulk of the time spent on this project was sewing each sequin on, one at a time, there were a couple of other things to take care of on the construction of the skirt itself.

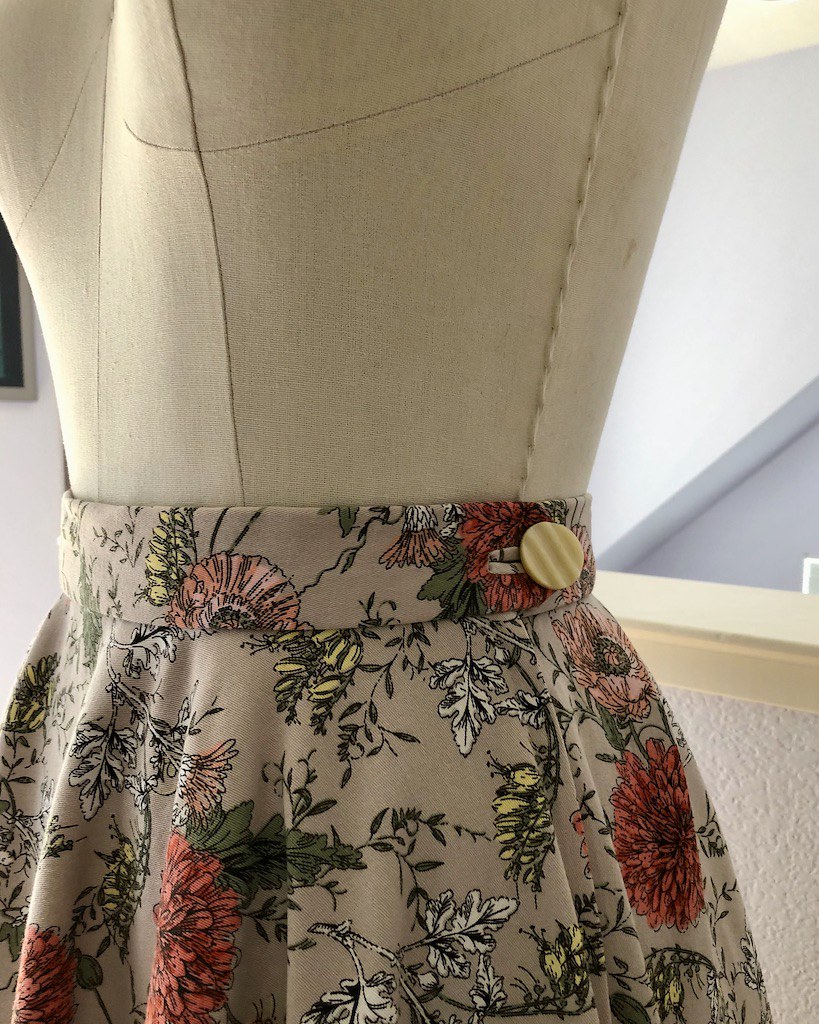
I usually like to have my zipper openings at center back, but for this skirt, I decided that it would be easier to work with two panels instead of three. I also found a single button amongst a collection found at an estate sale that was a perfect match to the print, so instead of my standard hook & bar closure, I went with a button.

And there was some seam binding involved, obviously!

And while I can't find any photos of the process, I also added a few bones to the waistband to keep it from collapsing.
I have to say, I loved working on this project!

I have mentioned before that I find hand work to be therapeutic, and this project definitely fit the bill.

As a finishing touch, I used a larger sized sequin along the hemline.

I think it does a nice job of finishing the look.

And the skirt obviously needed a couple of hanging loops. I didn't think that a ribbon would be enough to support the weight of the skirt, so instead, I used two bias tubes of fabric. Since the zipper opening is on the side seam, I put the hangers at center front and back.

And that, I think, is about all there is for this skirt. It was a labor of love, and I have to say, it is quite fun to wear!
Oh so pretty. Can't have too many sparkles. Can't wait for the photos of you wearing the skirt.. twirling in the sun....
ReplyDeleteI stumbled across your blog not long ago and liked it. And I have to say this is stunning. What a beautiful labour of love!
ReplyDeleteJust gorgeous. It looks like the sequins are attached so that they're convex (i.e., hollow-side) down. Does that make them less reflective or is it the same either way?
ReplyDeleteOh my!!!
ReplyDeleteExquisite!!
Can't wait to see you wearing this creation!
Just beautiful.
ReplyDeleteAbsolutely amazing! So much work but a masterpiece for definite.
ReplyDeleteThat is so amazingly gorgeous!
ReplyDelete