Showing posts with label Sequins. Show all posts

Thursday, July 21, 2022

Illustrated Ladies

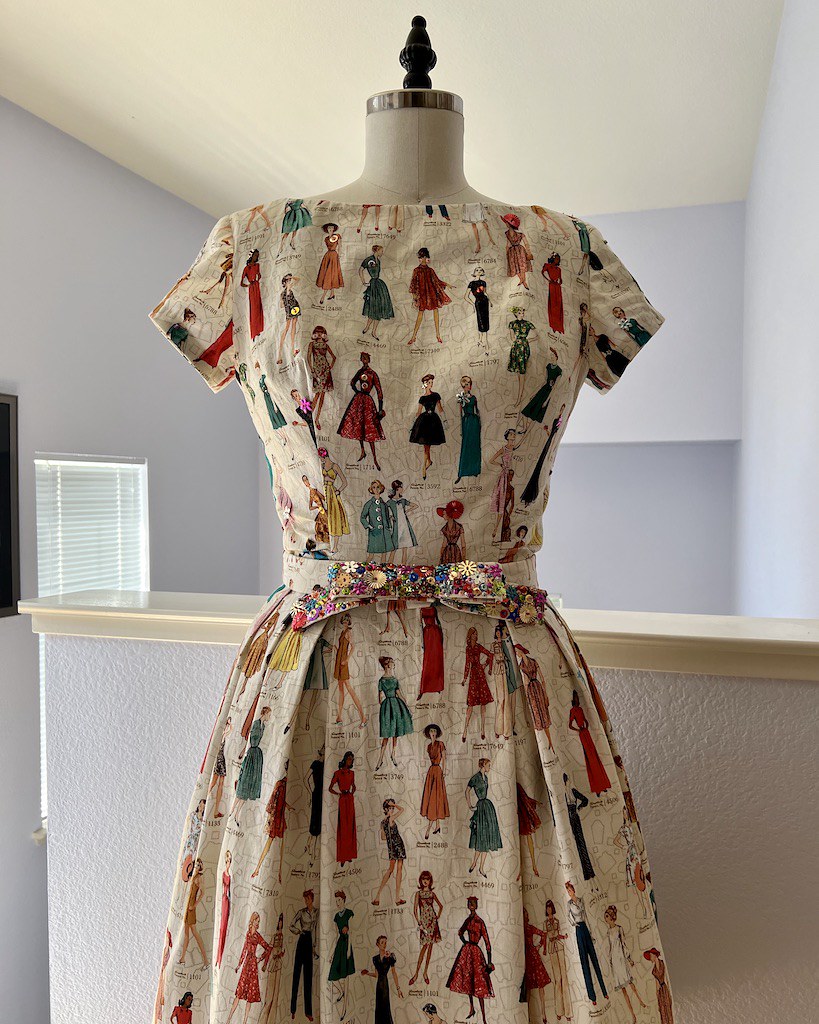
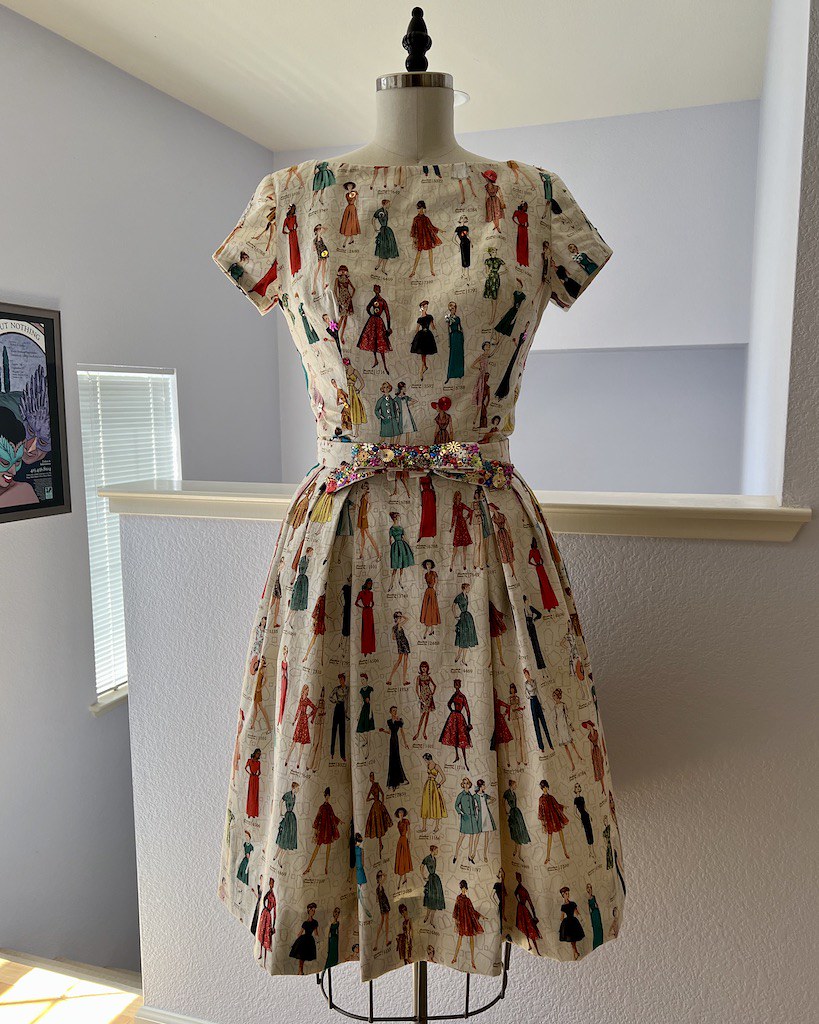
It may not happen with each project, but every once in a while the pairing of fabric and pattern comes together so perfectly, it was just meant to be!  This was one of those dresses.

I have a difficult time resisting novelty prints, and these vintage sewing themed prints are even more challenging for me to walk past at the fabric store than your standard novelty print.  The fact that the fabric design had an image of Simplicity 3592 printed right on it and I happened to have that very pattern in my stash made it very clear that the fabric had to come home with me.

I wanted to do something extra special with this fabric, but I wasn't quite sure what that might be.

The addition of some sequins was what I finally came up with.

Early on I decided that I wanted the belt to be the star of the show, and I think I accomplished that goal!

I had a feeling that I was going to love the silhouette of this dress, and I was right.  The 1960s have really grown on me in the last decade of my sewing journey.  And I was also hoping that this particular dress pattern might turn out to be something that I would want to make over and over again in different fabric types with a minor variation here or there.

Having already worn this dress a couple of times, I can confirm that it's a good one, and I have an idea of the next version in my mind . . . or maybe I want to do something different with that particular fabric, I haven't really decided.

For now, I am enjoying the classic fit and flare silhouette and have been spending my evenings with a knitting project, although I am sure I will be back in the sewing room any day now.

In the meantime, I have no intention to stop working with these whimsical prints, and am always keeping my eyes open for the next one to cross my path.  They make me happy to look at and are equally enjoyable to wear.


Dress:  Made by me, Simplicity 3592
Belt:  Made by me
Shoes:  Remix "Babydoll"

Tuesday, June 28, 2022

Sparkling Florals


In May of 2020, I began work on this skirt.

I wanted a project that was going to keep me busy for an extended period of time.  And it did!  

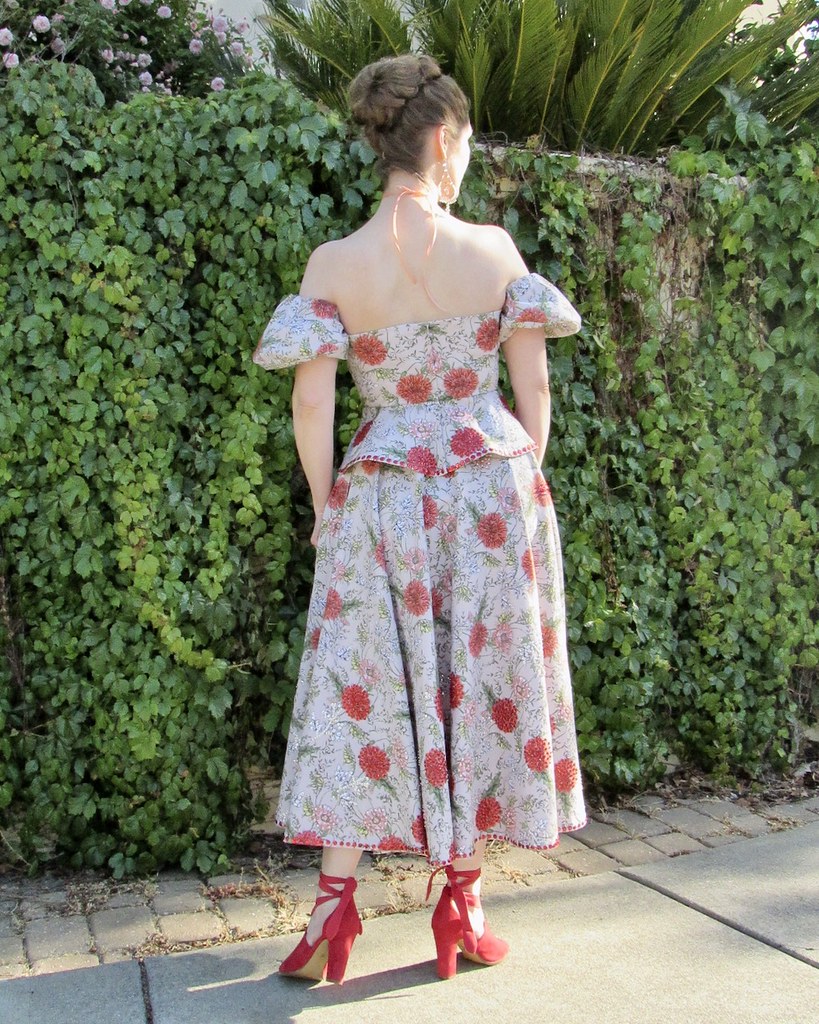
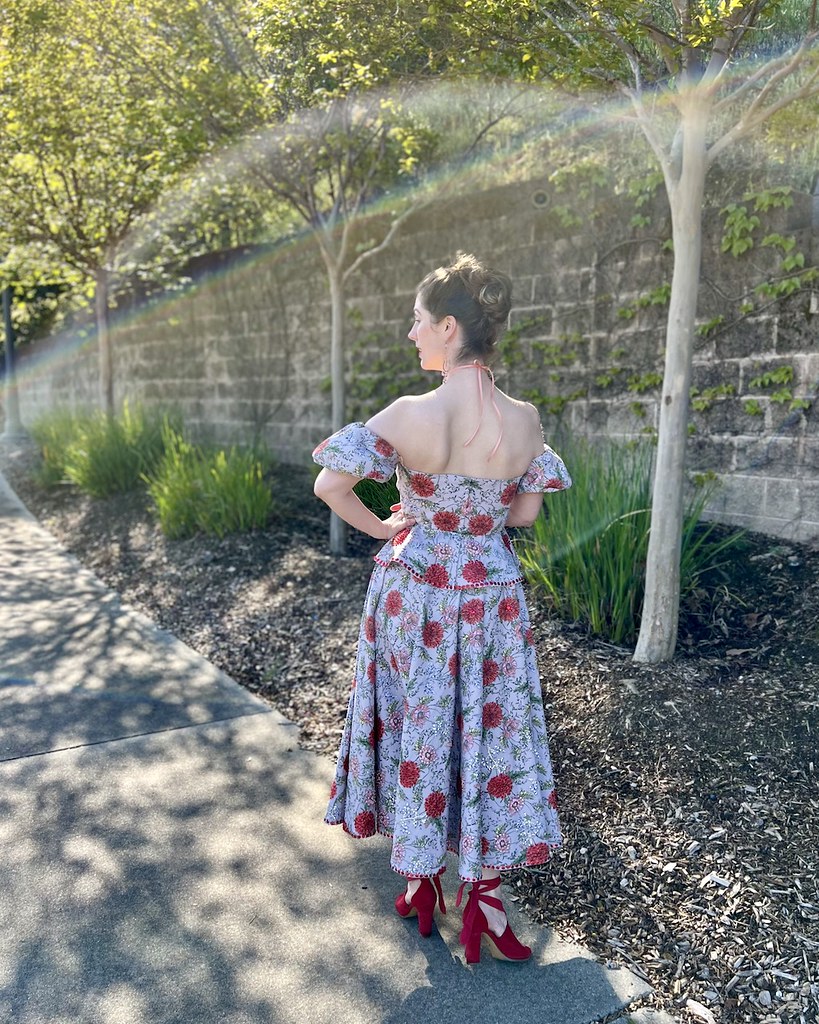
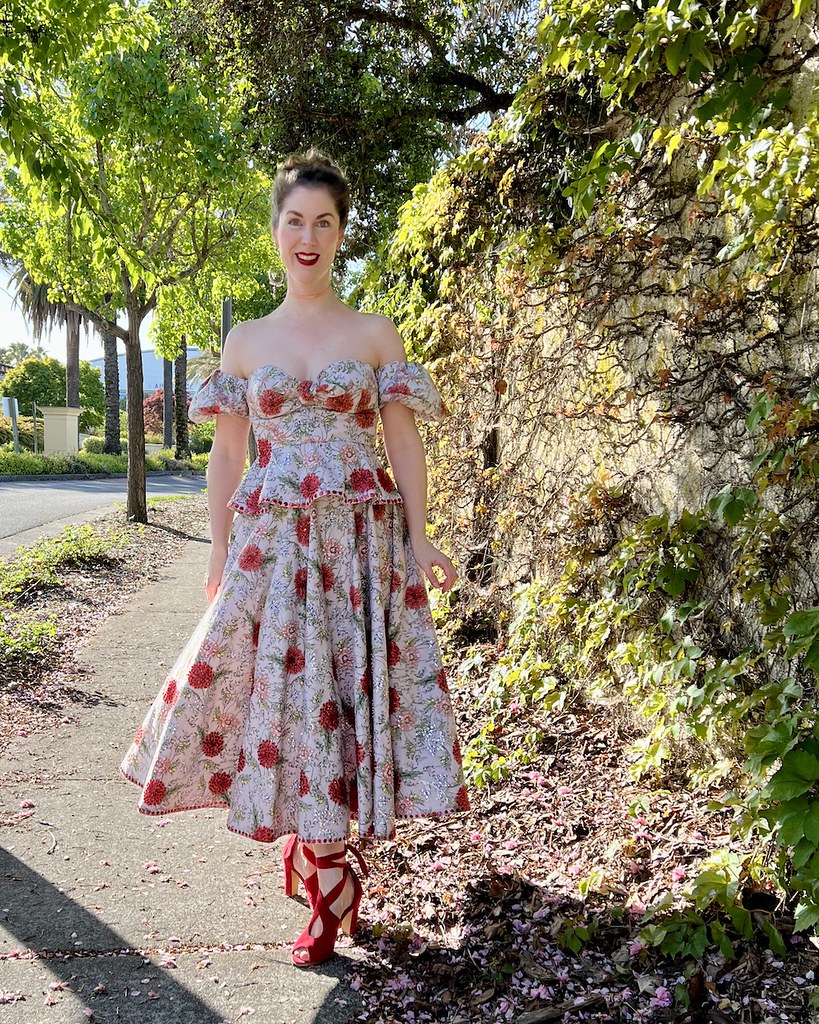
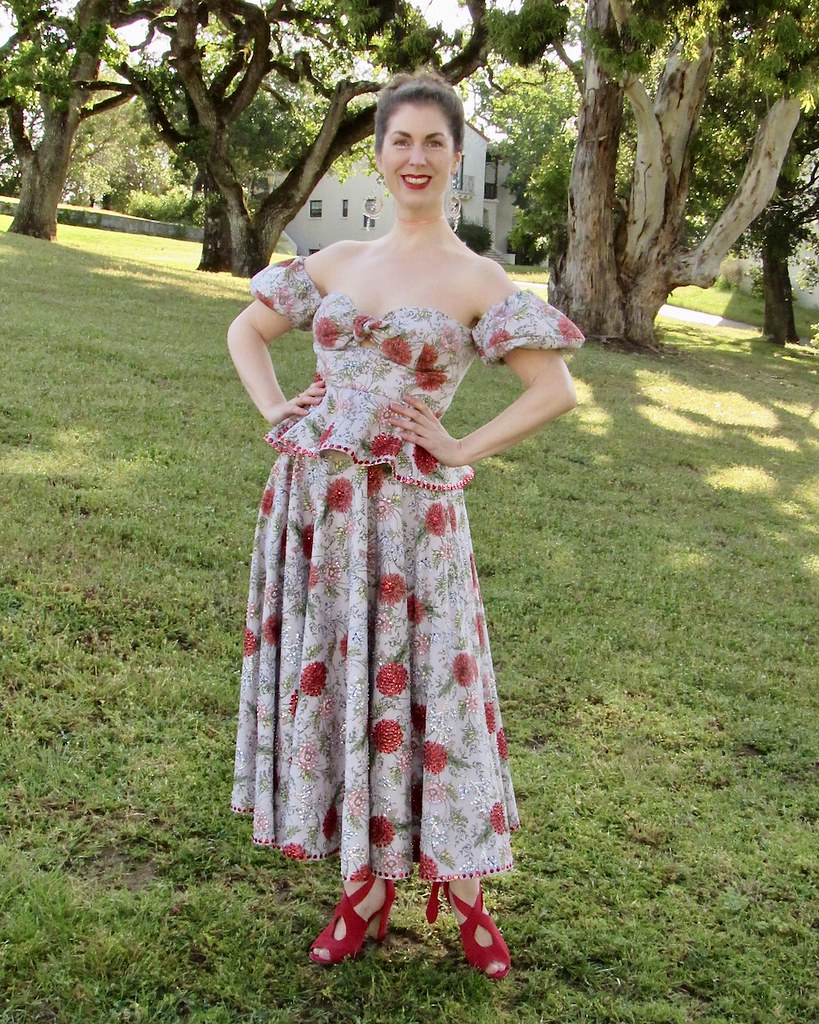
What began as a few sequined floral motifs at the hemline eventually extended to most of the skirt.  At some point, the matching top was dreamed up, and although that particular article of clothing gave me a bit of grief, I eventually finished the entire outfit.

Serendipitously, I knitted a sweater that was a fabulous match to the skirt, so I have shared the skirt on this blog before.  And now I am finally getting around to sharing the whole look.

The final push to finish the peplumed top was a symphonic performance by The Marin Symphony in April.  

This was only the second live performance I have attended since the beginning of Covid, the first being about one month prior, so I decided to go all out!  I also felt like the program (that included a performance of Carmina Burana) was up to all the sequins.

The program was fabulous, by the way, and I had an excellent time!

As for the top that gave me attitude during the construction process, for a variety of reasons . . . I can confirm that the elasticized under-bust stay does, in fact, work.

While I don't have another project requiring such an addition at the moment, I will definitely be keeping this trick in my back pocket should the need arise at a later date.

And while I believe that there are some failed/frustrating projects that are best left behind entirely, I am very glad that I powered through this one.  Giving myself the extra time to work through the issues was probably one of the main reasons I saved this one.  Time outs are not necessarily a bad thing when it comes to the creative process, and I really need to remember that when I get frustrated.

Which reminds me . . . I have quite a few in-progress items that I should pull out to see if they spark some sewing motivation.  It has been exceptionally warm in these parts, and since the sewing room is on the second floor, it is not all that fun to stay in for anything other than very short periods of time.  But I can only go so long with out some sewing creativity in my life, and I have a dress that is very close to being completed, so back to the sauna I go!

Top:  Made by me, McCalls 7929/McCalls 7937
Skirt:  Made by me
Shoes:  Nina "Serena"
Earrings:  Banana Republic

Wednesday, June 8, 2022

A Soupçon of Sequins

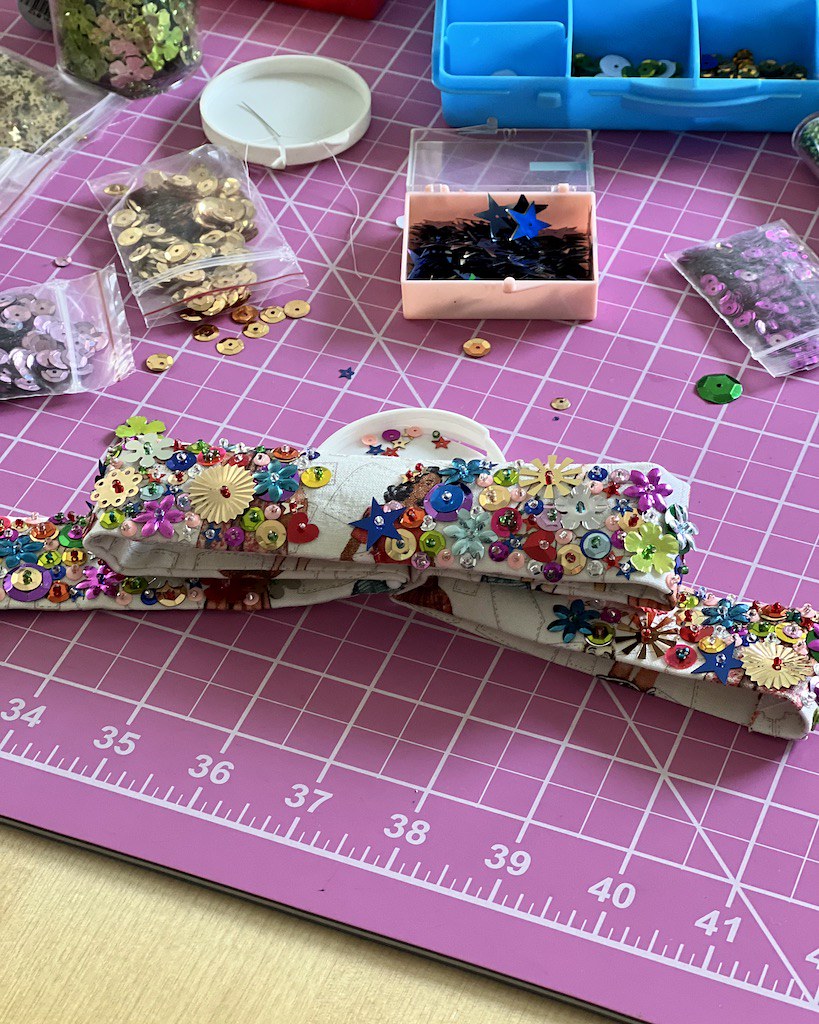
After findings a bunch of novelty sequins at an estate sale last year, I wanted to find a good use for them.  So for the ultimate finishing touch to my novelty printed dress, I decided to go all out with the belt, and use some of those sparkly bits.

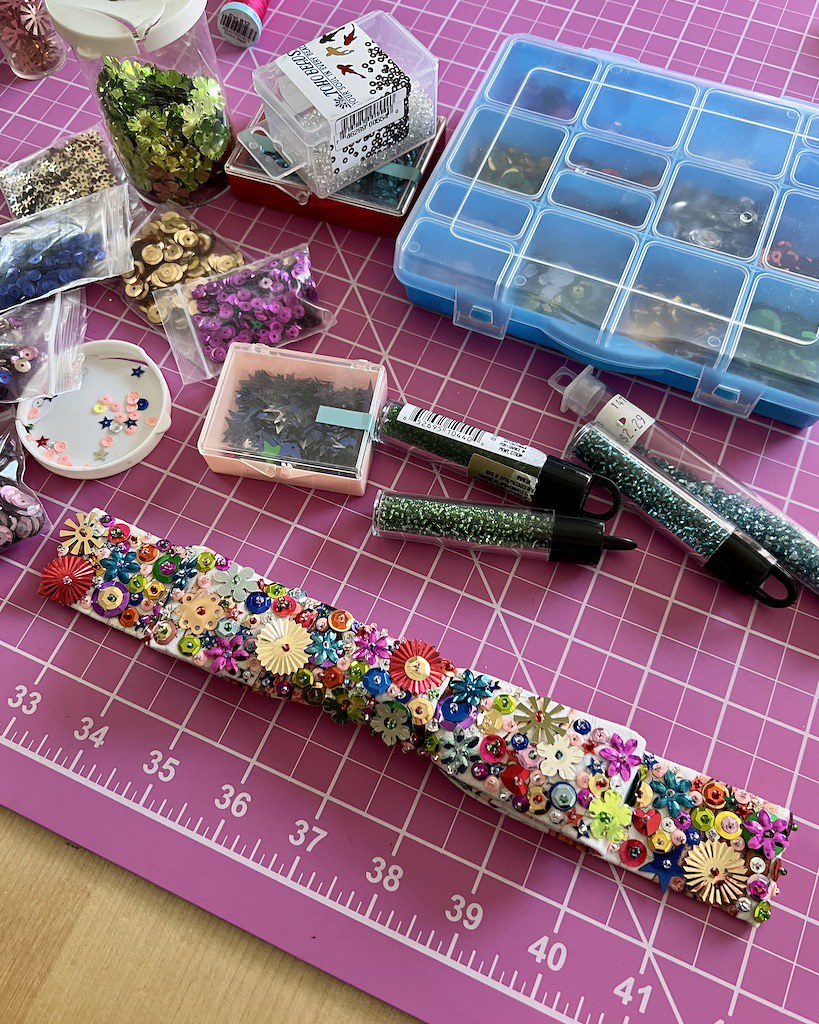
The Sixties seem especially suited to the addition of sequins to apparel of any kind, and so that bow belt included with the pattern was going to get the spangled treatment.

I pulled out all of the sequins I had stashed away, including those from the estate sale, and decided to jump right in.  After placing a few of the larger sized sequins in a pleasing pattern, I stitched them in place.  And then I started filling in the blank canvas of the fabric with the smaller sized embellishments.

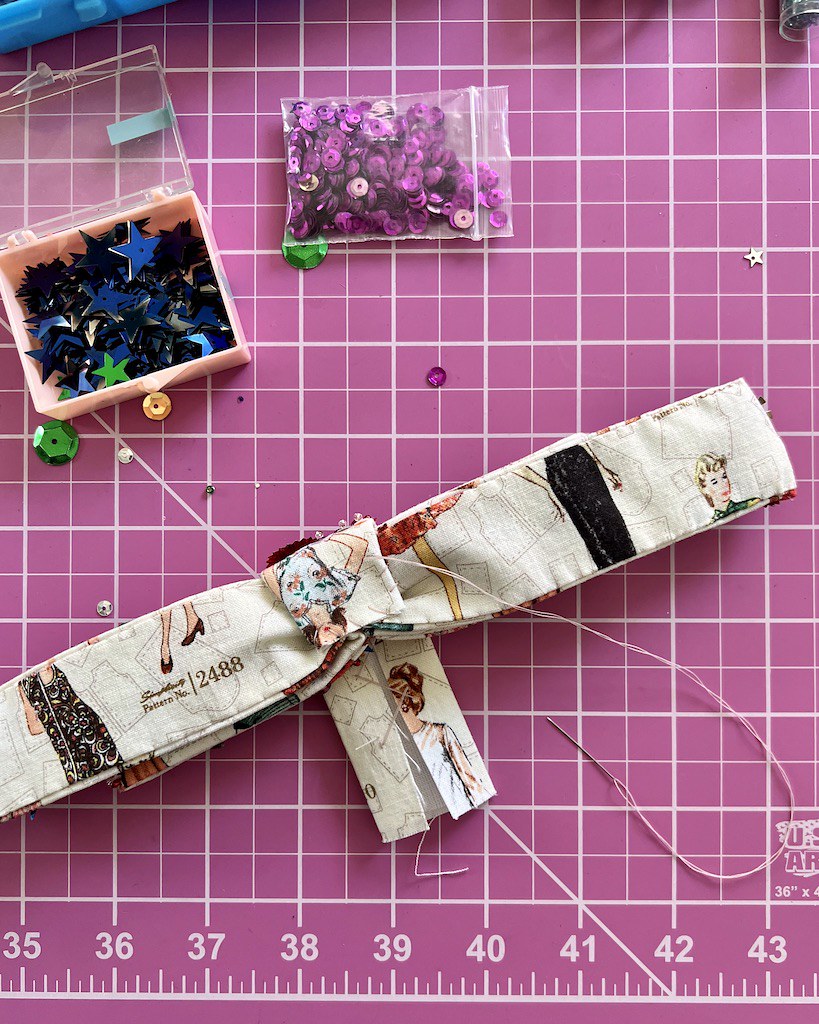
Of course, all of those sequins were going to be a problem for the sewing machine, so the back of the bow was stitched to the front piece by hand.

The same thing was done for the "knot."  The portion that would show from the front was covered in sequins and beads, leaving the back bit that would be wrapped around the bow completely unembellished.

I also left the middle portion of the bow blank so that once the "knot" was in place there would be as little bulk as possible.  The bits of bow that are folded to the back are left blank as well.

Everything was basted together by hand.

And once I was happy with the look of the bow, the knot was wrapped and stitched into place.

I just love how this little accessory turned out - it looks so cheery!

Sometimes the execution of an idea doesn't quite live up to the image in my mind.  In this case, however, I think the finished project is even better than I could have anticipated!

I love the extra sparkle that the belt adds to the dress.

And I am thrilled to have found the perfect use for some of my sequin collection!


Friday, May 27, 2022

Off the Shoulder

Have you ever had a sewing project that needed a time out?

This was one of those for me.  And it's going to be a bit of a saga because there was a lot of construction involved in meshing three different pattern together, and I took a lot of photos of the steps along the way!

It all began when I realized that I had plenty of leftover fabric from my sequined circle skirt to make a matching top.

I did make a muslin, but what I failed to think about was the fact that two layers of cotton twill was considerably thicker than one layer of muslin. 

So after spending many hours embellishing the peplum and stitching everything together, I went to try on the garment.  And, horror of horrors, the two front bodice ties were too thick to tie a knot.  Which is something that is required of this particular bodice.

I had not inserted all of the boning in at this point, but the sleeves had enough weight that they were falling down and taking some of the bodice with it, too.

Well, I had a bit of a tantrum, and moved the project from off of my sewing table to a bin.

Out of sight, out of mind, right?!

I did have a hand knitted sweater that was a great pairing with the skirt, so all was not lost, but I was still sore about all of the time that I had spent thinking that I was going to have a lovely matching outfit.

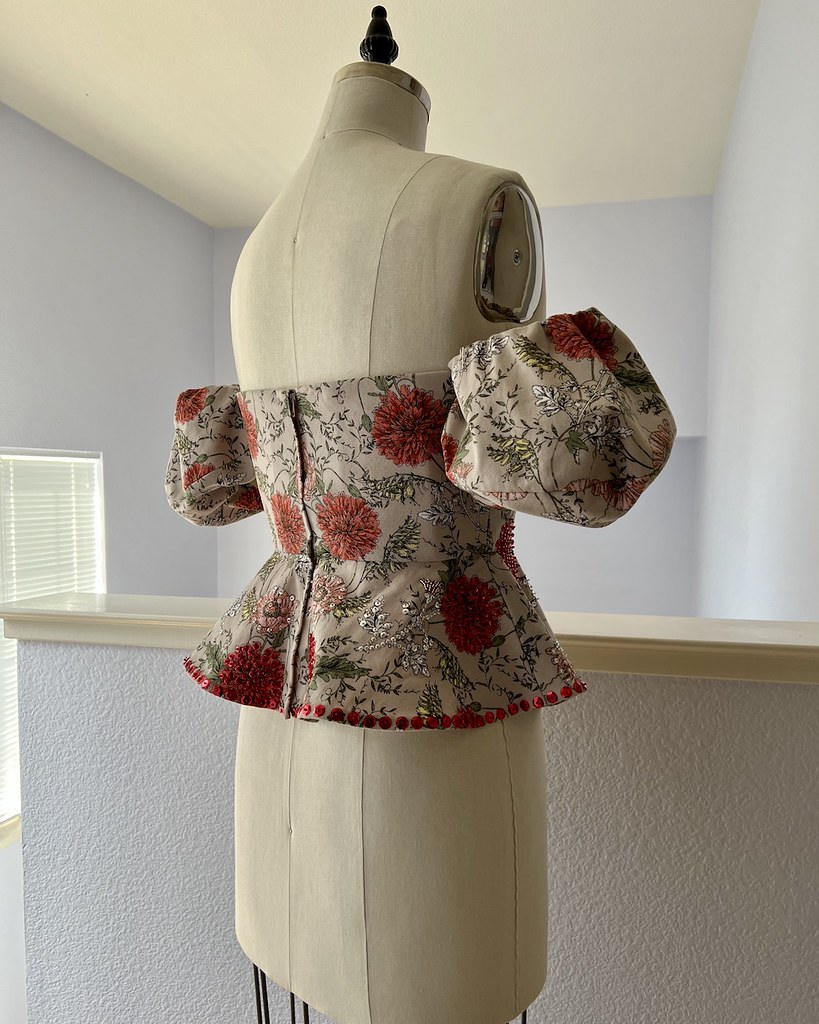
But back to the actual construction . . . I had an idea of exactly what I wanted: it was  to be a combination of the peplum portion of McCalls 7929, the bodice of McCalls 7937, and a pair of fabulous lantern sleeves from my Cherries Jubilee gala dress from 2014.

I added boning to the lining.

This boning pattern works well for me, so I went with what I know.

And there were also plenty of sequins and beads to be added.

For this garment, I decided to limit the embellishment to the peplum.

This mirrors the sequin pattern on the circle skirt, as the majority of the sequins are on the lower portion of the skirt.

And I really like the way it turned out, which was the major reason that I was so frustrated when I realized the fit of those ties weren't going to work as drafted.

I also spent a fair amount of time on the construction. 

I continue to find uses for my scraps of silk organza, and this project was no exception.

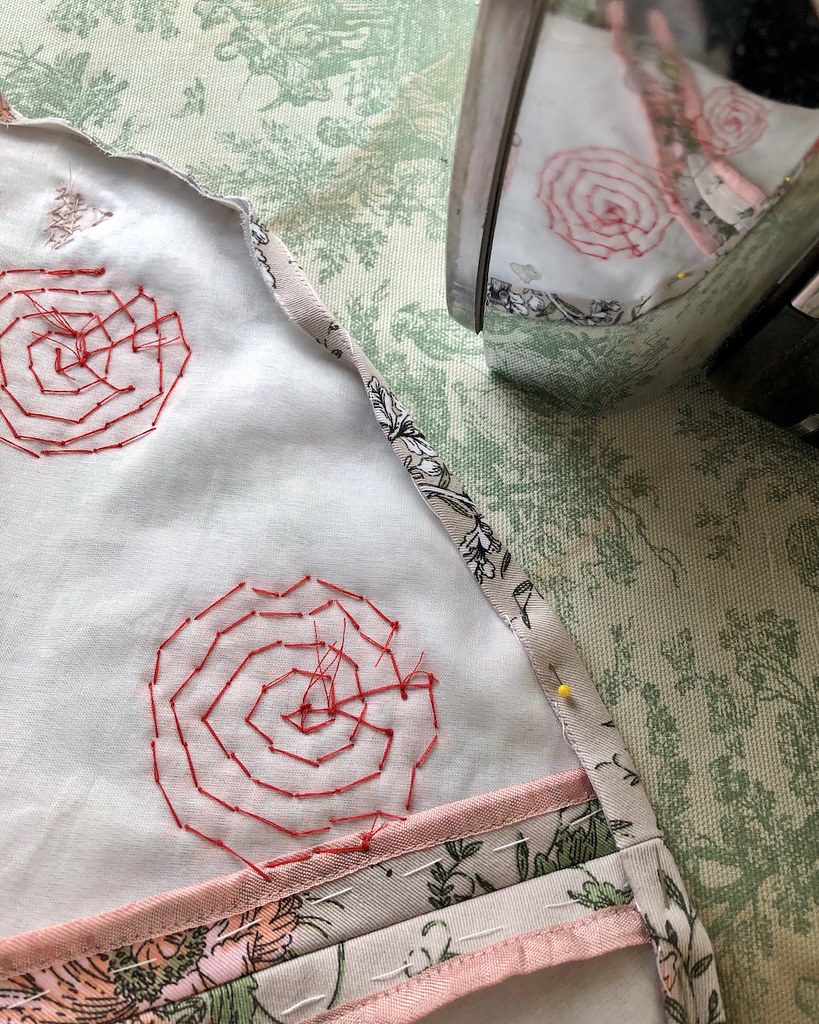
I get paranoid about clipping corners, but if I wrap the clipped portion with a small piece of organza, it feels so much more secure.

Seam edges that were unlined were finished with rayon seam binding.

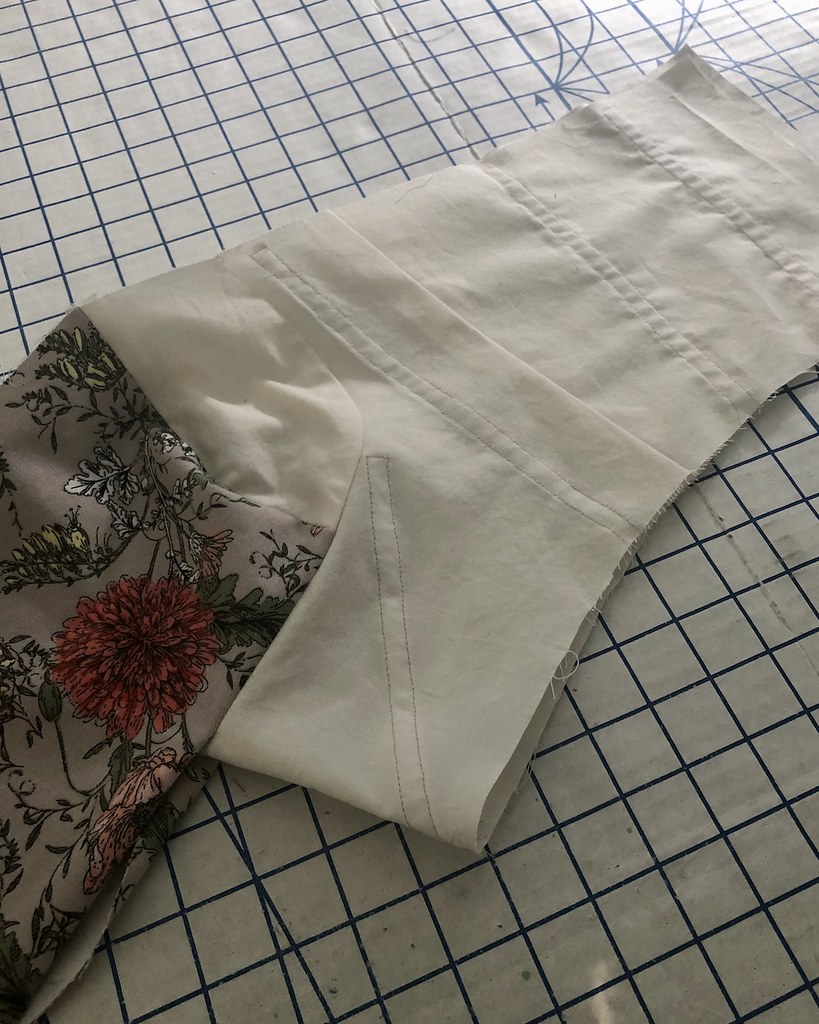
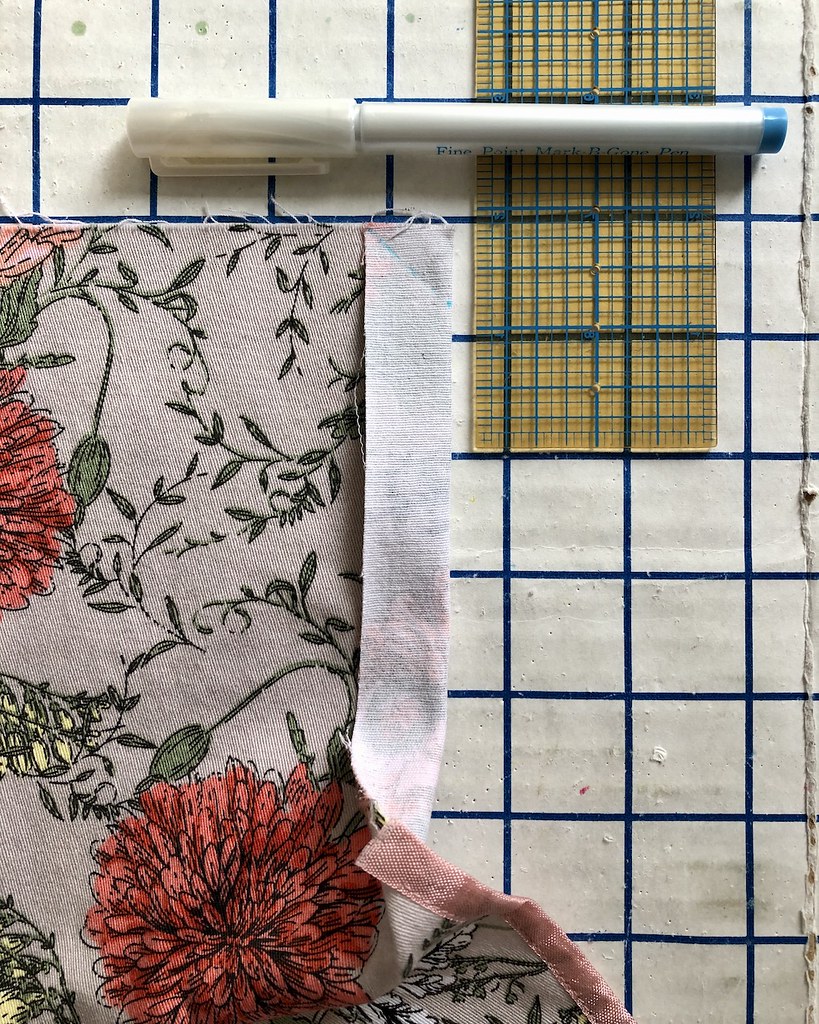
And here is a peak at my favorite way to finish the upper edge of a lapped zipper.

Because I like to have a fairly deep overlap, there is an issue with a normal facing.

Since the raw edge cannot be faced beyond the zipper teeth, I stitch a diagonal line from the seam allowance to the upper edge.

This gives me a finished edge so that the facing or lining is clear of the teeth on the lapped side of the zipper.

And I did stitch a few extra sequins onto the bodice since the floral motif matched up so that the two separate flowers on the peplum and bodice looked like a single blossom.

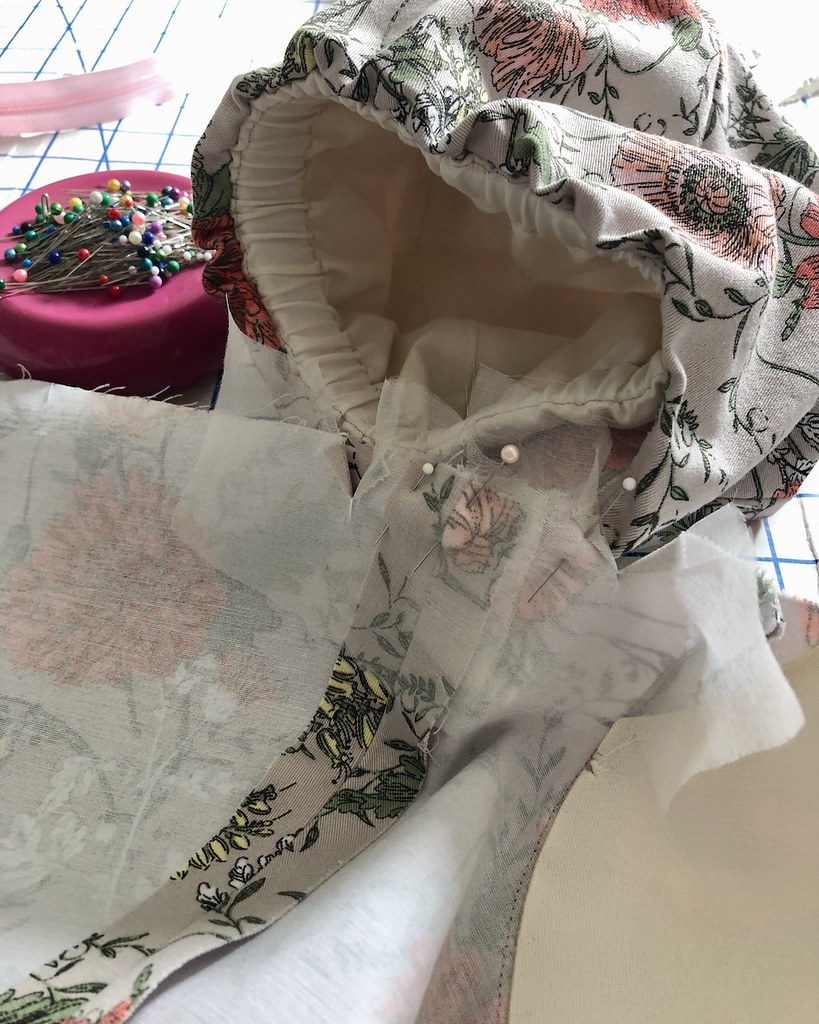
Because the sleeves fall off the shoulder, an elastic casing was added to the top and bottom of the sleeve.

The upper edge was stitched into a casing in the sleeve lining, but the lower portion is held into place with a number of thread loops.

And here comes the scary part.  As I have already mentioned, the ties and the sleeves were causing some fit issues.  But like many garments, it's quite difficult to know exactly how something is going to work and/or fit until the construction is almost completed.  And those ties were just too bulky and short to close.  I thought of a couple of options (including wrapping a separate rectangular piece of fabric to create a bow), but in the end, I took a deep breath and stitched a new line and cut a section of each tie right off.

I had previously added bra cups to the bust area, but they still wanted to collapse after the ties were knotted together.  To add further structure to this area, I catch-stitched a length of horsehair to the lining at the bust seam.

And for even more added structure, I hand tacked a small piece of boning at the outer edge of each side bodice.

The lining was hand stitched in place once again, and I tried it on one more time hoping that the removal of those two wedges of fabric would save the garment.  And it did! 

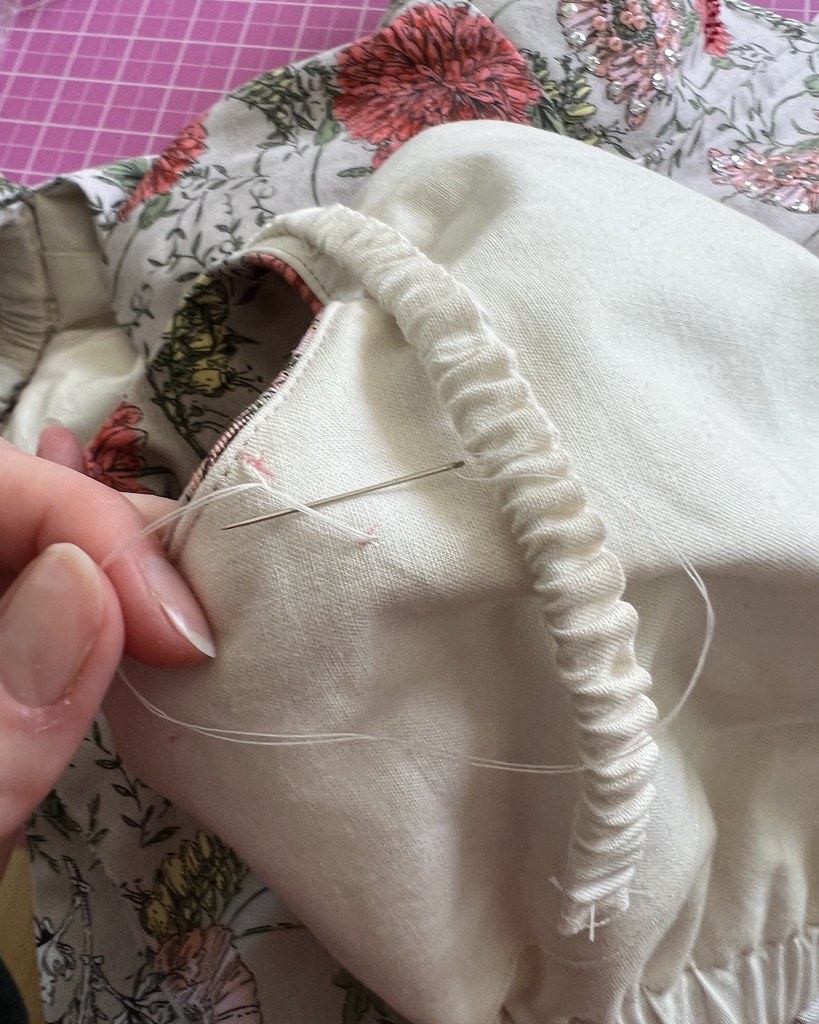
I had left some extra room through the waist because  it needed to go over the waistband of the circle skirt that has a large button at the waist opening.  So in addition to a waist stay, I thought I would add an elasticized stay under the bust.  

I have seen this type of stay in interior photos of haute couture pieces and I thought I would give it a try.  The elastic was inserted into a fabric casing approximately twice as long as the elastic length.  The stay is kept in place along each piece of boning with a thread loop (similar to the sleeves).

A hook & eye closes the stay just to the side of the zipper opening.

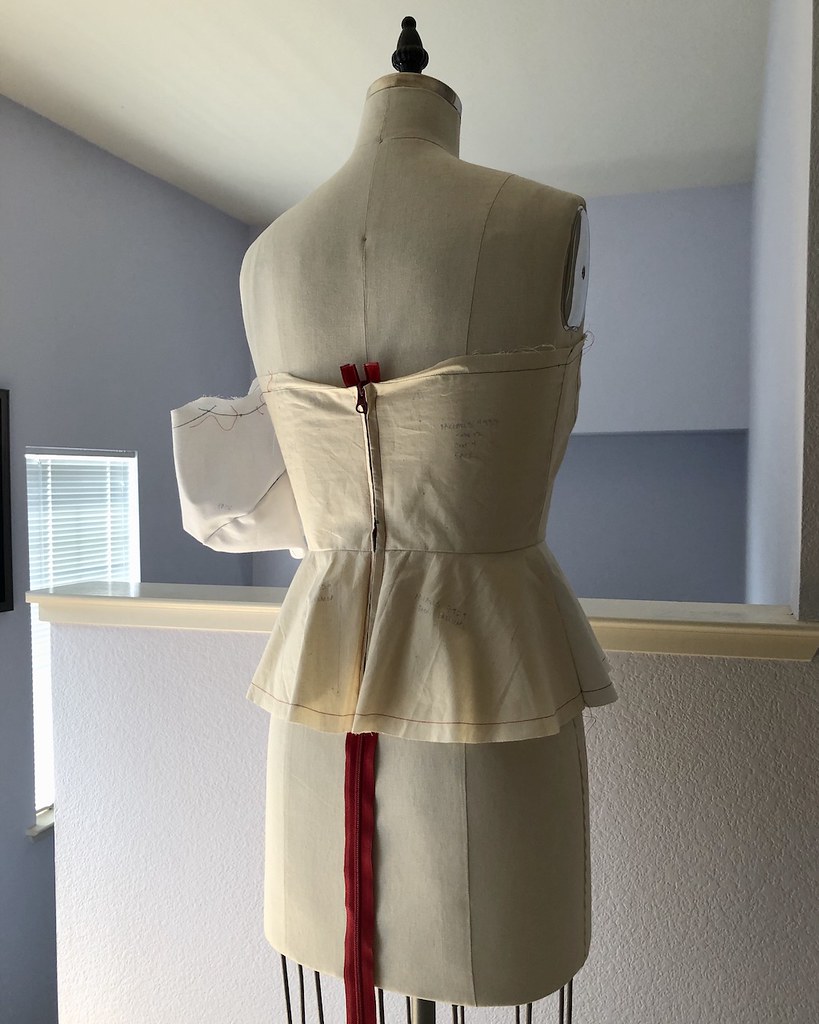
As for the zipper, I don't like to see bulky separating zippers on anything other than a hoodie, so instead, I fold up the excess length of a standard dress zipper.  That extra length is necessary to get the garment on over my head, or to be able to step into it since my waist is significantly smaller than my bust and my hips.  If the zipper closed at the waist, I would never be able to get into the top.  That extra length of zipper allows the center back seam to open wide enough and tucks away while the garment is on the body.

I also added a waist stay for good measure.

Both of those stays keep this (essentially strapless) garment on my body.

And as a final touch, I added the same sequined border to the hemline as I did with the circle skirt.

I am happy to say that all's well that ends well with this project.

I am very glad that I left it alone long enough to come up with a decent solution to the issues that cropped up because of my fabric choice.

It's also a good reminder to think through potential problems when using a fabric on a mock-up that is significantly different than your fashion fabric.

And here is a look at both pieces paired together.

It may have taken more time than expected, but I am going to call this one a success!