

One great thing about vintage patterns are the extra little details that are included. Some of those details are part of the design itself, and others are construction tricks that are often overlooked or excluded from contemporary patterns. And I greatly appreciate getting to learn from both!

So after a whole lot of fun with adding a metric ton of sequins to this dress, there were a few other things to do. This dress is essentially a dress front and back with a side opening. The drape adds interest, but that's just a single piece that is attached to the dress front.

Noted on the pattern tissue is placement for boning channels. As expected with a pattern that is drafted as a strapless garment, the pattern has four bones to be added to four of the darts on the bodice front and back. Because this dress utilizes an underlining instead of a lining, and the boning channels were going to be visible, I decided to make my own out of the dress fabric.

There are two additional bones added to the front bodice above the bust. These keep the dress from collapsing and falling down. It's a small detail, but it does a lot for a strapless bodice and is something I will remember for future projects. As suggested by the instructions, all of the boning is catch stitched to the darts/underlining. I believe this is similar to a technique used on antique bodices, but I have never come across it in vintage pattern instructions before. It is a quick and easy way to attach boning, and I am definitely a convert. That being said, I do prefer full linings . . . but if I ever need to add boning to a finished garment, I will be keeping this technique in mind!

Although not included in the instructions, I always like to add a hook and bar tack (or two) to the lapped zipper closure to keep the fabric nice and flat. I find that waist level is a good place for the hooks.

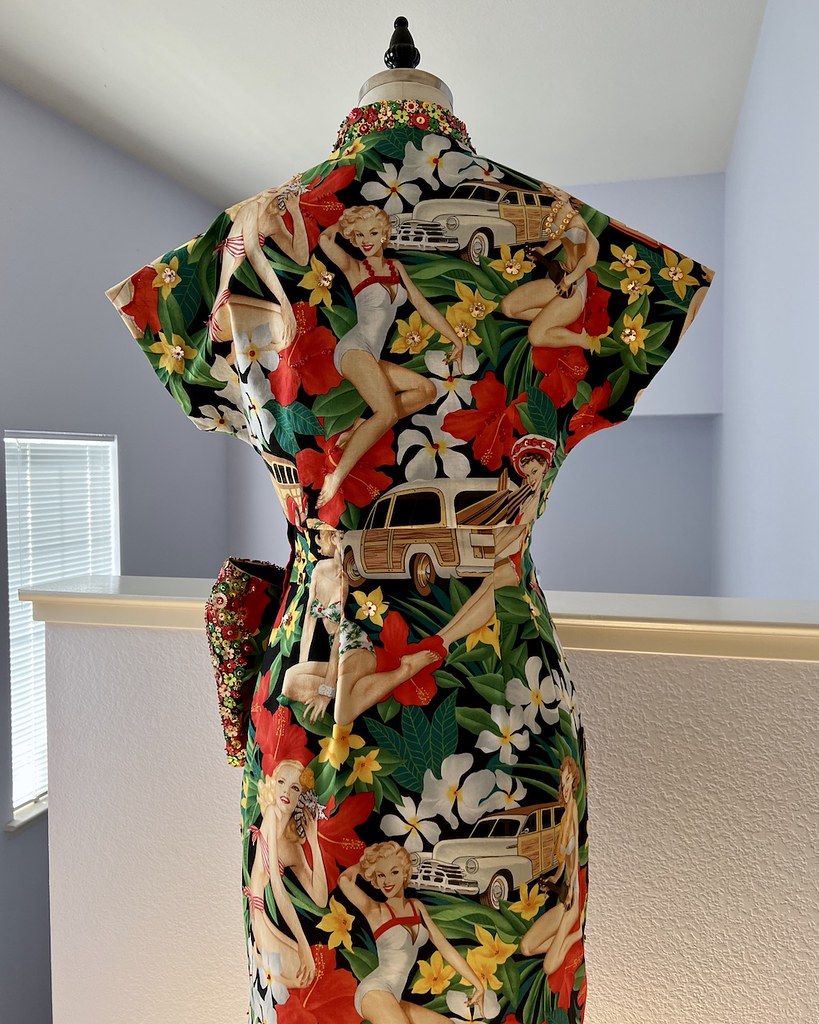
And then, of course, there are the straps. This dress has both a strapless and strapped version, and the dress that I made would stay up just fine wihtout the straps, but I also felt that the straps would give me another opportunity to tie in all of the sparkles.

I originally intended to use gold sequins in this spot, but decided it might look jarring with all of the color throughout the rest of the dress. I laid out a few options to decide which would look best.

This is not a random pattern like the drape on the dress, but I think the multi colored sequins mirror that portion of the dress nicely.

And since the hemline of this dress is shaped, a facing (or two) is in order.

Although the instructions did not suggest it, I understitched the facings.

The neckline is also faced.

And here is an opportunity for more hand stitching!

And that about covers it for the construction of this dress.

This was one of those projects that I was excited about from beginning to end. That doesn't happen all the time. From the initial idea to the finishing stitches, I was extremely pleased with how everything came together.

And I am so happy that there was enough fabric for the matching bolero. It's the perfect finishing touch!

I find myself avoiding princess seamed garments because I think that the back portion of garments fit much better on my body with a waist seam, but this one works rather nicely after a few minor adjustments. And I can even see myself making this pattern again.

Oh, and one of my favorite parts . . . I even managed to do a pretty good job pattern matching the bolero to the dress!
You are an amazing seamstress. This latest project is spectacular!
ReplyDeleteThank you so much for this lesson on real dressmaking and a showcase of your talents. I hope you post a picture of you wearing it. I can't wait to see that. Such inspiration.
ReplyDeletethis dress is so you! love it. the style lines are fantastic. so pretty
ReplyDeleteIt was a fun one! Hopefully I get motivated to make myself a solid colored wool coat this Winter, but I keep getting distracted by novelty prints.
DeleteI am stunned at how well the top of the woody on the bolero matches the lower part of the woody on the dress. Simply beautiful! I think I scrolled back and forth 10 or 11 times before I could definitely see two separate garments. Stunning.
ReplyDeleteThis is just spectacular and the finish is impeccable throughout. It's been a real pleasure to read your blogs detailing each part of the garment. Would love to see a photo of it worn.
ReplyDeleteI have photos of me in the dress, I just have to go through them (which is not my favorite thing to do!).
DeleteYour work on this dress is just stunning. And the print is so fun. Not something you would expect in a dress! The added sequins make it extraordinary.
ReplyDeleteThis is a fabulous, eye-catching dress ! May I ask where you intend to wear this masterpiece ?
ReplyDeleteI made is specifically for a Luau, but will definitely wear it again . . . I just have to find the right occasion!
DeleteWow. Just wow.
ReplyDelete