

And now it's time for the annual novelty print Christmas themed dress.

This has become somewhat of an annual tradition, and this year, I knew the exact dress pattern that I wanted to make, which is one that Michelle from Old Patterns sent me. It uses a massive amount of yardage, but I found this novelty print at the last fabric swap I attended and it was just under the required amount of fabric needed. Which means I had the perfect opportunity to make a wearable muslin.

I did have to shorten the skirt pieces by 2.75" to get everything to fit, and cut the collar facings out of a contrasting fabric, but I made it work.
One of my favorite features of this design is the basque waist. Not enough patterns include this style, and I don't know why. It's so flattering.

The pattern calls for the entire dress to be lined, skirt included. Well, that was too much fabric to deal with, especially since I didn't have enough solid red cotton on hand.
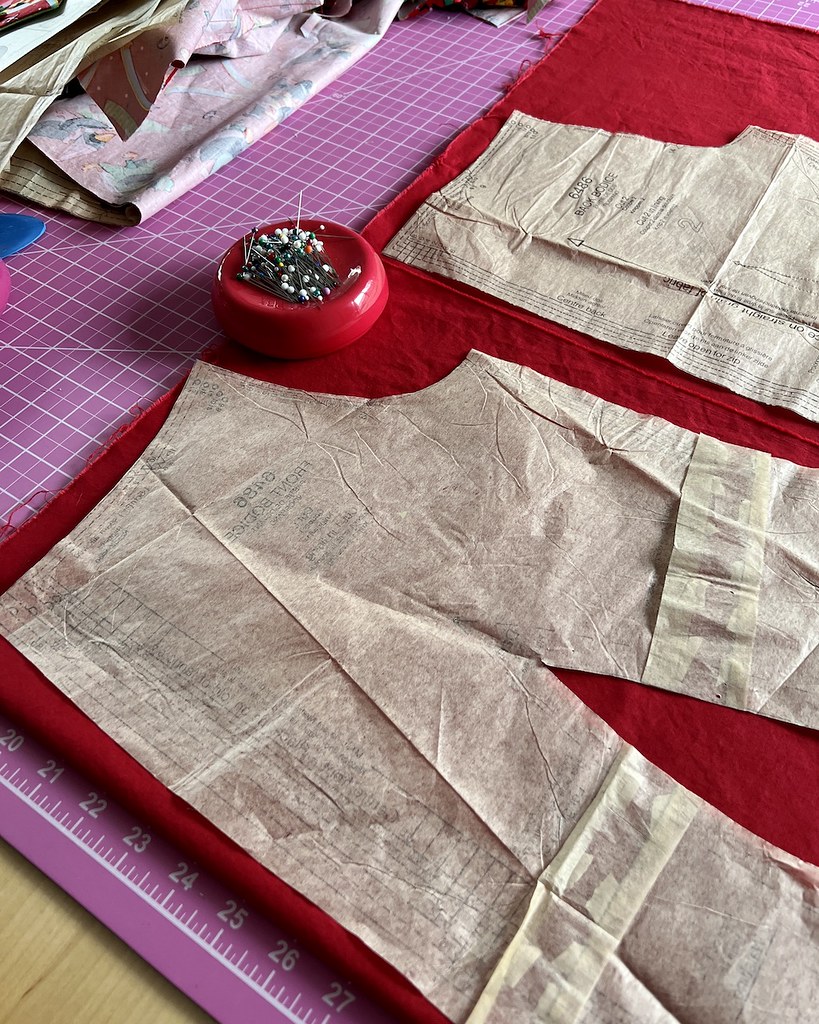
But the mid-weight cotton seemed sufficiently sturdy without a lining for the skirt and sleeves, so I just cut out duplicate bodice pieces in the red cotton.

My second favorite part of the dress is that collar. Does it get much better than an off the shoulder collar? Not in my opinion!

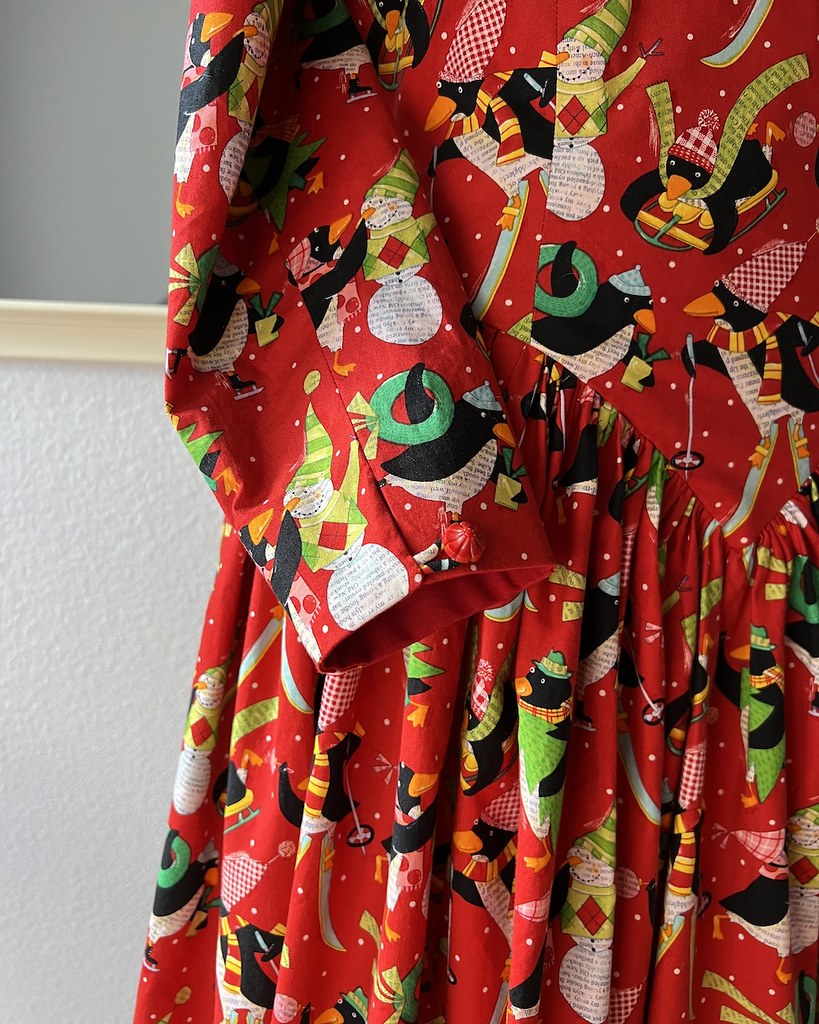
The one oddity was the sleeves.

I saw the facing pattern piece and didn't think much of it at the time, but once I opened the instructions, I was perplexed. Why did this sleeve need a button and loop closure?

That button isn't treated as a design feature since the opening is on the inside of the wrist, and is therefore essentially invisible while worn. And the opening is plenty wide for a standard sized hand to fit through. I even removed some width from the sleeve because it seemed excessively wide (and that's not a standard adjustment for me), but still did not have an issue with fitting my hand. So for now, the mystery of the sleeve opening will live on. Thankfully, I managed to scrounge up two red buttons from the stash that were a fairly good match. If I use this pattern in the future, I suspect that I will make a standard sleeve and ignore the button and loop addition.
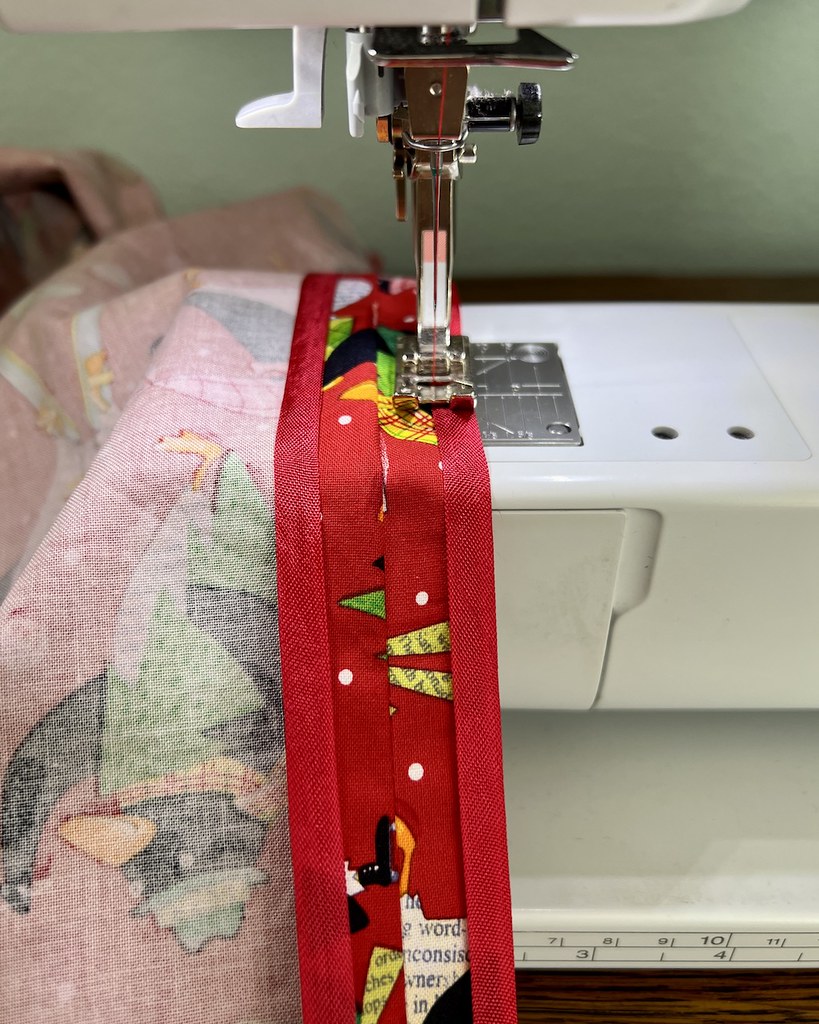
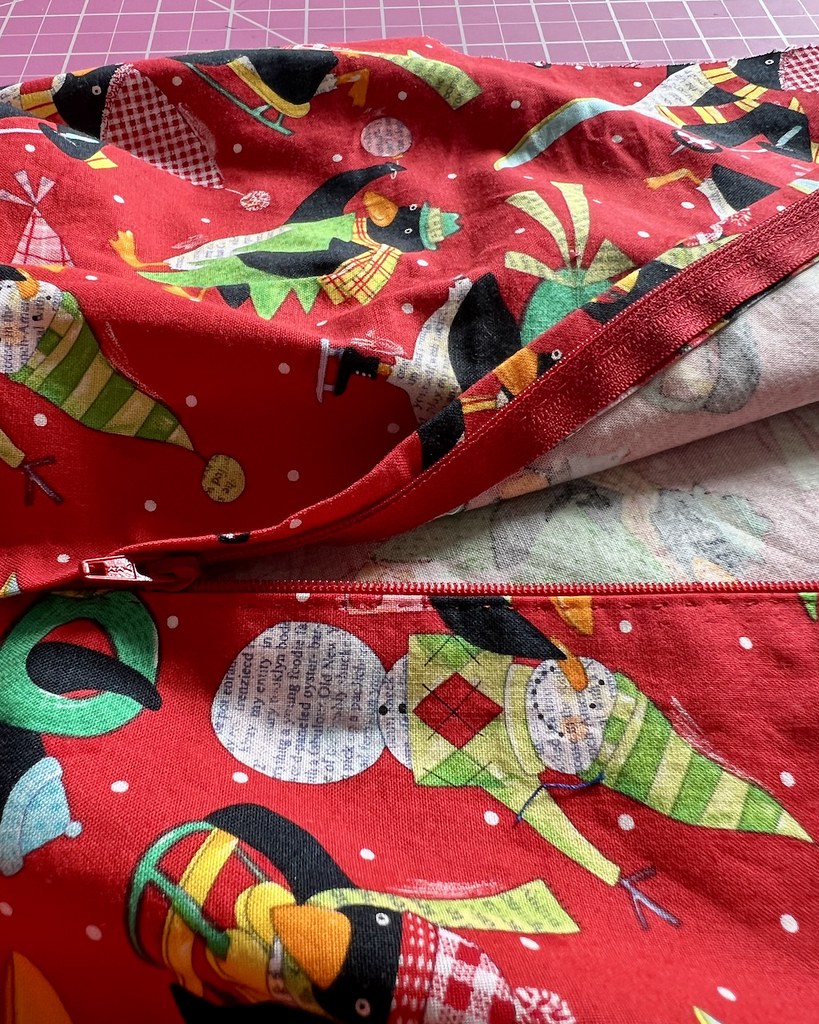
And here is your reminder that basting is your friend!

Could I apply the zipper with pins in place? Of course I could. But do I really want to get poked and have the thread tangle up around said pins? Not so much. I have become much better about my fear of installing a zipper with machine stitches, but I believe that I will always prefer a hand picked zip.
I was slightly skeptical about the construction of the armscye seam and collar, but it all worked out okay.
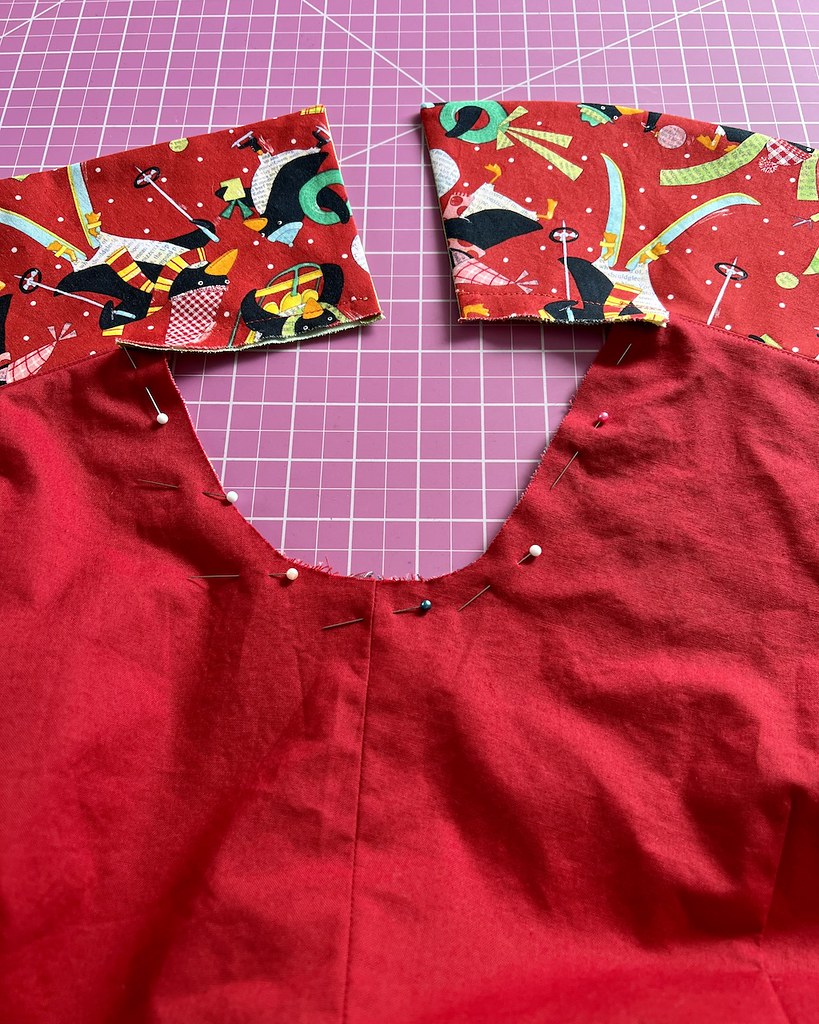
And while I did not have enough fabric to use the print as a facing, I really like that the green breaks up that crazy print slightly.

The collar is attached to the upper portion of the sleeve and a channel of bias fabric finishes the edge, also allowing for a piece of elastic to secure the off the shoulder treatment.

The pattern calls for two pieces of boning, one at each side seam.

Using the technique that I discovered in my recent sarong style vintage pattern, I added four additional pieces of boning: two on the back bodice, and two at the upper edge of the bodice front.

The only additional finishing detail was to stitch the lining in place along the zipper tape and lower bodice seam.

But what about those shoulder bows?

I had plenty of the contrasting green cotton, and this was a crazy print, so I figured that I might as well go for it. But what if I added some of the length that I lost because of my limited yardage back to the hemline with the contrasting fabric?

First I started by cutting out the bow pattern piece. This gave me a finished strip which I pinned in place at the hemline.

I liked how that looked, so I cut bias strips that would match the width of the finished bow when it was wrapped around the hemline edge.

Ironically, I removed another inch of fabric from my skirt piece before applying the contrasting bias because I thought it would end up looking slightly long with the proportions of the dress.

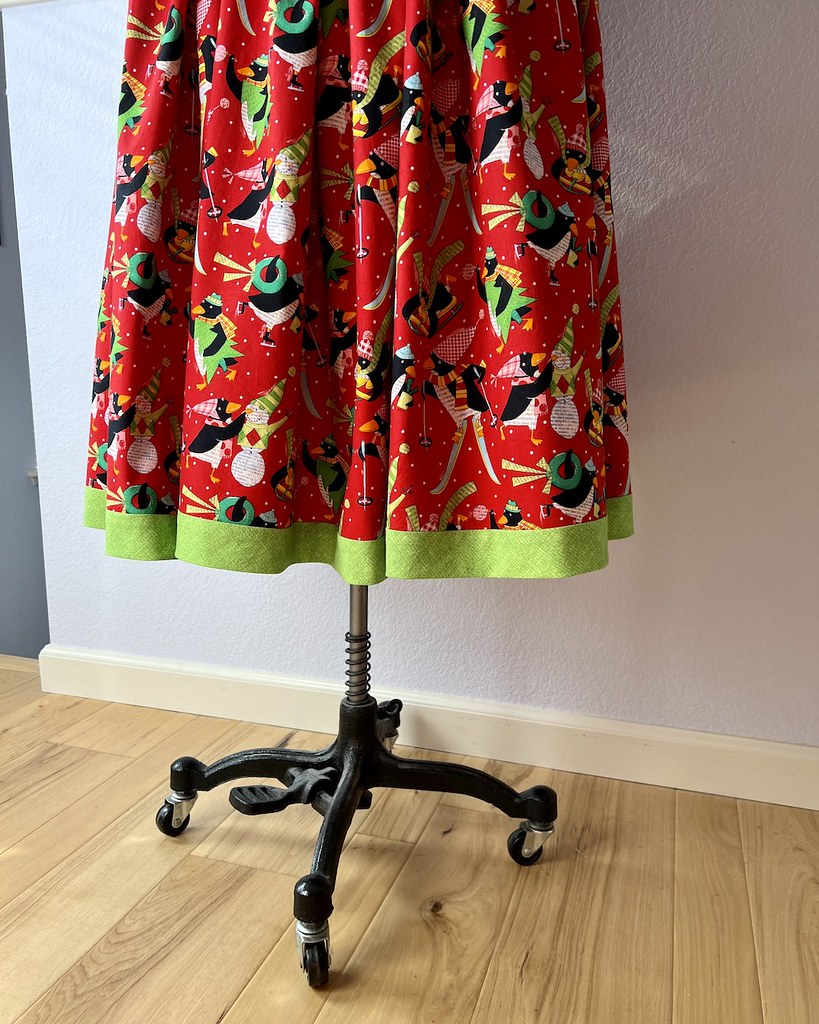
The bias strip was applied to the hem, stitched into place, and then wrapped around the raw edge.

And those quilters know what they are doing when it comes to bias binding! I did a quick google search and solved that problem of how top neatly finish that edge.

I was slightly unsure about the bright contrast when I began, but I really love how it turned out.

And the shoulder bows are pretty cute, too.

The print has so much going on and the green breaks it up.

My little helper has been determined to be involved in all of my projects these days, and this dress was no different.
And because I knew that I would be attending a Christmas concert in this outfit, I made myself a matching mask.
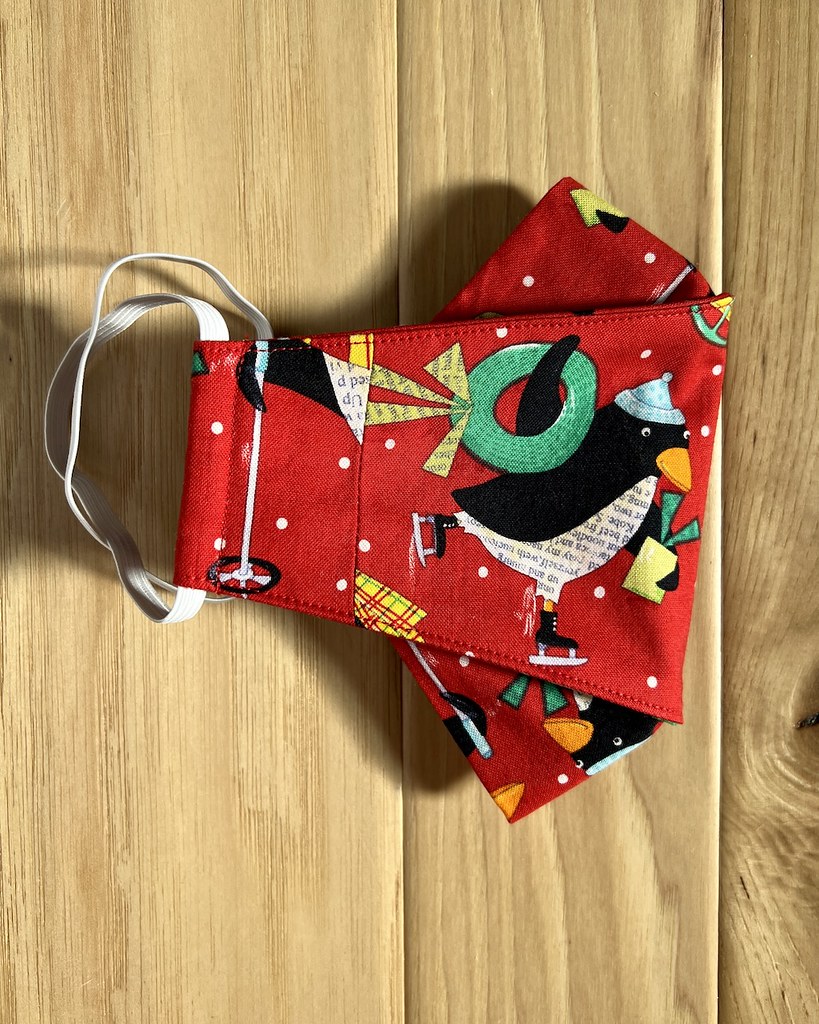
When I said that I was cutting it close with my fabric yardage, I meant it! You can see that it was necessary to piece my mask, so that gives you an idea of the small amount of fabric scraps that I was left with!

I just love when that happens! If I have leftovers, I want to be able to make myself another project, so a half yard or less ends up being almost worthless. But there is something very satisfying about mere scraps remaining after a project is cut out.

And that's about all there is to say for this dress. I am very pleased with the outcome, and I would definitely think about making the pattern again . . . although it would be in a more subdued fabric choice and perhaps without the shoulder bows!

The collar and waistline echoing one another, the trim, your friend in a fur suit assisting and encouraging...such a construction journey and one can only imagine your party presence in this frock.
ReplyDeleteThank you again for another year of your creative efforts, insights regarding sewing (and life), as well as the joy you sprinkle atop your far-flung fans.
The best to you and yours in 2023!!!