

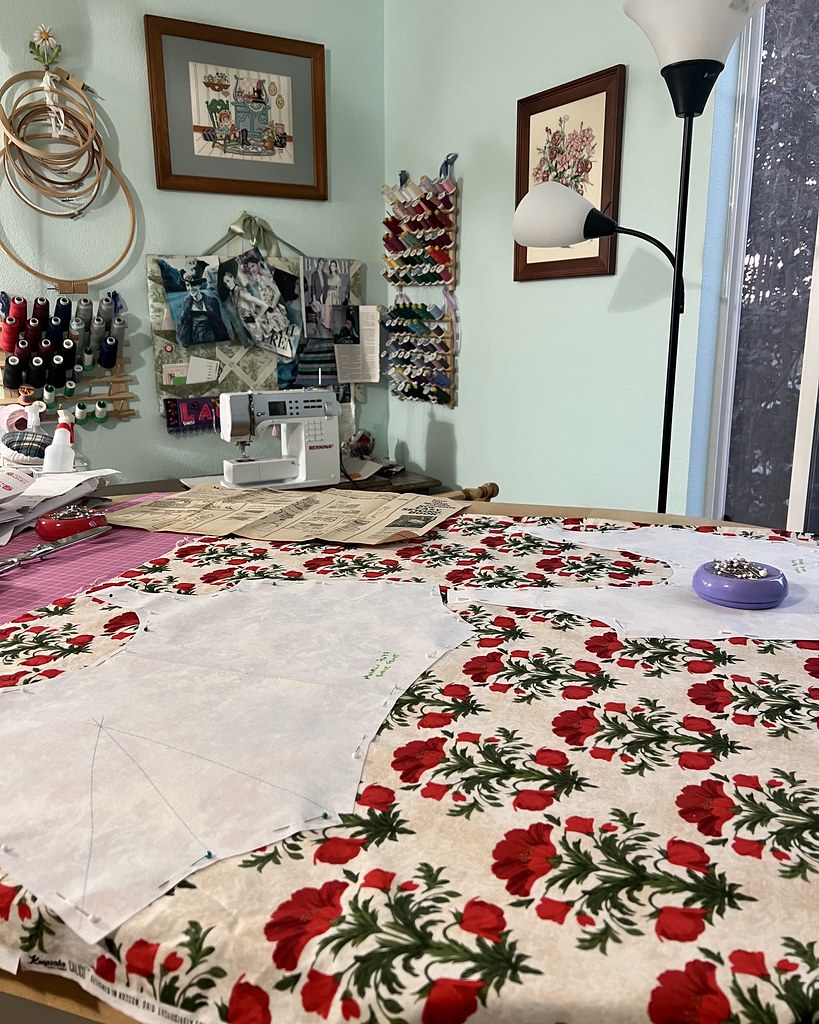
Back in June, I had the opportunity to attend a pattern swap, and was lucky enough to snag a copy of McCalls 7677. And I was so excited about it, I actually grabbed some fabric (I was definitely inspired by the pattern illustration) and got right to it.

This is a great silhouette, and I didn't want a full length gown, but I thought it would be fun to have a Summer appropriate maxi. I squeezed as much length as I could out of my limited yardage, and while I was somewhat disappointed that I didn't have an extra inch or so of length, I think it turned out for the best.
And once again, there were some interesting bits of information to be found within. For one, there are three lines of gathering stitches noted right on the pattern tissue. I know that many people use three rows of gathering, but I have never seen it noted in pattern instruction, vintage or otherwise.

And although it was not included, I added a separate shortened skirt piece to help the hipline of the skirt stand out. This was a technique that I saw in another vintage pattern years ago and have used it on a few occasion since. It really does make a difference.
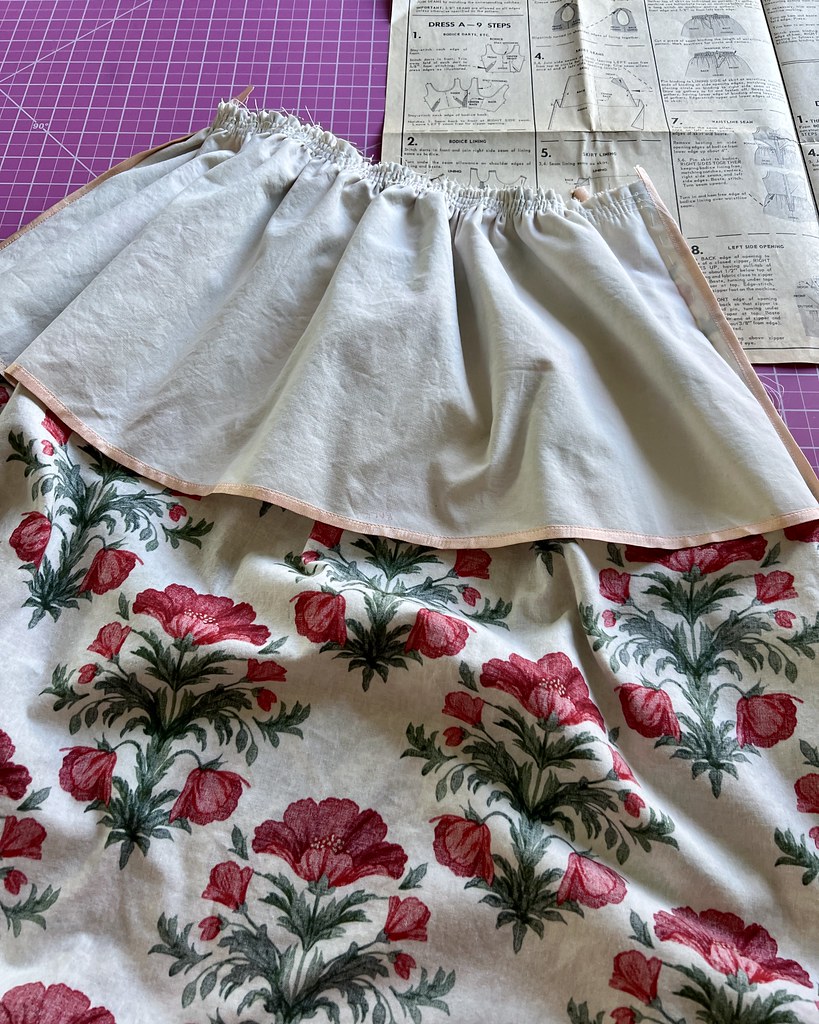
And those three rows of gathering also make the process much neater - I think that I have been converted to this method thanks to this project!
Another thing to note is that the instructions suggest using a thicker thread in the bobbin. This pattern calls for a fully lined skirt. I did not line the skirt, but did add my mini petticoat, and the additional layer can make gathering up a long length of fabric difficult with standard thread. There is the zig-zag over a really thick cord technique, but I am going to have to remember to try this method as well. As for my dress and the two layers of cotton, the standard Mara 100 thread I almost always use in my sewing machine worked just fine.

This pattern has two diagonal darts at bodice front instead of the standard two vertical from waistline to bust, and two from side seam to bust. I love the way the diagonal darts look, and it was one of the main reasons I wanted to try this pattern out. That, and the super wide neckline paired with the dropped back is gorgeous.

Just for fun, I decided to add some piping to the waistline seam.

This detail is quite common on vintage dresses. It doesn't take a whole lot of extra effort, and looks very polished on a dress that will not be worn with a belt.

This pattern had another surprise for me. I actually noticed this technique on a vintage reproduction, Simplicity 9536, which I made this year. The bodice is lined, and the zipper opening is finished with the seam right sides together before inserting the zipper.

Most pattern have you apply a zipper to the bodice front only, and then fold under the seam allowance of the lining to finish the raw edges and hide the zipper tape. I thought finishing the seam prior to installing the zipper was an interesting way to go about it. Well, it turns out it is a vintage finish, and I recently came across another vintage pattern instruction sheet with the same instructions, although I can't remember which one it was at the moment! Proving once again that vintage pattern instructions are always worth a read.

The only raw edges left on the bodice at this point are at the waist. And that obviously gets attached to the skirt.

Just look how neat those gathers turned out!

And yes, I couldn't forget my seam binding for any remaining raw edges.

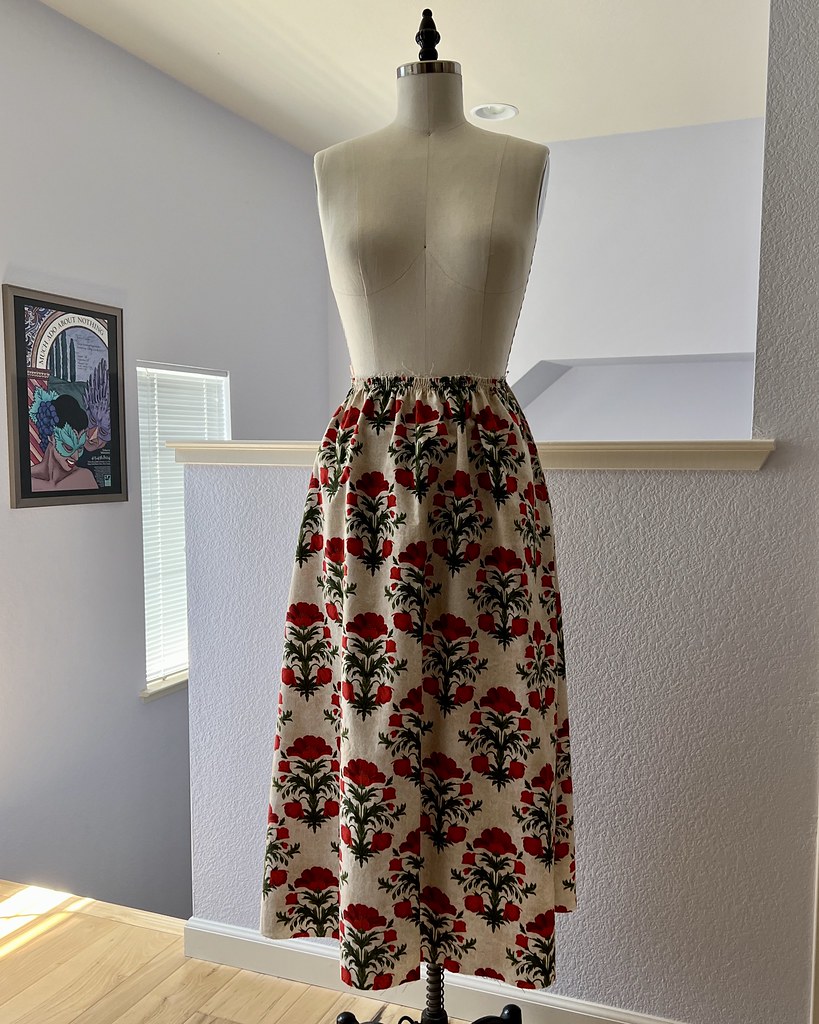
The other change that I made to the pattern was the addition of a facing along the hemline.

This was for two reasons. Number one, I wanted to get as much length as I could out of the skirt, and two, the facing also helps the hemline to stand out. It also looks pretty!

The lining was stitched in place by hand along the waistline.

I also added a few boning channels to the bodice, which you can see here if you look closely.

Because the neckline is extra wide, this seemed like a good idea, since the straps are sitting precariously on the edge of the shoulder.

And here is the zipper being applied to that finished edge. The upper edge of the zipper tape will be folded under and stitched into place.

It doesn't look quite as finished from the inside as when the lining is applied over the top of the zipper, but it works great for a lapped zipper application. And it would also make swapping out a broken zipper a whole lot easier . . . maybe that is more of the point before self healing zippers made from nylon were easy to come by?

And once again, I learned something new from working with a vintage pattern, and have a great dress on top of it.

I just love the back!

And yes, I suspect that this dress pattern will be used again. I think it would look amazing as a more formal gown, but there will definitely be at least one more cotton sundress version of this in my future.

Ohmigosh, that is gorgeous! I love the idea of an extra hip panel for structure—-that’s gonna go in my hot tips section of my brain! Love your fabric choice soooo much.
ReplyDeleteIt’s jeanine (I don’t know why it didn’t grab my name but I don’t like to post anonymously!)
DeleteSo many interesting points in this post, I use vintage patterns mostly but I haven't seen three rows of gathering before. I will definitely use it next time. Thanyou so much for the post.
ReplyDeleteLaura Mae,
ReplyDeleteAmazing vision and execution! As for the yardage stretching, you are on the varsity team.
The collar does not gape. Did you sew or iron anything along that expansive curve to keep it from wobbling or sagging?
that is so pretty, I love a pattern with a low back like that. and great use of the print.
ReplyDeleteI got lucky with the print - the size worked especially well with this design for some reason. I guess it was meant to be!
DeleteOoooh I love the piping at the waist!
ReplyDeleteI've seen triple gathering thread recommended on some patterns before. I don't use it often but it definitely looks better than even 2.
As for the way the zip is applied, I'm sure my sensitive skin would react to something! But yes interesting to speculate the difference between modern zips and older ones, as to why that way of applying them.
Aren't those bodice darts pretty! Thankyou for sharing!