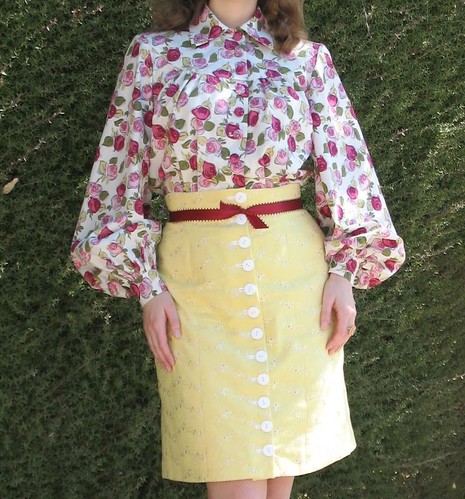
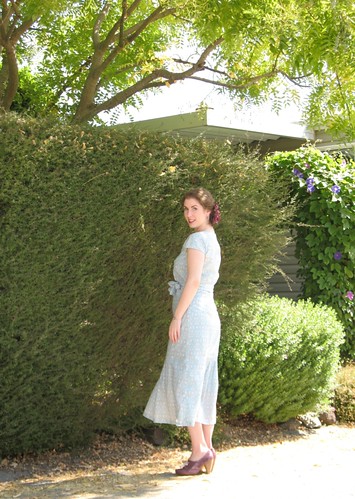
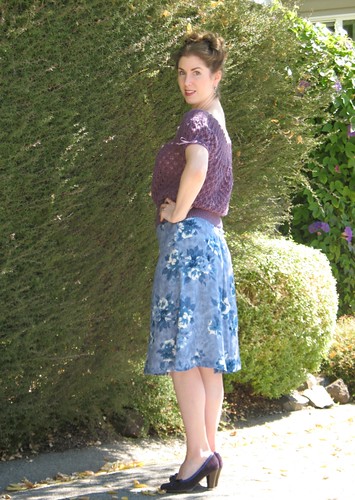
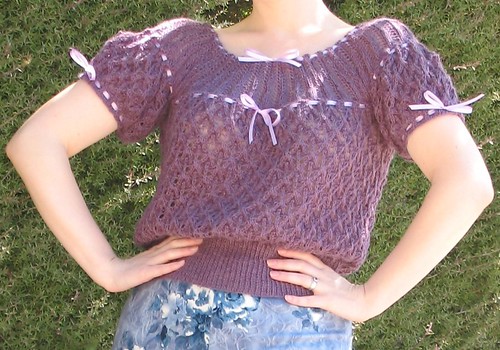
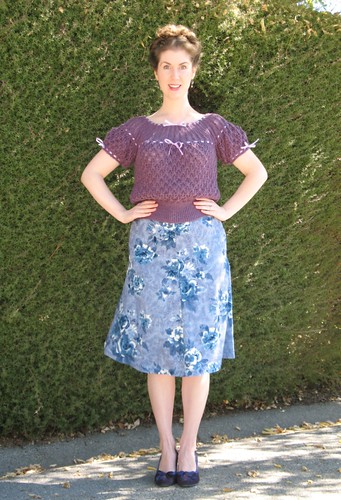
Sunday, September 30, 2012

Ribbon Threaded


Of course, it took a while to decide what I was going to do 
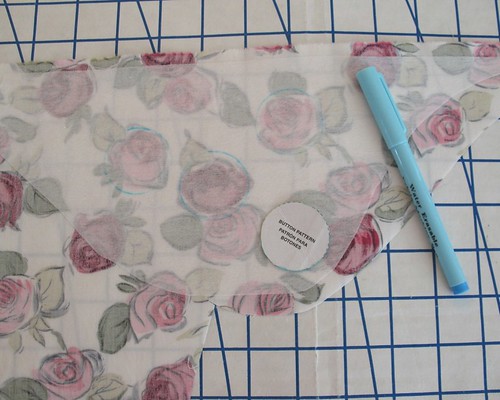
about all the ribbon required by the design.  
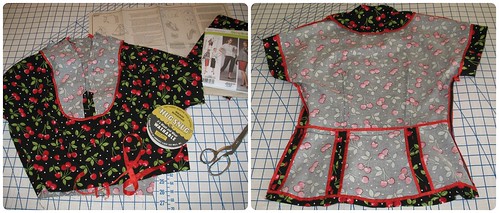
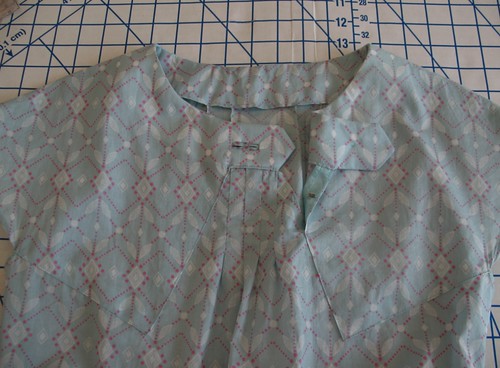
And yes, it really is necessary!  After sewing my front, back, and sleeve pieces together, I tried the sweater on and had a bit of a moment.  Yikes, that neck opening was big.  
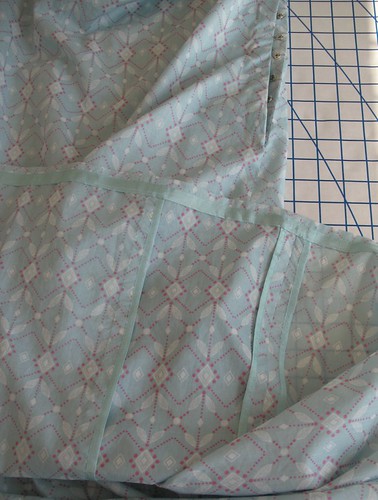
Thankfully, a length of ribbon threaded through the eyelet pattern pulls in all that extra width.  I guess they did that on purpose! 


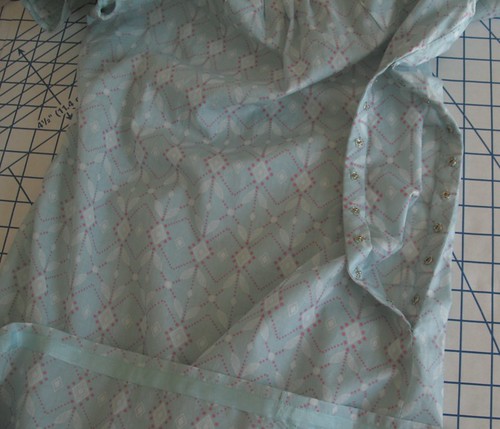
I ended up using some narrow satin ribbon in a lavender colorway.  I have an entire shoe box full of old Spool o' Ribbon in many colors from JoAnn Fabrics.  They seem to have stopped carrying the product, but it sure does come in handy having some extra spools stocked away.  And the good news is that I can always swap in another ribbon if I find something I like better.  


Once again, I managed to make myself a sweater that does not really match anything in the closet. 

Okay, that is not completely true, but it was a great excuse 
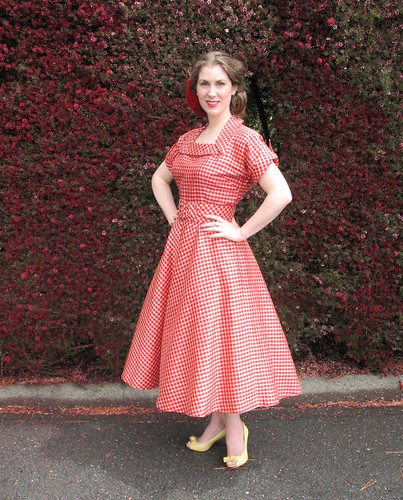
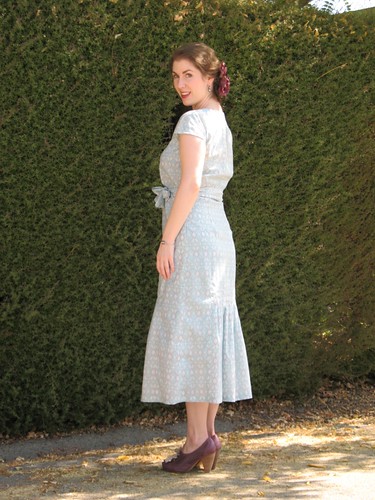
to make another easy to wear skirt with Simplicity 4044 (the fabric of which 
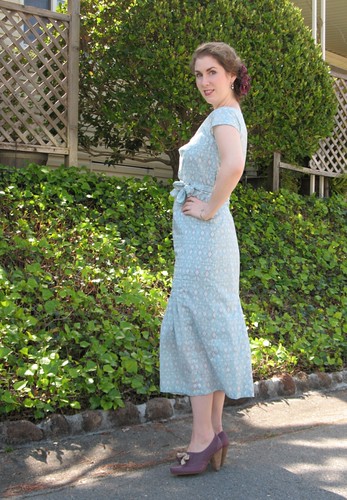
was leftover from this dress).


I was unsure if I was going to have enough yardage and then remembered just how long this skirt is drafted.  I cut four inches off the pattern piece and it could even stand another inch.


This is now my third version of the skirt.  Yes, I already have a blue rayon jacquard version, but it gets so much wear that I had to make myself another for fear the original will wear out one of these days!
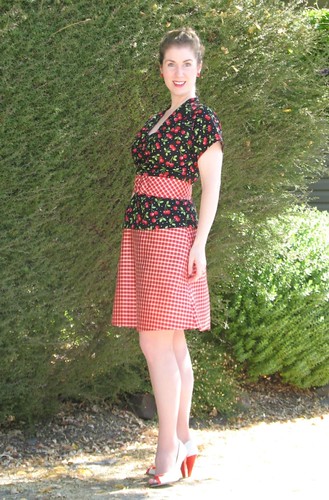
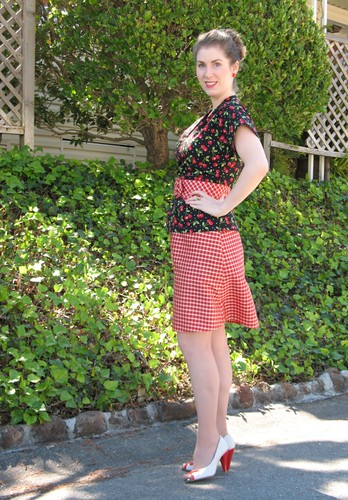
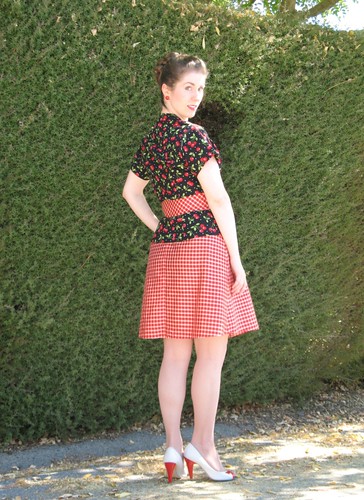


Sweater:  Made by me, "Ribbon Threaded Jumper" from A Stitch in Time, Volume 2
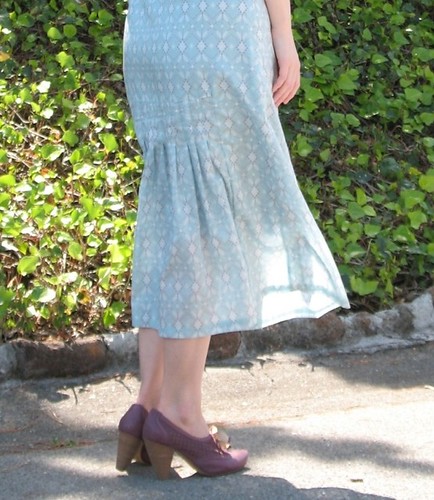
Skirt:  Made by me, Simplicity 4044
Shoes:  Poetic License
Earrings:  Shadows

Friday, September 28, 2012

“Planned for all Occasions”


Here are more pattern goodies from 1950.


The description for #8597 is just too much:  “two piece frock that’s softened with pert peplums.”  Pert peplums!  I cannot think of the last time a contemporary pattern description made me laugh out loud!  And that is just one more reason that I love vintage!


If I was able to shop from this catalog, I would have a very hard time picking just a few styles.  They are all so wonderful!

Thursday, September 27, 2012

“For a Trim, Slim Look”


Here are two more pages from Fashion: Fall-Winter 1950 for your enjoyment.  


I just love all of the scalloped edges.  And that contrasting lace yoke just gave me an idea for another version of my latest creation  . . .  


The neckline of 8620 reminds me very much of the jacket from Vintage Vogue 1136.  And that feathered hat is truly fabulous.  How do get into a car with something like that on your head?

Does some lucky person have any of these lovely Sew-Rite Patterns?  And does that mean that you have one of these lovely outfits in your closet?!  

Wednesday, September 26, 2012

Return of the Rose Print


You know all of those Asher prints that Peter has been mentioning lately? . . . Well, you may have caught a glimpse of one right here on my little blog!


I knew I wanted to wear one of my Beignets for the Colette Launch Party, so I needed something suitable to pair back with one of those skirts.  Something new!  And then I caught a glimpse of that rose print out of the corner of my eye which happened to be right next to the leftover scraps of yellow eyelet.  Clouds part, and light shines into sewing room!


Because I already had twelve contrasting buttons running down the skirt, I did not want to do the same with the blouse.  Enter the covered button, and nine more bound buttonholes!  (It really is time for bound buttonhole rehab.  Would someone please convince me that my machine and its buttonhole attachment is not going to destroy my finished garments?)


Yes, I am a big dork, but I just love the construction process and watching as a garment takes shape.  I love how all the raw edges are matched and finished, and finally, you have a brand spanking new piece of clothing.


And did I mention how much I love these sleeves?  Yes, they are over the top (and perhaps would work better with a more drapey fabric) but they are so much fun to wear!

This is the first pattern I have come across that stops the buttonholes right above waist-level, and adds a snap right below to keep the tucked section together.  Brilliant!  I know that some Victorian and Edwardian construction uses the same idea; if something is going to be tucked in or covered, the embellishments stop at that point.  Not only does it save on button costs and buttonhole work, but there is no bump to contend with!


The silhouette of a blouse like this is always improved by the addition of a shoulder pad, in my opinion, and I used my go-to pattern.  Vogue 2494 is a scrumptious vintage reprint, and it also includes a pattern for a slim shoulder pad.  To be fair, the blouse pattern does include three pieces to make up a shoulder pad, but I have had a bad experience with the three piece stuffed shoulder pads from vintage patterns, so I am wary of them and decided to avoid them altogether in this instance.


I only have a few pictures from the Colette Launch at which this blouse made her debut, so I decided to wear the outfit again yesterday with a few different accessories.

Eat your heart out, Cathy Lane!  Although that brat may have the last laugh.  After all, her rose print is a glorious gown, mine is merely a blouse.  But I do have some yardage leftover, and may have a few tricks up my voluminous sleeves . . .


And is anyone else a bit miffed with her for losing all those extra pounds about 24 hours after the birth of her bouncing baby?  Those darn celebrities and their fad diets and personal trainers – it just isn’t fair.  I am put out for pregnant woman everywhere!

But I would like to say a great big thank you, Peter, for sharing your Asher Studio cotton print – I just hope you do not have a screaming harridan of a cousin on your hands throwing a massive hissy fit over your generosity.


Blouse:  Made by me, McCall 8358
Skirt:  Made by me, Colette“Beignet
Belt:  length of ribbon
Shoes:  Hinge “Tegan”
Fishnets:  Simply Vera

Tuesday, September 25, 2012

Tips and Tricks: The Covered Button

It should come as no surprise that I am a fan of the covered button.  With the many challenges that come with finding that perfect button for a project, the covered button creates an easy solution – use your fashion fabric, and it is sure to match back beautifully to whatever you may be making.  And they are the perfect companion to a set of bound buttonholes!


First off, I will say that button kits with the mold and pusher have never worked for me.  Someone must be having a level of success with the kits because they keep selling them, but my fabric always shifts and getting the back piece on with the pusher sends the whole thing flying across the table.


Instead, I use the button forms that have serrated edges or teeth that catch the fabric until the back piece is snapped into place.  These kits have the added appeal of not needing any tools, so you will never buy the refill kit only to find that you do not have the proper sized mold, or can’t find the darn thing.

[Just be aware that some some thick fabrics are unsuitable for these kits.  Using a plastic ring and a bit of batting, you can rig up your own base - just remember to create a shank with your thread when sewing the button to your garment!] 


Super thin or sheer fabrics can also cause problems – the metal of the form shows through the weave and creates a shiny/cheap look.  But there is a solution!

After glaring repeatedly at the shine-through of my covered buttons on this jacket, I decided to do something about the problem – because there was no way I was going to give up on them completely.


A quick application of a lightweight fusible interfacing covers and blocks the metal from shining through the weave of your fabric.  Yes, it is that simple!  Not to mention an excellent way to use up all those scraps of fabric and interfacing.  


The idea came to me after struggling with two layers of fabric shifting as I tried to catch those two layers in the teeth of the button form.


For super lightweight or light colored fabrics, two layers of fabric stuck together with a double sided fusible also works (I use Steam-a-Seam2).  I believe this is usually found in the quilting section and generally used for appliqué work.


An added benefit is that the extra body you have added to the fabric scraps makes it easier to tuck all of those edges in and keep the edges from fraying.


And that trick with the pencil eraser mentioned in the instructions . . . it really does work.  Instead of my fingernails being chewed up by the metal prongs, the eraser takes all of the abuse!


Speaking of reading directions . . . if your backs do not want to click into place, use the suggested spool of thread - but make sure you pad the area you are pushing down on or your button will lose its dome shape and flatten out in the center!

What are your thoughts on covered buttons?  Do you think they are worth the extra trouble or do you avoid them like the plague?

Monday, September 24, 2012

Fall Weather Inspired Giveaway


I thought it would be an excellent time to host a Fall-themed giveaway, seeing as I was lucky enough to win Colette Patterns new Anise jacket at Saturday’s Launch Party.

So if you are in search of a new Fall wardrobe – look no further!


McCall’s 5192 (size 6-12 in its original factory folds) is a classic wardrobe pattern.  It includes a cute jacket (excellent for all of those coat/jacket sew-alongs coming up!), a skirt, and trousers.  The only thing you need to provide is a classic turtleneck or silk shell and your new wardrobe is complete!


To enter, leave a comment below stating some of your upcoming Fall sewing plans, or just a quick note.

The giveaway will close Monday, October 1, 2012 at 9:00 p.m. PST.

Good luck!

Sunday, September 23, 2012

Colette Patterns: Fall 2012 Launch Party


While ridiculous, it is generally with a bit of trepidation that I walk into these blogger meet-ups.  I suppose I feel the same way about any gathering where I may not know anyone in attendance.  It feels a bit like the first day of school or a new job.  Will I be able to join a group of people already chatting without feeling like an unwelcome outsider?

But it took only minutes before I spotted Amy and Meg in the crowd!  Friendly AND familiar faces!  It was a BurdaStyle launch party reunion!

This time around I came a bit more prepared and jotted down a few new names and blogs.  Daiyami and I are fellow dress and skirt enthusiasts and appreciate a great pair of tights and Tracey looked amazing in her perfect shade of green Sencha.  I also met Romy, Ali, Elisabeth, and Jilly (who recognized the origin of my latest creation - more on that later . . .).

Daiyami, me, Leah, and Amy 

One thing is for certain:  this group of online sewing fanatics enthusiasts is a wonderful bunch!

People could be heard chatting about Sarai’s creations all evening long as if they have their own personalities, and of course, they do.  Patterns with proper names become old friends, and “my Meringue” is infinitely more chic than “my 8358”!

A Verb for Keeping Warm

I have even learned about a new yarn haunt - A Verb for Keeping Warm is a fantastic little shop, complete with an adorable dachshund named Cleopatra and a bunny with an equally excellent name, although it has slipped my mind for the moment.  Just up the road is the amazing Lacis, but I might never have found this store if not for Colette Patterns.

And to top off spending a lovely evening with kindred spirits, I won the raffle giveaway!  Now I just need to find the perfect fabric for my new Anise jacket.  (The store quickly sold out of both new patterns, so it looks like they are a huge hit and I cannot wait to see everyone’s new Fall wardrobes!)

Thank you Colette Patterns and A Verb for Keeping Warm for hosting a fantastic evening!

A new pattern to keep me busy!

Saturday, September 22, 2012

Cherries & Polka Dots


I keep meaning to skip a week or two of Sew Weekly Challenges and give myself a break, but lately, they are just too good to pass up!  This week was "Polka Dots," and I could not, in good conscience, let that one pass me by.


Turns out, the only fabric with polka dots left in my stash (other than scraps – there are plenty of them) was this quilting cotton, leftover from an apron I gave as Christmas gift.  I had forgotten all about the original project until the lady with the apron, whom I see everyday at work, recognized the print (she had used the apron a few days prior)!  We had a good chuckle over that!


Now, I really do love the print (which is perfect for an cheery apron!), but it would be 100 times more beautiful if it were made of silk or rayon, am I right?!


I have used this particular pattern before (Simplicity 4047), so I knew what to expect.  And everything went together beautifully.  I love my silks and rayons to death, but cutting a quilting cotton is SO EASY after working with drapey material!  


And, of course, I had to use my cherry red Hug Snug seam binding.  I may be obsessed with my seam finishes, but they make me happy.


Then there is always the issue of what to wear with my new garment. . .  Turns out, I had the perfect skirt and belt, from two separate projects.  I just love when everything comes together like that!


Blouse:  Made by me, Simplicity 4047
Skirt:  Made by me, Sewaholic Cambie (modified)
Belt (and silk checked dress):  Made by me, Advance 5574
Shoes:  Seychelles
Earrings:   Vintage from Rummage Sale
Ring:  Grandfather’s class ring

Sunday, September 16, 2012

A Bit of Last Minute Motivation


This particular dress was one of those pesky unfinished items hanging in my closet (for at least a year and a half - yikes!). 


I lost interest as soon as the weather started getting cold.


Well, it is time to stop the UFO cycle.


One of the original issues was that this lovely fabric was printed off grain.  And not just a little bit.


I decided mid-construction that the dress was a lost cause – there was absolutely no way to match the design, and it looked awful.


Other than the grain issue, this fabric was wonderful to work with - crisp and silky soft.  

And I went ahead with the snap opening - vintage construction details are fun!


I happened to have the perfect shade of seam binding in the stash.  How often does that happen?!


Well, Autumn weather is fast approaching, and my guilt was beginning to get the best of me.  There was so little left to do, I was determined to finish this dress (and, let’s be honest, there is no way I am going to work on a thin cotton dress in the middle of Winter).  So the time was now!


In conclusion, I am happy that I finished the dress, but I am not as happy with it as I originally hoped.  Ah, well, you can’t win them all.


Dress:  Made by me, Vogue 2671
Shoes:  Hinge
Hair Flower:  Made by me