
So many zipper possibilities, so little time! These days, my first choice is often a
regular zipper with a lapped insertion technique, with invisible zippers coming
in a close second – there is something very tempting, after all, about a
closure that disappears into a seamline.
I do my best to keep a variety of zippers on hand so when those weekend
projects come up, no last minute trips to the fabric store are necessary. And most of those stashed zippers are 18” or
longer for one simple reason – I can shorten them if need be.
If you haven't already guessed, nylon zippers are a cinch to shorten! Provided you have a strong enough wire cutter,
metal zippers can also be shortened, although the rough edge of cut metal might
create some issues if not properly covered or filed down. So if your pattern calls for a zipper much shorter than what you are able to find, no problem!
Mark the needed length on the zipper tape. You can stitch in a makeshift zipper stop
right at that marking, but I find that it is easier to work with a little extra
length (especially with an invisible zipper that twists in on itself) so I mark
a good inch below that point.
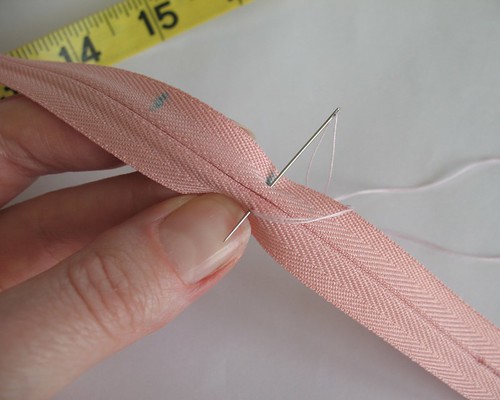
Now is the time to create a new stopper for the zipper which
will keep the pull from zipping right off the end of the cut/shortened zipper
tape while you are sewing it in place.
You can now trim the zipper one inch below the thread
stopper. I like to use pinking shears to
keep the tape from fraying, but really any scissors will do (except for your
good fabric sheers, of course – make sure to keep those away from the nylon
coils!).

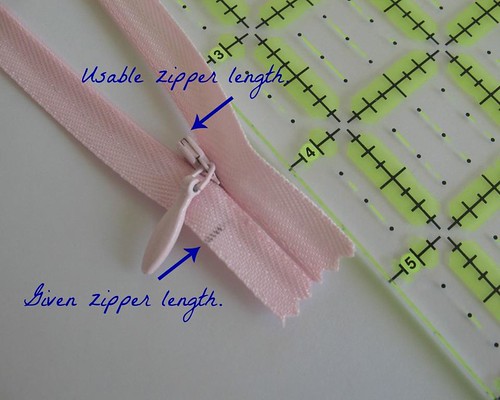
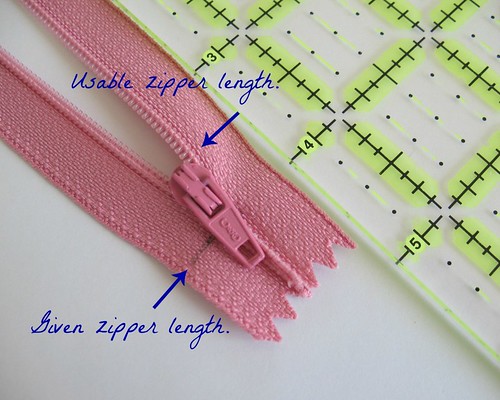
Something to be aware of is how much space the sliding mechanism
that zips the teeth together and apart uses up.
This is not always a big deal, but that 16” zipper for that 16" opening may already be one-half
inch (or more!) too short for your garment.
I have long suspected that zipper manufacturers have been
cheating us out of the full length promised, so I did a bit of measuring with
the zippers I had on hand.
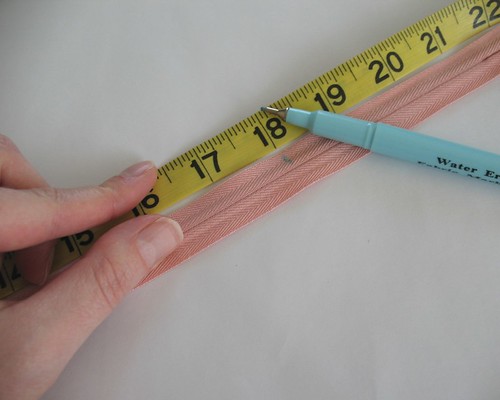
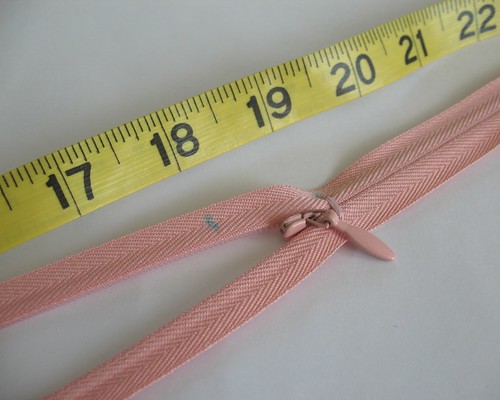
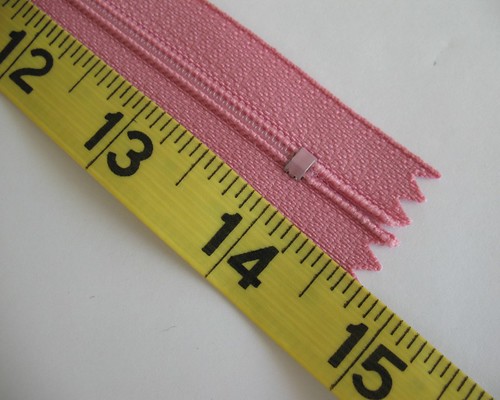
Measuring from the top on down to the length stated on the
package brings you to the bottom edge of the stopper for both invisible and standard zippers.
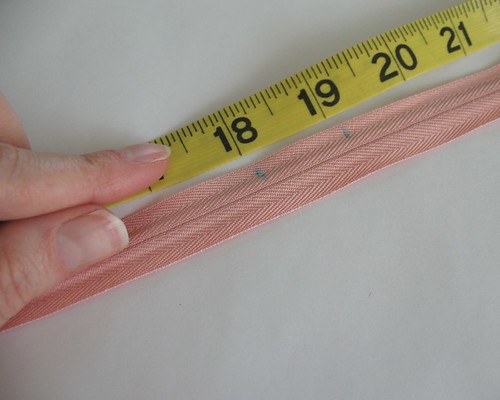
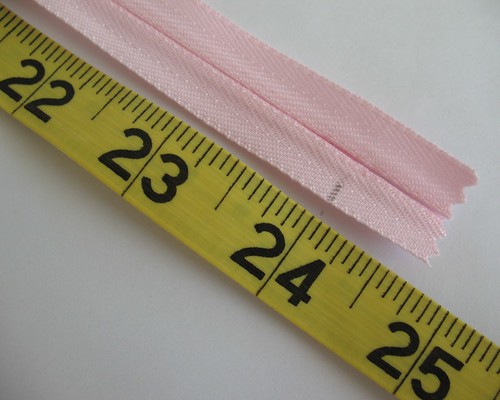
A nylon invisible zipper fuses the lower coils together so
that the stopper is a short strip of plastic coils.
When you take the zipper mechanism into account , 5/8” is lost.
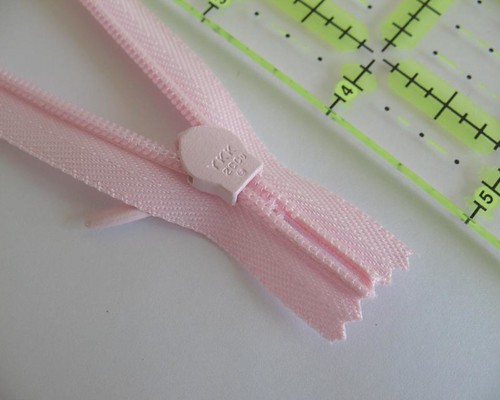
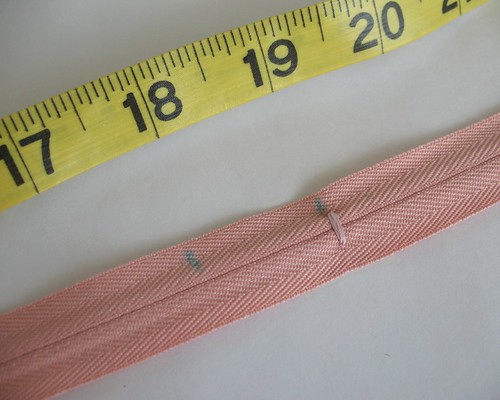
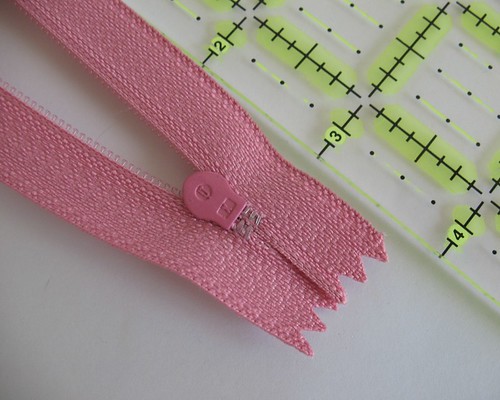
A regular zipper uses a metal stopper that looks like a
chunky staple. With the added zipper
mechanism, a standard nylon zipper loses approximately ½” from the stated measurement.
It might seem petty to begrudge ½”, but that can make quite
a difference on a side zipper opening, especially for someone like me who
consistently has to add length to torso measurements.
So perhaps that extra long zipper does not need quite as much
shortening as you might expect . . . but if it does, the process is easy and
completely painless!
[These instructions refer to standard zippers that are
closed at the bottom edge and open at the top.
A separating zipper would have to be shortened from the top edge to keep
the separating mechanism and specialized lower teeth in place.
If you plan to use an exposed zipper
application in your garment, make sure to account for the fact that your new thread stopper is going to need to be hidden along with the lower edges of the tape, and any marks you make on the zipper tape may end up visible.]
Really useful post...I wonder if there is a tool or kit that is available to re-install the metal bracket or staple like end piece on a metal zipper?
ReplyDeleteDagmar