
After a whole lot of last-minute sewing, the dress was
finished just in time to be worn to the Gala event yesterday evening! (There a few sneak peeks over on Instagram and
Facebook.) But to be honest, I do not
have the energy to go through all of the photos right now, so those will come later . . .
Before all of the steps disappear from my memory, I want to
work through more of my process here on the blog.

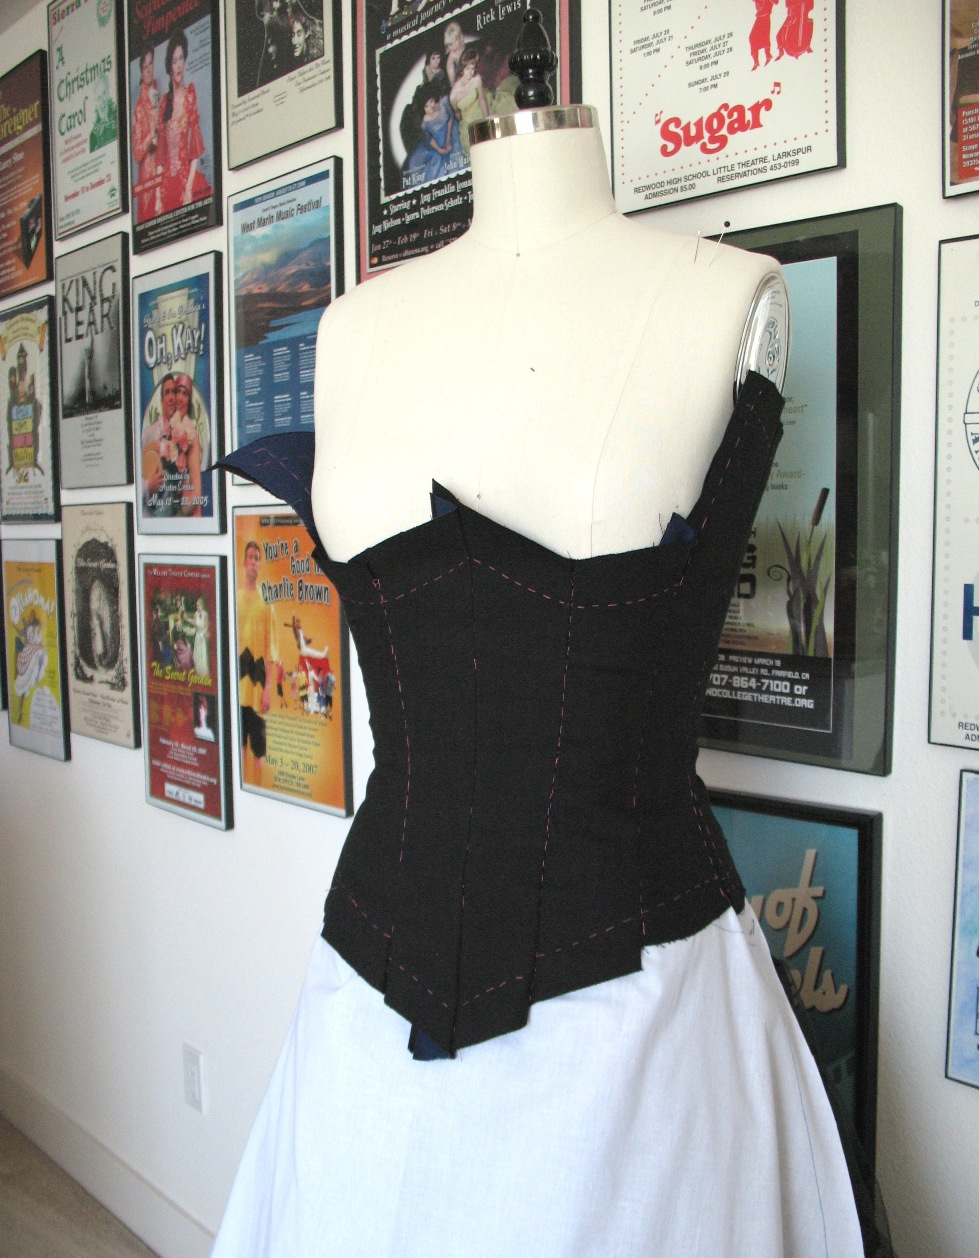
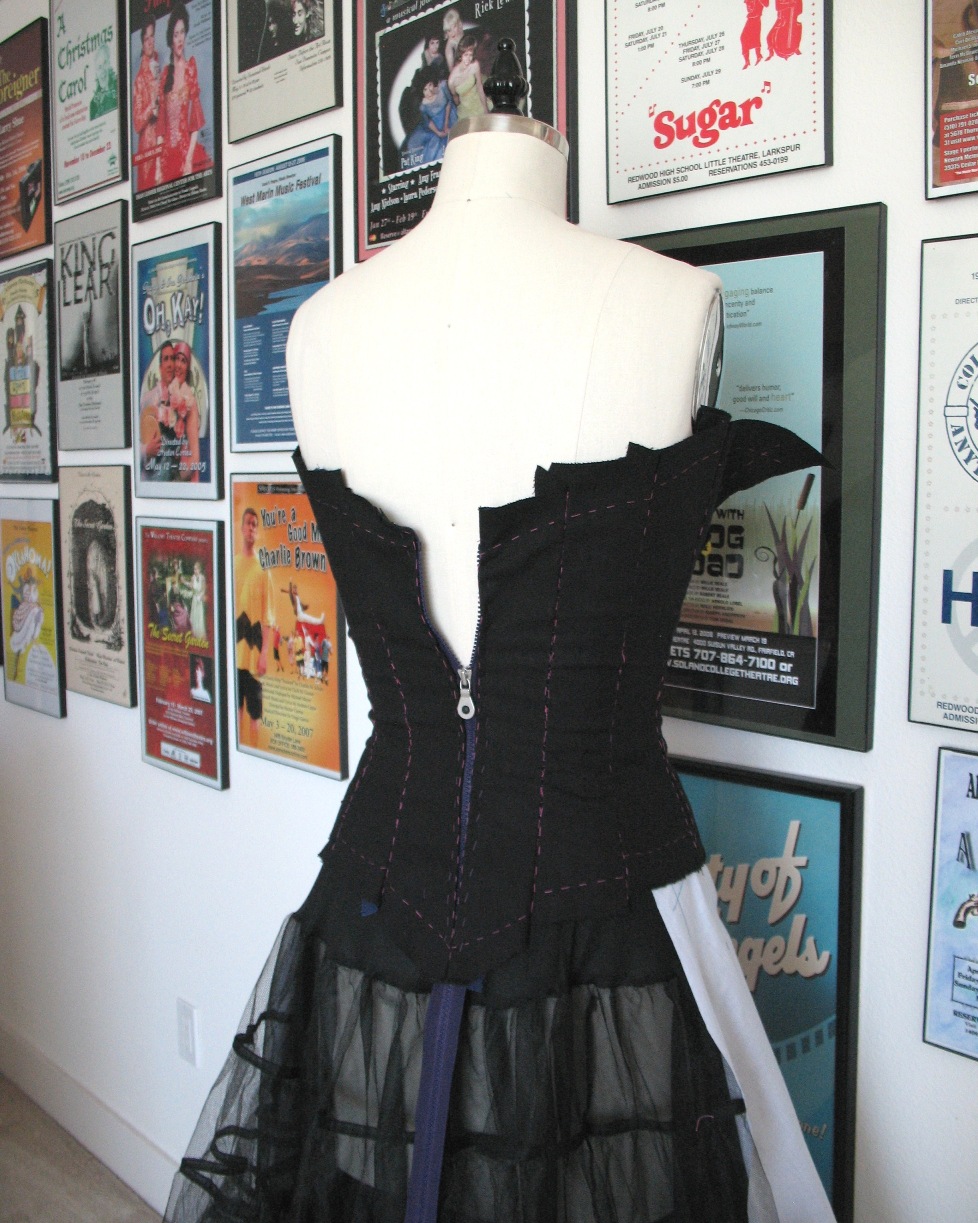
I knew that a foundation layer was going to be needed with
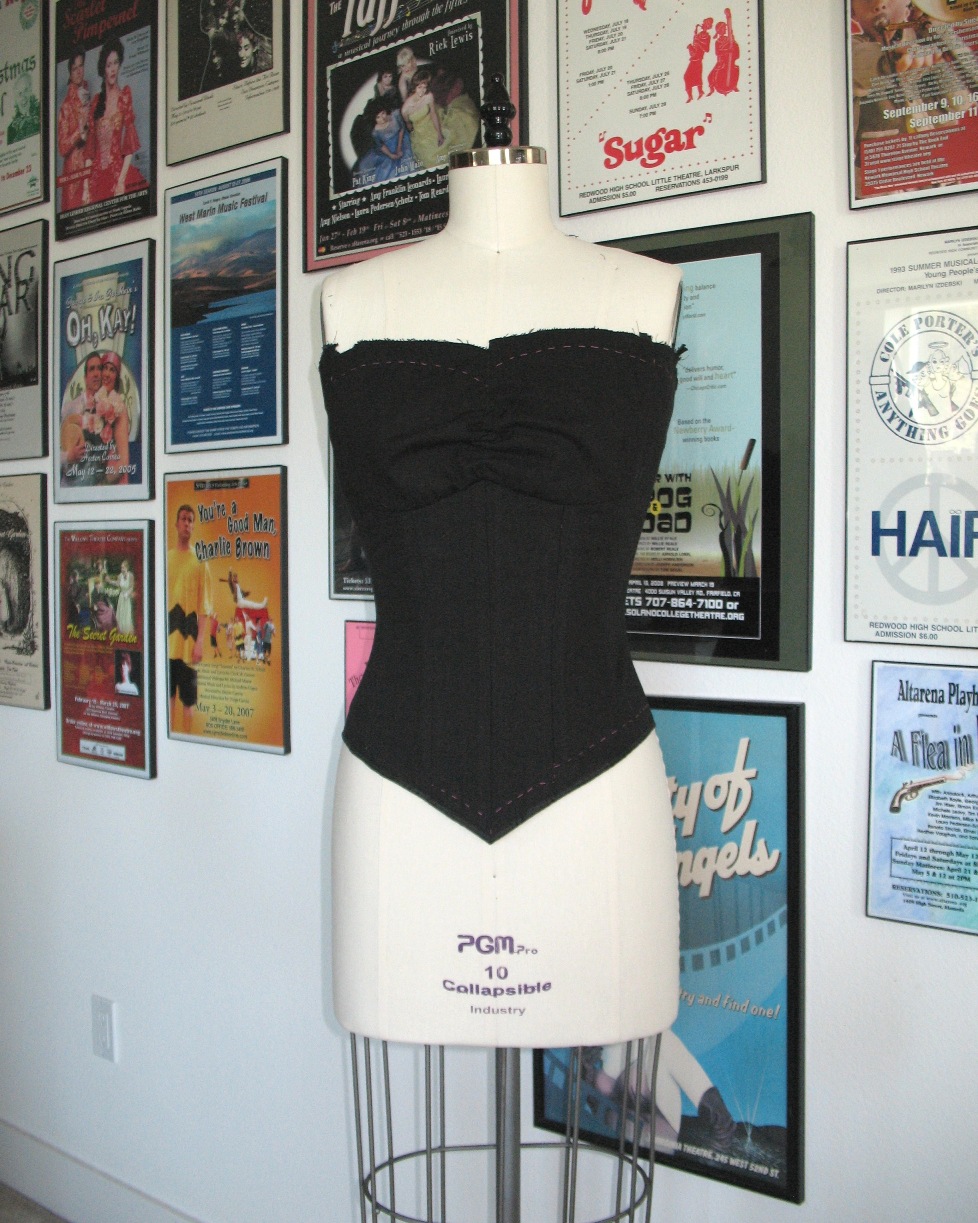
an off-the-shoulder dress that dips in the front and back. A corselette was the perfect solution.
I used Vogue 7698 as a starting point. Since I previous used it for my Emerald Green Ceil Chapman Gown, I knew it would go together easily.
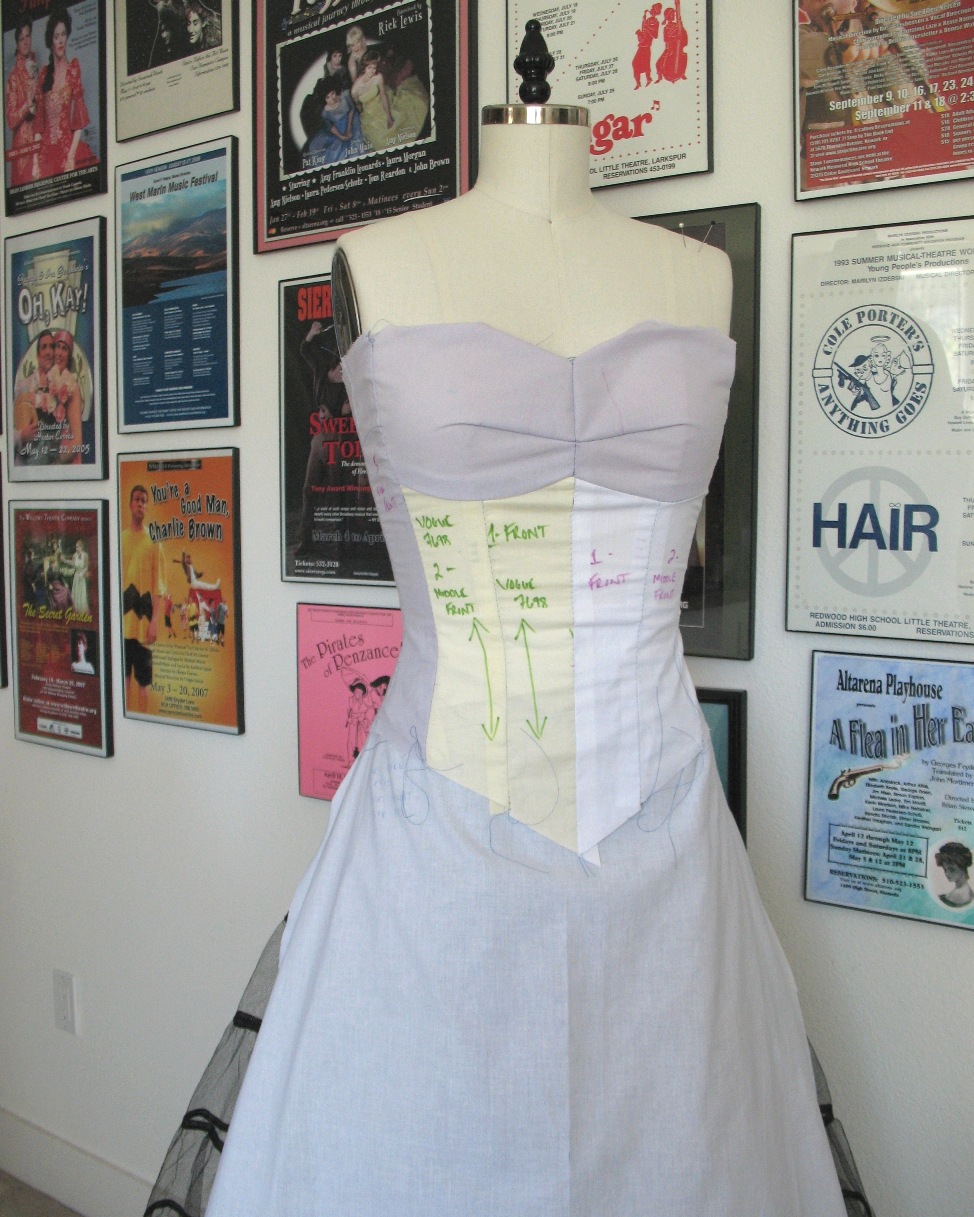
First up was a muslin.
I tried a couple of different things with the bust cups, only to go back to the original, although I did end up adding a bit more coverage to the upper edge and lowered the center back. I also lengthened the lower edge to match back to the dropped-waist and pointed bodice pieces of the dress.
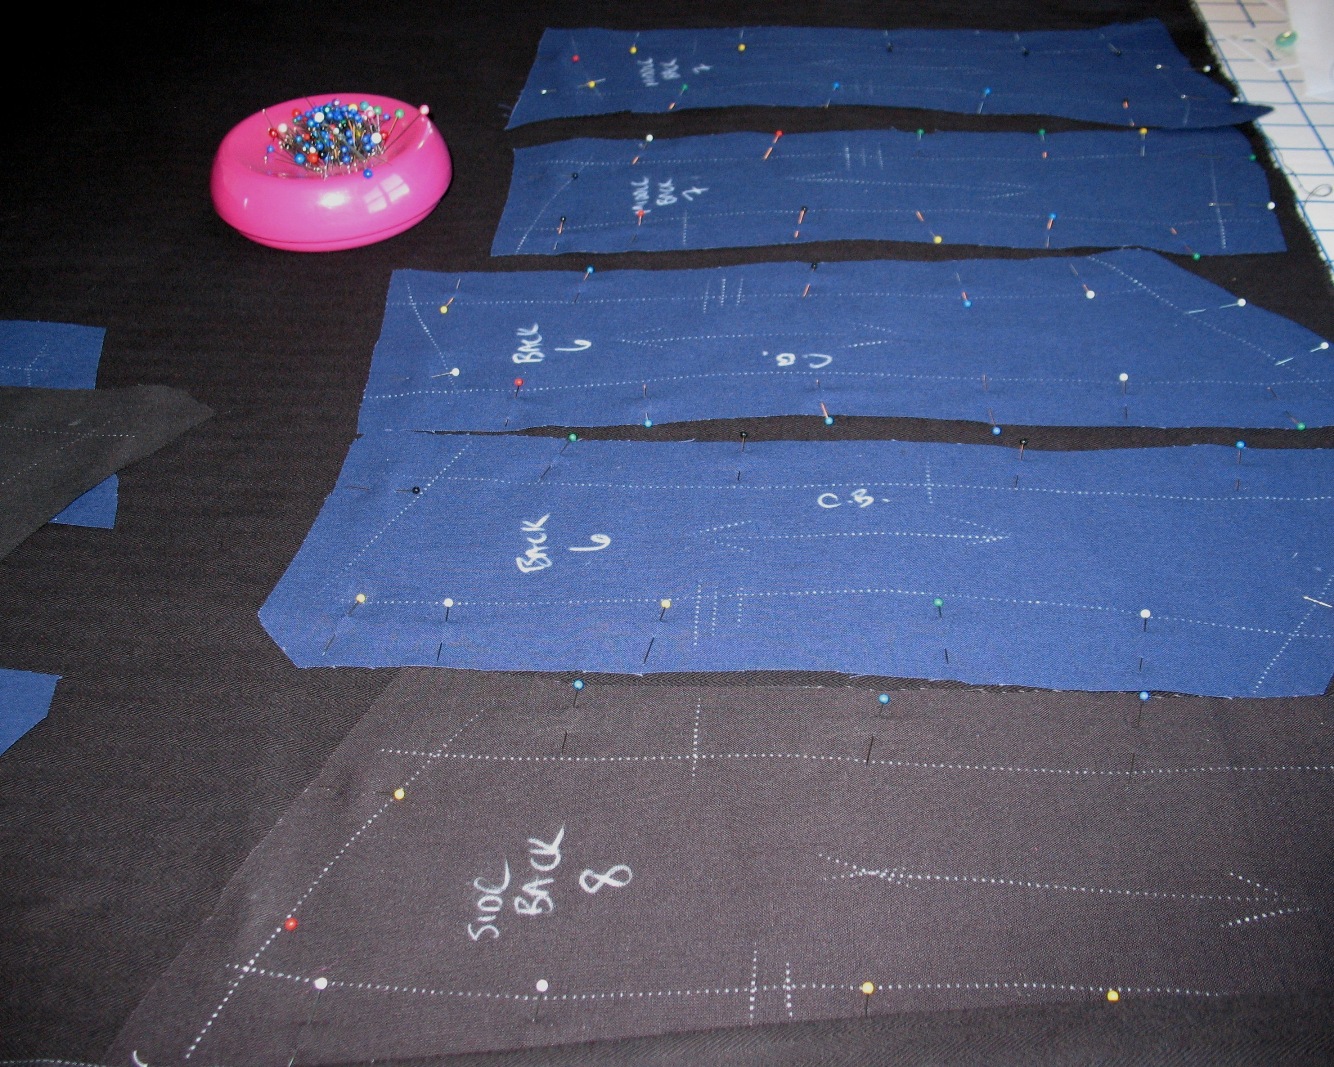
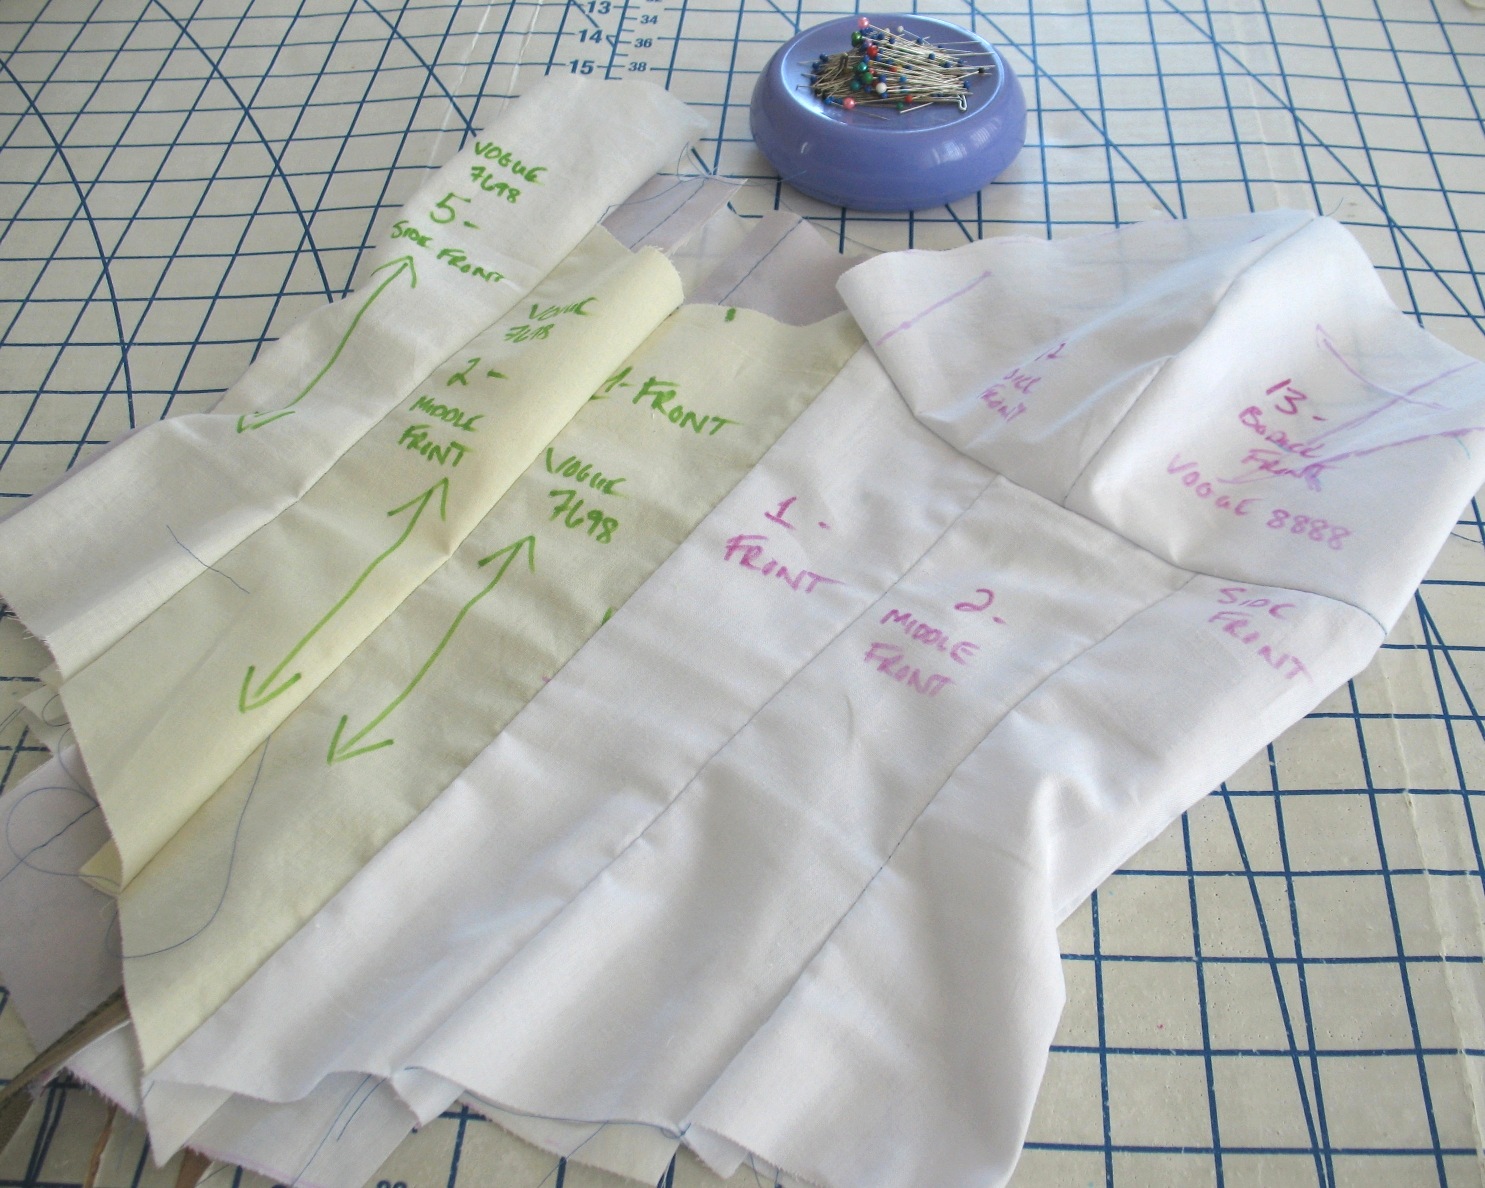
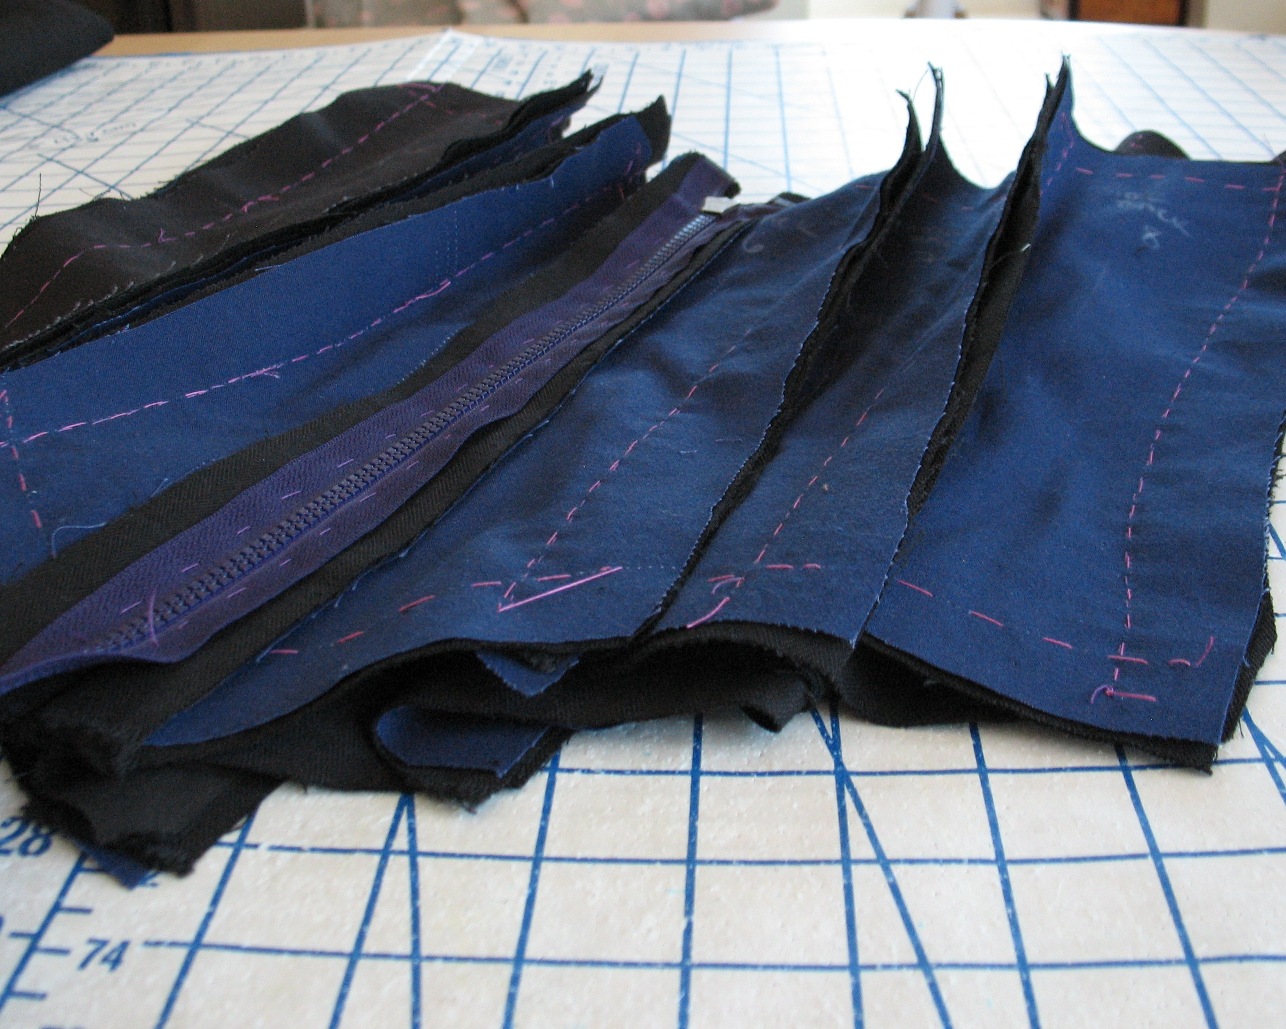
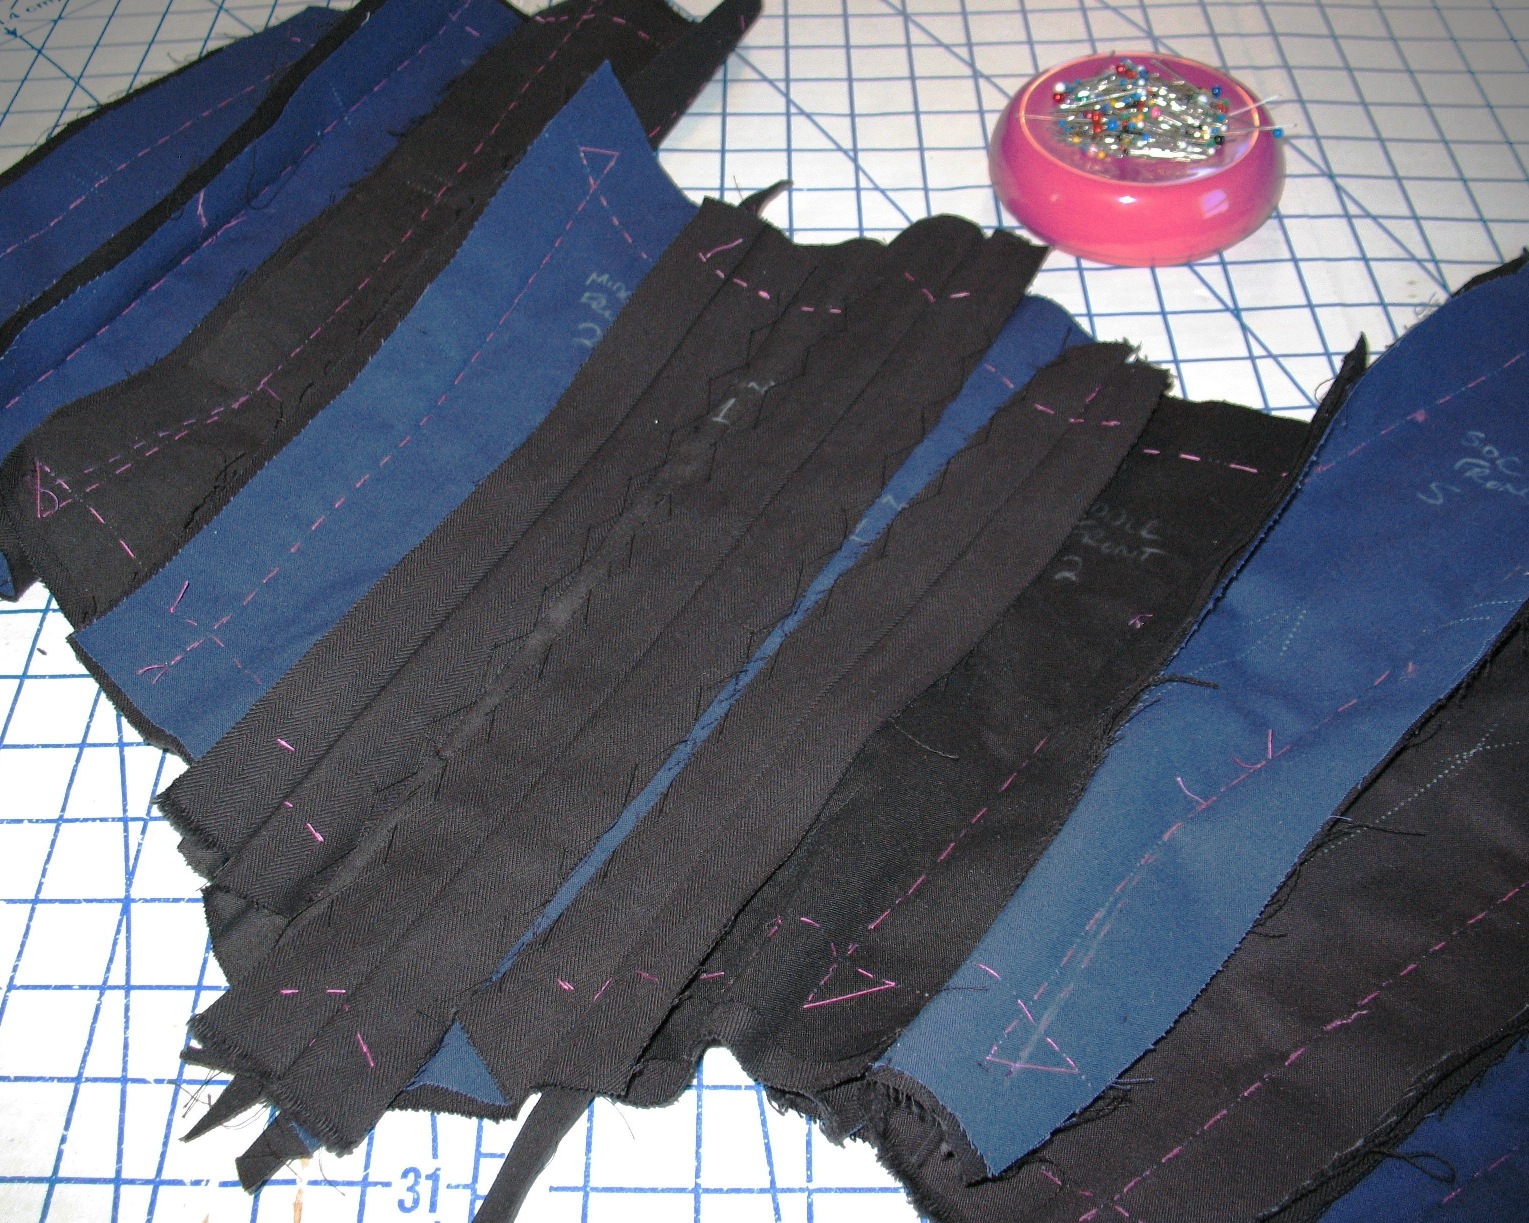
The underlining is plain old quilting cotton that is leftover
from various projects. I ran out of
black, so I pulled out some blue. I knew there was a reason I kept all of those small scraps of cotton stashed away!
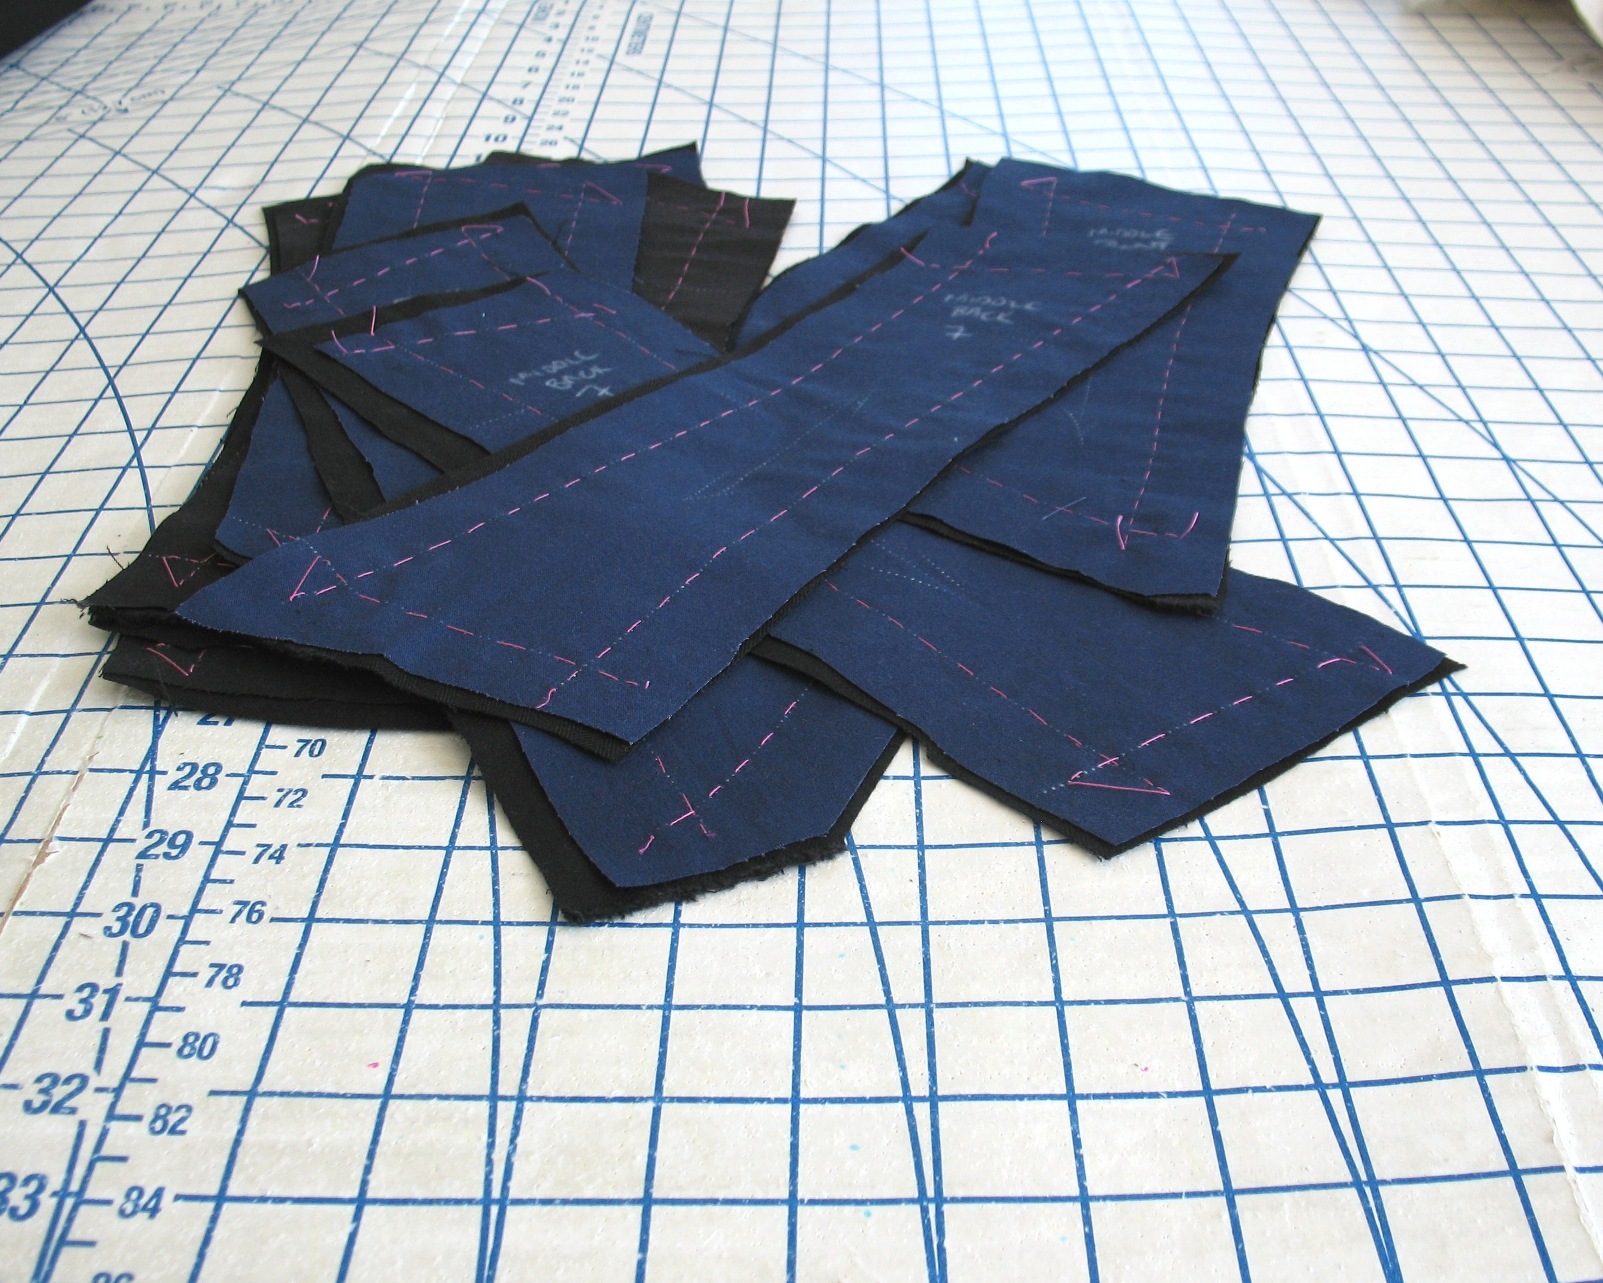
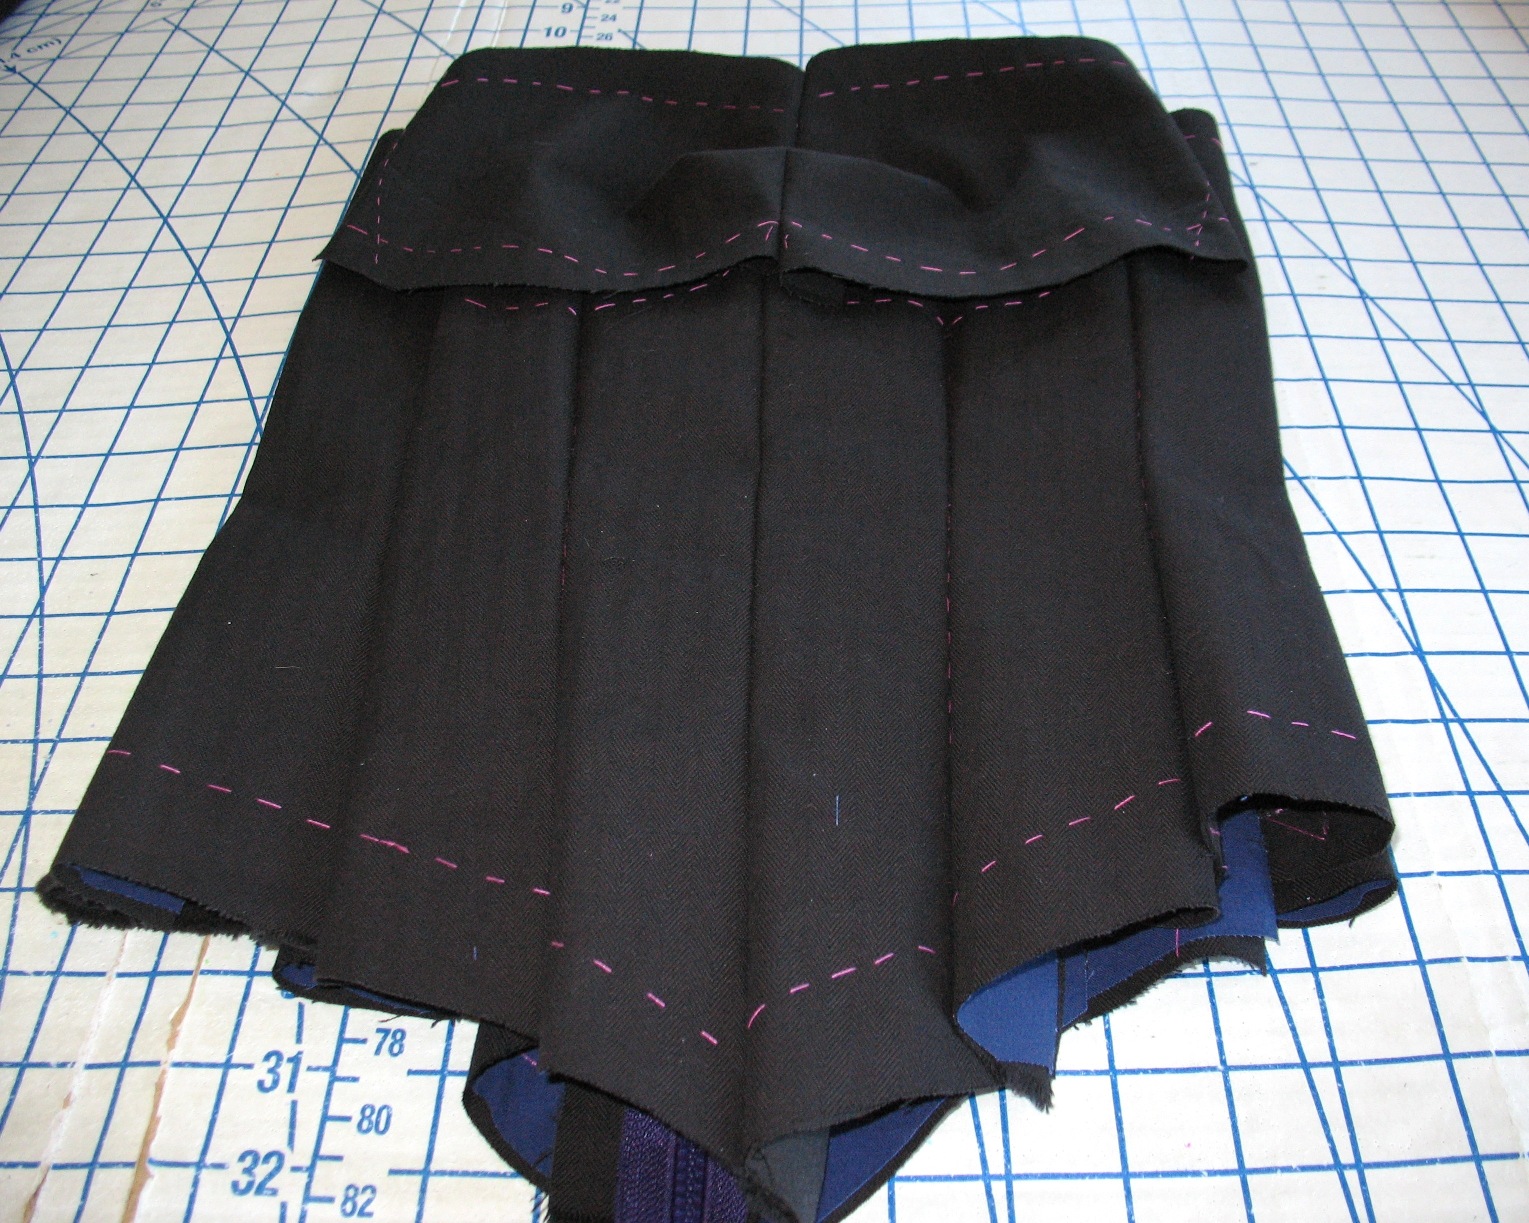
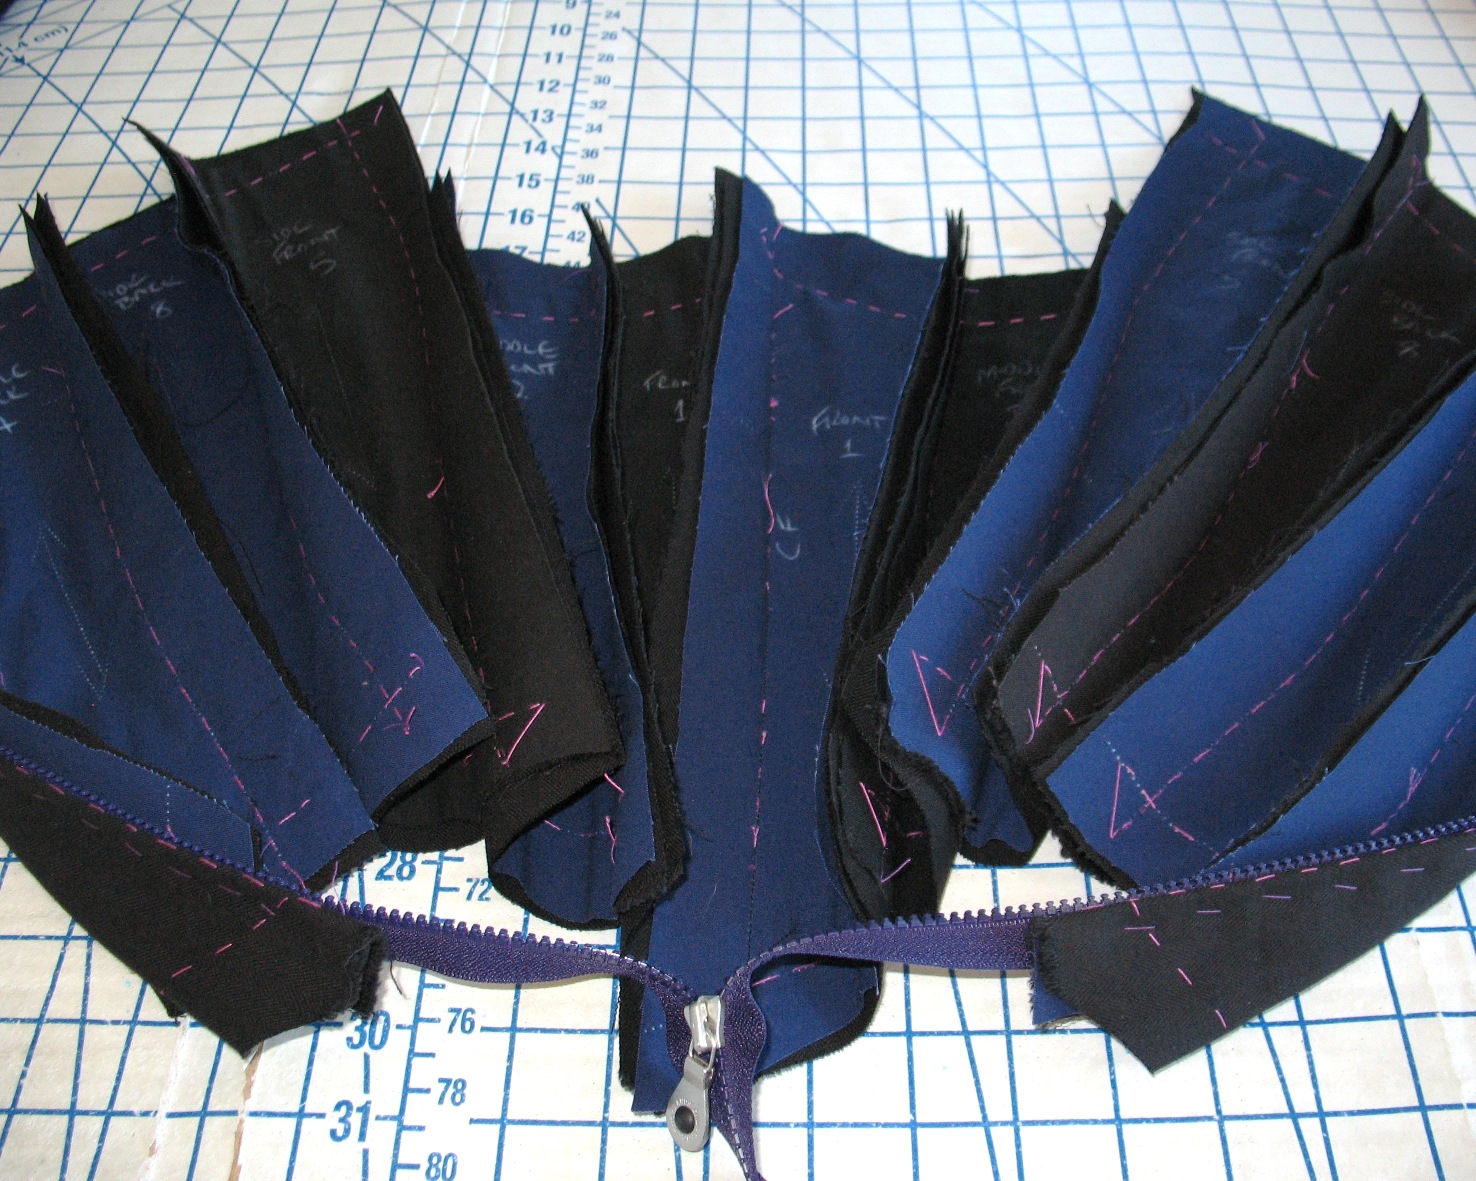
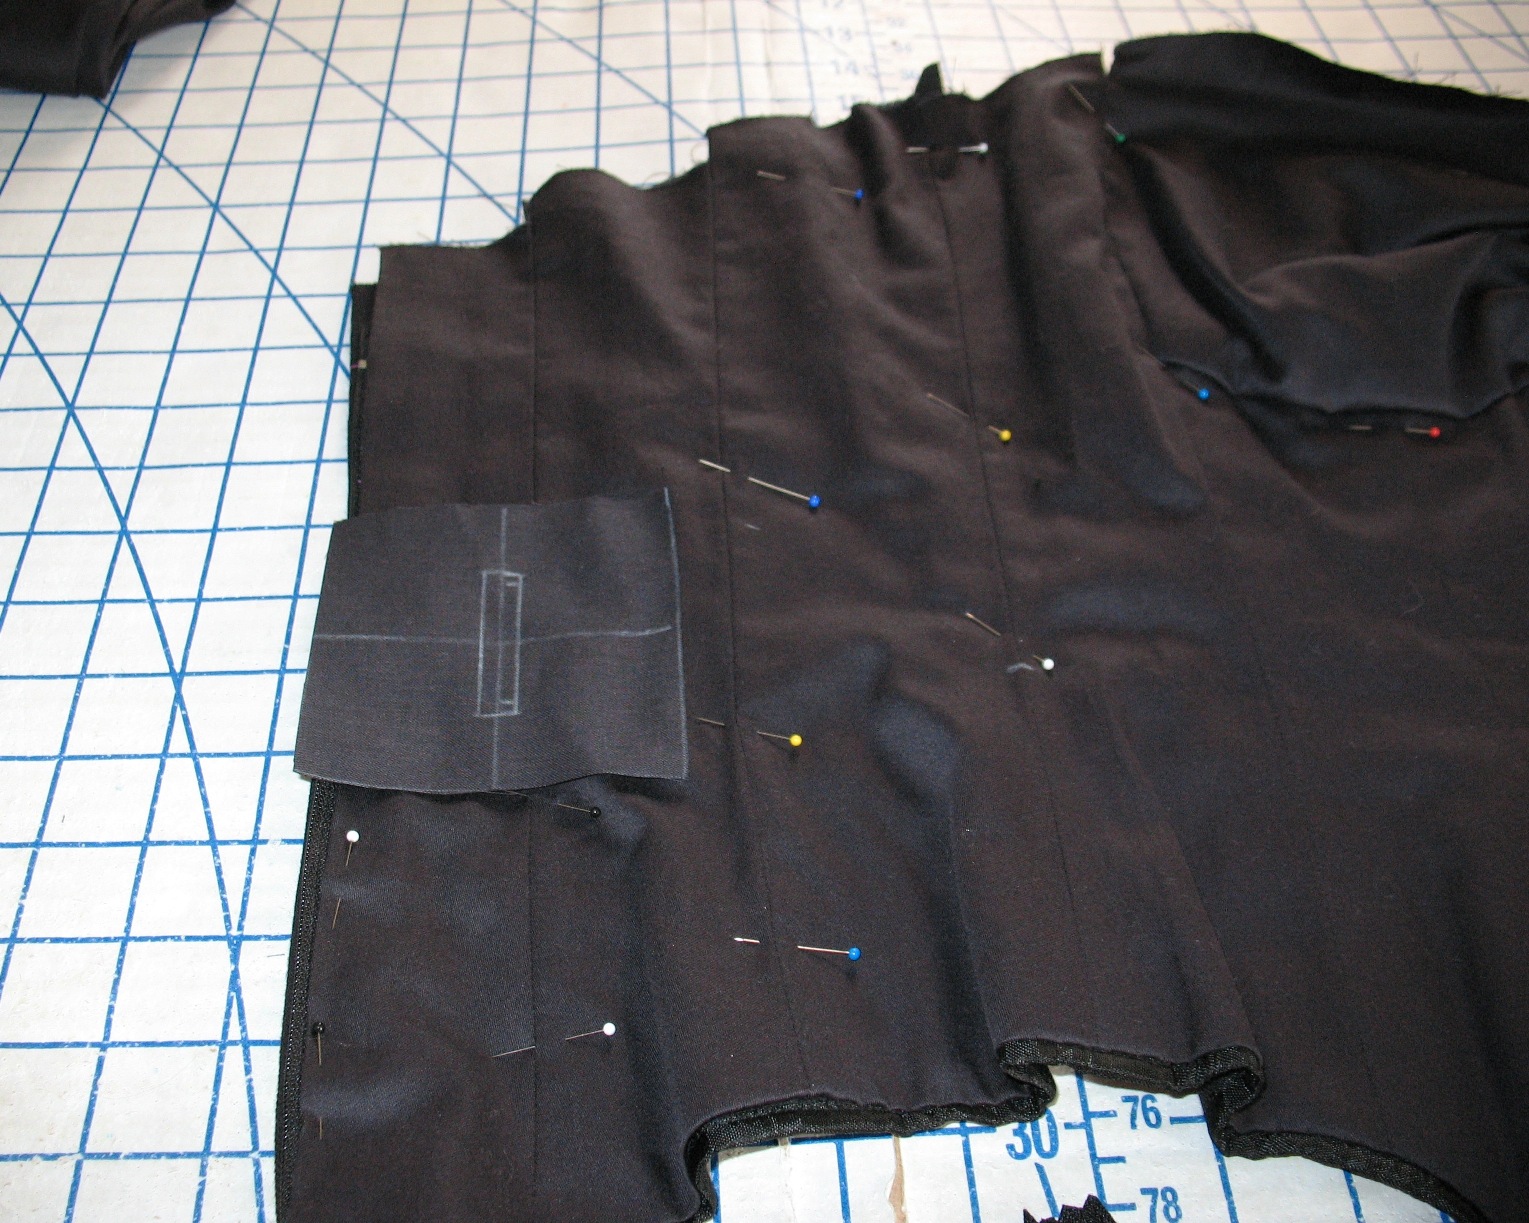
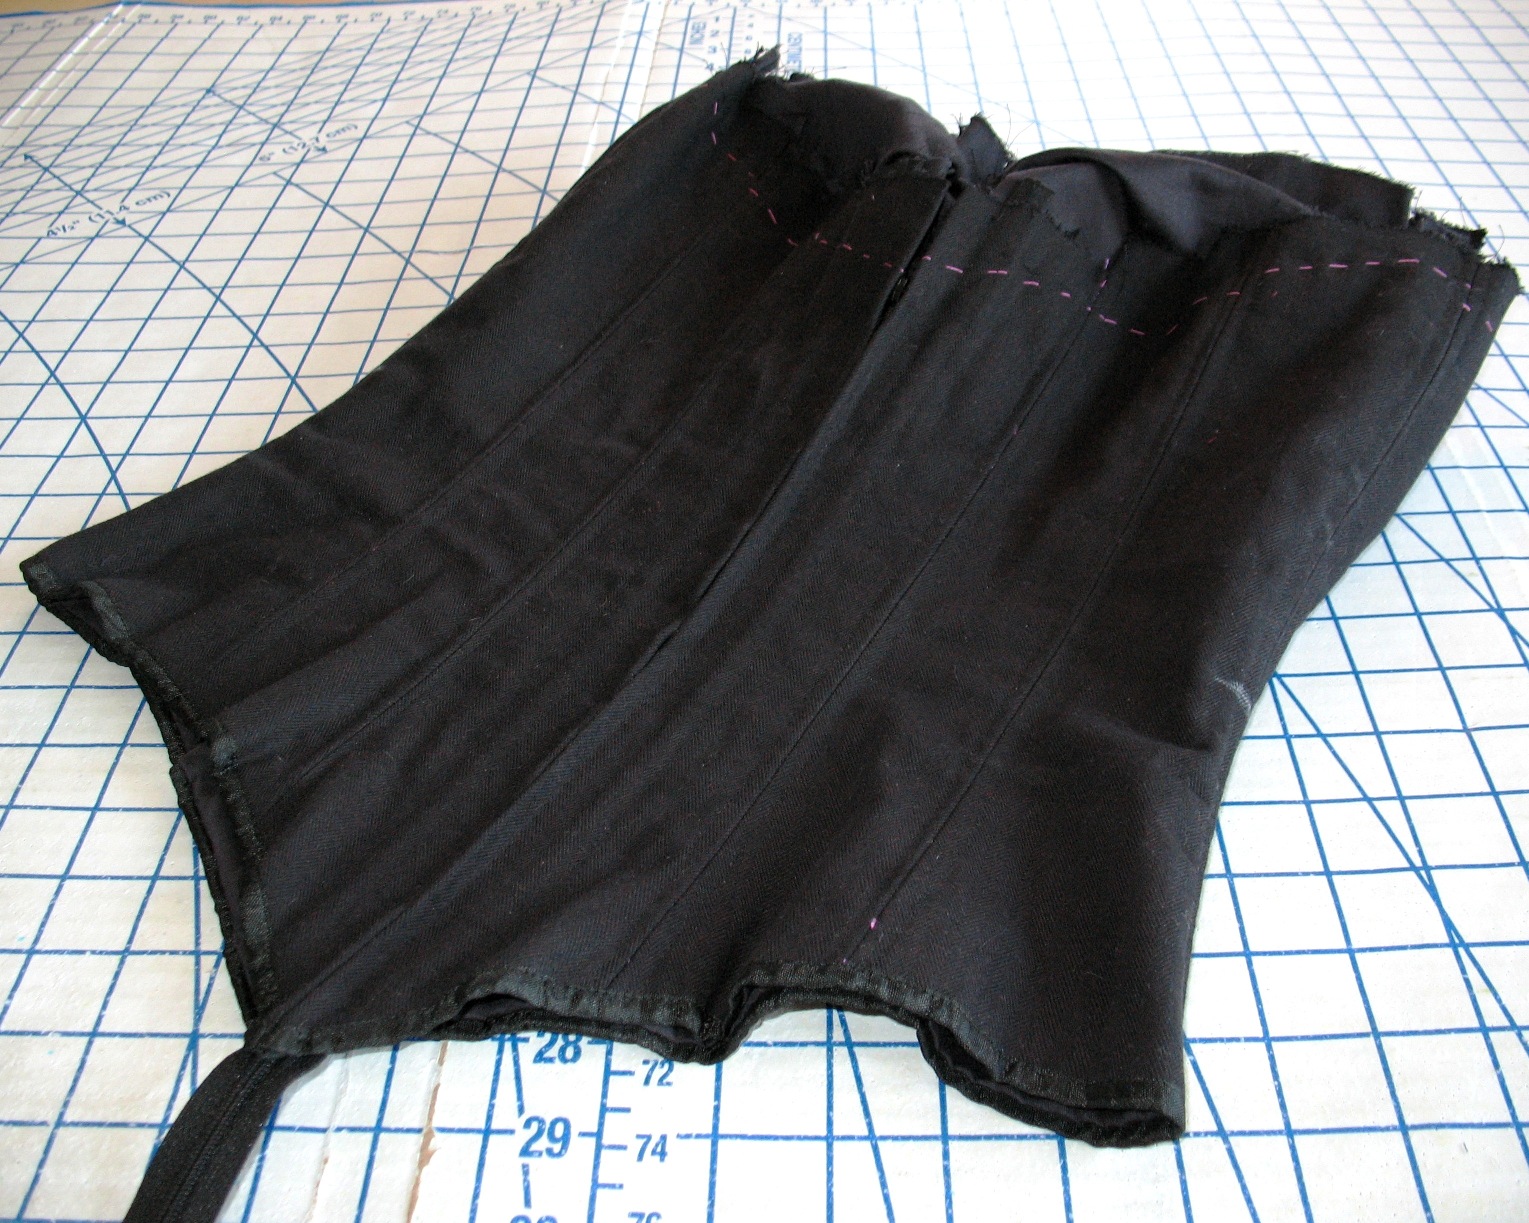
I traced the stitching lines with my fabulous waxed tracing paper onto the quilting cotton and then used those pieces to cut out and thread trace the stitching lines onto the black coutil. They are treated as a single layer from this point on.
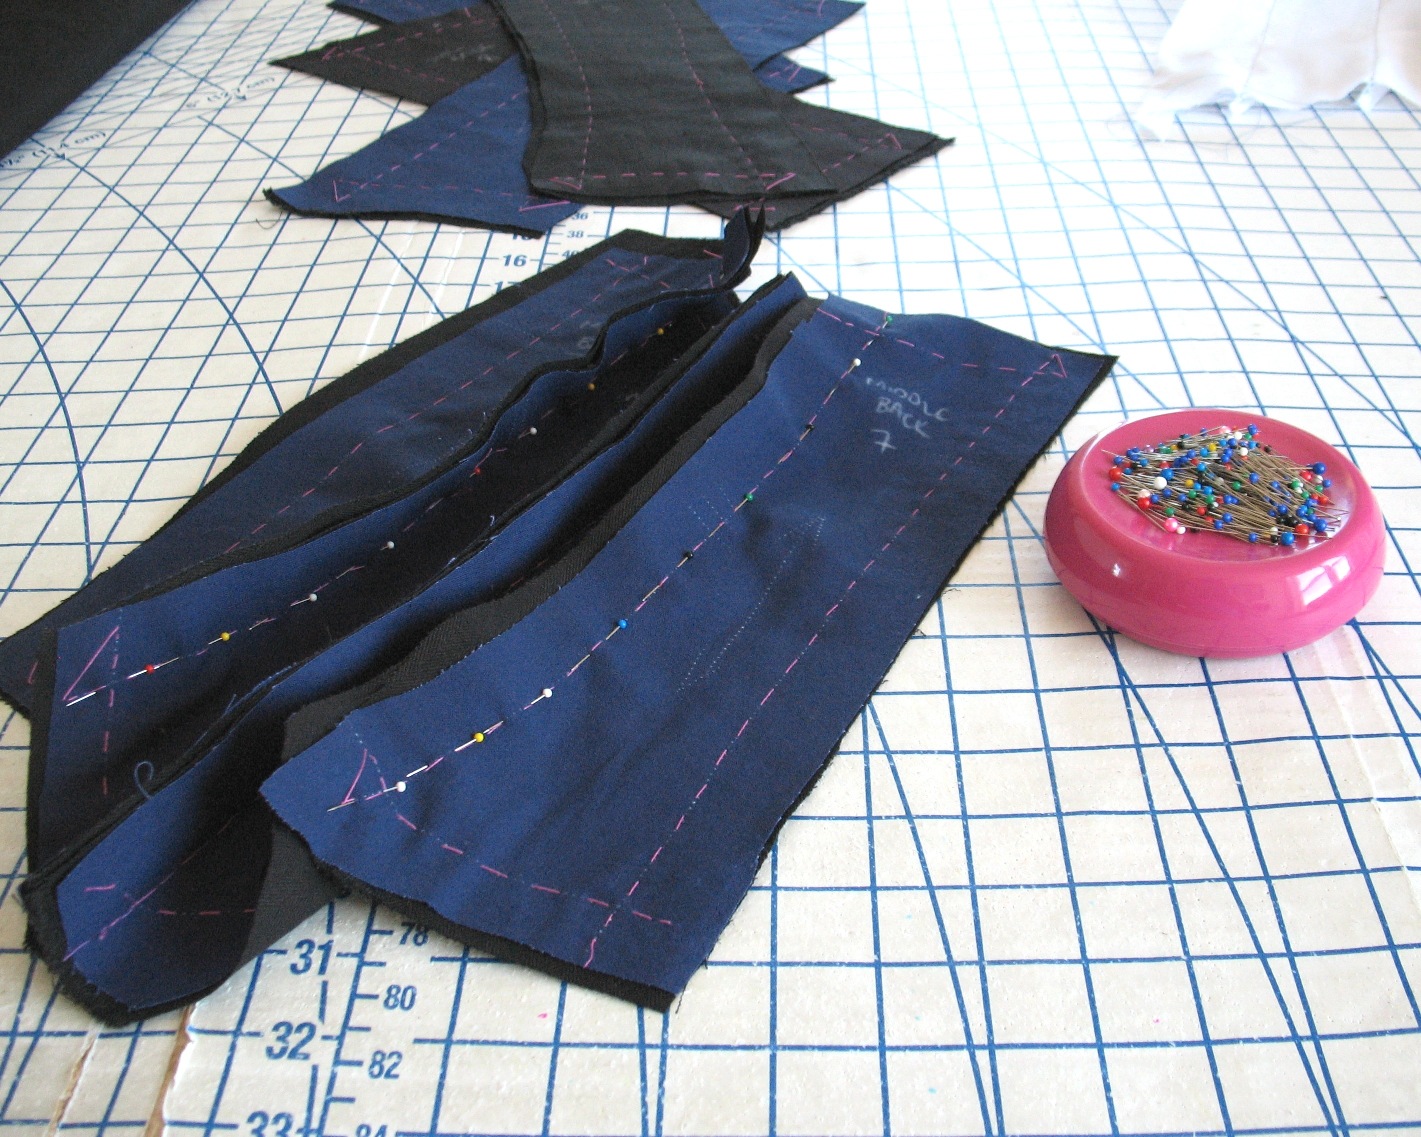
This is the first project that I have used this technique, and I was a bit concerned that I would miss having those raw edges to help match everything up. Well, there was no need to worry. It is quite easy to feel the thread tracing and match it to the next bit of thread tracing. And just think how much more accurate this would be when working with a fabric that frays easily!
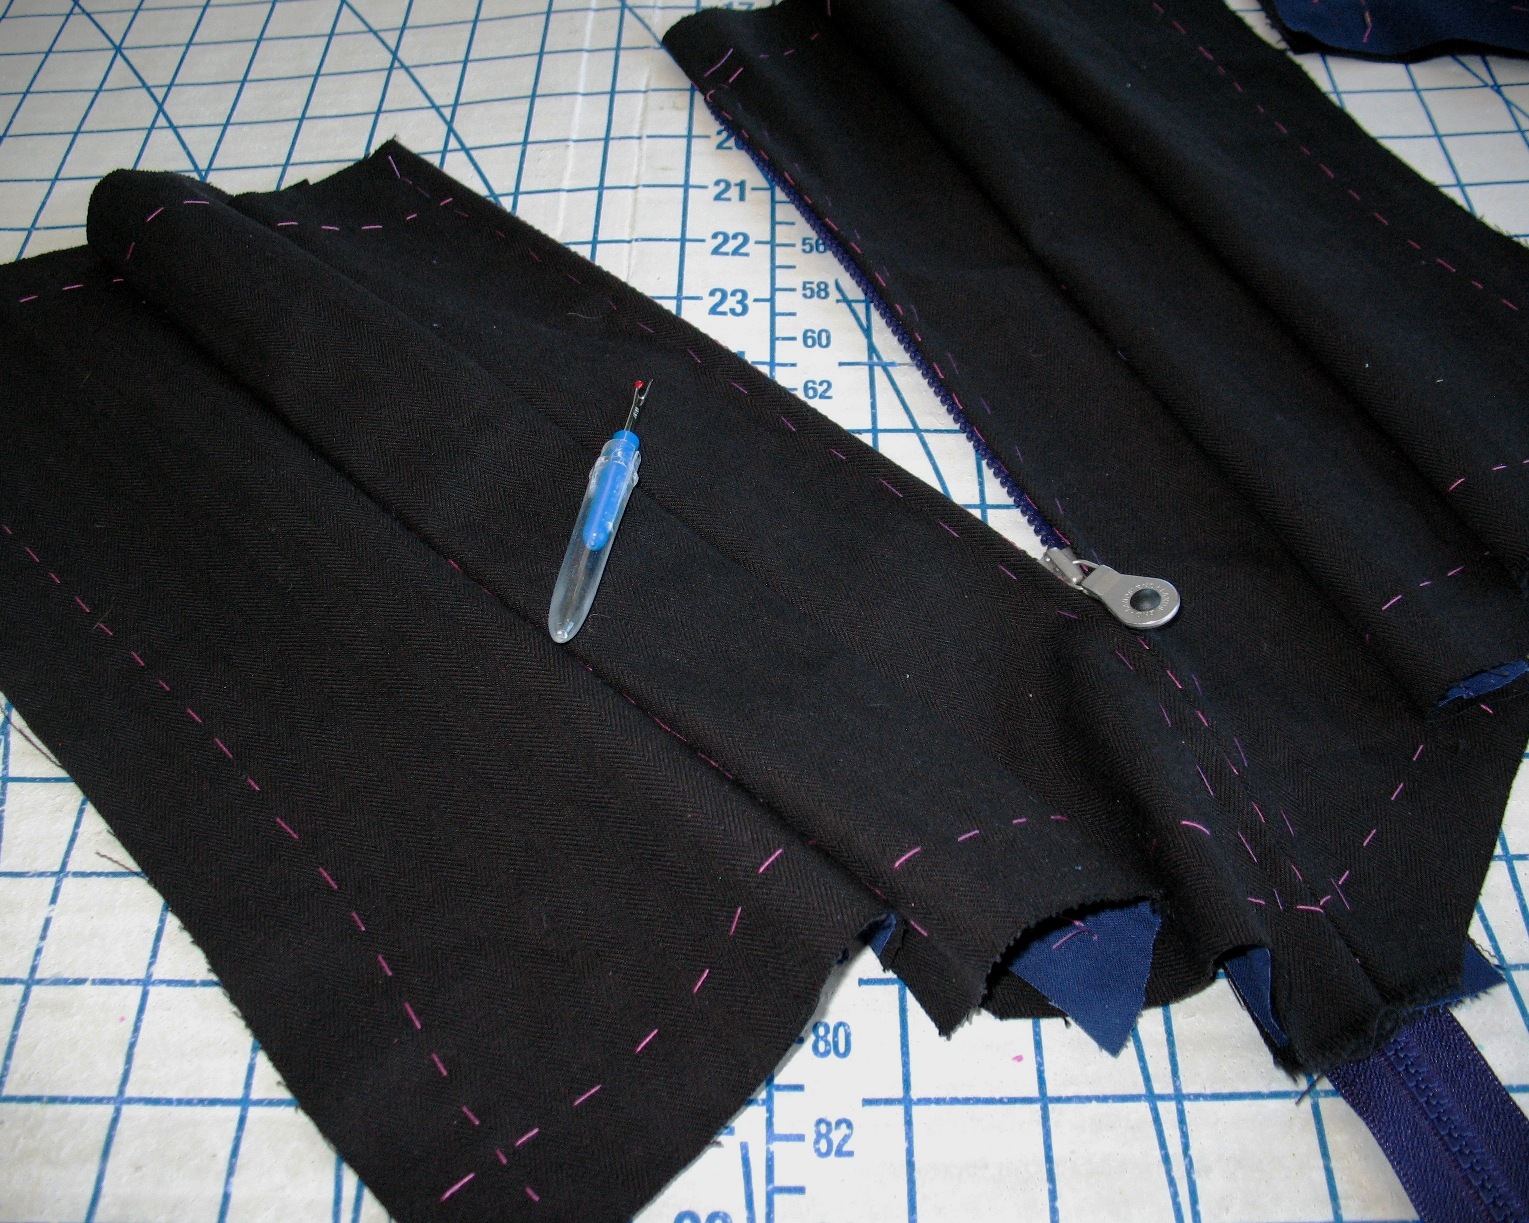
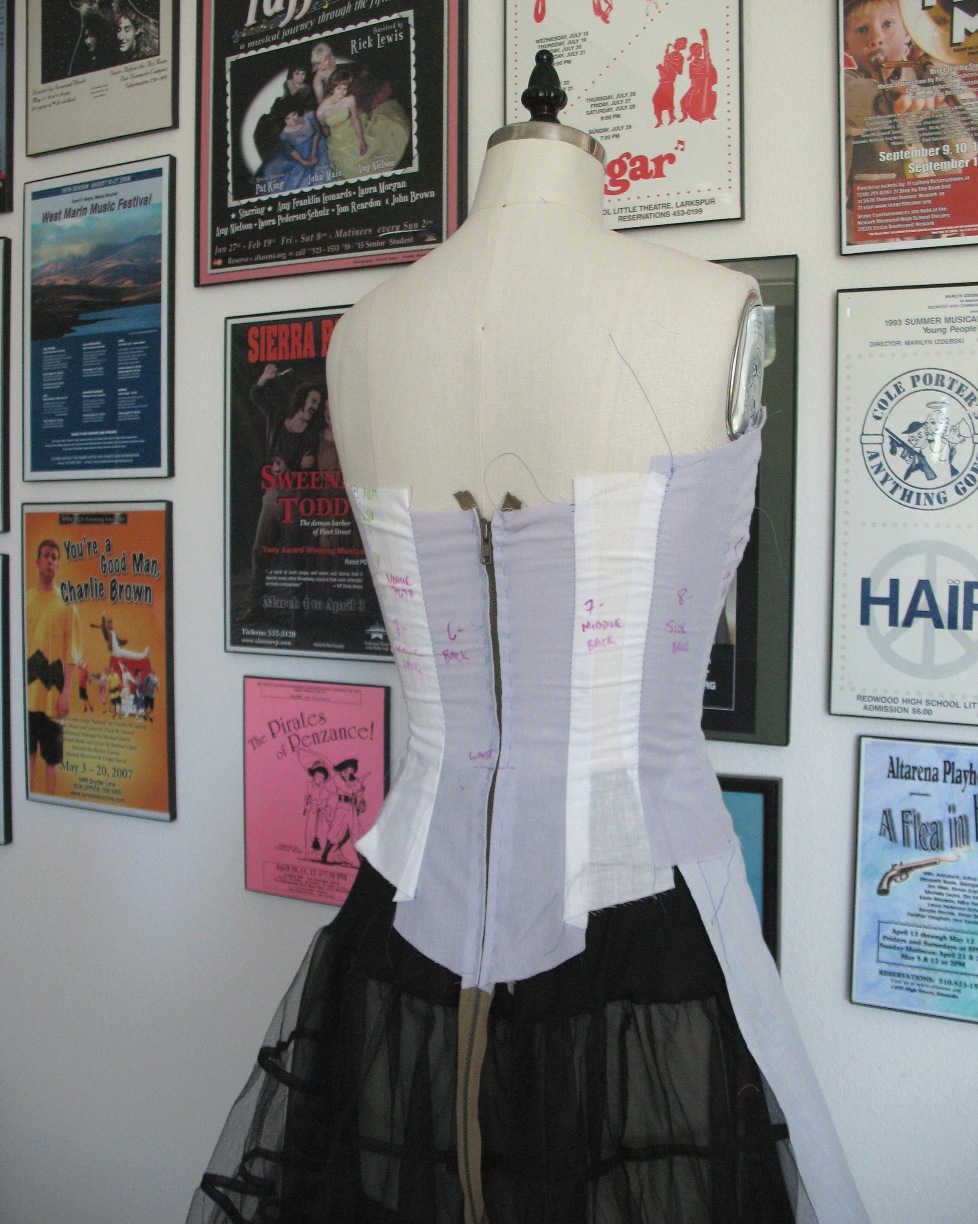
Before hand-picking the zipper, I basted one in to check the fit.
I have to say I love all the hand sewing this requires!
This is the first project that I have used this technique, and I was a bit concerned that I would miss having those raw edges to help match everything up. Well, there was no need to worry. It is quite easy to feel the thread tracing and match it to the next bit of thread tracing. And just think how much more accurate this would be when working with a fabric that frays easily!
Before hand-picking the zipper, I basted one in to check the fit.
I have to say I love all the hand sewing this requires!
The most annoying part of the process comes later on, when the basting has to be ripped out from underneath the final machine stitched seam. That is not so much fun.
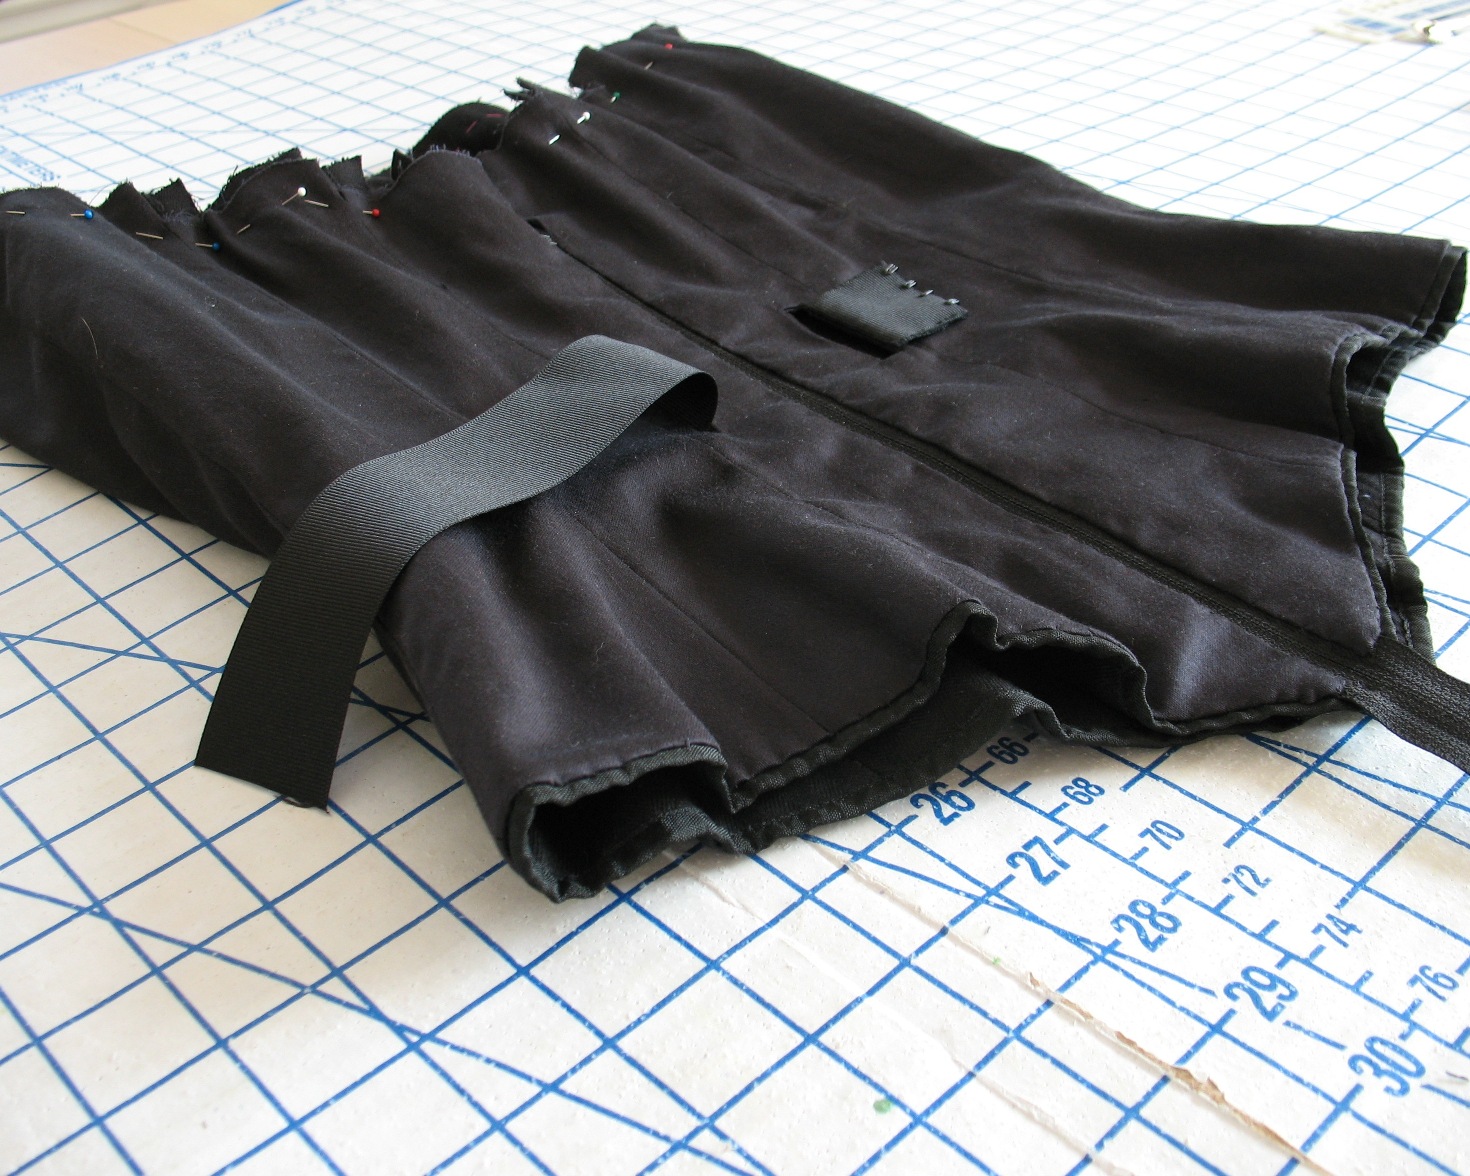
I splurged on pre-cut spiral steel boning – no time or energy to fight with a pair of wire cutters for this project!
After the boning channels were stitched into place, I catch-stitched the trimmed seam allowances into place. Some of the side seams had to be clipped at the waistline to make everything lay flat.
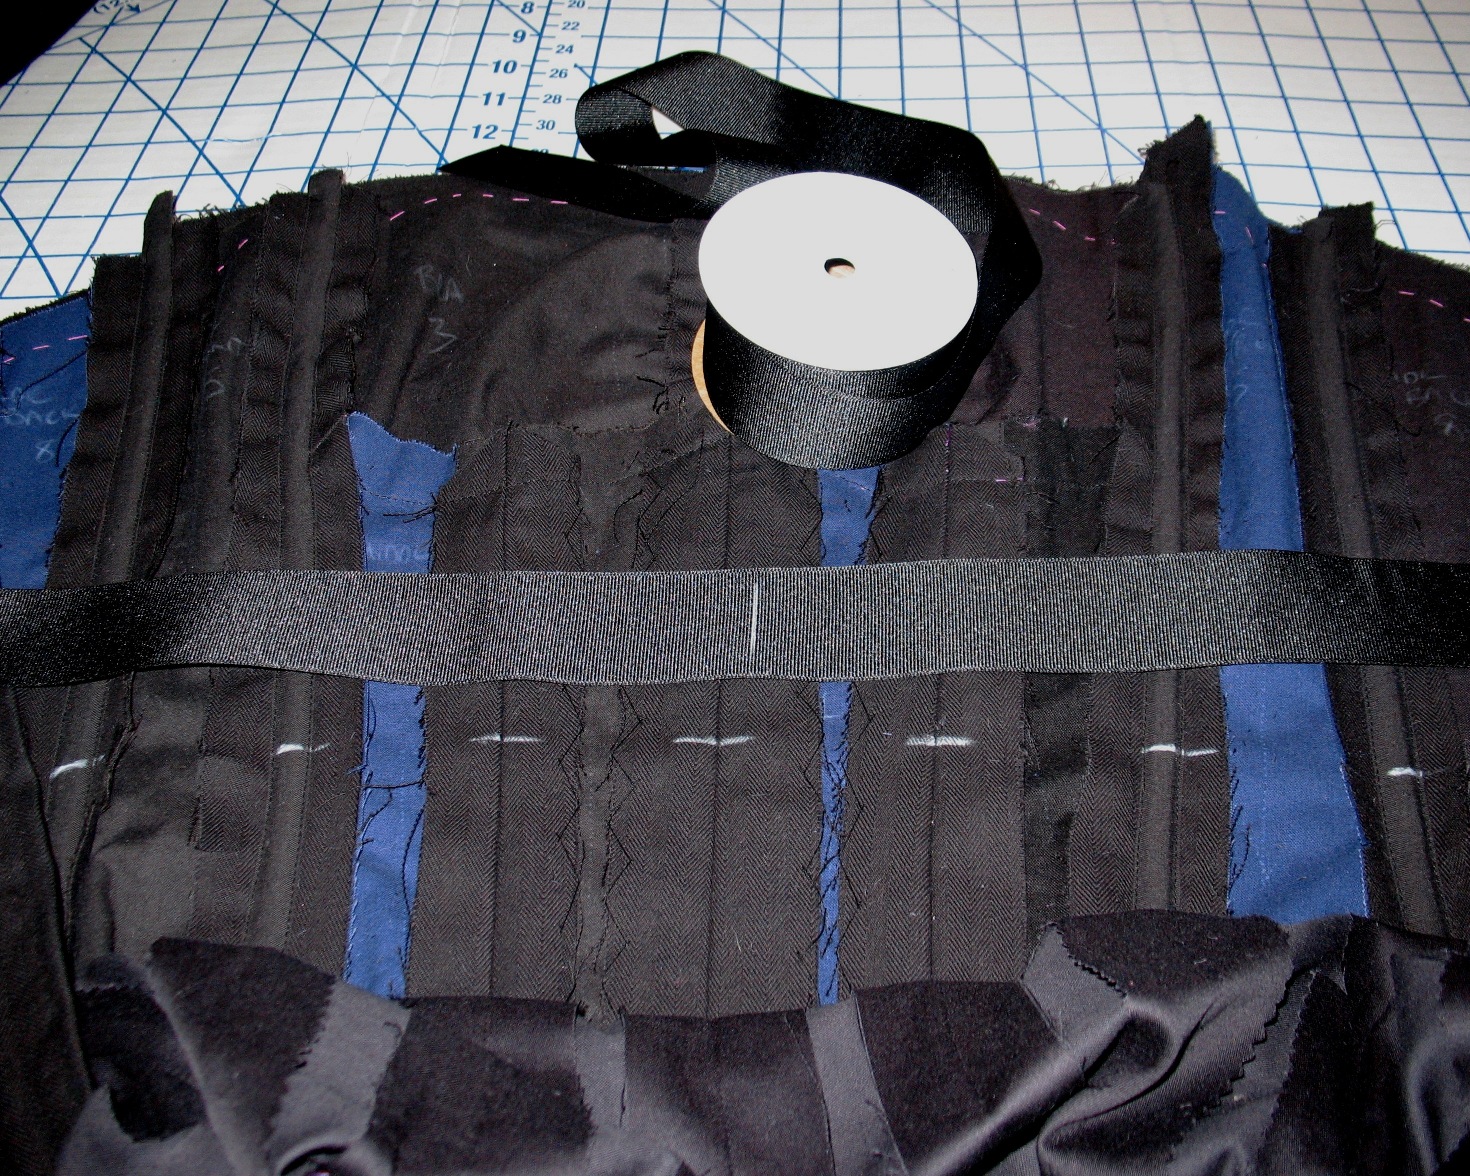
Instead of attaching the waist-stay after the lining was in place, I placed it between the coutil and the lining. I figured this would be more comfortable (especially with the wider grosgrain) and would keep it from digging in at the waist.
After the boning channels were stitched into place, I catch-stitched the trimmed seam allowances into place. Some of the side seams had to be clipped at the waistline to make everything lay flat.
Instead of attaching the waist-stay after the lining was in place, I placed it between the coutil and the lining. I figured this would be more comfortable (especially with the wider grosgrain) and would keep it from digging in at the waist.
But I needed access to the ends of the ribbon.
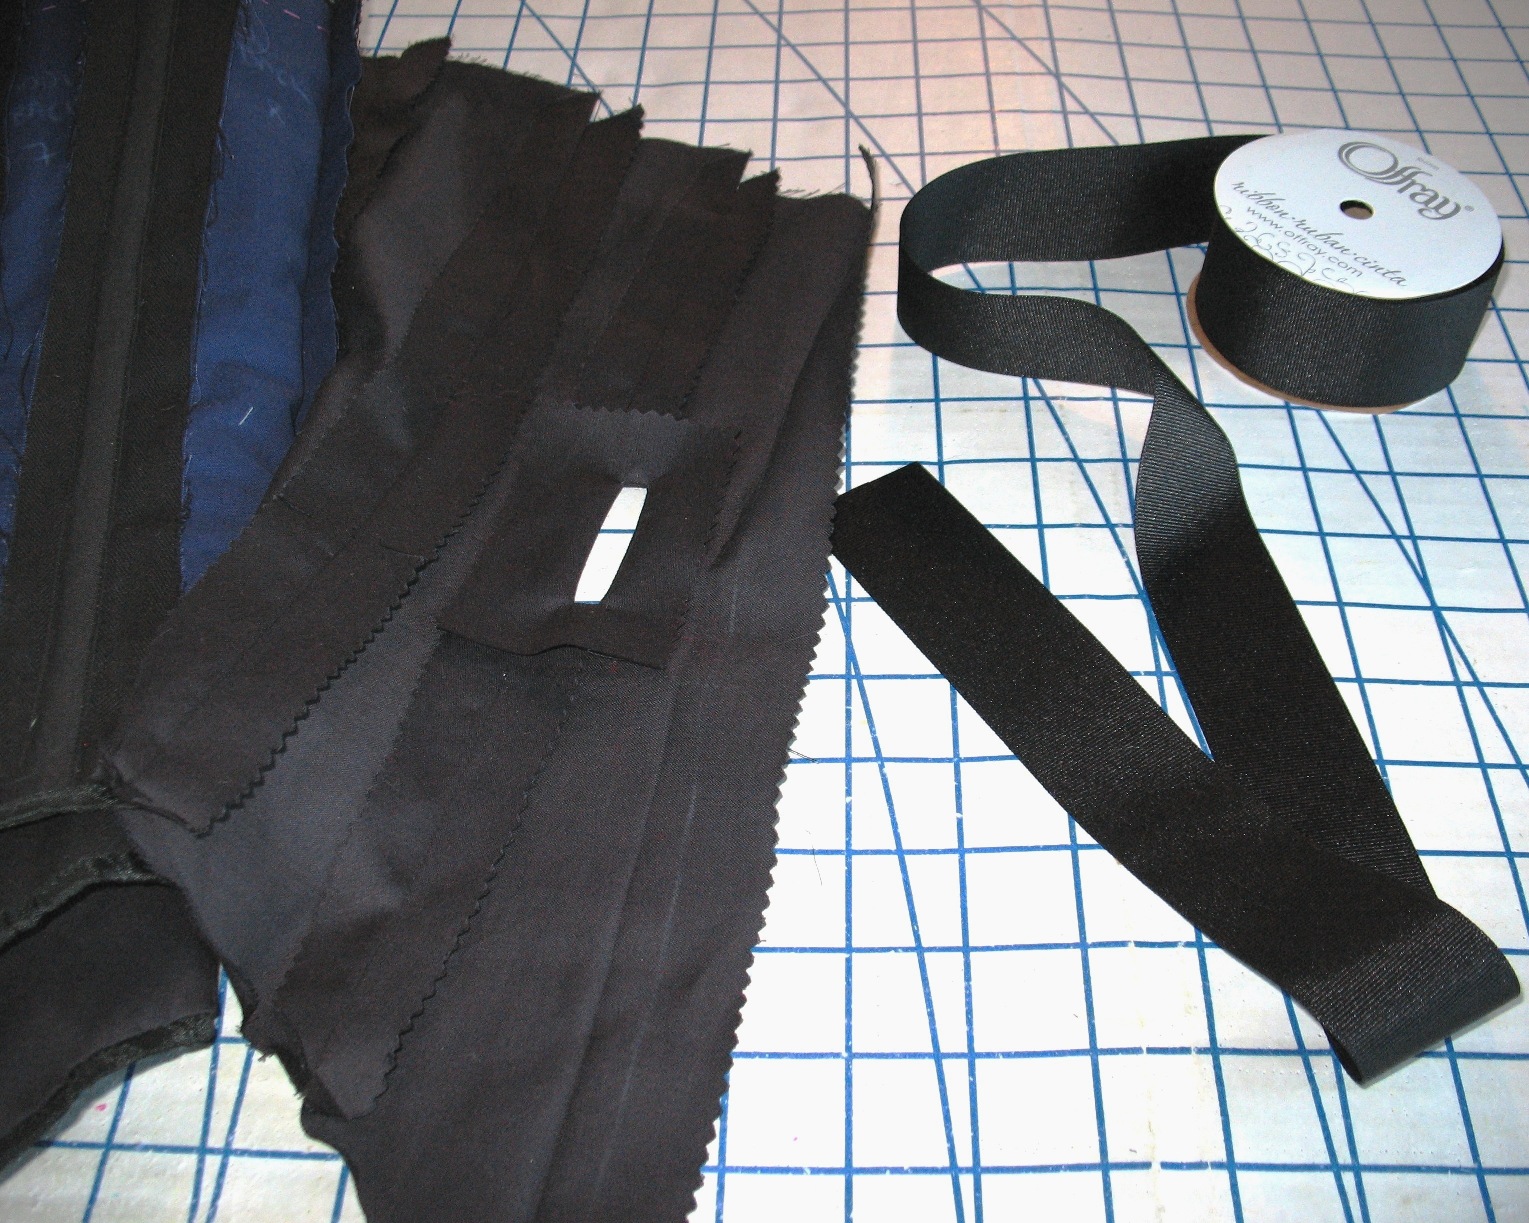
My trusty bound buttonholes came to the rescue.
The waist-stay was stitched to the seams of the corselette and fed through the buttonhole openings on the lining. The lining was then hand stitched in place along the bottom and zipper edges.
Then, of course, the stay needed a few hook & eyes as a closure.
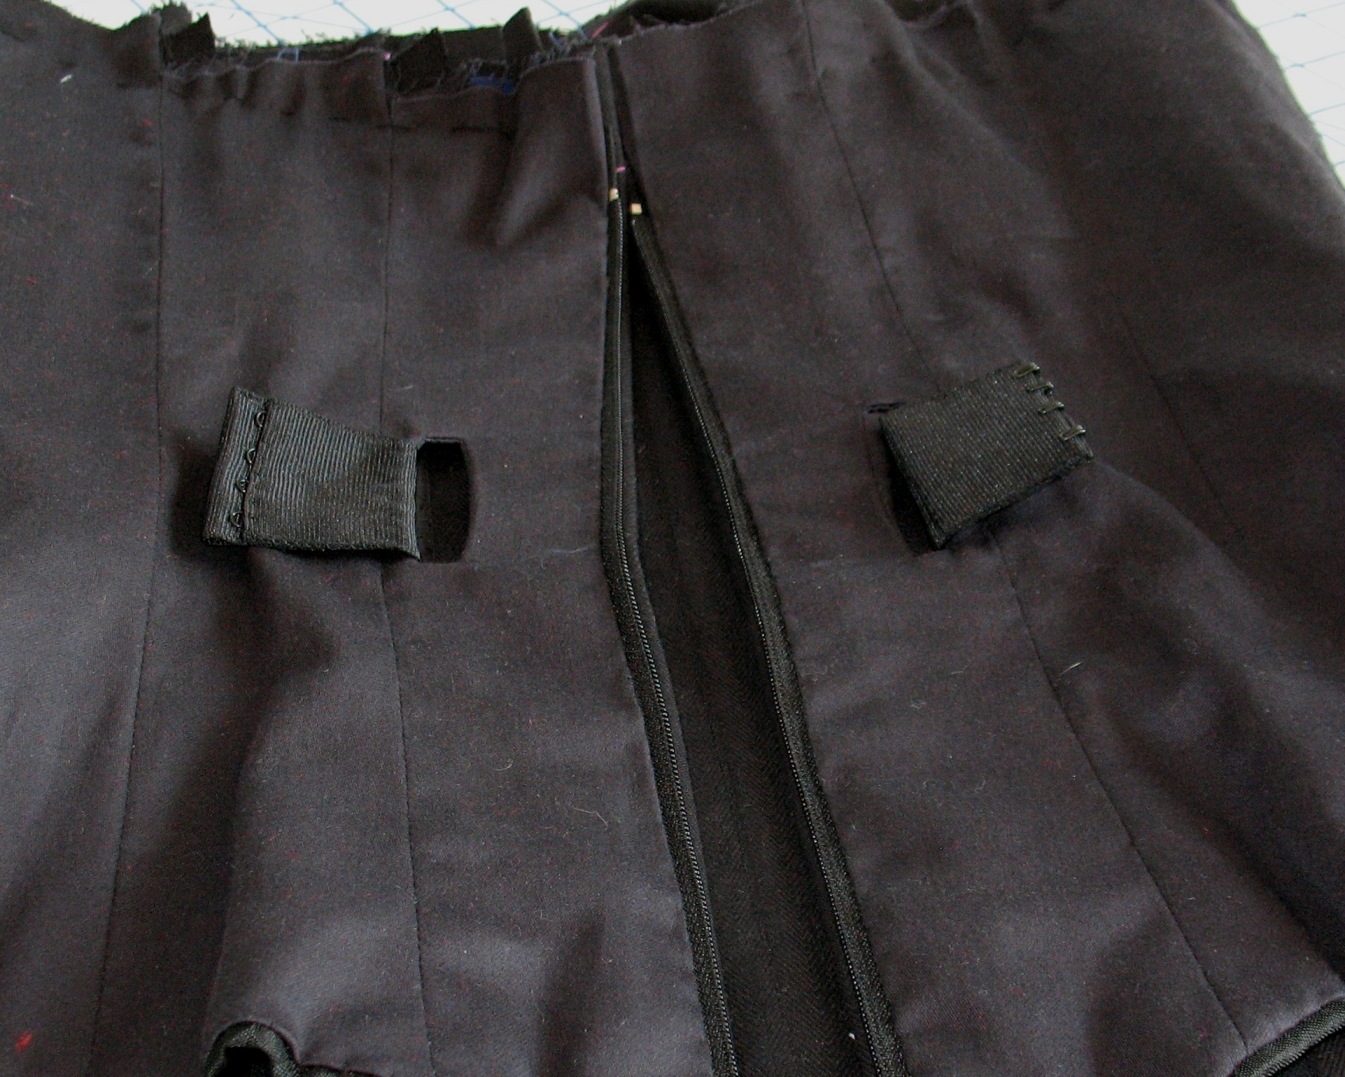
I often get lazy and just use a larger skirt hook & eye, but they can dig in a bit. So I went the more labor intensive route and used four small ones.
I often get lazy and just use a larger skirt hook & eye, but they can dig in a bit. So I went the more labor intensive route and used four small ones.
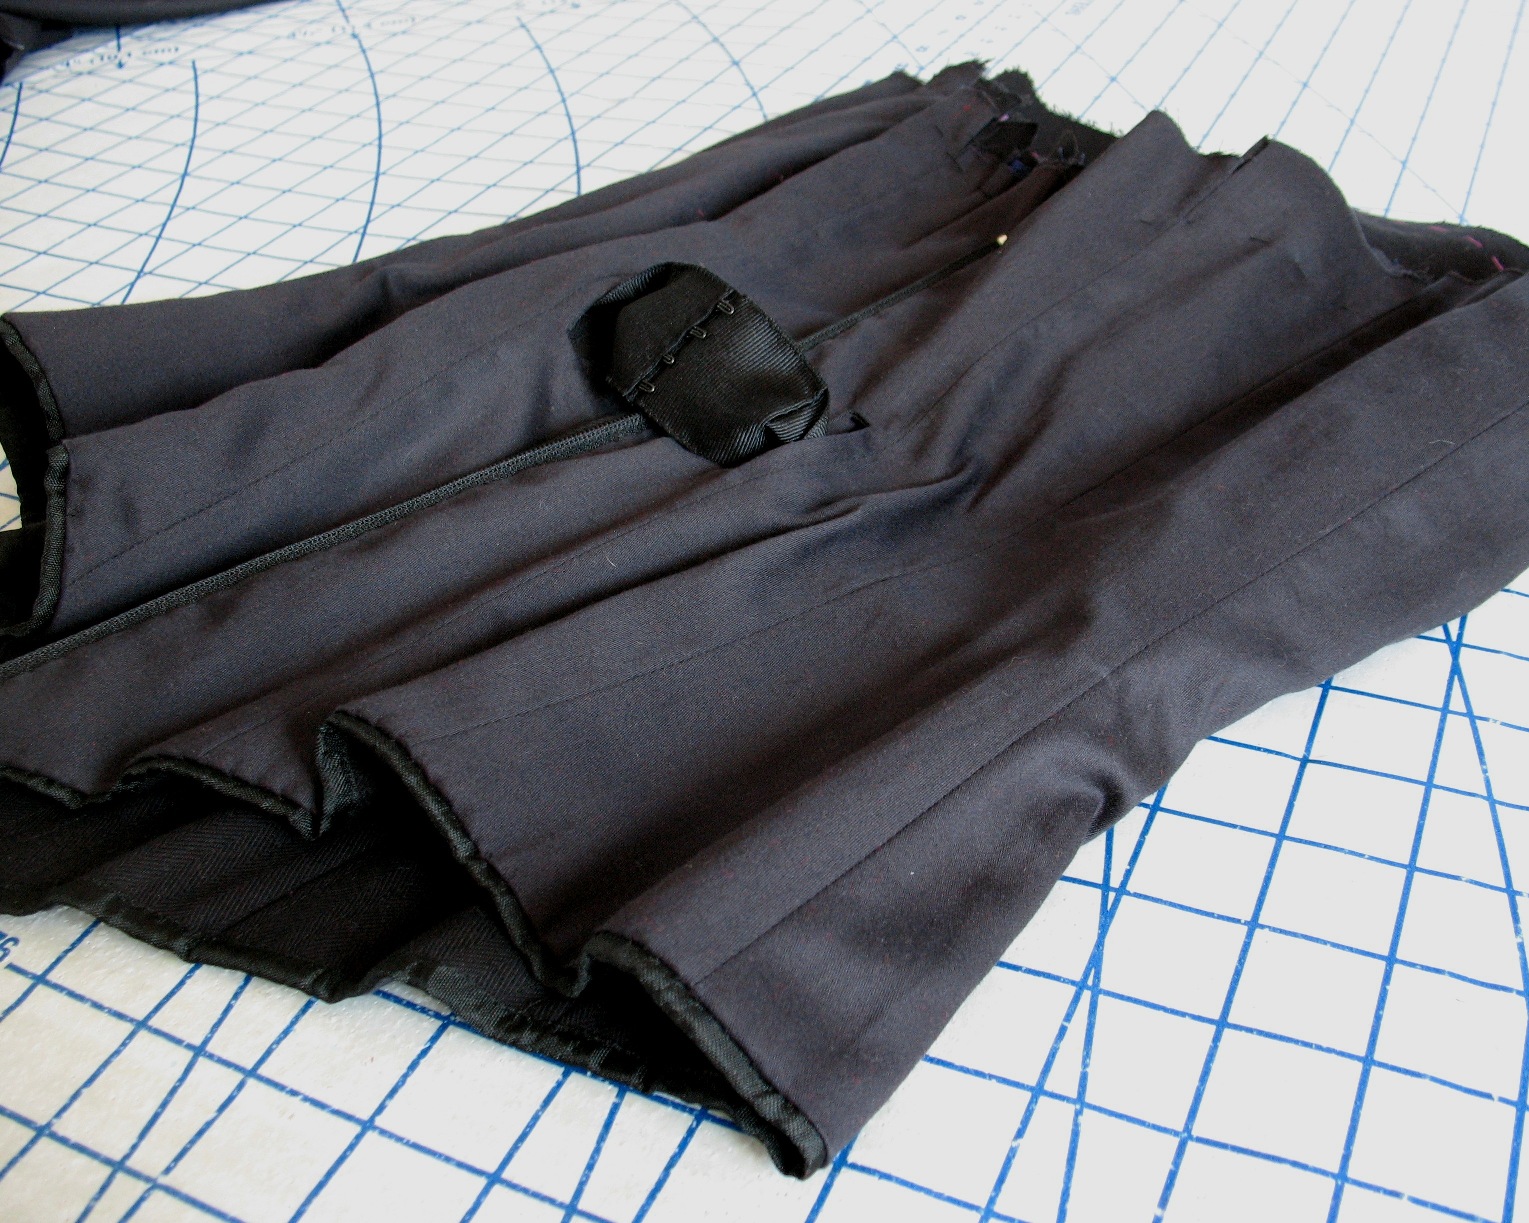
I was not careful about measuring the stay, so I ended up making it too small the first time
around. Whoops! Thankfully, I had left enough of the ribbon folded under to extend the stay.
So guess what I was doing Friday evening? Ripping out and re-stitching lots of little hook & eyes which have a tendency to fly out of my hand. Then, of course, I had to find the things among all that black fabric.
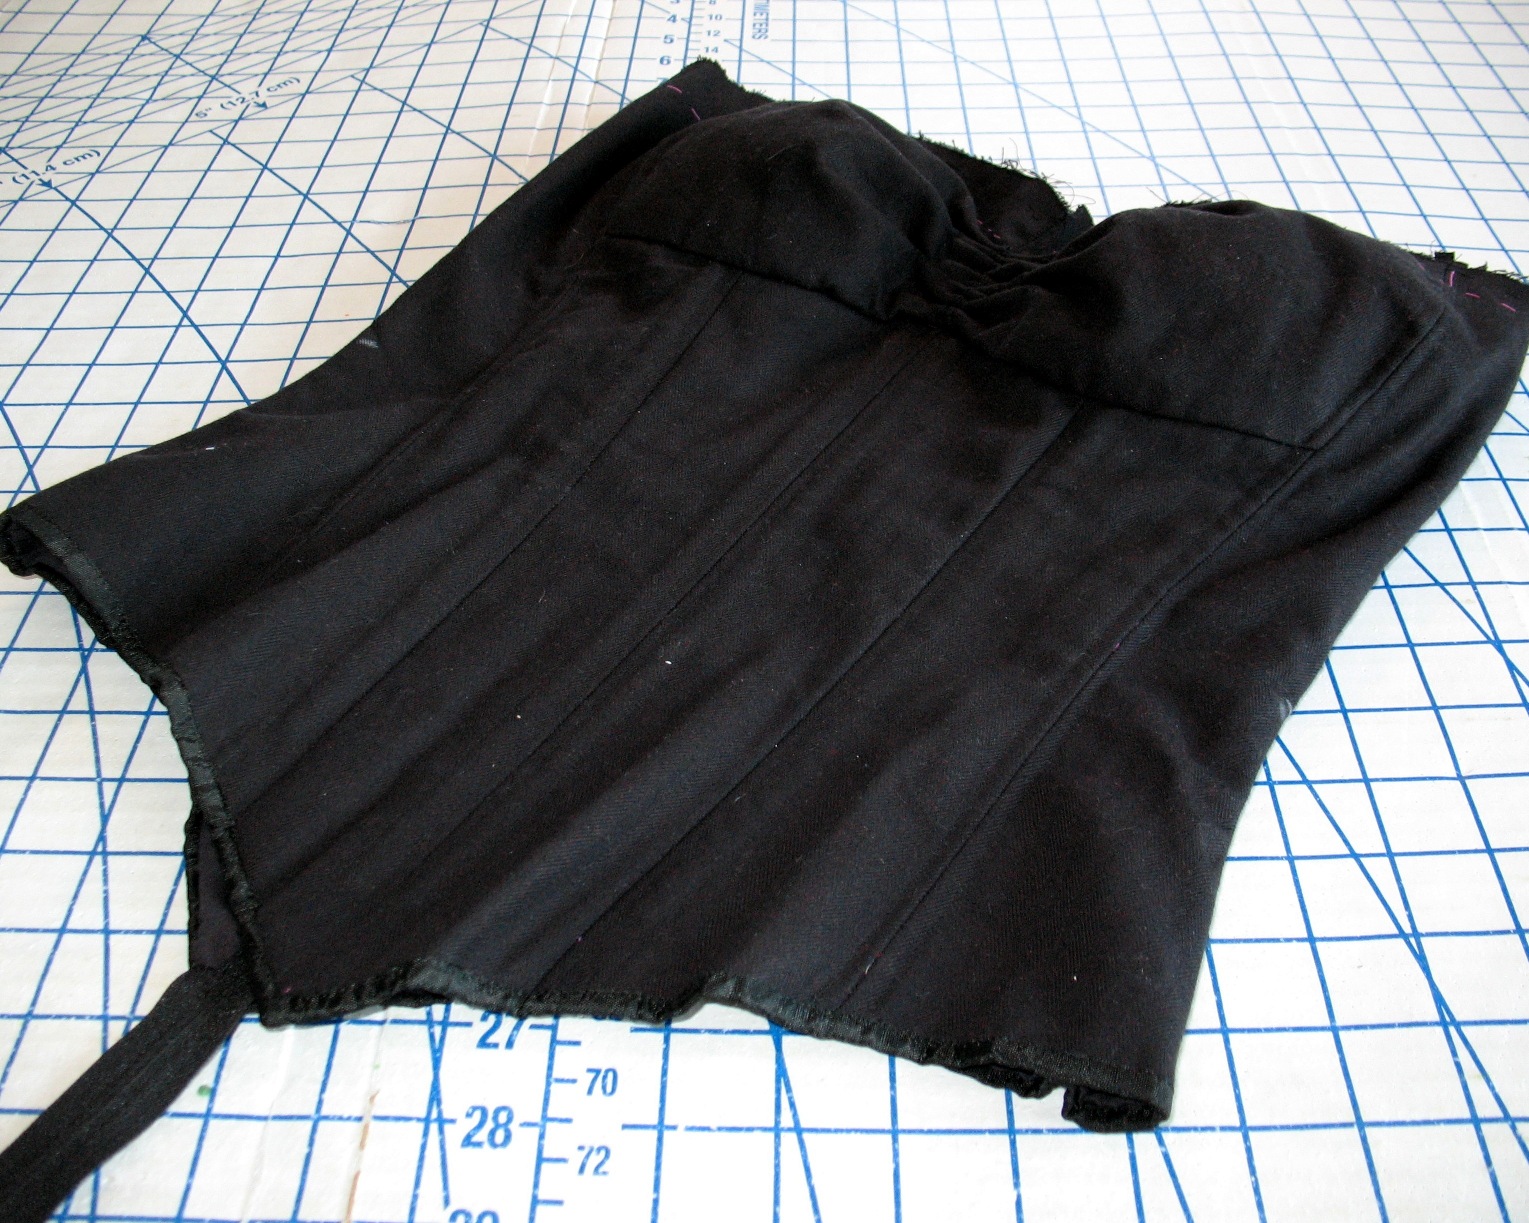
A pair of bra cups was added, and the top edge basted together (eventually it was bound with my dress fabric). And that is the corselette!
So guess what I was doing Friday evening? Ripping out and re-stitching lots of little hook & eyes which have a tendency to fly out of my hand. Then, of course, I had to find the things among all that black fabric.
A pair of bra cups was added, and the top edge basted together (eventually it was bound with my dress fabric). And that is the corselette!
I thoroughly enjoyed watching your progress on Instagram, it's incredibly interesting to see how it call came together. I love those bound button holes and the waist stay arrangement. Every element of your gown was thoughtfully considered.
ReplyDeleteAnd you looked absolutely stunning in the photos from the event. :)
If the Golden Gate Bridge had to have been sewn together, only you would have been up to the task.
ReplyDeleteThis is lovely. Did you find that the bra cups gave enough erm.....cuppage? I was always going to put them into a corset but am never sure how they would hold up, if you pardon the pun.
ReplyDeleteThe pair that I had on hand are molded and definitely stay put. They are so sturdy, in fact, that I would only use them in a garment that needs to stand up on its own. But for this kind of garment, they work quite well.
DeleteYou are such an inspiration Laura Mae! Bound stay openings?? Wow. Forgive the simple question - why did you choose to underline this? Is it simply to manage the tension or is there another reason?
ReplyDeleteI added an extra layer for stability (spiral steel boning needs a sturdy foundation), but also because I wanted to test out Susan Khalje's couture method on something before my gala dress! The corselette was my test run, if you will . . .
DeleteThank you for being such a great teacher. Your work is so well planned, and the result is beautiful!
ReplyDeleteBeautiful work! All the extra effort for a nice corsellette really paid off with the final dress, I'm sure.
ReplyDeleteJust scrolling through your photos makes me tired! You are amazing!
ReplyDeleteWow! You have been quite a busy bee! I am sure this effort will result in a spectacular dress!
ReplyDeleteAt some point, I'm going to go back and read all these posts about this dress in one, heady rush. Wow. Just ...wow!
ReplyDeleteVery inspiring -- so gorgeous!
ReplyDeleteWow. You inspire me to learn SO many more sewing techniques! This is amazing!
ReplyDelete